 | Home > Maintenance & Mods (L322) > L322 TD6 Oil change & all filters |
 
|
|
|
| Ollie7195 Member Since: 11 Dec 2016 Location: Somerset Posts: 74  
|
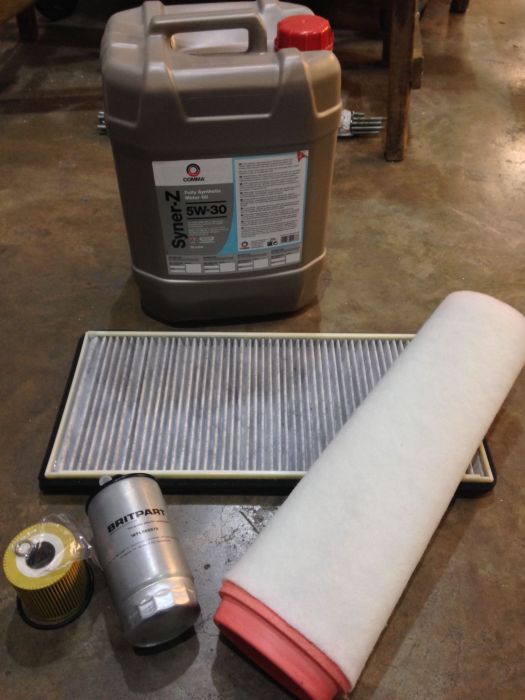
Hi everyone,
|
||||||||||||||||||||||||||||||||||||||||||||||||
|


| stan Site Moderator Member Since: 13 Jul 2010 Location: a moderate moderated moderator moderating moderately in moderation Posts: 34913 
|
done a good job there Ollie, i'll stick in the wiki.. |
||
|
| gregdav Member Since: 26 May 2014 Location: just north of stafford Posts: 1077 
|
Well done Ollie, thanks for taking the time.
|
||
|

| Weegie Member Since: 09 Jun 2014 Location: East Sussex Posts: 3192  
|
Nice write up.
|
||
|
| Ollie7195 Member Since: 11 Dec 2016 Location: Somerset Posts: 74
|
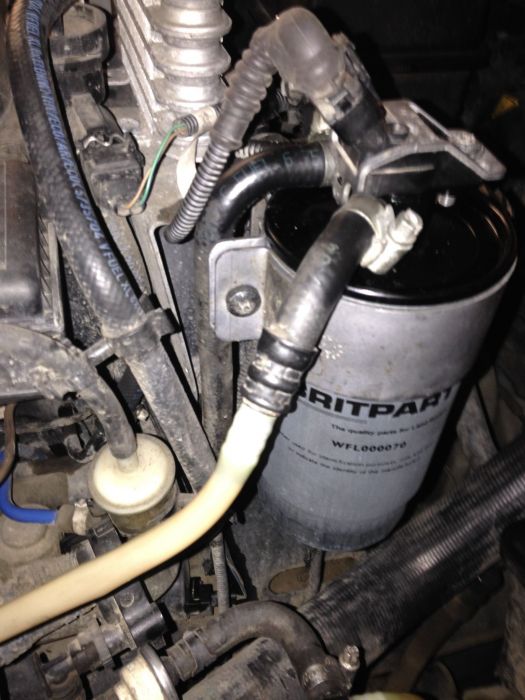
Thanks for the comments, just thought it may have been easier with the bonnet up but agreed it could be done with it in the normal position, interesting comment on the britpart stuff, have only had the car 2 months and hadn't seen any negatives about them till just now |
||
|
| Weegie Member Since: 09 Jun 2014 Location: East Sussex Posts: 3192
|
Experience with Britpart tends to show that they are fine for some things but for others OEM is, in the longer run, the cheapest way to go. For me filters fall into that category. |
||
|
| Ollie7195 Member Since: 11 Dec 2016 Location: Somerset Posts: 74
|
Will take note for next time |
||
|
| gregdav Member Since: 26 May 2014 Location: just north of stafford Posts: 1077
|
I have used bearmach in the past, I go for the mahle filters, oe if cheap enough, sometimes come up on ebay, my last fuel filter was a bearmach and fitted great, I had problems sealing the all makes one.
|
||
|
| Judo Member Since: 24 Nov 2016 Location: Melbourne Posts: 14 
|
Thanks for a great write up. -Justin
|
||
|
| Michel Member Since: 18 Jul 2022 Location: Belsele Posts: 1  
|
Hey Guys, just finished mine ( Vogue 2004, 332.000Km, still running like new |
||
|
| Haylands Member Since: 04 Mar 2014 Location: East Yorkshire Posts: 7908 
|
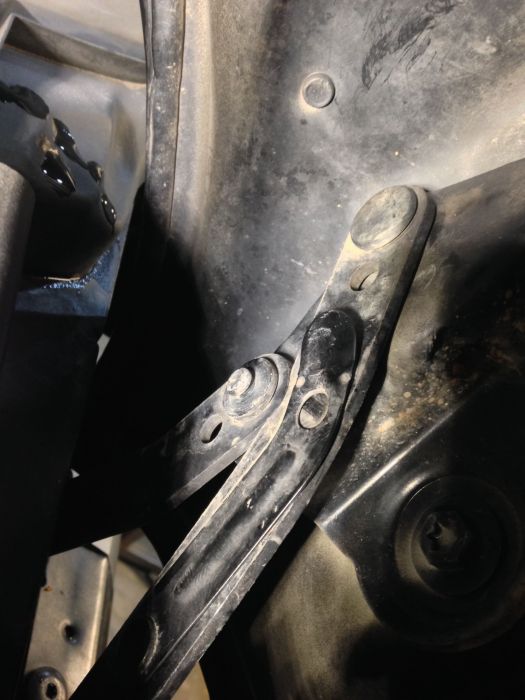
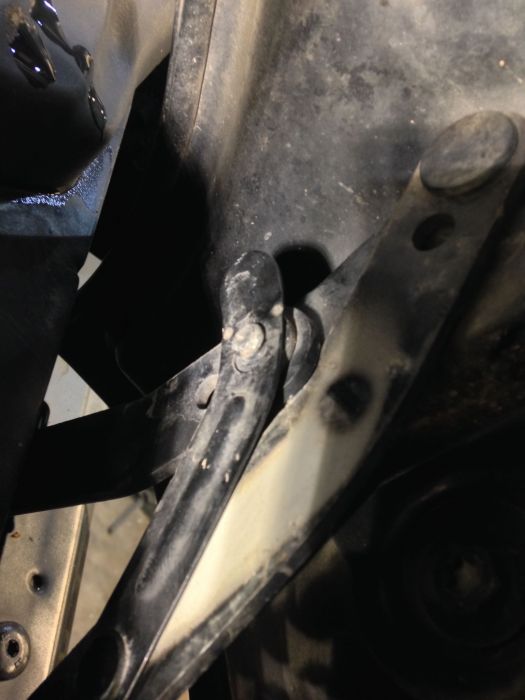
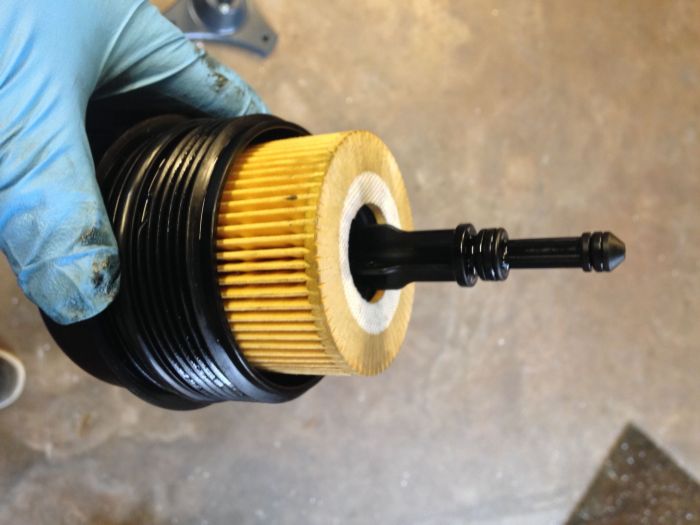
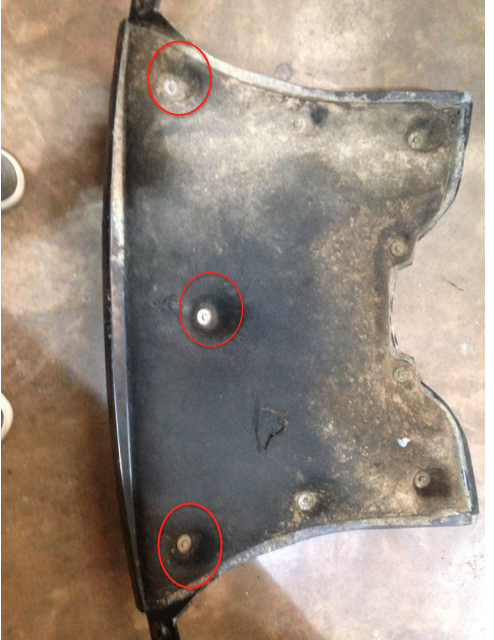
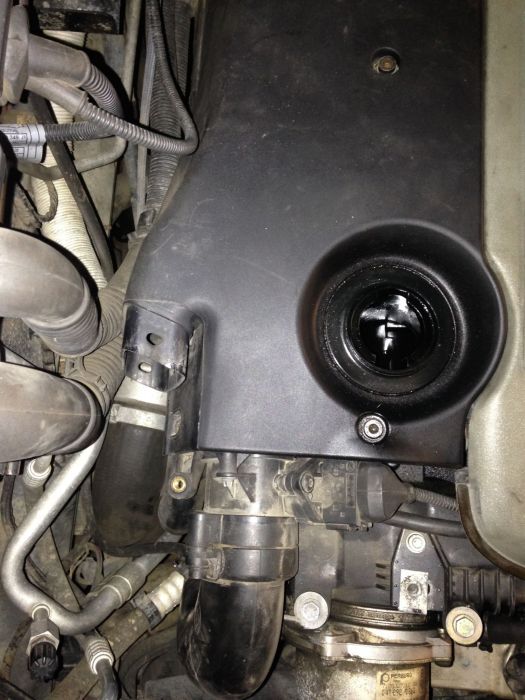
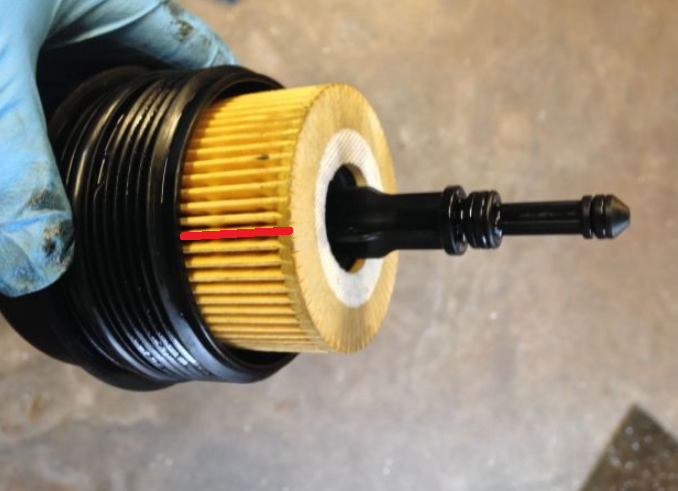
The most common mistake first timers do is in fitting the new oil filter to the top housing, it needs to be fitted correctly and pushed in far enough to seat correctly... If you have not done one before then measure the distance shown in red here on the old filter and insure the new one is pushed home to the same distance...
|
||
|
| Phoenix Member Since: 16 May 2022 Location: Gone Posts: 1631
|
Good advice there, couldn't agree more. |
||
|

|
|
| All times are GMT + 1 Hour |
< Previous Topic | Next Topic > |
Posting Rules
|
Site Copyright © 2006-2024 Futuranet Ltd & Martin Lewis
![]()
