| How I removed my ITC DD295 Transfer Box from my 2006 4.2 S/C | |
A quick guide to how I removed the Magna Steyr (ITC) DD295 transfer Box from my 2006 4.2 Supercharged L322 in case any of you were contemplating doing it yourselves but were unsure whats involved. This could possibly also apply in some respect to the later models of the L322 that also use this box. I have just completed this job without the use of a vehicle lift or transmission jack. OK so very awkward, a bit sketchy at times because of the size/weight of the items involved and by no means easy because of this, but otherwise quite a simple job.
Disclaimer: Please note these are only my observations/suggestions and a guide to how I completed the job without removing the exhaust system, not the recognised/approved Land Rover method but hey, Im not one of their technicians. Please be warned these components are very heavy and great care should be taken if attempting this yourself. I accept no liability for any damage or injury sustained if using this method.
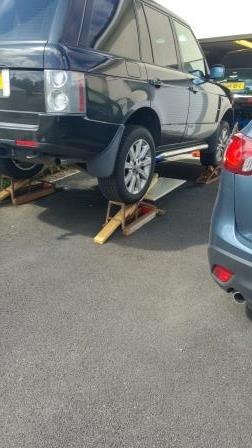
First I got the car high enough to work under comfortably (??) and safely chocked so it could not roll when the prop shafts were disconnected. I left the suspension in "Wading" (High) position to give me that extra clearance but she was probably a bit too high in hindsight because jack lift height was an issue.

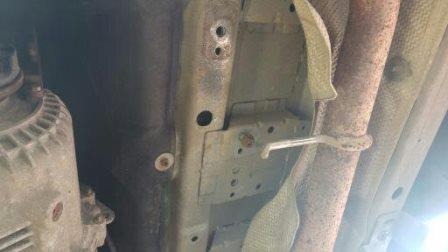
Then I drained the oil from the transfer box (drain plug arrowed in lime green).
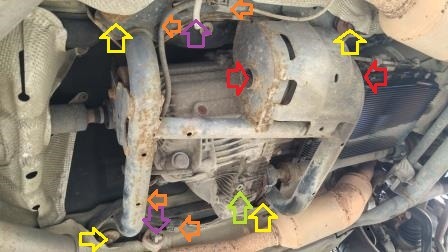
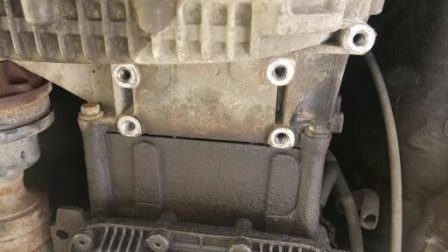
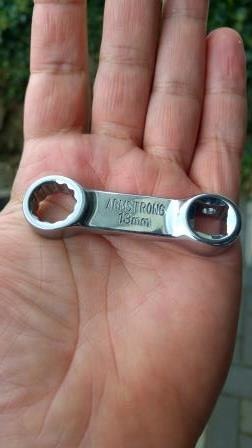
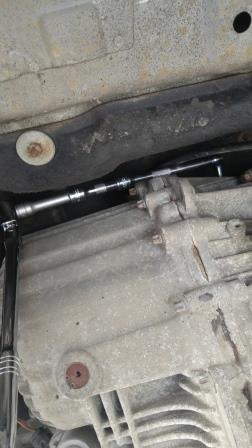
I undid the 5x Cradle to TBox mounting bolts arrowed in blue. N.B. 2x short, 3x long (13mm head). Bolt arrowed dark blue is inaccessible/obscured by the cradle & can only be undone by spanner.
Loosen (but no need to remove) the long cradle to alloy mounting through bolt arrowed in red (18mm head).
Gently bend the heat shield away from around the 4x cradle mounting bolts (16mm head) arrowed yellow.
Undo and remove the 2x exhaust hanger assemblies arrowed purple (15mm nut) sliding the rubber hangers completely off the exhaust and remove from the car.
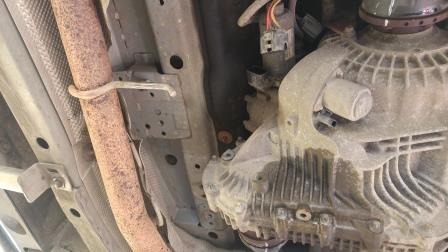
Undo all the electrical connections from both the transfer box/motor and the lambda sensors, and position safely to avoid damage etc (N.B. Lambda wiring harness and connector plugs arrowed orange, will need to be un-clipped from TB Cradle at this point).
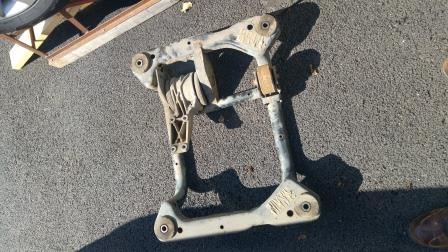
I positioned a trolley jack under the cradle to support its weight during removal just in case. I cracked the cradle mounting bolts undone with a breaker bar then wound them out using an impact gun. One bolt is only just accessible due to the exhaust pipe but I found that a 3/8dr wobble extension bar and a short socket did still work with the gun. With the exhaust mounts removed it is possible to manipulate the cradle round the obstacles and downwards but probably better to have assistance with this it is quite heavy and awkward, I didnt!
With the cradle removed and clear it is easier to undo the front & rear prop shaft bolts. I marked their positions, which is slightly pointless if changing the TB, but I intend to rebuild my old box and may want to re-fit it at some point. E11 Torx socket front and E12 rear. My props were quite well attached to the TB flanges so they required the generous attention of a heavy copper mallet to free them (just ensure that the outer covers are prised back safely first).
Once free, I cable tied the front to the exhaust to support it.
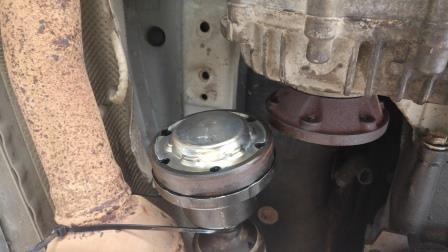
The rear was supported by the rear heat shield, however, I later found that I needed extra clearance to slide the TB off the main gearbox output shaft so it was necessary to undo and drop this heat shield to allow more flexibility in this prop shaft.

With the cradle and prop shafts removed, the engine, main gearbox and transfer box assembly will tip downwards to the rear. However, mine was still connected by the change mechanism and only dropped slightly so there was no chance of the cooling fan fouling/damaging the radiator. I did check this as I lowered the assembly then supported the main gearbox sump with blocks of wood on an axle stand (gearbox sump/oil change etc. is next job).
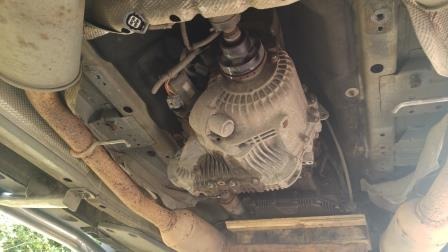
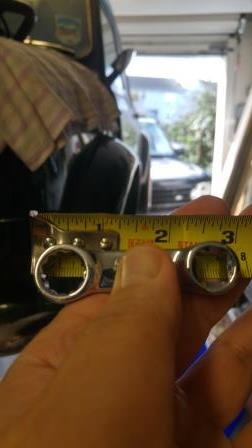
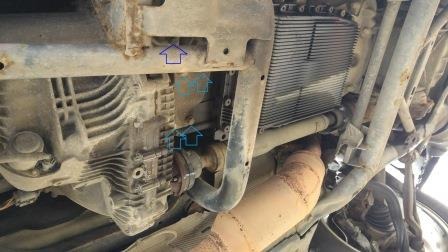
The ITC DD295 transfer box is connected to the ZF 6hp26 6 speed gearbox by 8x 13mm head x approx. 60mm long bolts. The L/R workshop manual says it is necessary to use special tool number 303-1069 to undo the top 4 bolts. It is a short torque adaptor but neither of my local main dealers nor large independent had it. I decided to buy something similar because I could see the benefits.

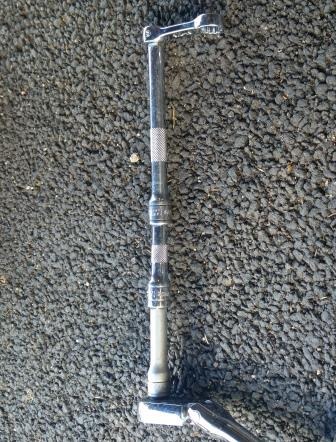
This tool, whilst not absolutely necessary, makes this job so much easier and quicker!! I undid the inaccessible top bolts first working downwards to the easily accessed lower ones last.
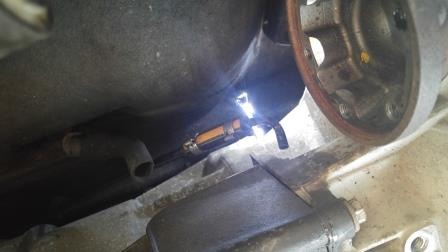
Before undoing the left top bolt I would advise you to release the TB breather pipe. It is a bayonet fitting into the top of the TB just requiring a push downwards on the flange around the angled pipe where it meets the casing. With this removed it is much easier to access this top bolt.
I had the TB supported at this time, but to be fair it still required major manipulating to come free of the gearbox splined shaft.

When eventually free I lowered the TB down onto a hop up table that I had positioned accordingly, then subsequently manoeuvred it onto my trolley jack to lower floor wards. Please dont be fooled
.this transfer box is very heavy, very awkward, is totally unbalanced when loose and will try to bite you at every opportunity!!!!
I swapped my TB Motor to the replacement box, filled it with the correct LR spec oil and inserted a little paper plug into the breather hole to prevent dirt ingress, and as the old Haynes workshop manuals used to say Re-fitting is the reverse of removal
. !??! Well maybe if there are at least 3 of you struggling to re-align it!!!
I didnt attach the large rubber coated weight over the rear output flange until after the TB was in place and the rear prop was attached. This gave more space to help align the TB and then to lower the rear prop into position. Trying to align the TB on the splined main shaft from the main gearbox by myself was a real mission!! I did clean off the rust from the splines of this shaft which was probably why it was so reluctant to release, and greased it lightly to aid refitting.
Once the TB is back in place refitting is actually pretty much the reverse of removal, but dont forget to remove the paper plug from the breather hole and refit the breather pipe (the paper plug makes it much easier to find the breather hole to refit the pipe!!).
Obviously any/all torque settings should be as per figures quoted by Land Rover.
This link kindly supplied by another member https://app.box.com/s/upoz0ga8fw0xilslslao is for the 2007 Land Rover workshop manual.
Hopefully this post will be of help and assistance to at least one of you guys in the future.
Cheers,
Ken 55 S/C L322 Zambesi Silver.....GONE!!
56 S/C L322 Java Black......surviving at present...just!
04 N/A 4.2 V8 S Type Jag
1961 reg 3.5 V8 Bowler Tomcat.....Sold
Numerous Classic (rusty!?!) Minis
|