 | Home > Maintenance & Mods (L322) > How to replace the Front Grille and Side Vents: With Pics |
 
|
|
|
| RRUK Site Supporter Member Since: 08 Jun 2007 Location: UK Posts: 6383 
|
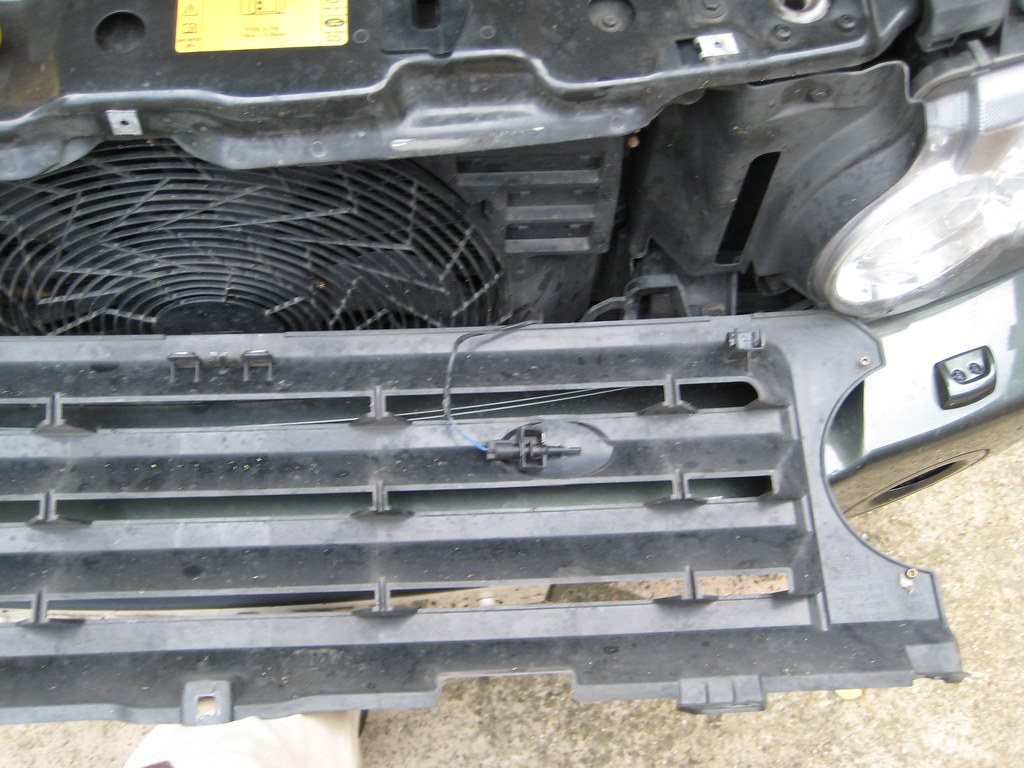
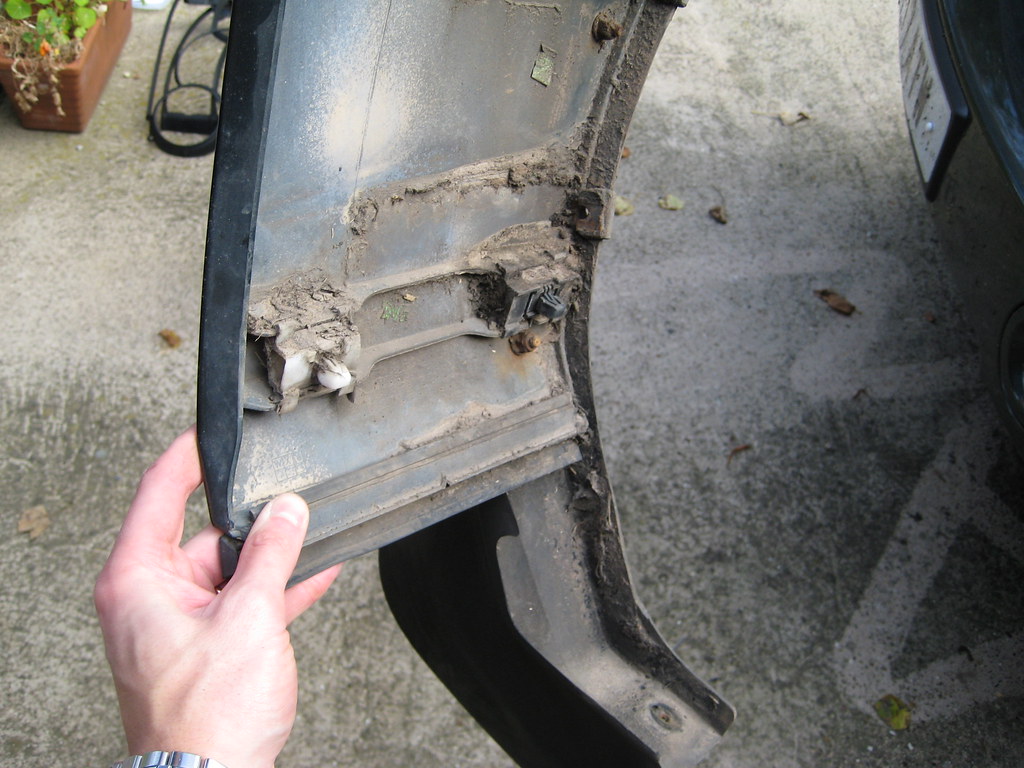
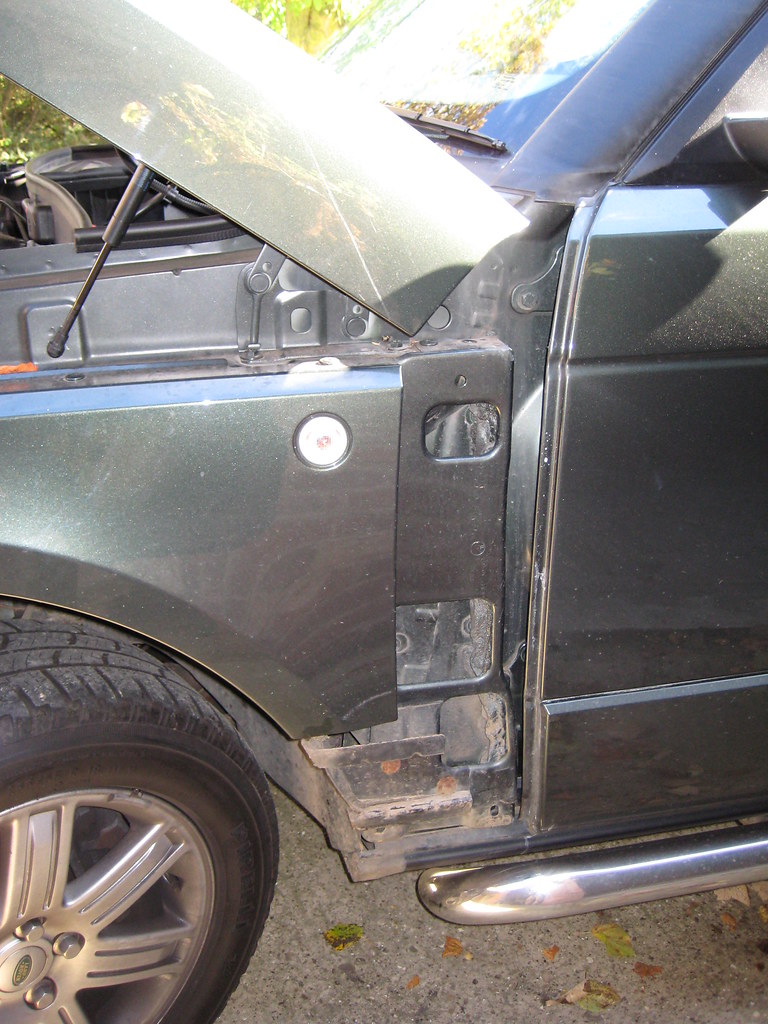
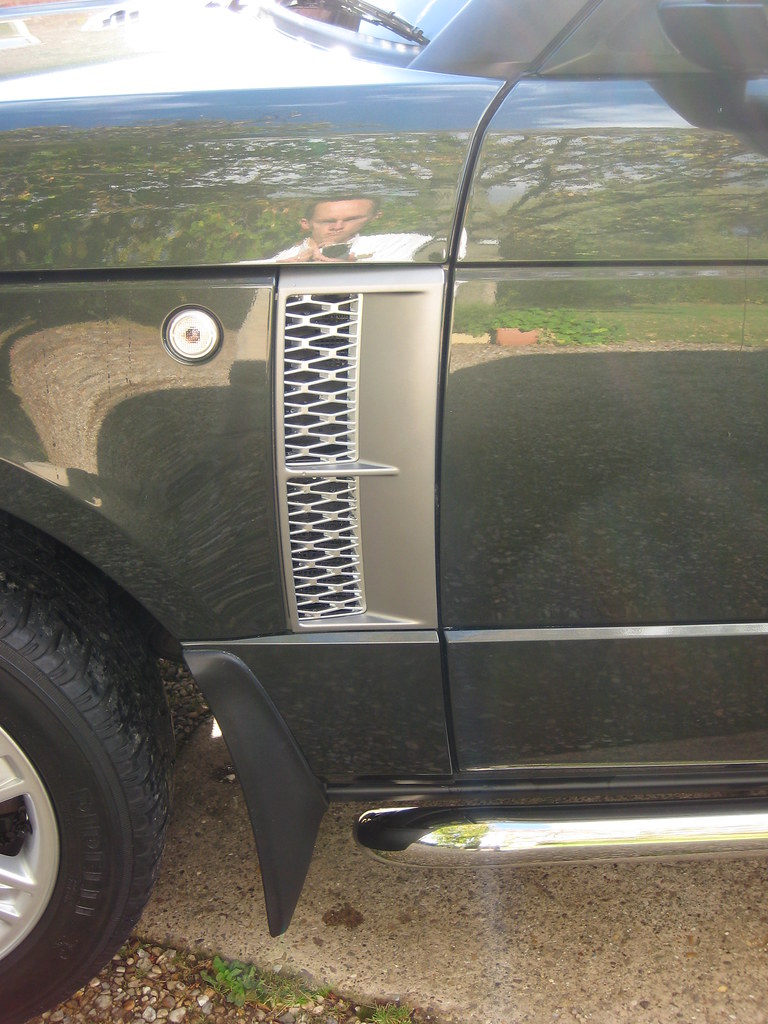
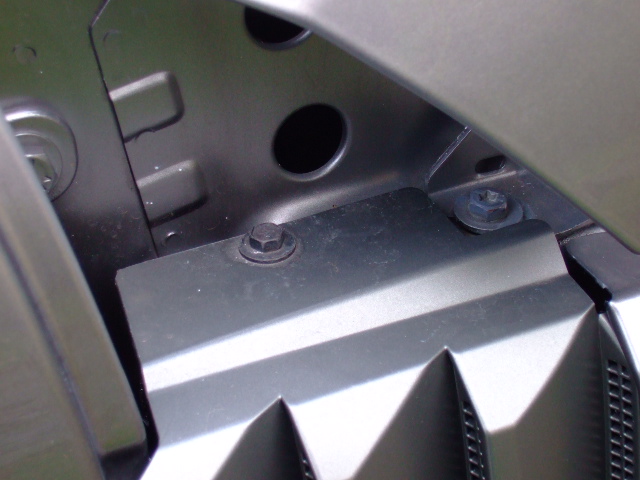
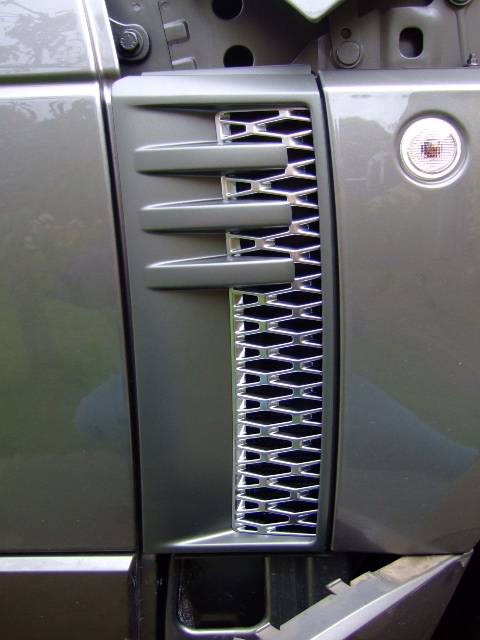
I just swapped my Grille and Vents for the Supercharged ones, however this process is exactly the same if you wanted to update a 2002 car with OE parts. i.e put a new non SC grille on etc.
|
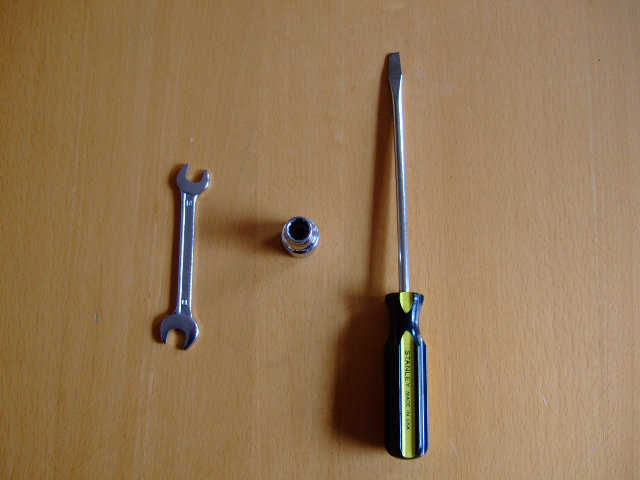
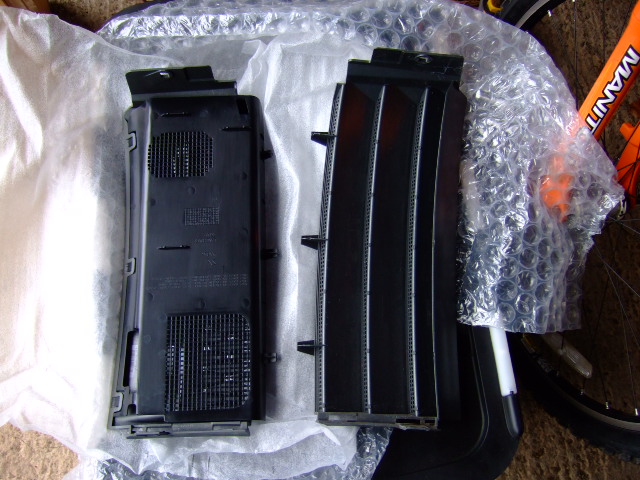
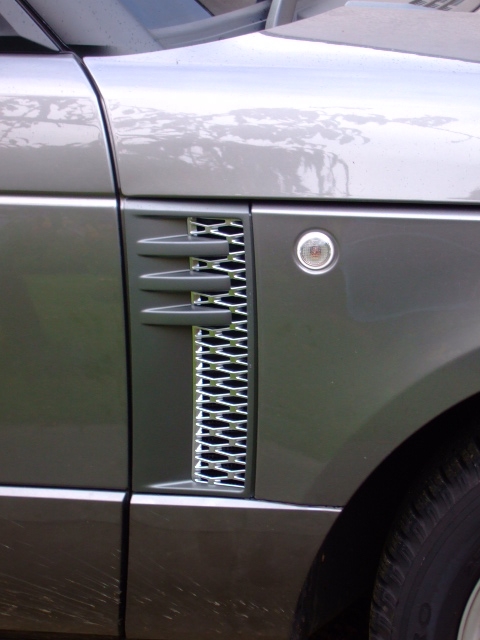
||||||||||||
|
| RRUK Site Supporter Member Since: 08 Jun 2007 Location: UK Posts: 6383
|
RRCanuck, for you, I will make it so! |
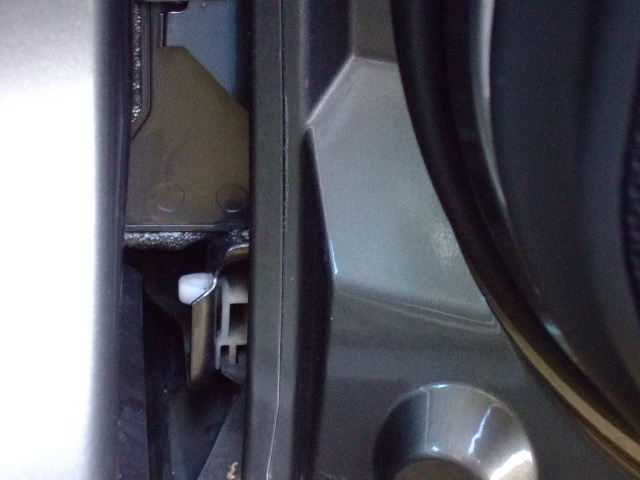
||||||||
|


| RRCanuck Member Since: 23 Dec 2009 Location: Ontario Posts: 172  
|
RRUK, Magic |
||
|
| Full fat not diet Member Since: 16 Nov 2008 Location: Herts Posts: 1209  
|
Yet again Adam great pics in your thread make it an easy job |
||
|
| MarkT Member Since: 10 Jul 2010 Location: Bucks Posts: 20 
|
Thanks, perfect explanation that even I could follow |
||
|
| XXXAngelXXX Member Since: 25 Mar 2007 Location: Stuttgart Posts: 4995  
|
Adam you took a pic of yourself |
||
|
| Tim in Scotland Member Since: 25 Mar 2007 Location: Somewhere between here and there, if not then I'm all at sea or at home in Scotland Posts: 2181 
|
My 2010MY S/C side vents were ordered on Sunday and have just arrived, no instructions included. Googled it and found some very convoluted instructions and then came here and found we have them already |
||
|
| Full fat not diet Member Since: 16 Nov 2008 Location: Herts Posts: 1209
|
Why not take a few pics and add to to the thread Tim? The revised 2010 version |
||
|
| Tim in Scotland Member Since: 25 Mar 2007 Location: Somewhere between here and there, if not then I'm all at sea or at home in Scotland Posts: 2181
|
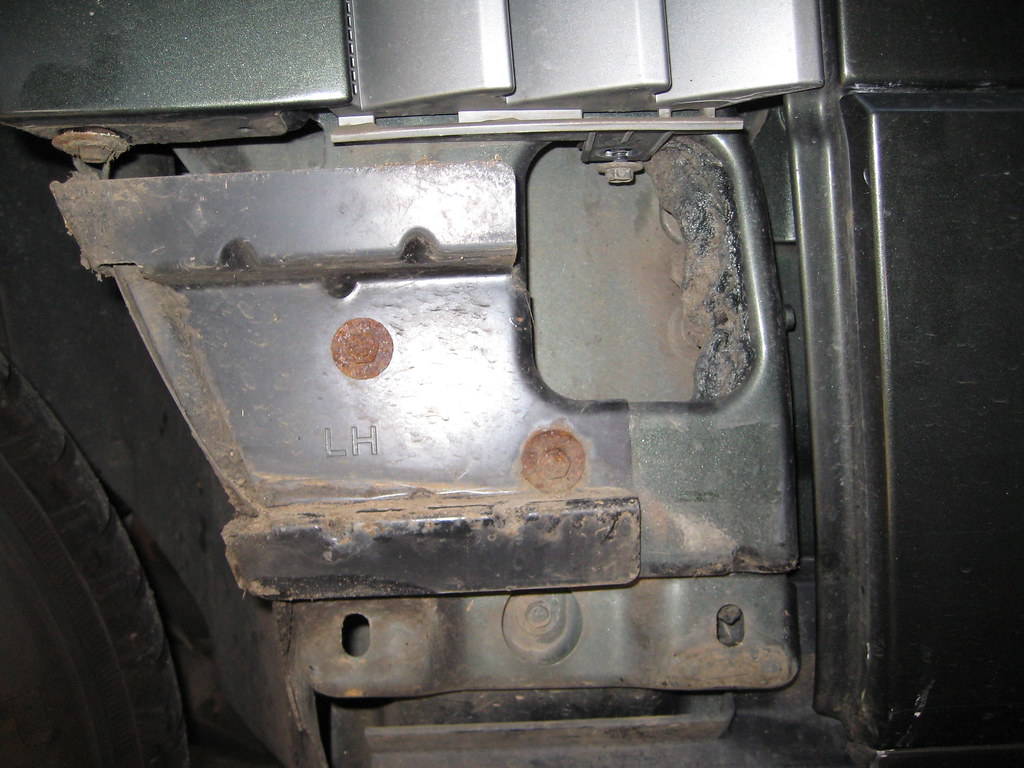
Will do, have already started taking some, I hope too that mine doesn't have all those corrosion spots behind the vents....... 2018 Mini Countryman Cooper S E All4 PHEV in Melting Silver - it’s whisper quiet in EV and polluter modes |
||
|
| Vogue Member Since: 31 Jan 2008 Location: on the hill Posts: 3818
|
wouldn't harm to paint it with waxoyl or similar - seems like muck gets trapped in there |
||
|
| Tim in Scotland Member Since: 25 Mar 2007 Location: Somewhere between here and there, if not then I'm all at sea or at home in Scotland Posts: 2181
|
Basically it's the same as RRUK's pre 2010MY method but a couple of things to watch out for so I'll start from scratch:also my car doesn't have mud flaps so the job is a little easier
|
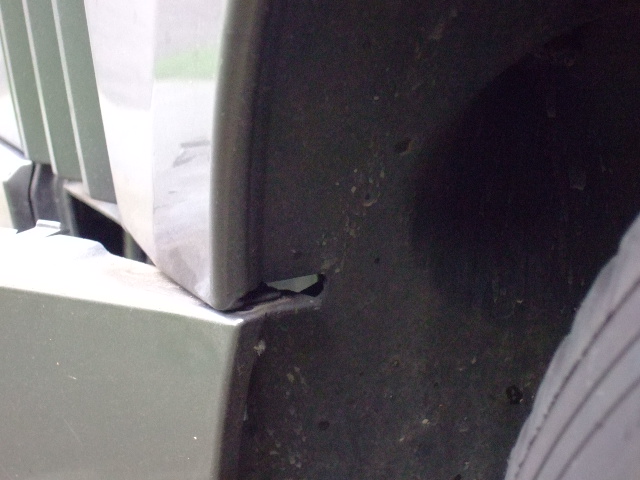
||||||
|


| Gazellio @ Prestige Cars Member Since: 22 Jan 2010 Location: Chilterns, UK Posts: 11309
|
Worth noting that when changing SIDE VENTS it is not necessary to completely remove the bottom plastic panel. If you pull from the door side and release the clips you can then just swing it out leaving the wheel arch side still attached and there is plenty of access for your 10mm spanner. When changed you just clip the door side back in top and bottom. MUCH easier than trying to loosen the screw or force it back in....
|
||
|
| pretlove Member Since: 10 Feb 2011 Location: Bas vegas Posts: 1865 
|
just wanted to say thanks guys did mine today and found it was very easy only differance was my mud flaps had 4 screws and none of which was underneath.......once again thanks guys |
||
|
| rich_959 Member Since: 13 May 2011 Location: East Yorkshire Posts: 64
|
Hi chaps,
|
||
|

|
|
| All times are GMT + 1 Hour |
< Previous Topic | Next Topic > |
Posting Rules
|
Site Copyright © 2006-2025 Futuranet Ltd & Martin Lewis
![]()
