Advertise on fullfatrr.com »

Home > Technical (L322) > no heater blower
Post Reply  Down to end
Page 6 of 7 <1234567>
Print this entire topic · 
SveinHa


Member Since: 22 May 2016
Location: Karmřy
Posts: 36

Norway 2008 Range Rover Vogue TDV8 Buckingham Blue

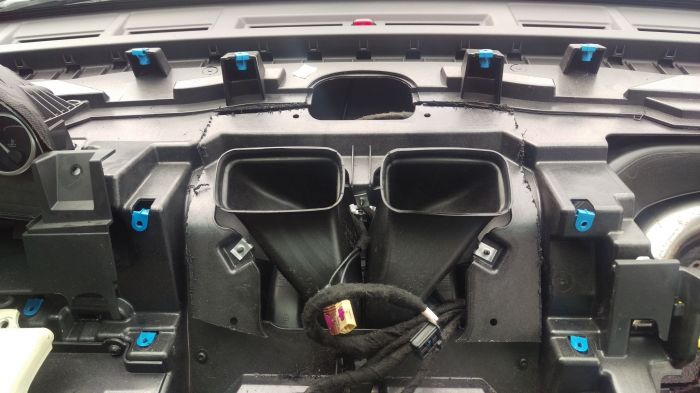
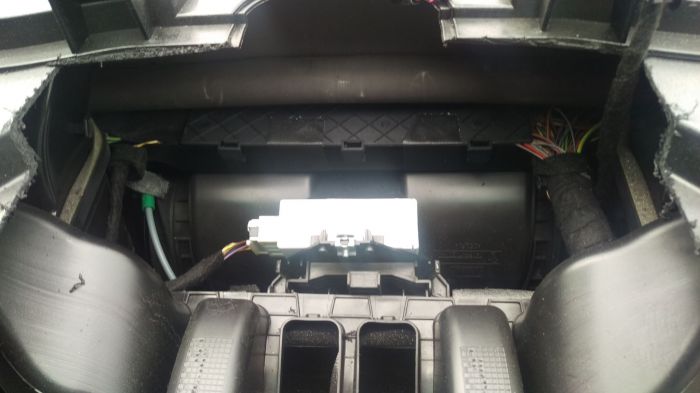
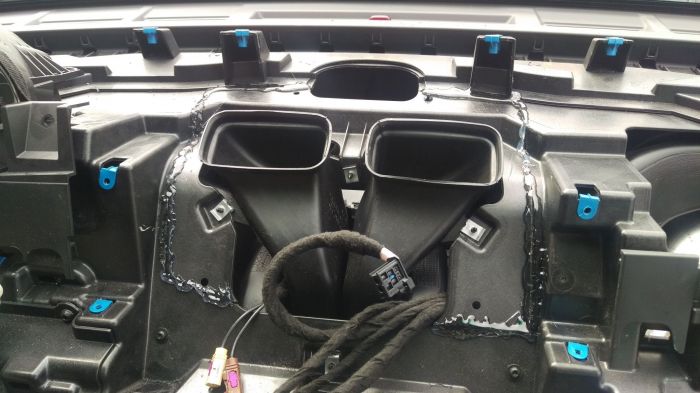
After uncovering the holy grail, my Fein Multimaster had to do the next job.The finished cut is visible here:


All 4 short airducts are fairly easily removed, two is fixed with one torx "the wrong way" ie. a short torx driver is needed from behind.

The white box, whatever that is, slides away easily and don't need to be disconnected.

Now, it's time to apply som gentle brut force. The cableduct needs to be lifted about one cm to access the center fixing clip. There are also one metal fixing clip on each end of the fan housing but they are more easily accessible. A mirror helps to locate them.

While still lifting the cableduct, the fan cover can be removed using some force.

So far so good but the hole is far too small to get the fan out. The 6 damper housing need to be trimmed, time to find the Multimaster once more. The 6 hole connecting plate also need to be removed. I moved the right hand (LHD vehicle, on a RHD I suppose the left one is the on to go for) long duct to the door window slightly out of the way, fixed with 2 torx, one in the middle and one on far right. The cut is down to about 1 cm above the dampers, they move downwards so the don't interfere with the cut. Bewar of one axle and two grey steel wires right in the cut zone.

The hole is still quite on the small side but lifting the cable duct makes it just exactly big enough to slide the fan out. The fan is fixed with 3 torx visible on the picture. For some reason, my new fan had the connector upside down but it was easy to turn it 180 deg. While struggeling to put the fan in, you may accidantly move the fans in relation to each other so, for the sake of balancing, apply one ink mark on both fans so that you find the original position when finished.

The two plastic pieces that were cut out is fixed in position with a hot melt glue gun.

Then it is just to replace all other stuff... The whole procedure took somewhat less than 4.5 hours of effective work time.

Enjoy Cool "Plentraktoren/Garden tractor": 2008 L322 TDV8
"Project": 1990 90 County 300tdi

Post #395093 8th Jul 2016 7:27pm
View user's profile Send private message View poster's gallery Reply with quote
SteveNorman


Member Since: 18 Sep 2008
Location: somerset
Posts: 17

United Kingdom 

Thanks for the write up, helped a lot.
We did find there isn't a need to cut the front flap panel, as you can remove it. Just move the vent pipes (unscrew them from the outer ends to give more access). Then move them forward. This is the LH screw to remove.


The RH one is under the loom & vent pipe, here.


Then lift the panel & tilt, to access & remove the metal adjusting rod.


There is now enough room to remove the fan.

Regards
Steve

Post #442847 27th Jun 2017 12:02pm
View user's profile Send private message View poster's gallery Reply with quote
MrSteed


Member Since: 04 Nov 2018
Location: Florida
Posts: 2

United States 2009 Range Rover Supercharged Supercharged Zermatt Silver

I just completed putting in a new blower motor in my 2009 L322, left hand drive US version. Just want to let everyone know you don’t have to cut any part of the Dash (or anything for that matter) at all. There is plenty of room to get the new motor in and out. It really wasn’t that bad, just take your time and label all the screws in baggies. One tip, for the vent tube that goes towards the passenger window, there’s an accessible torx screw to remove in the middle of the vent tube. Take your torx screwdriver and find the head of the screw with your fingers. Removing that securing screw allows you to completely move that vent out of the way giving you plenty of room. You do need to remove the CD Changer to get to that screw. The thing that gave me the most trouble was removing the metal rod from the flap (the above poster mentions), then getting it back on. I did damage the part that secures it but it should still function fine. Many thank to those who contributed to this thread - you all saved me a ton of money!

Last edited by MrSteed on 7th Nov 2018 1:39am. Edited 1 time in total

Post #494614 4th Nov 2018 5:51pm
View user's profile Send private message View poster's gallery Reply with quote
MrChubba


Member Since: 03 Dec 2017
Location: Penrith, Cumbria
Posts: 4

United Kingdom 2008 Range Rover Vogue SE TDV8 Cairns Blue

MrSteed,

You say you don’t need to cur anything at. Can you elaborate on this? I have a 2008 TDV8 with the air vents completely covering the blower area. How have you avoided cutting anything?

Many thanks in advance

MrChubba

Post #494823 6th Nov 2018 8:53pm
View user's profile Send private message View poster's gallery Reply with quote
MrSteed


Member Since: 04 Nov 2018
Location: Florida
Posts: 2

United States 2009 Range Rover Supercharged Supercharged Zermatt Silver


Yes, Mr Chubba, no cutting whatsoever on my full sized super charged 2009 Range Rover L322. The flapper assembly comes out by removing the two screws pointed out by the prior poster. You then tilt it to remove the flapper rod, which is the tricky part. Even trickier getting it back on. I wish I had taken more pictures, but there was plenty of room to get the blower in and out.

This photo shows the flapper assembly still in place.

Post #494854 7th Nov 2018 1:36am
View user's profile Send private message View poster's gallery Reply with quote
MrChubba


Member Since: 03 Dec 2017
Location: Penrith, Cumbria
Posts: 4

United Kingdom 2008 Range Rover Vogue SE TDV8 Cairns Blue

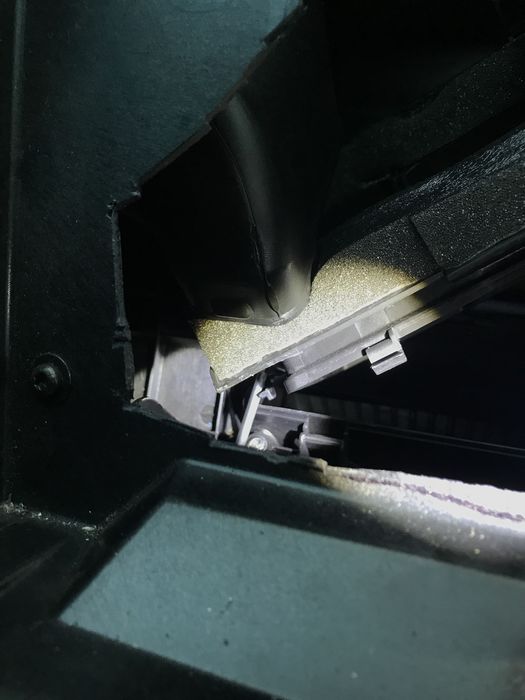
Mine looks a bit different to yours, I don’t seem to have the space you have at the bottom of the plastic surround. So, I think I need to cut despite removing the flapper assembly

Post #494858 7th Nov 2018 9:02am
View user's profile Send private message View poster's gallery Reply with quote
Pavetim


Member Since: 02 Sep 2019
Location: Valdosta, ga
Posts: 12

United States 2010 Range Rover Autobiography Supercharged Buckingham Blue

Can you change the blower from the top on a 2010 RR full size? Mine looks different than these pics here.

Post #526793 2nd Sep 2019 1:35am
View user's profile Send private message View poster's gallery Reply with quote
Pavetim


Member Since: 02 Sep 2019
Location: Valdosta, ga
Posts: 12

United States 2010 Range Rover Autobiography Supercharged Buckingham Blue

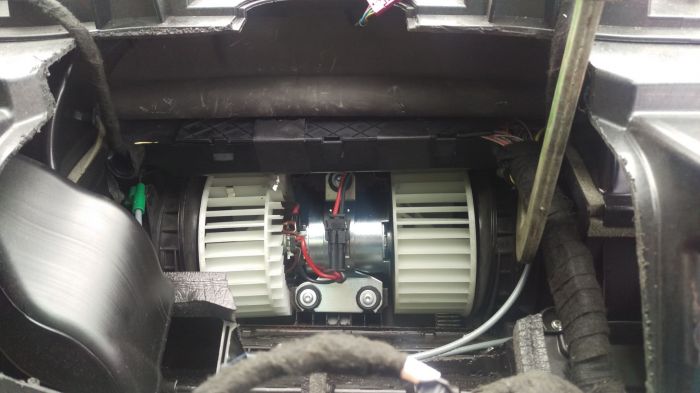
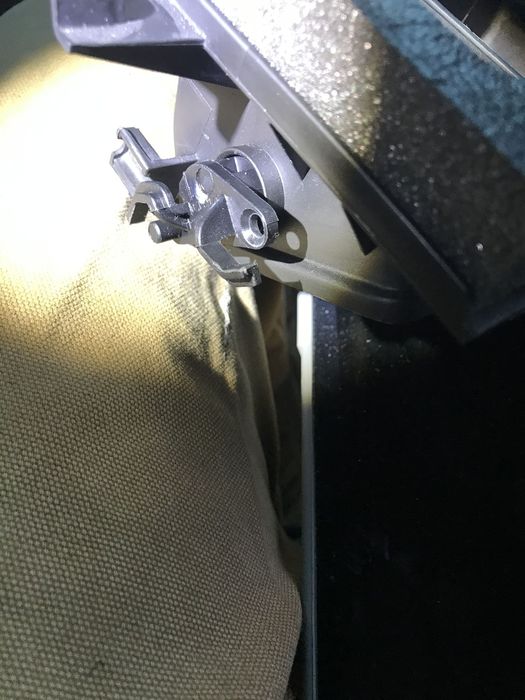
Ok got old one out and only thing i had to cut was the top middle where that siler nutplate is. But i honestly still dont see how you can get new one in without jacking it uo.

Post #526848 2nd Sep 2019 5:54pm
View user's profile Send private message View poster's gallery Reply with quote
Matisse


Member Since: 02 May 2021
Location: Massachusetts
Posts: 4

United States 2008 Range Rover Supercharged 4.2 SC V8 Java Black

So I’ve got an 08. Not quite as big a hole as the 09, but I can copy that shape and trim.

I am having a terrible time getting that 6 way flapper out. That rod won’t release and the vent tube to the driver’s side is blocking the flapper from rotating up. On lhd cars there seems to be less play in that driver’s side tube. Any tips? Do I need to take apart all the stuff around the steering wheel to get access to that rod from the side? I am dubious it will help.

Edit: ok , I got it by twisting it up and to the right as shown. You want to get the metal rod outside of that black tab. You will need to trim the access hole wider first. After that put it back down to its normal position and reach in and pop the rod up and to the left to remove it.


Click image to enlarge


Click image to enlarge


Post #593006 2nd May 2021 11:46pm
View user's profile Send private message View poster's gallery Reply with quote
benjwom


Member Since: 13 Apr 2017
Location: Sheffield
Posts: 12

United Kingdom 

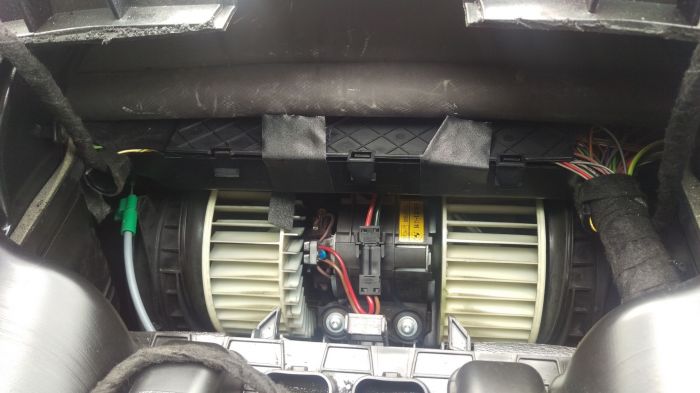
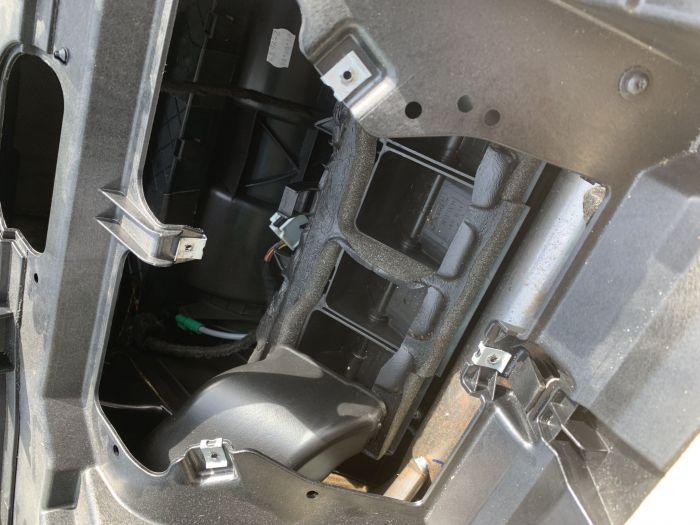
Really regret selling my old L322 so thought it would be a good idea to buy another one. Less than a week into ownership the heater blower started making a noise so after much faffing about trying to get the clam shell like baffles to stay open with the fan off so I could check it for debris through the filter housing, it seems the fan is starting to die. Thought I would be better to change it before it gets worse and starts taking fuses out with it, and how hard can it be to change a heater fan? Shocked

Really helpful information here so wanted to say a big thank you.

Couple of bits which might be helpful for somebody:

    I had a nightmare removing the drivers side screw on the baffle plate. I found that by cable tying the vent pipework forward and using a smaller Torx bit (T15 I think) I could get enough of an angle on the screw to get it out. Getting it back in wasn't as bad as I expected either.

    The old fan was a nightmare to get out as the wiring harness tray was in the way. The new fan had a slightly smaller diameter, maybe 5mm less, so went back in surprisingly easily.


Took about 6 hours including a couple of tea breaks and almost an hour looking for a screw that I dropped down the drivers side / getting sidetracked reassembling the drivers foot-well panels correctly after somebody else had made a mess of it. Current: 2011 RR 4.4 TDV8 Vogue SE
1986 LR 90 Recently Rebuilt
1958 LR S2 Ready for a rebuild!
Previous: 2007 RR 3.6 TDV8 Vogue SE

Post #664224 16th May 2023 9:34am
View user's profile Send private message View poster's gallery Reply with quote
garyRR


Member Since: 13 Mar 2021
Location: Hampshire
Posts: 1349

United Kingdom 

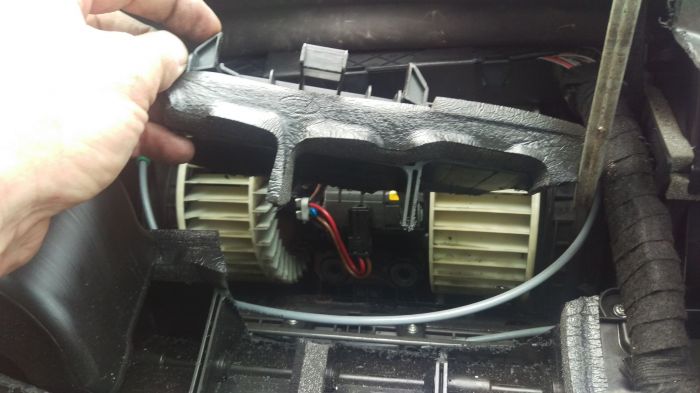
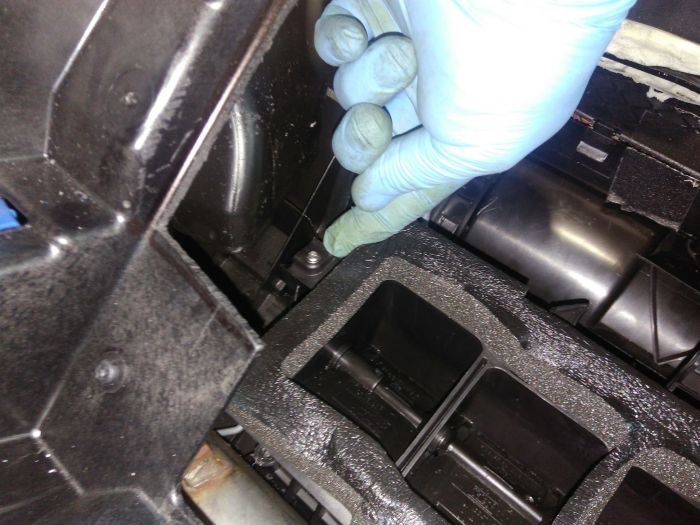
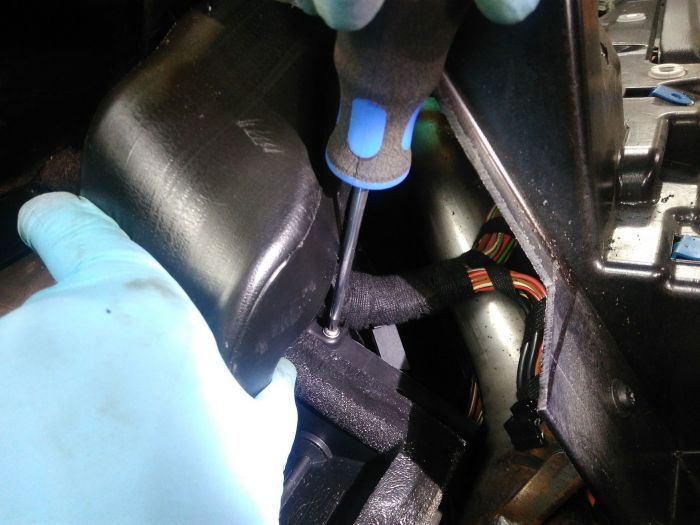
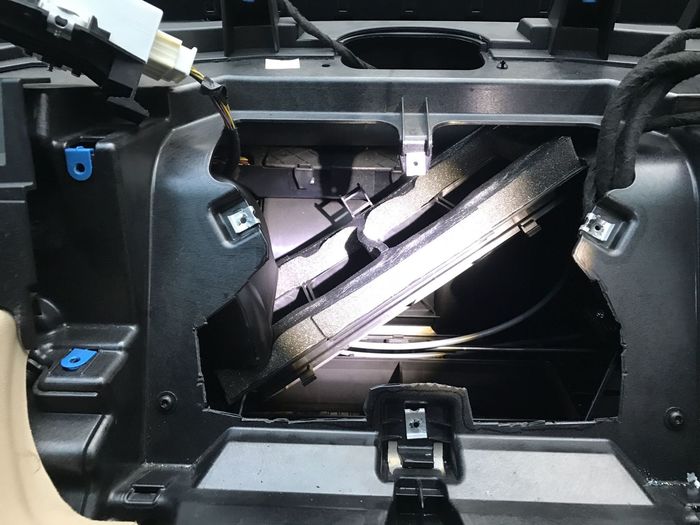
So, I have joined the club and replaced my blower with no cutting at all (although some cutting is needed on vehicles pre 2009).

Many thanks to this thread and Norman's for the guidance and pictures beforehand.

Step by step guide with lots and lots and lots of photos, including a nifty trick for making the removal and fitment of the adjuster rod a 5-second job, on the way soon. 2015 Range Rover Autobiography 4.4 SDV8

Post #670377 3rd Aug 2023 2:39pm
View user's profile Send private message View poster's gallery Reply with quote
Epson Green


Member Since: 20 Mar 2021
Location: Sutton Coldfield
Posts: 100

United Kingdom 2012 Range Rover Westminster TDV8 Orkney Grey

Hi Gary

I have this job on the list, looking forward to your guide - it looks a bit daunting still.

Regards,

Kevin Kevin
2012 L322 Westminster 4.4 TDV8
1999 P38A 4.0 SE - Sold

Post #670434 4th Aug 2023 12:33pm
View user's profile Send private message View poster's gallery Reply with quote
DrRob


Member Since: 16 Apr 2015
Location: Petersfield, Hampshire
Posts: 4231

United Kingdom 2011 Range Rover Vogue SE TDV8 Buckingham Blue

Looking forward to seeing the write up Gary! 2011 4.4 TDV8 Vogue SE Buckingham Blue with Ivory and clear glass = "Rory"
New Defender D300 90 on order so "Rory" will be going to a new home....!
1974 Series 3 Lightweight = "Millie"
My preferred specialist: www.glenrands.co.uk
--------------------------------------------------

Post #670435 4th Aug 2023 12:35pm
View user's profile Send private message View poster's gallery Reply with quote
DrRob


Member Since: 16 Apr 2015
Location: Petersfield, Hampshire
Posts: 4231

United Kingdom 2011 Range Rover Vogue SE TDV8 Buckingham Blue

Gary, remind me of the symptoms you were getting please 🙏 2011 4.4 TDV8 Vogue SE Buckingham Blue with Ivory and clear glass = "Rory"
New Defender D300 90 on order so "Rory" will be going to a new home....!
1974 Series 3 Lightweight = "Millie"
My preferred specialist: www.glenrands.co.uk
--------------------------------------------------

Post #670454 4th Aug 2023 3:12pm
View user's profile Send private message View poster's gallery Reply with quote
garyRR


Member Since: 13 Mar 2021
Location: Hampshire
Posts: 1349

United Kingdom 

Squeaking (like there was a family of mice) when the fan was running, especially when just starting the car for the day. It was more prominent at temperatures below 10 degrees. 2015 Range Rover Autobiography 4.4 SDV8

Post #670460 4th Aug 2023 4:16pm
View user's profile Send private message View poster's gallery Reply with quote
Post Reply  Back to top
Page 6 of 7 <1234567>
All times are GMT + 1 Hour

Jump to  
Previous Topic | Next Topic >
Posting Rules
You cannot post new topics in this forum
You cannot reply to topics in this forum
You cannot edit your posts in this forum
You cannot delete your posts in this forum
You cannot vote in polls in this forum


Site Copyright © 2006-2024 Futuranet Ltd & Martin Lewis
fullfatrr.com RSS Feed - All Forums


Switch to Mobile site