Advertise on fullfatrr.com »

Home > Maintenance & Mods (L322) > Howto: FFRR TD6 '02 Replace Front and Rear Brake Lines
Post Reply  Down to end
Page 1 of 4 1234>
Print this entire topic · 
Joe90


Member Since: 29 Apr 2010
Location: Hampshire
Posts: 6399

England 
Howto: FFRR TD6 '02 Replace Front and Rear Brake Lines

PART I

MOT guy didn't like my brake pipes last year, so have to change them out. Many have said they have done this, but no-one has shown what is involved, so here we go. This first post is mainly about setup and preparation, and removal of everything to actually get at the brake pipes and hoses. My life is complicated by having sidesteps which will make getting the RR line back in a bit tricky, and looking at the FR line I am guessing this went into the car before a lot of other things were fitted in the engine bay. I have purchased new brake pipes & fittings (copper - sorry purists!), a flaring tool (this is cool), a cutter and a pipe bender and the flexible hoses (rears are pricey!).

Tools needed:

Bottle Jack (Mercedes Sprinter)
Trolley Jack
Axle Stands + Wooden blocks that fit the jacking points & Large Oak blocks
Selection of Allen Keys
8, 10, 13 mm sockets
Selection of extension bars and ratchet
11, 13, 14, 17, 19 open ended/ring spanner
Crosshead screwdriver
Flat screwdriver
Pliers
Brake pipe making equipment
Hacksaw
Maybe a hammer Wink

Parts:

@ 14m of copper pipe SAE 3/16
Goodly number of pipe fittings SAE 3/16 (11mm)
If not reusing the larger fittings, you need 4
4 new spring clips for the flexible hose connections
WD40
Silicon Lubricant


First up, put car into off road height and into Park, handbrake on. ( I did this the night before and measured wheelarch heights; all the same in the morning Smile )

Loosen off all wheelnuts

Bottle jack under RAVE designated point on the subframe at front (chocks on rear wheels) and raise one front side of the car. Place sized wooden block in jacking point, pack with other wood, and then lower onto axle stand. Remove bottle jack and place second axle stand under subframe point. Repeat other side.


At rear, use trolley jack and suitable wood block and jack up one side under the lower wishbone, then do the same thing with wood block and axle stand as at front. Repeat other side. Use large oak blocks or similar under towbar. Vehcile now supported on all four jacking points, with safety of two more axle stands and support under towbar.


Remove all four road wheels and set aside.

I am tackling everything that needs replacing so removed both inner wheelarches up front.

Undo 6 x 8mm screwbolts
Undo 3 x 10mm plastic nuts (two snapped the threaded fixed bolt!)
Undo 3 x 8mm screwbolts and one plastic crosshead fixing to release the rear flap under the car
Undo 1 x plastic fixing bottom front.


Extracting the inner wheelarch is a case of bending and pulling. Start from flap under the car and work forwards. It is quite pliable when warm, so if doing this on a cold day use a hot air gun or similar to soften it up.

Actual insides of wheelarch revealed, including FBH.


The plastic cover behind the strut also needs to come out, so undo 3 x 8mm screwbolts first. Then you need to disconnecth the ABS sensor wire and brake pad sensor wires. These are in the little box (as indicated by red arrow) held closed by two clips at the top. To disconnect each sensor press down on the locking clip and use a flat screwdriver to ease the connector out. Release sensor cables from their mountings and set out of the way, and return the connectors to the little box and close it. The plastic cover will then come out, with a fair bit of heaving, wiggling, turning and shoving towards the front of the car. ON older cars these can be brittle ( I put a crack in the drivers side on, but nothing a bit of evostick won't cure.


You should now be able to see the full run of the metal brake pipes and the extent of the corrosion! You can see the rear brake pipe runs disappearing into a channel below the footwell. Plenty more to do yet!


Under the Left hand side of the car, below the front door, look up. There is a black plastic cover held in place by circular fixings with a hexagonal allen key hole in the middle. The allen key needed seemed to vary for me, somewhere between 5.5 and 6.5mm ??? Anyhow, these are likely to break off or refuse to budge, but they have to come out so you can access the pipes behind. if you break some, either improvise ( I used cable clips) or see if you can buy new ones?


Click image to enlarge


Moving to below the rear door is what appears to be an unnecessary cover with two recessed 8mm screwbolts. Remove this. If you have sidesteps this is likely to have been cut down to clear the sidestep brackets.

Click image to enlarge


Click image to enlarge


Still on the left hand side:
Now to the fuel tank cover. Undo @ 8 x 8mm screwbolts holding the heatshield in place (this gives access to the inner tank cover nuts/bolts , then undo @ 8 x 13mm bolts and 2 x 13mm nuts holding the cover in place. Of interest is the bolt on the outer side, which for me, when I removed it I got a torrent of clean water for a good minute. The other side didn't do it. It is in the chassis/monocoque somewhere but it is not rusting in there? Any clues ? The fuel tank cover will fight you, especially if you haven't jacked the car up high enough. There is a lip at the rear end that catches on the rear subframe. A good bit of levering and wiggling may be required to get it out. I had this off previously and it was a sod to get back in so will be doing a mod on this when I come to refit it.


Click image to enlarge


Click image to enlarge


Click image to enlarge


I also removed the plenum chamber in the engine bay for better access to the FR pipe and ABS block.

At last, now we can get at everything!

Spent a bit of time going round to all pipe connections and fixing giving them a squirt with 3in1 pro.

Next up, release all the fixings holding the pipes in place. There are four types.

In the engine bay, a small flat screwdriver will release the locking clip and the cover will drop down, you can then ease the pipe out of the fixings.

In the left front wheelarch, there are some more of these dreaded round fittings with the hexagon in the middle. fortunately, these are slightly more protected from the elements so should undo easily with an allen key. You can then ease the pipes out.

Under the car, working towards the back, ease the pipes out of the fixings, once you get to the rear wheelarch you will find a two small "flip clips". The second one is nicely situated right up by the rear subframe, try pulling it down towards the front of the car for better access. The knack to getting these undone is to ease out the FBH fuel line, then lever the clip apart with thumb to release locking clip. Then ease pipes out. There is also another rounded hexagon thing. This one will break!

The RR brake line runs along the underside of the car between the wheels, it is held in place by two simple clips, one accessible from each side of the car. Simple ease the pipe out of these clips.

Finally undo the two allen key fixings on each side on the rear upper wishbone holding the rear flexible pipe in place.

You will have had enough by now, so get a bucket with soapy water, and some Mr Muscle, and clean all your removed plastic parts and your wheels!

 .
Experience is the only genuine knowledge, but as time passes, I have forgotten more than I can remember Wink
Volvo V70 P2 2006 2.4 Petrol 170bhp Estate SE
MG Midget Mk1 1962

Previous: L322 Range Rover TDV8 3.6 2008; L322 Range Rover TD6 3.0 2002; P38A Range Rover V8 1999

Last edited by Joe90 on 12th Jun 2014 9:18pm. Edited 4 times in total

Post #263923 7th Jun 2014 11:11pm
View user's profile Send private message View poster's gallery Reply with quote
Joe90


Member Since: 29 Apr 2010
Location: Hampshire
Posts: 6399

England 

PART II

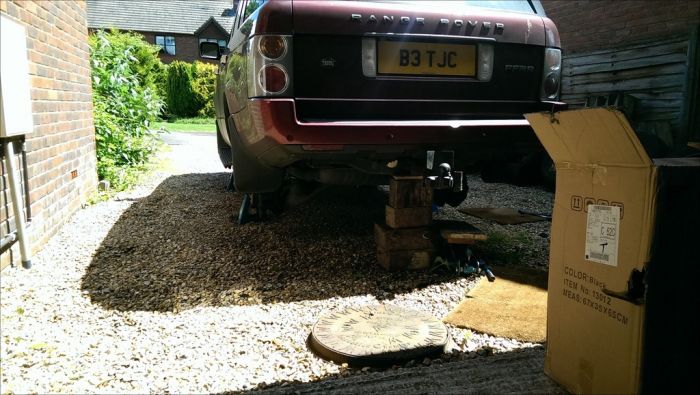
Tackled the rear pipes first (easier believe it or not!)

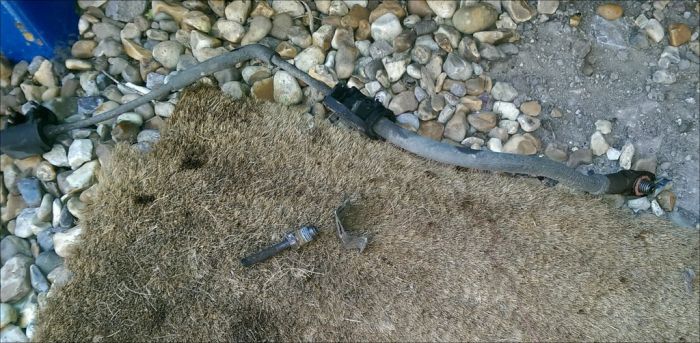
Rear flexible has to come out


and the RR cross pipe


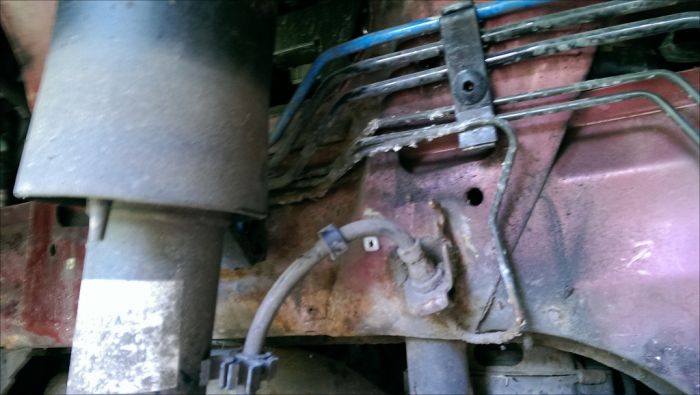
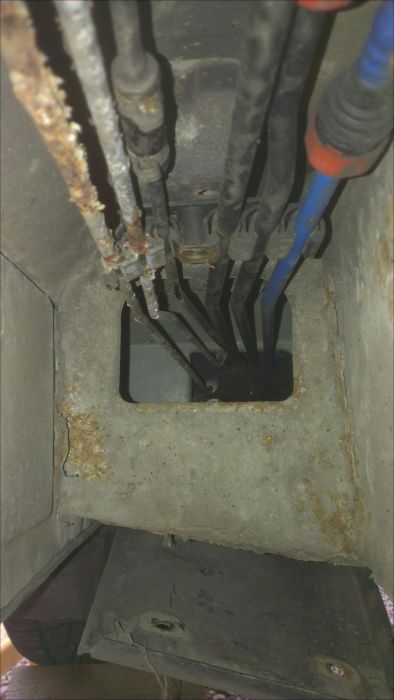
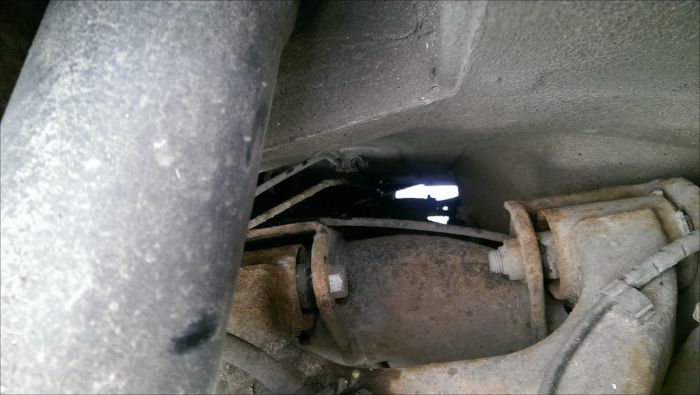
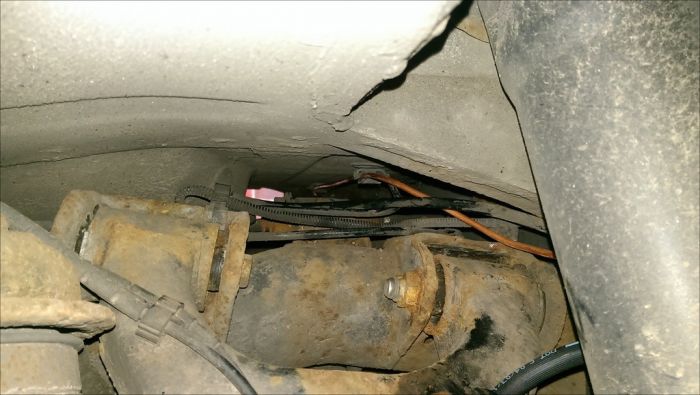
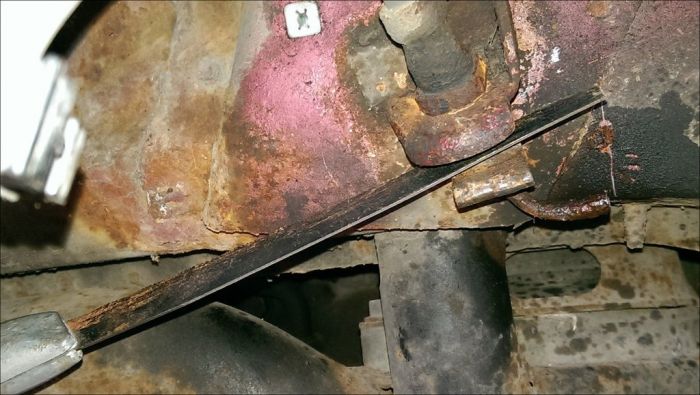
See corrosion from other side


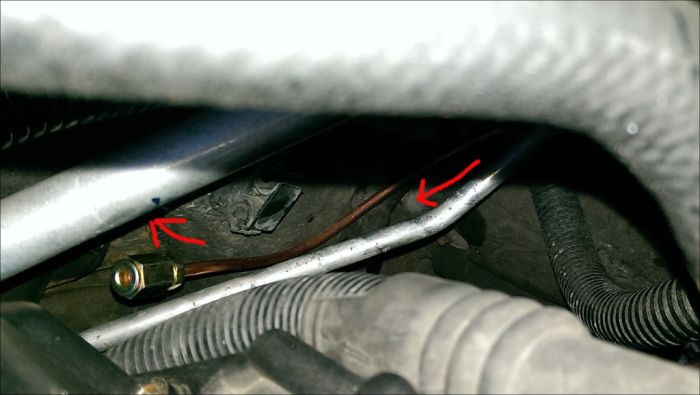
and the runs from front to back


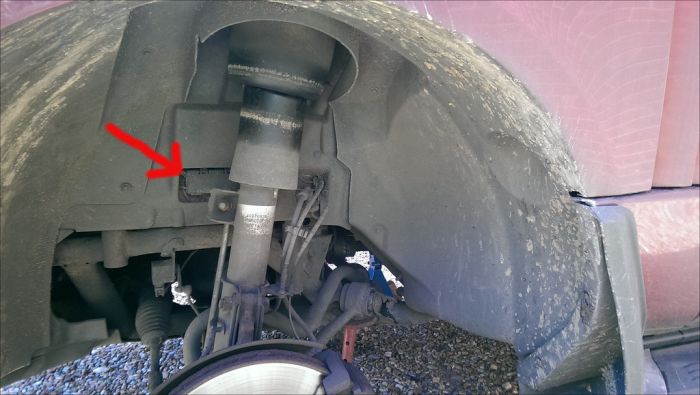
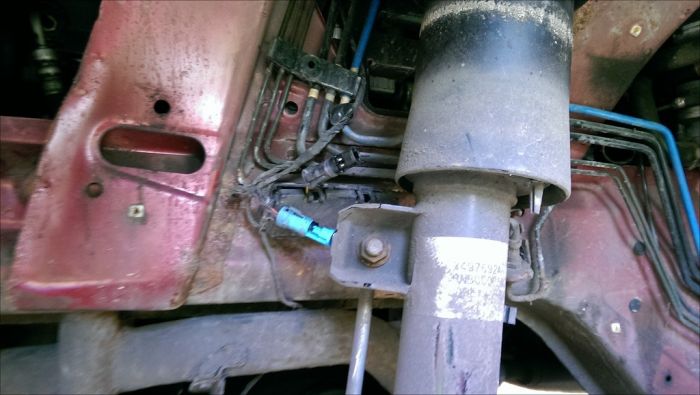
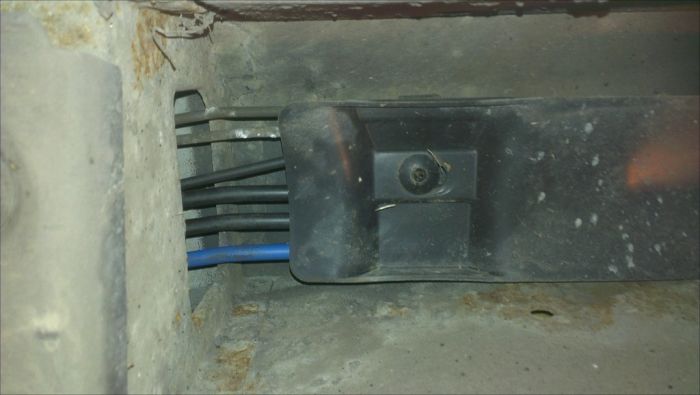
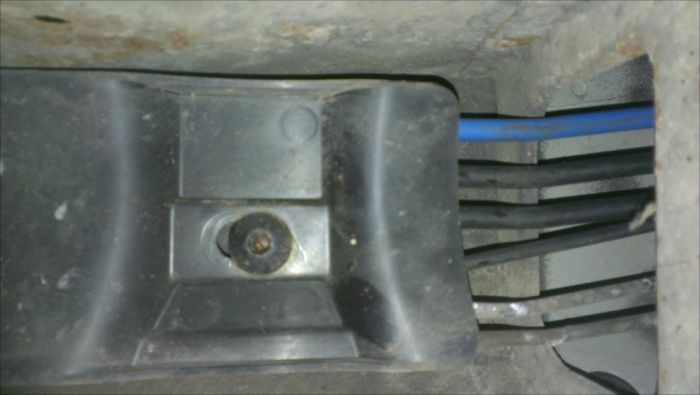
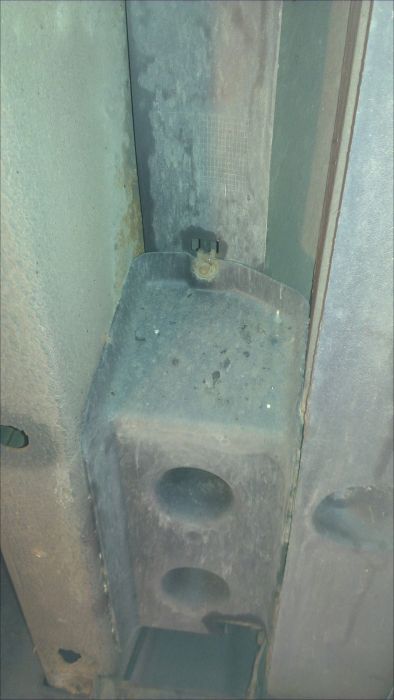
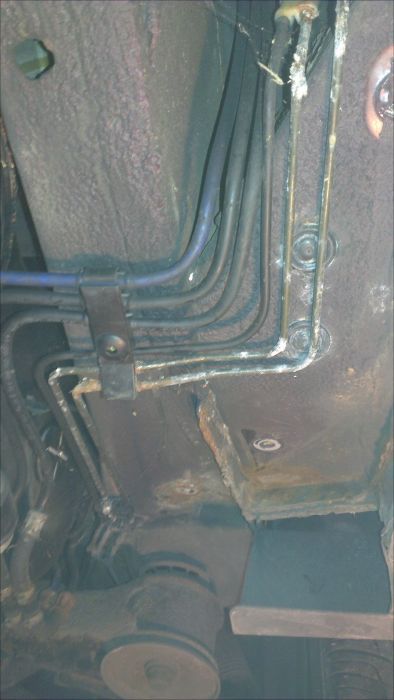
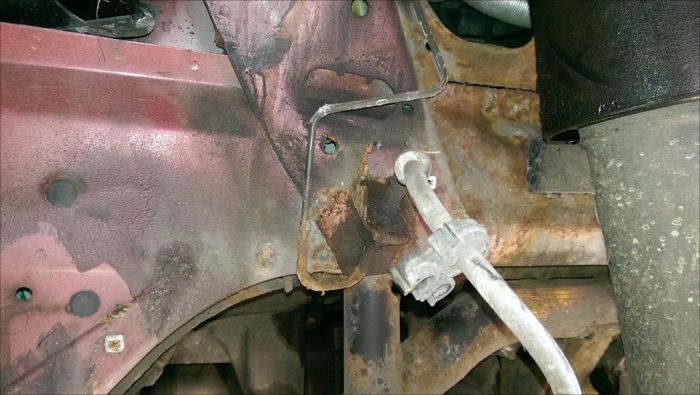
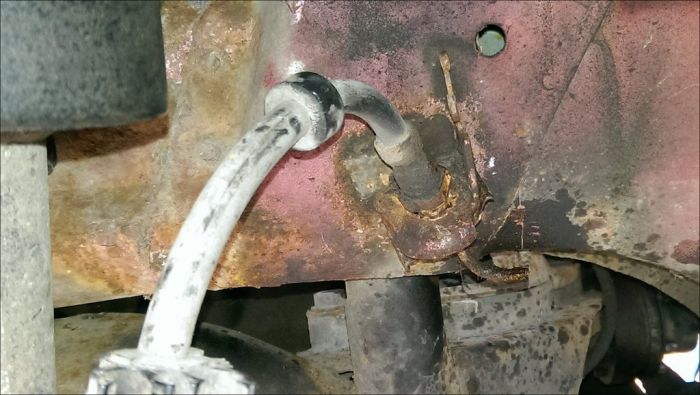
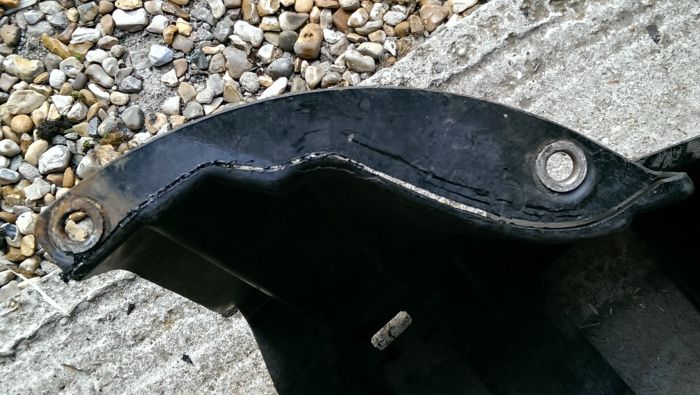
Corrosion to pipes in FR wheelarch, hidden by small cover


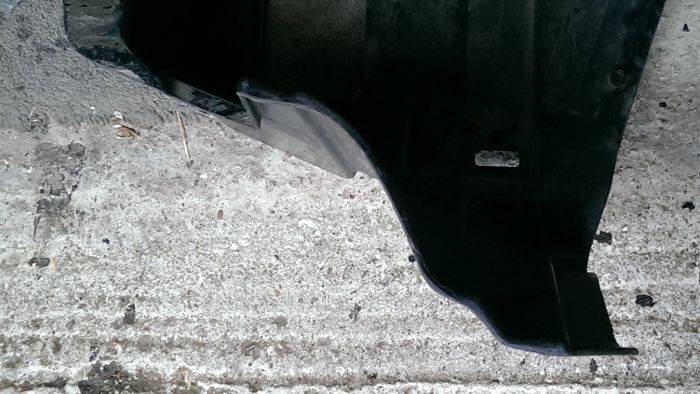
Corrosion to FL pipe (will get to that!)


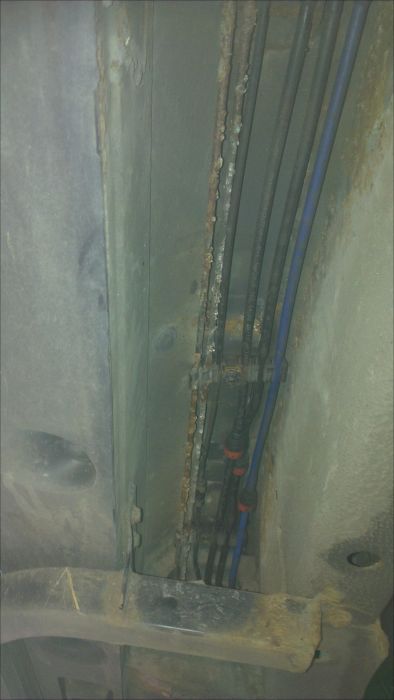
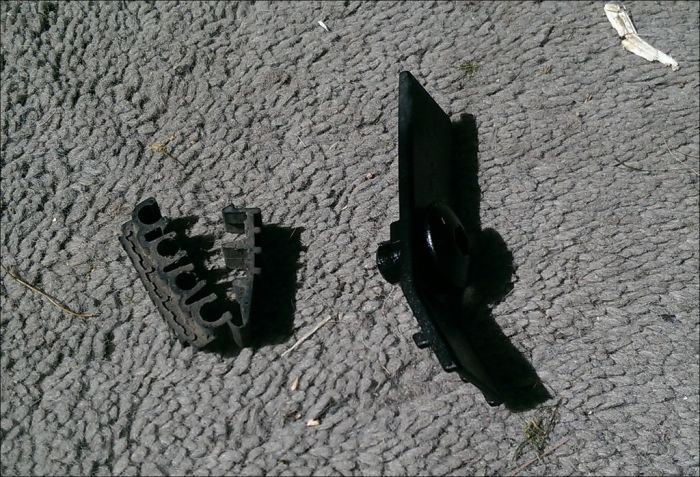
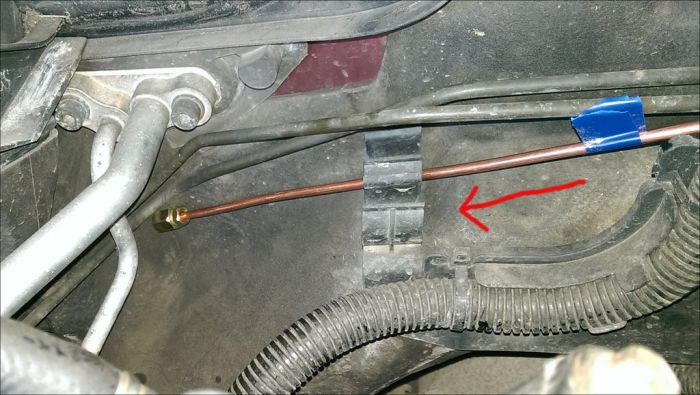
Those clips I was going on about in Part I


Oh and a before and after shot following Mr Muscle action! (it is not all work, in fact I had some fun fixing a leaking cistern in the house when I got bored!)


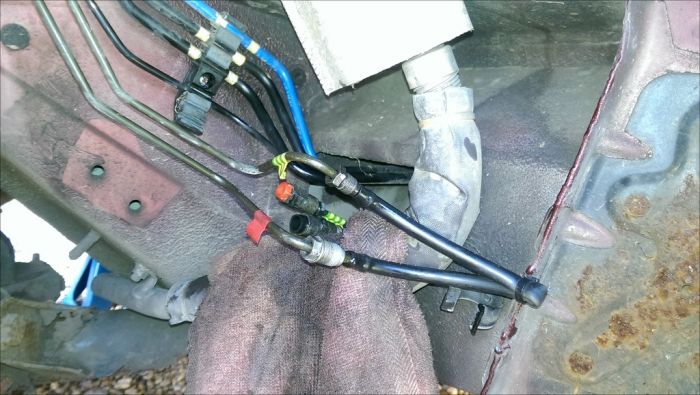
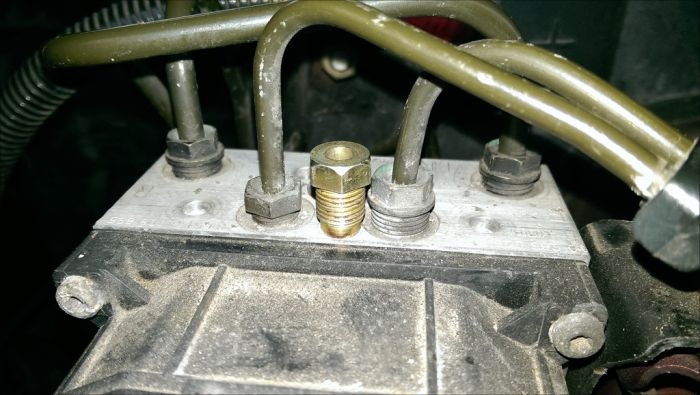
Right, to work! First up was to "label" the two main runs to the back. LR had kindly used a larger fitting on one of the pipes, so will have to reuse this as I don't have any! This labelling is necessary because I am swapping to new pipes.


(Suppose I should have put a normal sized fitting in the picture too!) Worth knowing though, if you plan to do any work in this area, to check what parts you may need.


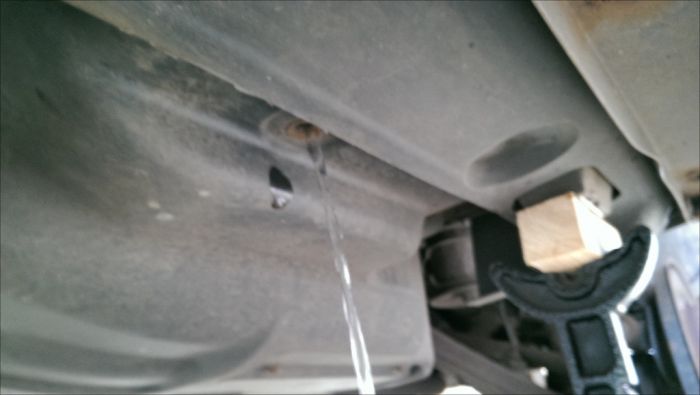
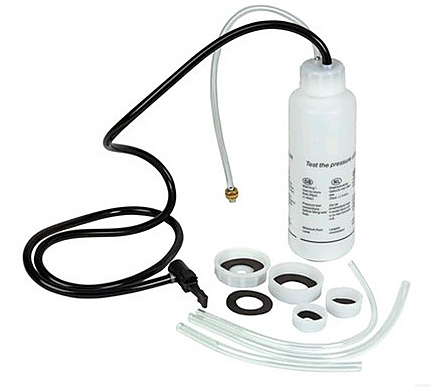
It has never worked for me - on any car, but might as well try it here. removed float from fluid cap, fitted small plastic bag over the sensor and tightened up. Supposed to stop fluid running. You can just see the bag if you look closely. When I did this, I removed the white float from the sensor pole for a bit more space. If you do this, take care to catch the small washer shaped magnet in the float which activates the sensor. I mislaid this on the bench and only after getting "Check Brake Fluid" faults and no suspension, did I realise what was wrong. You can short the pins in the sensor connector with a paperclip to test that the wires are working.


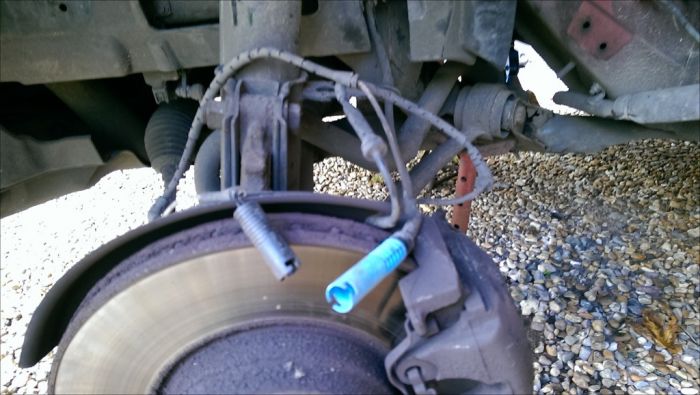
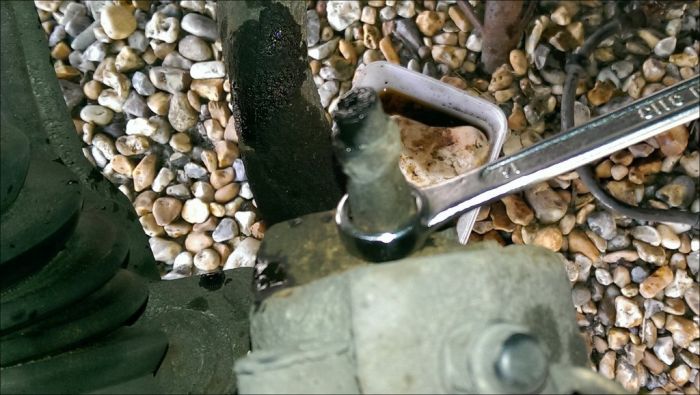
Managed to crack open both of the backward runs on the couplers, very tight! 11mm and 15mm open ended spanners. And yes, they started dripping. Grabbed some small hose and popped over the ends. Tight fit, drips stopped. Smile


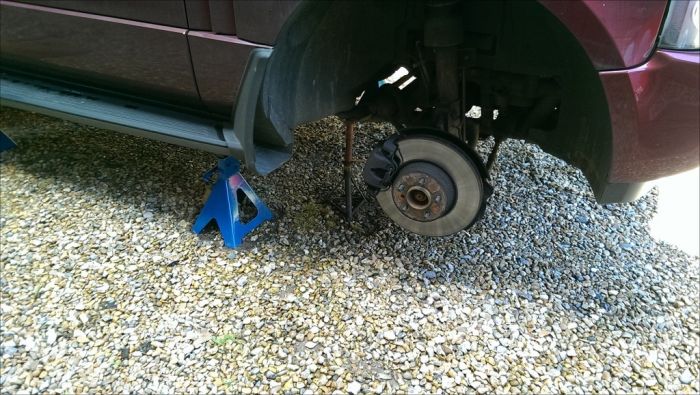
Tackled the RL fexible next. removed the two allen key fixings ( you need to retain these for the new pipe ) and undid the 11mm bolt on the caliper, catching the drips. Clean up this area carefully, there is likely to be a fair amount of rusty metal to clean off to allow the new hose to fit on. The other end of the flexible was not so much fun. As probably expected, the 11mm nut on the fitting just span around, so I cut off the pipe and used a ring spanner to remove it. No such luck on the other side, had to hacksaw through the whole fitting in order to remove it! There is a little spacer behind the star shaped hole, hang onto to this for refitting.


Right decision time, I could see that I had little chance of removing the RR pipe in one piece, and little chance of refitting one, so I cut the old pipe on the door side of the LR wheelarch. I was then able to remove the crosspipe and the front to back pipe - giving me comfort that I could do the same on refit.


Removal of the LR pipe went without further incident.

Time to make up the new pipes. Using a tape measure I worked my way along each of the old pipes, following the corners, and including the bits I chopped off, to get a reasonably accurate length. YMMV, but for me: LR pipe - @ 2600mm, RR pipe - front section - @ 2200mm, rear cross pipe section - @ 1510mm. Allow a little bit extra, say 1 or 2 cm, to provide some slack if you mess up a flare! I used a combination of pipe cutter and hacksaw with new blade to cut the pipe of my 7m reel. I won't go into the detail of making up the pipes, other than to say ensure a square end, chamfer the edges, burr the inside of the pipe, and you need a single flare.

You can see how I did it and what I used in this youtube video. I had six flares to do, and even with this great tool had three failures. Pays to take your time and get all the above right. I used the 3/16 SAE tool.
Flaring Tool and it really is that easy! (Sorry video now gone!)

I then set out to shape the new pipes the same as the old. This seemed like a good idea, until I offered up to the car when just about every bend was wrong! Fortunately, with copper pipe, and a warm day, it was possible to reshape in situ.

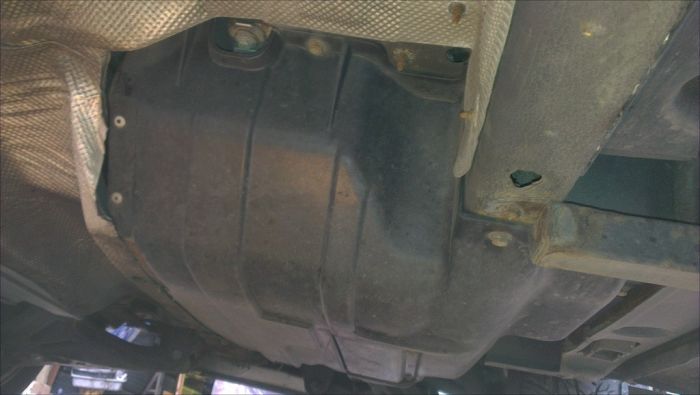
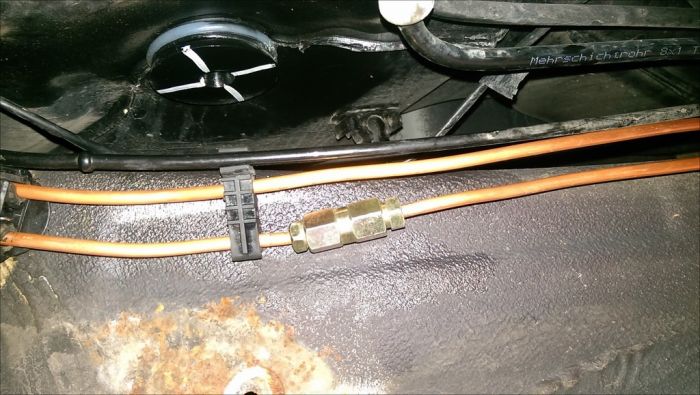
Fitted the RR crosspipe first, then connected this up to the new flexible hose. Then ran the front section of the RR pipe from the back up to the front, clipping into place. I connected up these two section with a joiner. This is somewhere near the fuel tank and will be protected under the fuel tank cover.


Then slotted the one piece LR pipe into place and connected up at the rear. i haven't yet connected to the front downpipes as these may also be replaced.

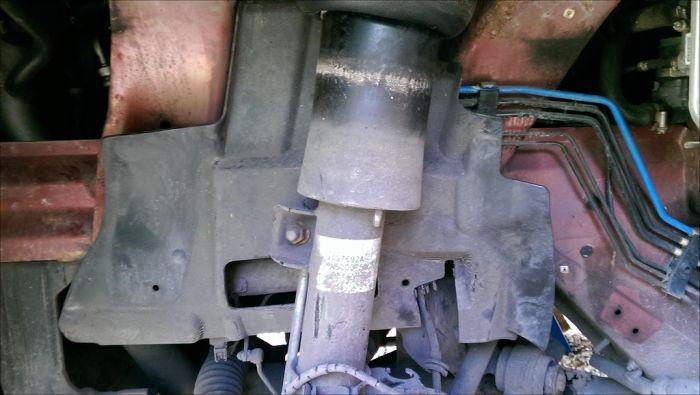
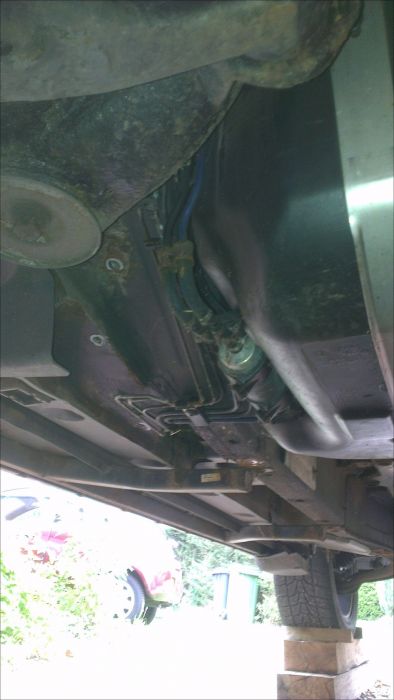
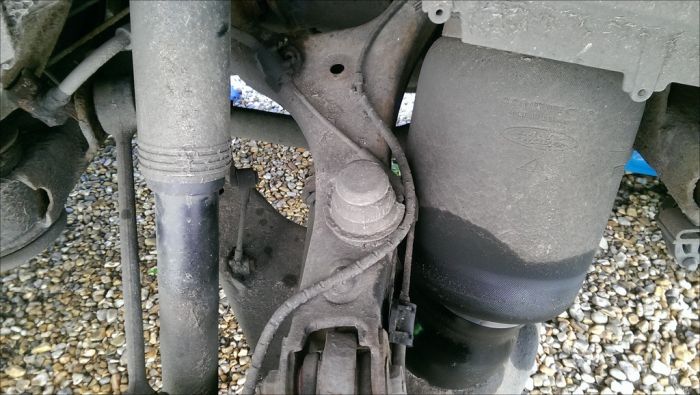
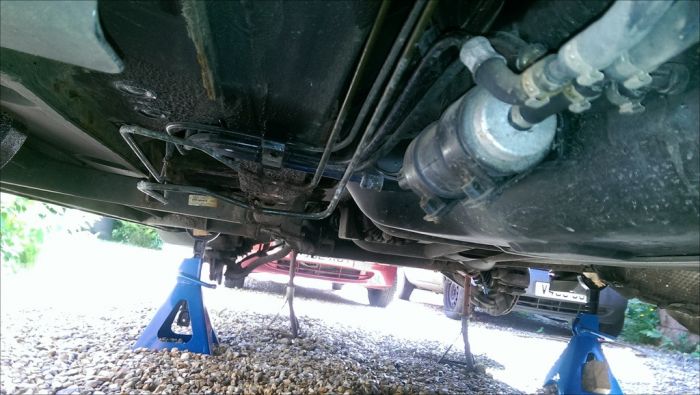
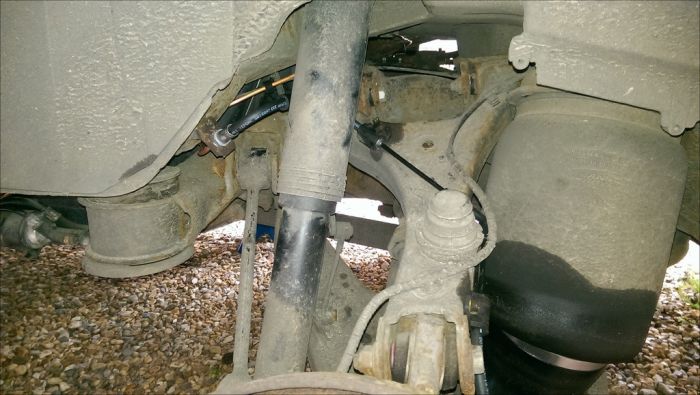
New flexi connected up. Seems a bit close to the air bag, but clearance should improve once weight back on suspension.


New crosspipe


Bending by eye not too bad - but then who is going to see it!


Finally went around and tightened everything up, and had a tidy.


Front Pipes:

Had a recon and measure up this evening. It seems a shame that for the most part the brake lines up front are in good nick (or some of the bad bits are hidden from the view of the MOT guy) but I have started so must finish.

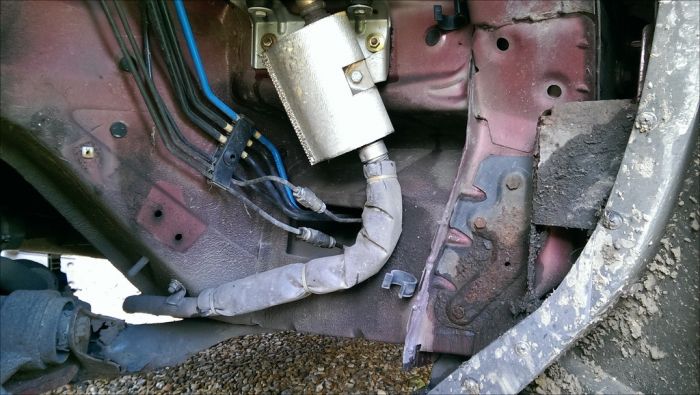
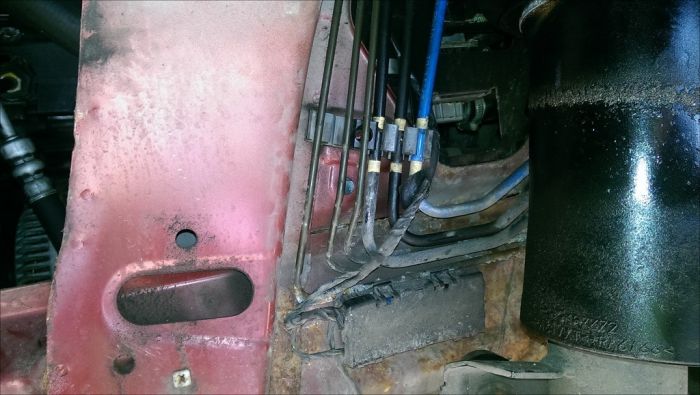
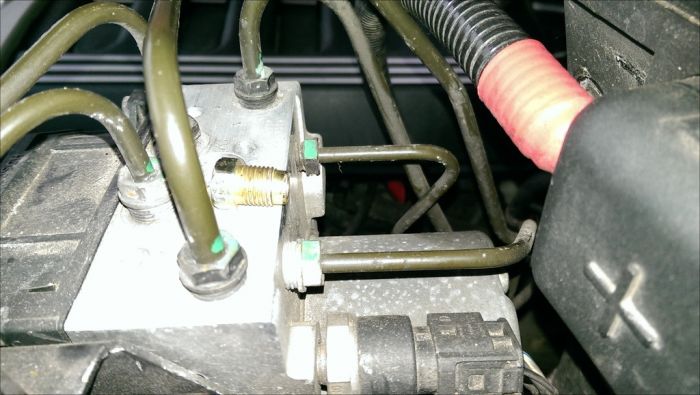
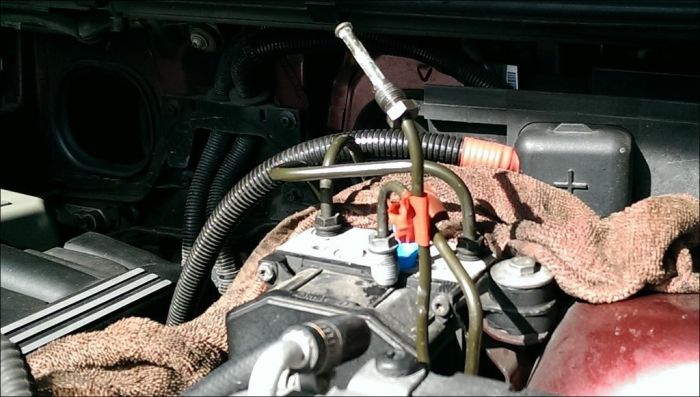
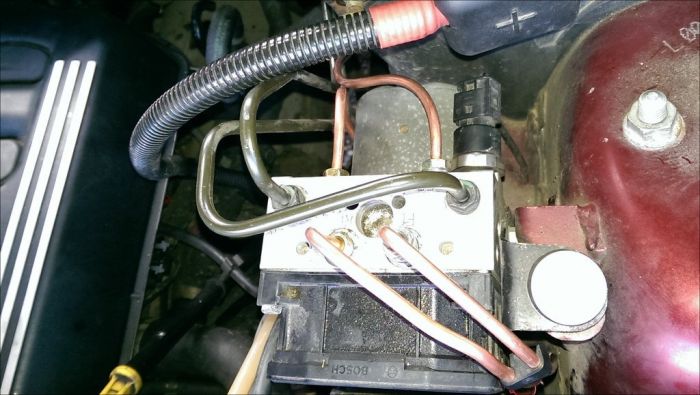
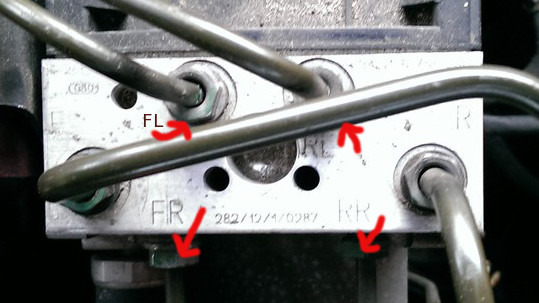
On closer inspection at the ABS block I see that LR have kindly continued their use of a larger fitting on two of the pipes, on the FR and FL pipes. This has scuppered my plan for a one pipe at a time using the only plug I have which is the normal size. Must have a root about in my bits box.


Also measured up the four front pipes:

FL: @ 1340 mm (from flexi to ABS block)
FR: @ 2170 mm (from flexi to ABS block)
RL: @ 1460 mm (from connector in wheelarch to ABS block)
RR: @ 1500 mm (from connector in wheelarch to ABS block)

Having used one 7m reel of pipe for the rears, was please to be able to get these pipes out of my second 7m reel.

Just measuring the FR pipe was an ordeal, I think it will have to be cut out, but I will work in the new one and shape it in place in order to follow the route before removal.


The other three will just be tricky working them around the ABS block.

Getting to be quite a dab hand at flaring now, the job gives pleasure so you just keep going back for more. Can't state enough though the importance of getting the cut square, and chamfering the sides, and deburring the insides. Very pleased with my little flaring tool, which now joins my press kit and brake caliper kit in Joe's Tool Hall of Fame (ooer!)

Right, four pipes and two flexibles to change: FR, FL, and RR and RL to sill tunnel connection.

Tackled to FL, RL and RR pipes first. Undid from ABS block and there was no fluid! Plugged each orifice in any case to keep any dirt out. The FL & RL pipes need to be straightened up to allow removal through the gap in the inner wing


The RR pipe (at the back of the ABS block) can be withdrawn into the engine bay.

Undoing the connection on the FL and the flexible hose can be fun, YMMV. For me, the nut span on the opened spanner so i cut the pipe, but it also span on the ring spanner and socket. So nothing for it but to take a hacksaw blade to the top of the nut in order to release the flexible hose. This invariably destroys the spring clip. Given I had the same problem on three corners of the car I strongly recommend you invest in four new spring clips before you start. Part number SGK100670L, available from Dan@Duckworths �3.50 each !


The flexi to caliper needs a 14mm spanner. This was on tight too, so to get a better purchase I cut the pipe and put a ring spanner on it. This worked. Make sure you have a good clean around this area before removing completely. I left the stub in place until ready for new flexi. Remove cable clip from old flexible hose and fit to new.


With everything out of the way, I took a wire brush to some of the rusty areas on the inner wing, including the mounting plates for the front mudflaps. Then coated with Hammerite Kurust.

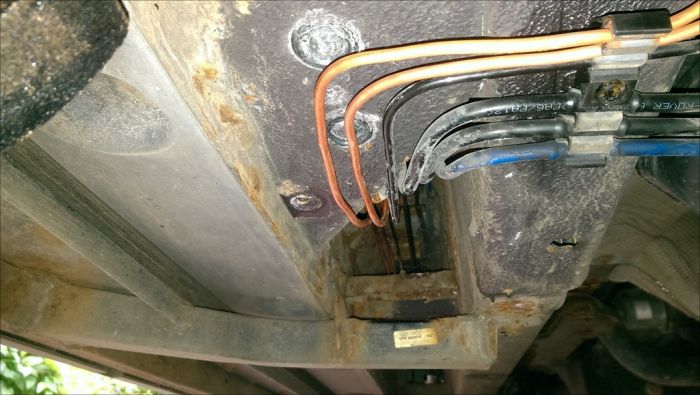
I had already made up the new pipes, so transferred the "bigger" fittings from the old pipes to the new ones, flared up the ends, shaped the new pipes against the old pipes and fitted in reverse of removal. I found it best to clip the pipe into the rubber mounts on the inner wing, then shape to ensure no pipes were touching each other or touching the body. Connected up the two rear pipes with the connectors to rear.

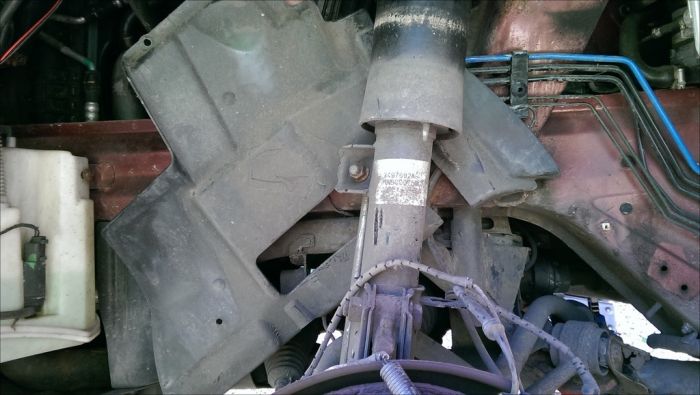
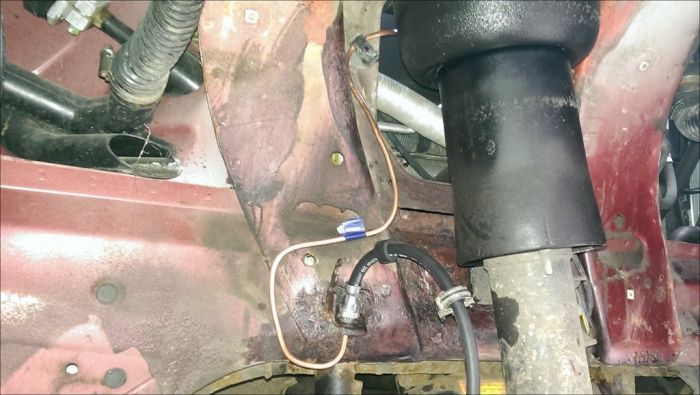
Screw in new flexible hose to caliper and tighten then fit to chassis mounting using new spring clip. Eventually you shouold end up with something looking like this:


Now to the FR, one I wasn't looking forward to, but actually getting the old pipe out proved more difficult than getting the new pipe in, thanks to the malleability of the copper.

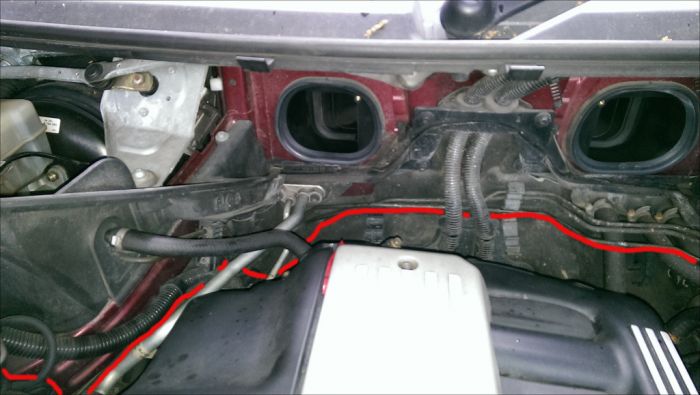
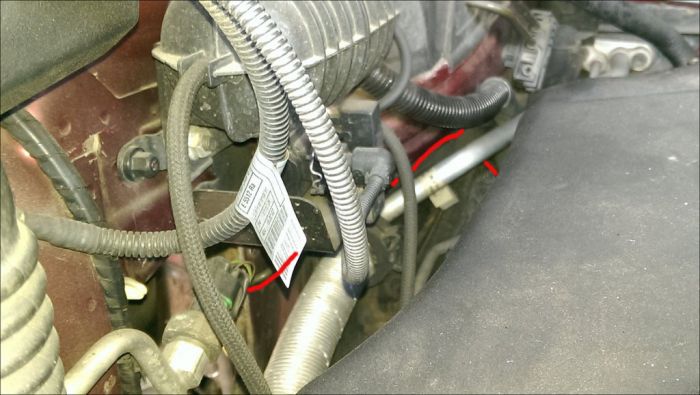
I took some photos of the pipe runs, undid the connection to the ABS block and then cut the pipe in the rear corner of the engine bay (behind the air filter cover). I had already cut the pipe near the connection to the flexible hose, and was then able to work the ABS end out in the engine bay, and the caliper end out into the wheelarch.


I didn't bother to shape the new pipe in anyway, just started to feed it across the back of the engine bay, following thepipes from the master cylinder.


Then, lying on top of the engine, I pulled and pushed and eased and bent the pipe around the back of the engine bay, up behind the air con and other pipes and into the wheelarch, checking on a couple of occasions how much was in the wheelarch, having measured what was needed.


Then shaped the other side of the pipe into the clips and aligned the fitting with the ABS block and screwed in. Loosely fitted the flexible hose and aligned and shaped the pipe, then tightened both ends.


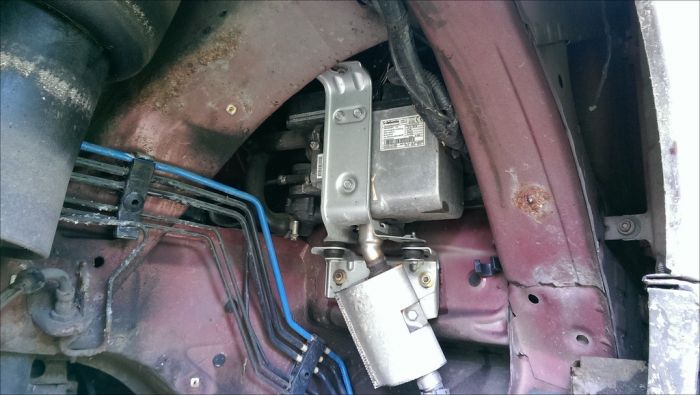
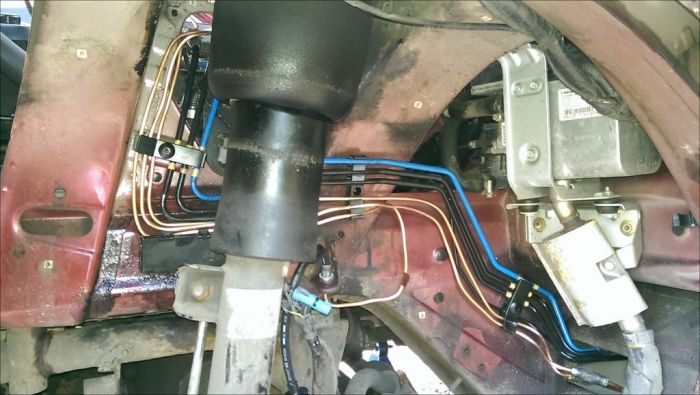
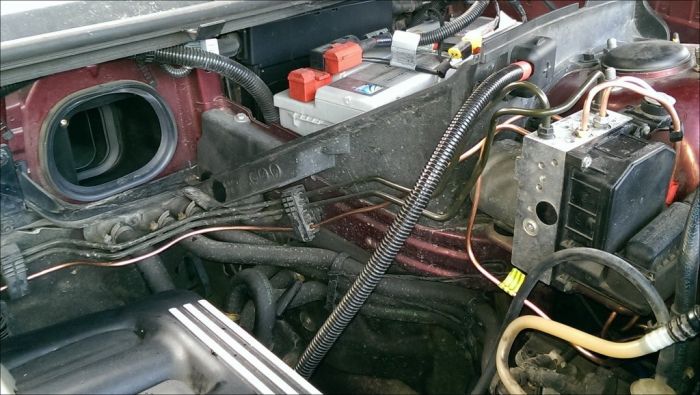
All that done, your engine bay should look a bit shinier with all that copper:


and reasonably tidy at the ABS block


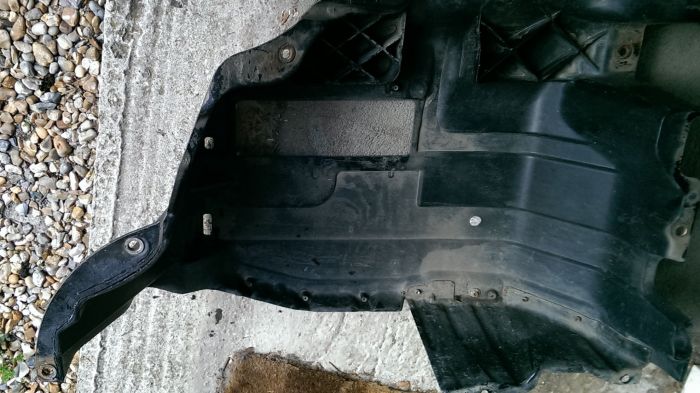
I then went round did another bit of tidying and shaping, gave everything a good spray with silicon lubricant, refitted the three clip covers on the LH side and fitted both inner covers back on.

As I was tidying up I was folding up all the pipes from the front and the back for the skip. Where the pipes looked rusty, they WERE rusty and just disintegrated in my hands in about 8 places across all the pipes. So if you car is @ an '02 and your pipes look rusty - THEY ARE and need replacing.

That's it for Part II, next up brake bleeding and refit. .
Experience is the only genuine knowledge, but as time passes, I have forgotten more than I can remember Wink
Volvo V70 P2 2006 2.4 Petrol 170bhp Estate SE
MG Midget Mk1 1962

Previous: L322 Range Rover TDV8 3.6 2008; L322 Range Rover TD6 3.0 2002; P38A Range Rover V8 1999

Last edited by Joe90 on 10th Dec 2018 5:50pm. Edited 9 times in total

Post #263925 7th Jun 2014 11:28pm
View user's profile Send private message View poster's gallery Reply with quote
Joe90


Member Since: 29 Apr 2010
Location: Hampshire
Posts: 6399

England 

Part III

Bleeding the Brakes

I have spent more years than I can remember bleeding brakes the old fashioned way, one man on the pedal (usually SWMBO!) and me at the wheels with a rubber tube and a jam jar of fluid. Decided to try a new way, and treated myself to a Gunsons Eezi-Bleed kit:


The instructions mention bleeding out of two nipples with a tandem master cylinder. Unfortunately RAVE makes no mention of this. I went for the straight forward process, as I would have done if doing it manually (as per RAVE!).

Process followed:

1. With engine off, a few taps on the brake pedal to release pressure on the servo

2. Went round to each corner, removed dust cover, cleaned up around the nipple area (ooer!) and loosened off each nipple just to check I could! One was very tight!

4. Did a double check on all fittings in case I had forgotten to tighten any of them up!

5. Setup the eezi-bleed kit as per instructions, carrying out a pressure test before adding fluid. The one downside appears to be that once connected up to a tyre, the kit fills the master cylinder reservoir, which is at first disconcerting, and only a problem once finished.

6. Went round and checked all connections and joints for leaks. None Smile

7. Followed the bleed sequence as indicated in RAVE, which is different to what one normally does:

Click image to enlarge


Front Left and Front Right were quick, but the 20psi struggled to pump to the rears, but they worked, slowly. All air expelled.

8. I then completed 2 more rounds of bleeding, firstly to check I really had got all the air out, but also to ensure I had clean new fluid coming through and that most of the old fluid was expelled.

9. Tightened up all the bleed nipples, replaced the dust caps, checked again for leaks. None Smile

10. Removed the eezi-bleed kit, and sucked a couple of syringe fulls of brake fluid out of the reservoir to give me Max level with the normal cap and sensor refitted.

The Eezi-Bleed might just get added to Joe's Tools Hall of Fame


Refit

Refitted the two inner wheelarches. On the LH side two of the plastic nuts had sheared the captive bolts on removal. I ground the remaining bolt off then drilled then out to leave a 6mm hole. This was plugged with a suitable rawlplug, and I used self tapping screws to tighten up with. The fitting in the centre does not have much room behind it, only about 1 cm before you hit the panel behind. Make sure you slide the front end of the inner wheelarch up over the lip on the front valence first. It is a right Censored to do it when the rest of the wheelarch is in place and fitted and you have the wheel back on!

I then fitted the pipe covers in the sill tunnel, giving all the pipework a good spray with silicone lubricant before closing off, and then tackled the tank cover, which I had decided to modify to enable an easier refit. The lip at the back of the tank cover gets trapped between the tank and the subframe on the way out, and is a real struggle to get back in if you don't have enough hands or enough space below the tank to manoeuvre it.

See here on the left the lip with the two bolt holes that causes the problem


A closeup (Yes I have made the cut already!)


With lip removed


On refit this worked a treat, the tank cover slide straight into place. Once I had tighten up all the remaining bolts, the cover was solid with no movement at the rear, so I abandoned any ideas (for now) of some kind of fixing arrangement. I did, however refit the cut off lip and bolts, to close off the holes into the chassis, and to prevent any unlikely horizontal movement of the tank cover.

Refitted the central exhaust heatshield to both tank covers.

Jacked up under the suspension at rear (trolley jack), subframe at front (Mercedes Sprinter bottle jack), to refit the wheels, then removed axle stands and lowered to ground. Love the way the rear end doubles its height when it gets jacked up and the suspension swings to its full travel!

Still no leaks from the brakes - this is a first for me!!

"Road test:"

Gah! Battery gone flat as car been sat there for 10 days. Couldn't even jump start it off high revving Ford Ka! In fact the Ctek charger is reporting battery will no longer hold charge! Treated myself to a new Varta Silver 110ah/920 crank for £101.

When I did press the brake pedal it went solid straight away. Also Message Centre told me "Check Brake Fluid Wink I've ignored the Air Suspension Failure Message for now Laughing The "Check Brake Fluid" message was because I didn't refit the small magnet to the sensor float when I took it apart. I didn't spot it falling out on dismantling and wondered why I had a spare when clearing up! This cleared the HDC and Air Suspension faults too Smile

A post from fisha suggested getting the HDC to go off a few times to jiggle the ABS solenoids into action, in case there is any air in there. Not sensing any sponginess but will give it a try. This might then mean another round of bleeding, but this is a simple affair with the eezi-bleed!

Just have to start having faith in my workmanship now, with the confidence to drive knowing the brakes will work OK. Can only be better and safer than what I had given the state of some of the rusty pipes I was previously relying on!

COSTS

£035 Brake Flaring Kit (eBay)
£020 Brake Pipe (14m eBay)
£005 Brake Unions & Couplers (eBay)
£015 Brake Fluid (2 litres, only used 1.5 litres Opie)
£120 Flexible Hoses Front (pair LR)
£040 Flexible Hoses Rear (pair LR)
£014 Spring Clip for Flexi to fixed pipe (4 LR)

£249 TOTAL

"My time" @ 3 days


SUMMARY:

This seems to have taken me forever, @ six days in all, but actually if I ignore all the other jobs I did on the car whilst I had it in the air, the time lost waiting for parts, real world distractions, world cup, servicing other members of the fleet, time spent writing it up on the forum! it didn't take that long. I do tend to take my time, check and double check things (old age memory loss). It always takes longer first time (although I seem to remember a "first time" that was over in a flash Whistle ). Having nearly all the parts and tools to hand makes a difference (thankyou dan@duckworths, Opie Oils and Halfords). It was certainly made a lot easier having the copper pipe which was much better to shape, though I was careful to avoid bending in the same place twice to prevent metal fatigue. I would never have got a new steel pipe back in for the FR without some serious engine bay dismantling of systems. Once you remove all the plastic covers, everything is easy to get at and being a FFRR there is always/usually good access to everything.

If you enjoy doing your own mechanical repairs, this is one well worth tackling, as garage costs for this job, would not be cheap. There is nothing highly technical here. You can always get the pipes made up rather than DIY, but this was part of my personal challenge and interest. I know my car that little bit better now, let's hope it behaves itself after all this attention! .
Experience is the only genuine knowledge, but as time passes, I have forgotten more than I can remember Wink
Volvo V70 P2 2006 2.4 Petrol 170bhp Estate SE
MG Midget Mk1 1962

Previous: L322 Range Rover TDV8 3.6 2008; L322 Range Rover TD6 3.0 2002; P38A Range Rover V8 1999

Last edited by Joe90 on 20th Jun 2014 4:22pm. Edited 6 times in total

Post #263926 7th Jun 2014 11:28pm
View user's profile Send private message View poster's gallery Reply with quote
johnboyairey


Member Since: 11 Jan 2013
Location: surrey
Posts: 2024

United Kingdom 2012 Range Rover Westminster TDV8 Orkney Grey

oh come on, you must have used a hammer SOMEWHERE!

looking forward to some pics, and part 2.
I had the rear 'left to right' across axle pipe fracture on my wife and two young kids, with a caravan on tow, on our old p38, really near to home, luckily, all ok, took one afternoon to change out all lines, in kunifer nickel pipes . old ones were really brittle. very interested in this post. as my (l322) car is 2002 (and a keeper)

Post #263928 7th Jun 2014 11:45pm
View user's profile Send private message View poster's gallery Reply with quote
Joe90


Member Since: 29 Apr 2010
Location: Hampshire
Posts: 6399

England 

Nope, Birmingham spanner not required (although I did use a hammer and chisel to fashion the wooden blocks that fit into the jacking points) .
Experience is the only genuine knowledge, but as time passes, I have forgotten more than I can remember Wink
Volvo V70 P2 2006 2.4 Petrol 170bhp Estate SE
MG Midget Mk1 1962

Previous: L322 Range Rover TDV8 3.6 2008; L322 Range Rover TD6 3.0 2002; P38A Range Rover V8 1999

Post #263930 7th Jun 2014 11:57pm
View user's profile Send private message View poster's gallery Reply with quote
Joe90


Member Since: 29 Apr 2010
Location: Hampshire
Posts: 6399

England 

Update, Part II - halfway through! .
Experience is the only genuine knowledge, but as time passes, I have forgotten more than I can remember Wink
Volvo V70 P2 2006 2.4 Petrol 170bhp Estate SE
MG Midget Mk1 1962

Previous: L322 Range Rover TDV8 3.6 2008; L322 Range Rover TD6 3.0 2002; P38A Range Rover V8 1999

Post #264134 9th Jun 2014 9:51am
View user's profile Send private message View poster's gallery Reply with quote
rathbranV8


Member Since: 23 Jan 2011
Location: meath
Posts: 283

Ireland 2002 Range Rover SE 4.4 V8 Oslo Blue

Your timing for this post is impeccible sir.Failed test last week on my rear lines..

great write up and pics as always Thumbs Up


Last edited by rathbranV8 on 9th Jun 2014 11:14am. Edited 1 time in total

Post #264142 9th Jun 2014 10:44am
View user's profile Send private message View poster's gallery Reply with quote
nicedayforit


Member Since: 11 Jun 2011
Location: Beside the Solway
Posts: 3954

England 2004 Range Rover Vogue Td6 Giverny Green

Good Job Thumbs Up

You obviously have great faith in axle stands sitting on shingle. Whistle Very Happy

Post #264145 9th Jun 2014 11:03am
View user's profile Send private message View poster's gallery Reply with quote
Joe90


Member Since: 29 Apr 2010
Location: Hampshire
Posts: 6399

England 

Yes, I know Rolling Eyes It is very shallow with hardcore underneath, solid as a rock, even when wet. I jiggle the stands to get down to the hardcore. The feet don't even sink into it. But also hence why I put in backup, never trust nothing! Wink .
Experience is the only genuine knowledge, but as time passes, I have forgotten more than I can remember Wink
Volvo V70 P2 2006 2.4 Petrol 170bhp Estate SE
MG Midget Mk1 1962

Previous: L322 Range Rover TDV8 3.6 2008; L322 Range Rover TD6 3.0 2002; P38A Range Rover V8 1999

Post #264162 9th Jun 2014 12:28pm
View user's profile Send private message View poster's gallery Reply with quote
Welshdragon


Member Since: 20 Jan 2012
Location: here and there...but not where I should be
Posts: 1898

Wales 2003 Range Rover Vogue 4.4 V8 Monte Carlo Blue

Spot on post, as always. Thumbs Up

@ Stan, wiki this will help others Bow down If it dont work.......burn it!

If the IId tool cant fix it.......burn the FF.

If the FF cant be fixed......buy a Land Cruiser!

If the LC cant be fixed..............................................BUY a horse !!

Post #264165 9th Jun 2014 1:20pm
View user's profile Send private message View poster's gallery Reply with quote
stan
Site Moderator


Member Since: 13 Jul 2010
Location: a moderate moderated moderator moderating moderately in moderation
Posts: 34913

United Kingdom 

yee of little faith, twas verily done a while ago... Mr. Green ... - .- -.


click link for ,

FORUM WIKI

HOW TO Ǝꓕ∀ꓕOꓤ PICS

workshop manual downloads are in our wiki

.

Post #264170 9th Jun 2014 1:40pm
View user's profile Send private message View poster's gallery Reply with quote
johnboyairey


Member Since: 11 Jan 2013
Location: surrey
Posts: 2024

United Kingdom 2012 Range Rover Westminster TDV8 Orkney Grey

on the subject of axle stands on iffy ground, people are right to be wary... tarmac ashphalt is also i no-no in summer weather, as some 'lesser' drive-layers, put it on poorly dry-mixed cement sand, so the tar can 'break through'. it's unlikely, but it did happen a couple of years ago, to some young driver. -slowly crushed to death. it's better to place them, on small 1foot squares of 18mm PLYWOOD not chip/mdf and for good measure, to place the wheels under the hubs (flat,) better the thing comes down and scratches your wheels, than lay on your belly. -i know it sounds anal, and i'm not ccertainly not criticising joe's work, but its always worth remembering what COULD happen. -now i'm going to have to look at my lines now.... good work Joe

and sloping drives too. NOOOO!

http://www.econofix.com/jacks.html

http://www.disco3.co.uk/forum/topic67034.html

Post #264203 9th Jun 2014 4:41pm
View user's profile Send private message View poster's gallery Reply with quote
Joe90


Member Since: 29 Apr 2010
Location: Hampshire
Posts: 6399

England 

Update to Part II Thumbs Up .
Experience is the only genuine knowledge, but as time passes, I have forgotten more than I can remember Wink
Volvo V70 P2 2006 2.4 Petrol 170bhp Estate SE
MG Midget Mk1 1962

Previous: L322 Range Rover TDV8 3.6 2008; L322 Range Rover TD6 3.0 2002; P38A Range Rover V8 1999

Post #265014 12th Jun 2014 9:08pm
View user's profile Send private message View poster's gallery Reply with quote
Joe90


Member Since: 29 Apr 2010
Location: Hampshire
Posts: 6399

England 

All done! .
Experience is the only genuine knowledge, but as time passes, I have forgotten more than I can remember Wink
Volvo V70 P2 2006 2.4 Petrol 170bhp Estate SE
MG Midget Mk1 1962

Previous: L322 Range Rover TDV8 3.6 2008; L322 Range Rover TD6 3.0 2002; P38A Range Rover V8 1999

Post #265851 17th Jun 2014 10:34am
View user's profile Send private message View poster's gallery Reply with quote
RRBlue


Member Since: 24 Feb 2012
Location: Cambs
Posts: 220

England 2005 Range Rover Vogue SE 4.2 SC V8 Buckingham Blue

Intrigued by your comment about there being little chance of refitting the rear offside pipe that goes across the back axle in one piece. I have a new one in my garage that I gaze at regularly, wondering how on earth I fit it without a lot of bending. 2014 5.0 Supercharged Autobiography & 2015 3.0SDV6 HSE Lux Discovery 4
2005 4.2 Supercharged Vogue SE & 2011 3.0SDV6 HSE Discovery 4
2002 4.4 Vogue
2000 4.6 Vogue
2011 Discovery 4 3.0 HSE
2015 Discovery 4 HSE Lux
2010 Freelander 2 TD4 HSE
2009 Freelander 2 TD4.e 2009
1992 Mercedes 300D
1986 Renault 2.1 Turbo D
1976 Morris Marina 1.8

Post #265858 17th Jun 2014 12:15pm
View user's profile Send private message View poster's gallery Reply with quote
Post Reply  Back to top
Page 1 of 4 1234>
All times are GMT + 1 Hour

Jump to  
Previous Topic | Next Topic >
Posting Rules
You cannot post new topics in this forum
You cannot reply to topics in this forum
You cannot edit your posts in this forum
You cannot delete your posts in this forum
You cannot vote in polls in this forum


Site Copyright © 2006-2024 Futuranet Ltd & Martin Lewis
fullfatrr.com RSS Feed - All Forums


Switch to Mobile site