| Front Seat Removal, Dissassembly and Heated Seat Repair | |
Drivers heated seat wasnt working on the L322, classic press button and goes off after 5 secs. After doing a bit of research on here I figured the likely culprit was a failed heater pad or connections so set off to investigate.
Along the way I found lots of posts discussing bits of seat removal, disassembly and heater testing but nothing all in one place so I thought I would try and document what I did to try and create a one stop shop for these things! 
Just for reference the vehicle is a 2006 MY TD6, the log book has it as an SE A and I believe it is an Autobiography as the build sheet shows the spec as unbadged Autobiography and as you will see the trim is marked as Autobiography as well. As such it has the comfort seating option with heated (but not cooled) seats and the adjustable upper squab.
Rave covers seat removal and disassembly in section 78.10.44.99 onwards but I couldnt find anything specific on the heated seat components.... 
Seat Removal - The easiest bit of the whole process!
1. Raise seat up on motors and move forward
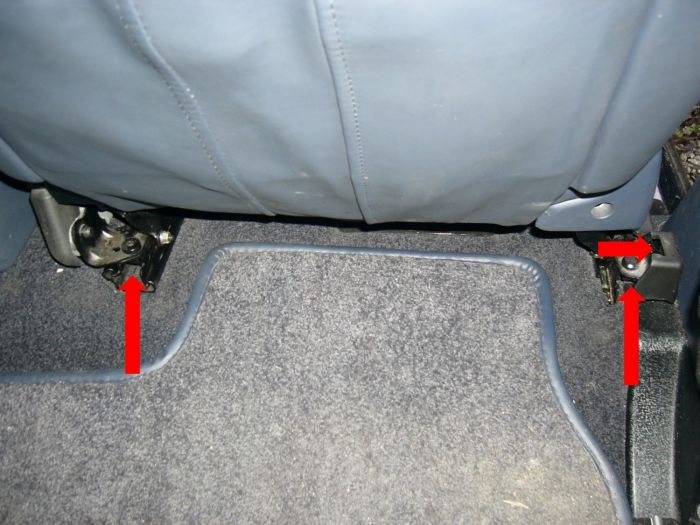
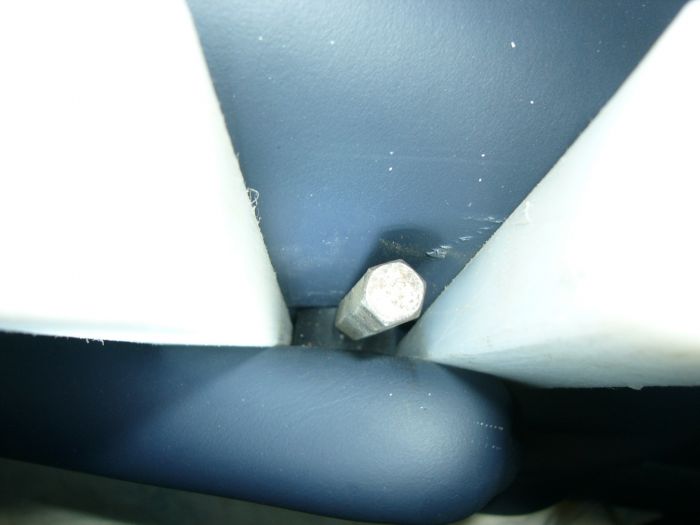
2. Undo two securing bolts in the rear of the seat runners (16mm socket)
3. Undo bolt securing seat belt bottom mounting to R/H side of seat
4. Move seat back on motors
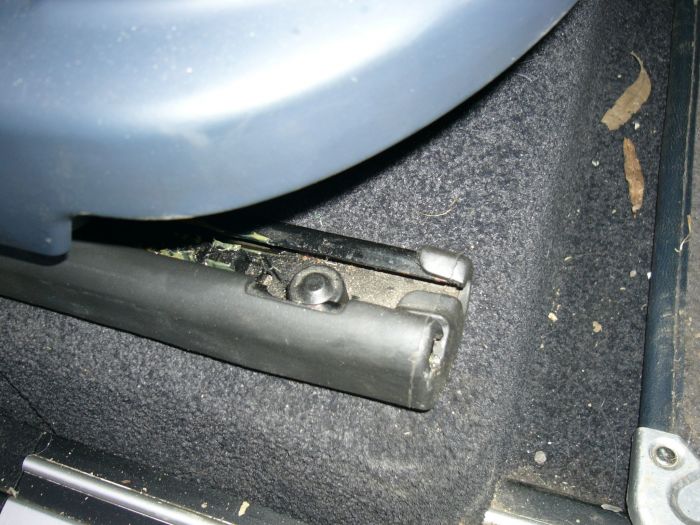
5. Remove caps and undo two securing nuts in the front of the seat runners
6. AT THIS POINT FOLLOW BATTERY DISCONNECT PROCEDURE AS DOCUMENTED IN WIKI this is after you have used the motors to move the seat about but BEFORE disconnecting the seat electrics, otherwise you will get SRS/Airbag warnings which will need resetting
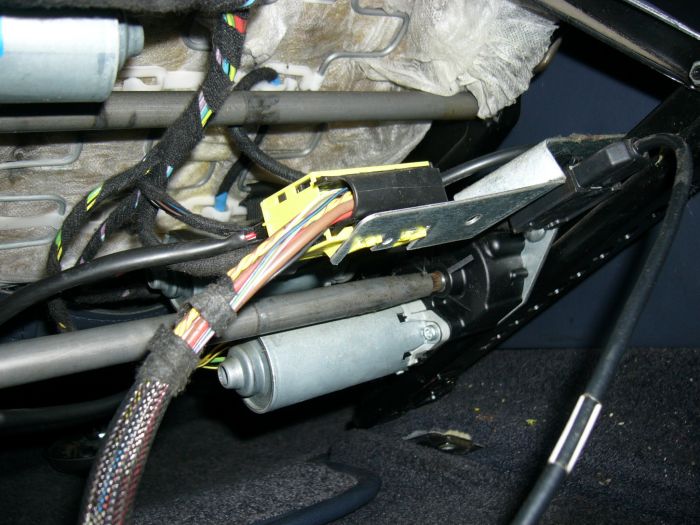
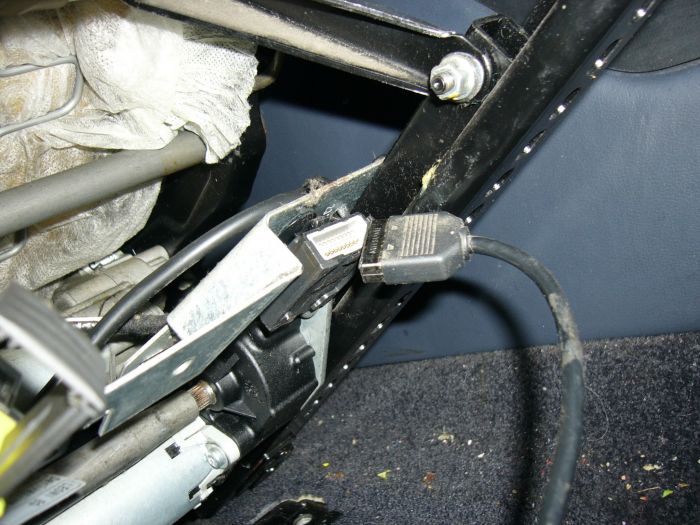
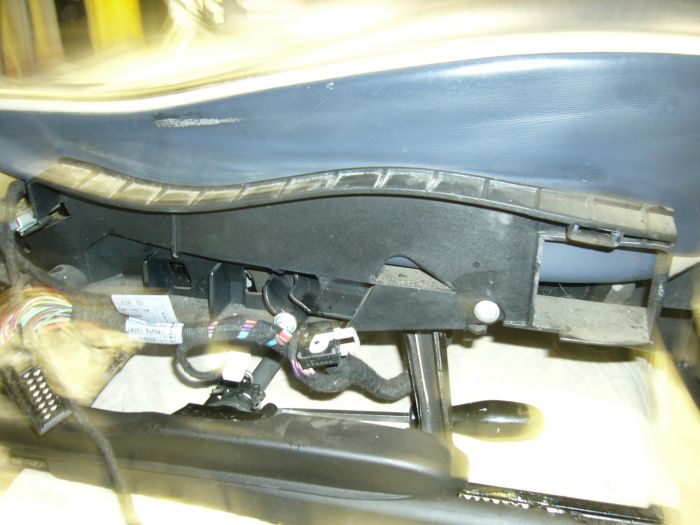
7. With battery disconnected tip seat backwards to gain easy access to seat multi connector and AV cable (if you have rear entertainment)
8. The seat can now be removed from the vehicle, it is an easy 2 man lift but can be done with 1 person if you are feeling strong (and brave) 
Seat Disassembly
There are two basic components here, the seat base and the seat back. Too only check the electrical connections you dont need to fully disassemble the seat, but I am toying with replacing the seat cover as it has a slight tear so I was interested to see how it comes apart. Also, separating these two components makes it much easier to work on the wiring and effect repairs. In the list below I have tried to identify procedures that are not strictly necessary (optional) to just check the heater wiring so you can potentially skip these if you only want to quickly check heated seat function.
So having taken the seat into the workshop I followed this approach:
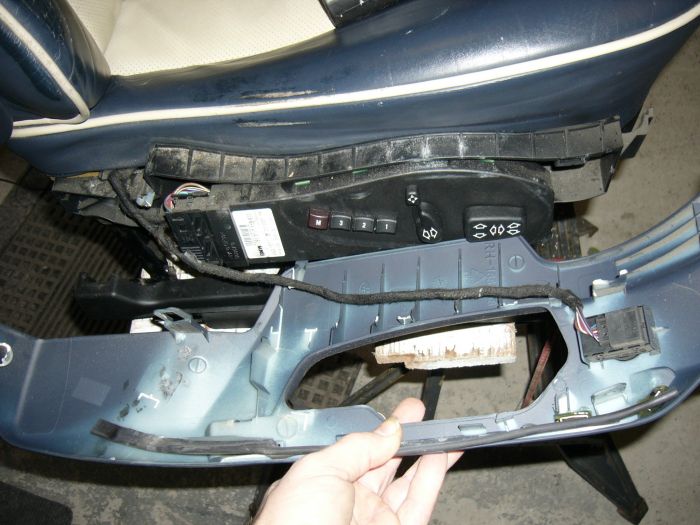
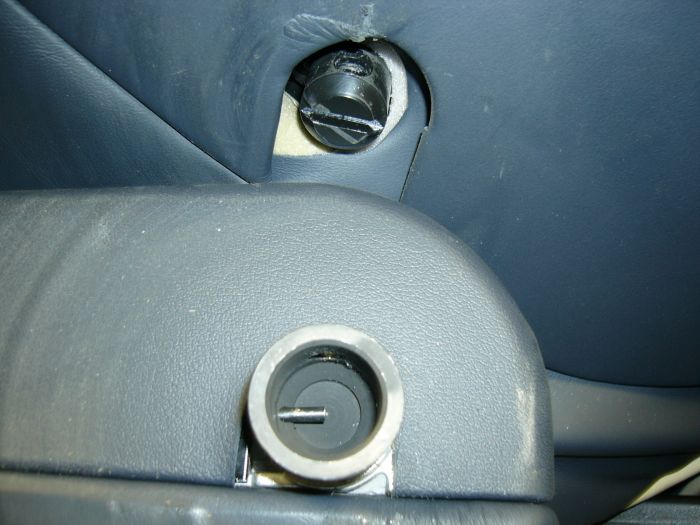
1. Optional remove the switchgear and covering panel for the electric seat by undoing the Torx screw at the rear of the panel (T30).
There are then a range of clips that have to be released. You can see some of these in the pics below, but for the life of me I cant see how you release them without breaking a load of the clips certainly all bar 2 on my panel had been previously broken so might be time to order a new trim panel!! 
2. Optional remove the connectors attached to the switch module itself
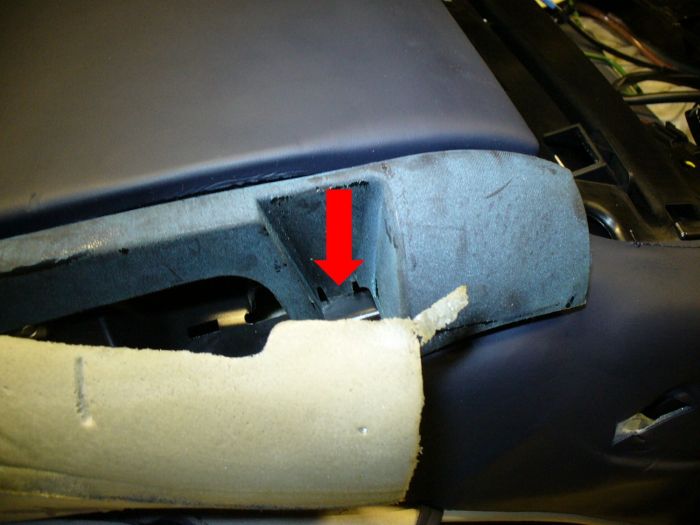
3. Remove the lower backrest panel (with the map pocket attached).
a. To do this tip the seat forward and you will see two elasticated straps that clip onto the seat springs under the base and tension the flap that comes from the base of the seat back.
b. This then exposes two torx screws that need to be undone.
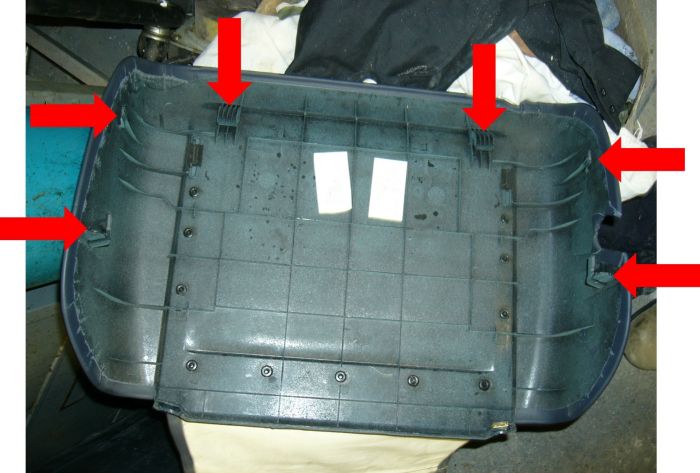
c. With these undone the base of the panel will lift away, there are two clips each side that slide in behind matching clips in the seat, a gentle inwards pressure releases these and then the panel will swing away from the seat back.
d. As can be seen from the picture it hinges on two upper clips that sit over hooks in the seat back so the panel has too be lifted away from the bottom then pushed up to release these clips.
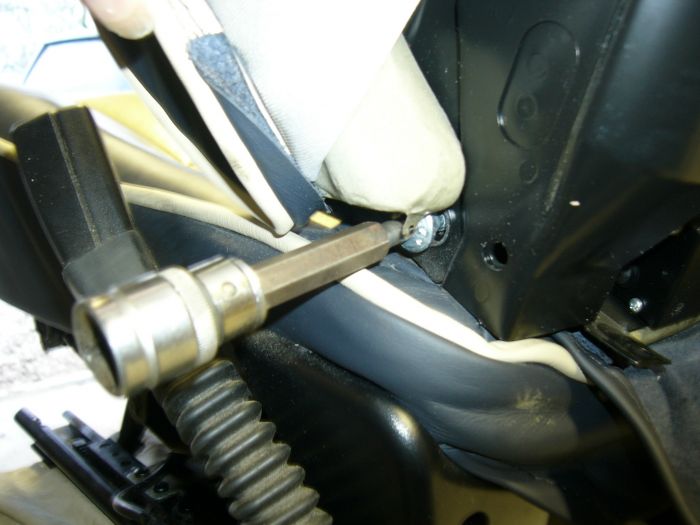
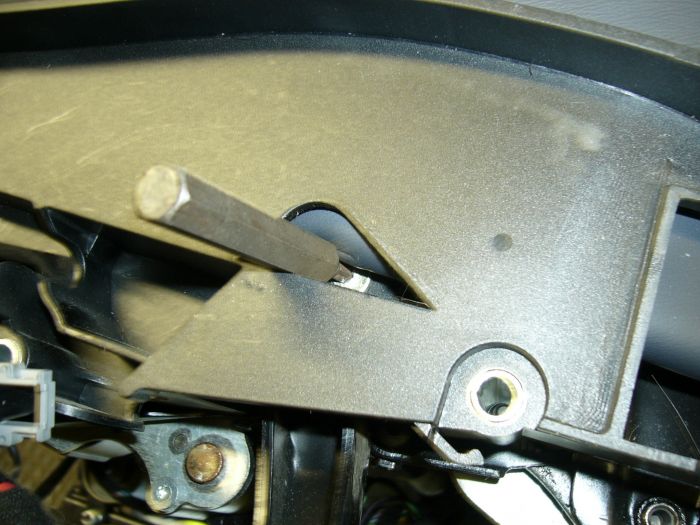
e. Rave suggests you remove the armrest before doing this. I found this to be a nightmare job as the plastic panel stops you getting too the allen screw in the armrest hinge. I managed it in the end using wedges and a long reach Torx bit as shown in the pics below, but when refitting found I could fit the armrest first and then fit the back panel which was much easier. I therefore would not remove the armrest if doing this procedure again. 
4. With the backrest panel removed the wiring in the backrest is exposed by folding down the fabric flap that covers the lumbar bladder pump.
5. Optional remove upper backrest panel. If you want to remove the backrest from the seat you need to undo a number of connectors to release the wiring harness for the headrest motors, upper squab motor etc. All but one of these can be accessed easily there is one though that I could only access by removing the upper backrest panel 
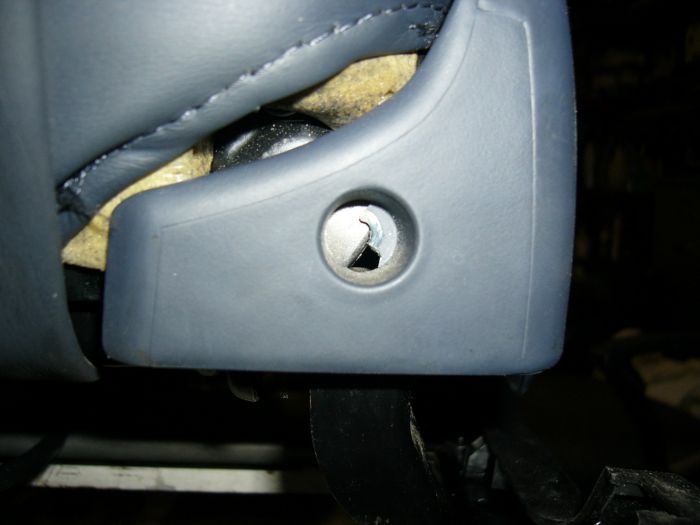
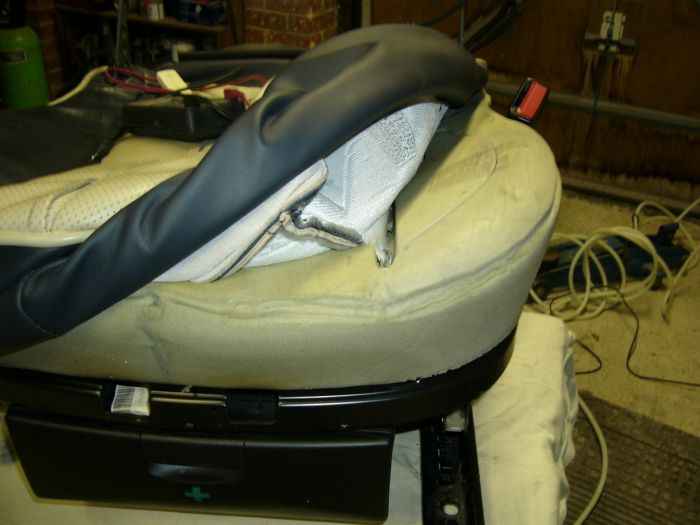
a. To do this pull the beading from the edge of the fabric around the panel out as in the first pic.
b. Then pull/push away the foam padding and push in on the two clips on the side of the panel towards the bottom.
c. Once these are released the top of the panel will pull away and the panel can be lifted upwards. Because I have the adjustable upper squab this panel has to lugs that sit in channels allowing the panel to flex.
6. Optional with the cable disconnected the whole backrest can now be removed. There is a torx bolt (T40) on each side of the backrest near the hinge. These are exposed by removing the switch cover on the r/h side (item 1 above) and removing a small black covering panel on the l/h side. The fabric can then be pulled back to reveal the torx screws.
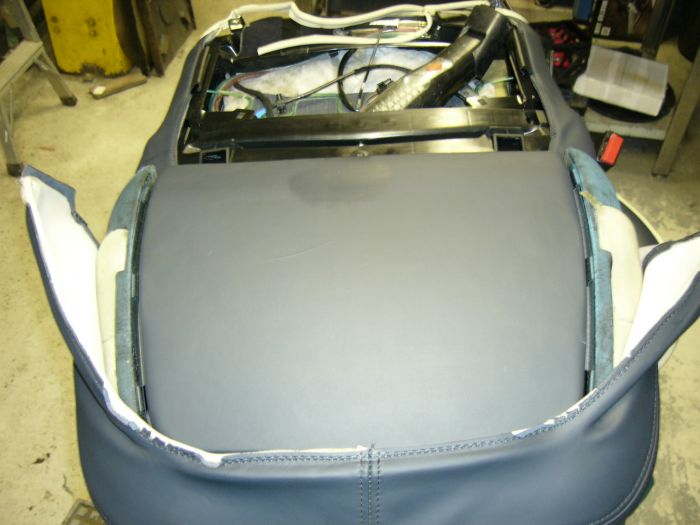
Once removed the seat back can be carefully pulled up and laid to one side.
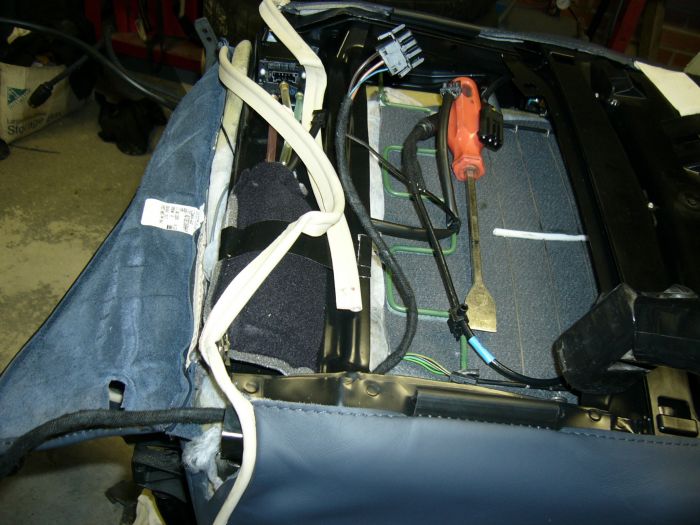
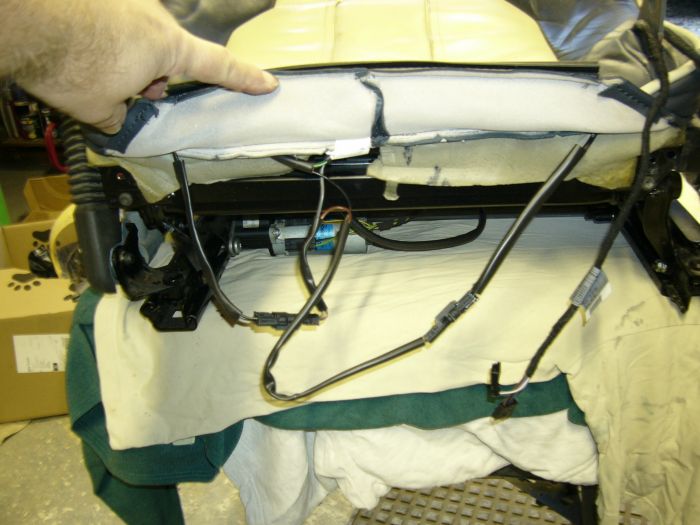
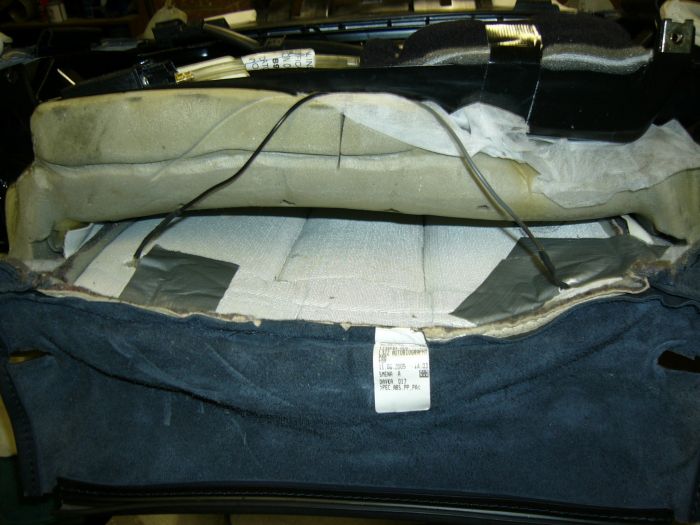
7. At the back of the seat base is another fabric flap that can be released to reveal the heated seat wiring
Optional - Seat Base Cover Removal
If you wish to remove or replace the seat cover then do as follows:
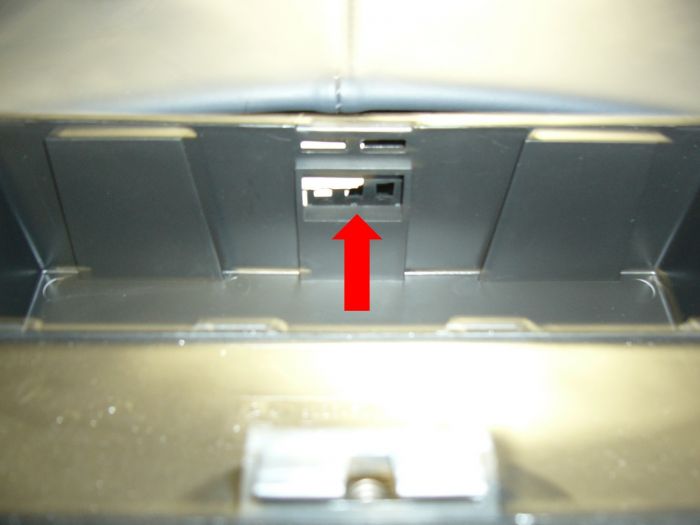
1. If you have the first aid compartment under the seat remove this by pressing in on the plastic lug in the top/middle of the compartment.
The whole plastic box will then slide out.
2. Remove the plastic trim piece that the switchgear mounts to, there are 3 easily accessible torx screws and one hidden one (see pic). I struggled to remove the hidden one but with all undone it gave me just enough room to release the seat cover.
3. The cover is held in by a plastic u channel that hooks over a steel rim on the seat. By leaning down on the seat you can create enough slack in the fabric to unhook this channel.
4. When pulling back the cover you will then expose the hog rings that secure the cover to the base. These will all need removing to fully release the seat.
Heated seat circuit testing and repair
On my vehicle there seem to be 3 circuits, 2 in the seat base and 1 in the seat back. Also it is worth noting on this (MY 2006) these circuits are stitched into the seat covers and NOT replaceable on their own as far as I can see. I understand (but could be wrong) that this is consistent with earlier model L322s, and only post 2006 models have replaceable heat pads
..
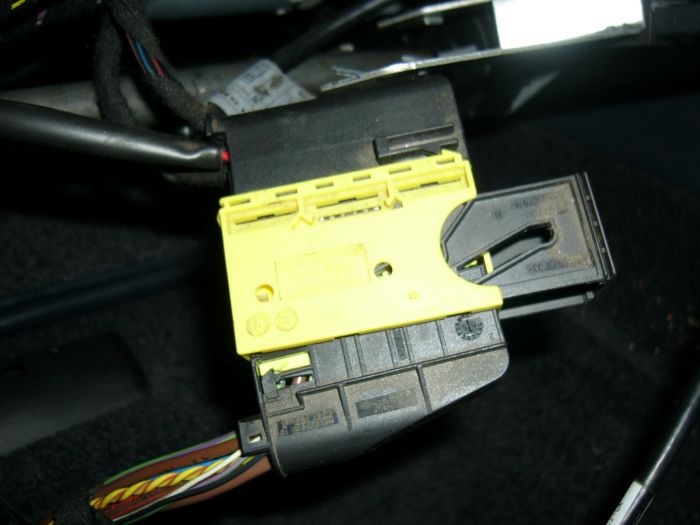
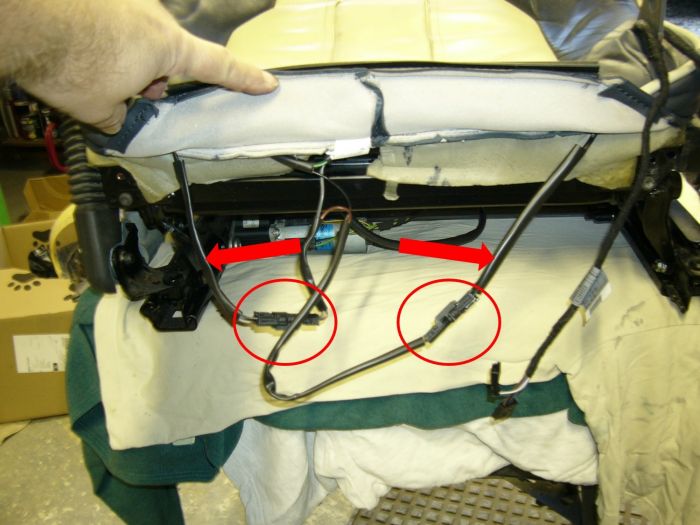
1. To test the heating elements I separated the three connectors (one for each circuit) and checked for continuity by simply using an electrical tester set to resistance (Ohms). If the circuit is intact the tester will show 0 resistance (the same as touching the two probes together), if it is broken you will get a reading of infinity. Make sure to test the side of the connector that has the two leads that disappear into the seat fabric, not the other side!
On mine the two seat base circuits were fine, but the seat back circuit showed a break (no continuity) - indicating a problem with the heater element/circuit. At this point it is worth noting a number of other users have found the heater elements to be OK, but traced issues with the connectors. The same simple diagnostic process can be followed to identify this as well checking for continuity from one connector to another till you find a break in a circuit. Electricity is like water, it will flow along a pipe (wire) until the pipe is broken, then it leaks out/wont flow any further. So diagnosing electrical faults is often just a case of logically trying to find where the break is .
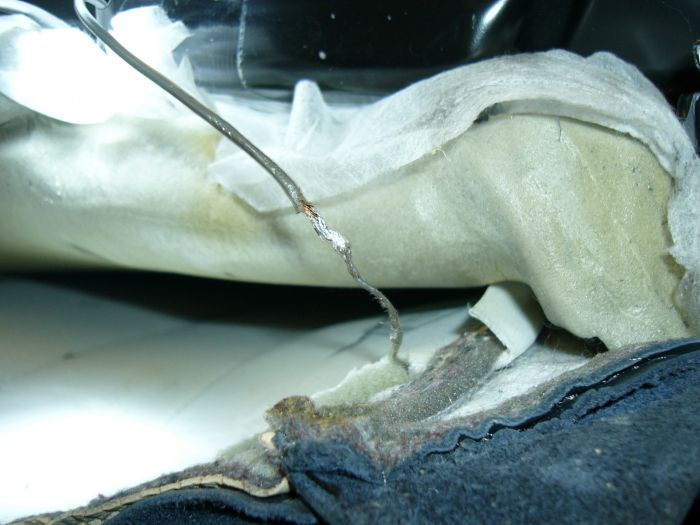
2. Having identified the heater element was at fault I then exposed where the wiring joined the heater element (a thin exposed wire filament). These are joined in what looked like a blob of silicone or glue and over time this connection had failed.
3. I exposed the filament, cleaned it and then soldered to the feed wires. This was then covered in heat resistant heat shrink and placed back in the seat material and taped in place.
4. A final continuity test showed all was well and the seat was then re-assembled and refitted. 
Seat Re-assembly and fitting
1. Not much to say just a reversal of the process really.
2. REMEMBER TO RECONNECT THE SEAT MULTIPLUG BEFORE RECONNECTING BATTERY
3. After reconnecting battery, start car, reset steering (turn lock to lock) and test heated seats
.
4. Hoo Haa they work perfectly and I now have a nice warm bum 
Hope this is helpful - and not too verbose
Cheers,
MM
|