| CV Joint and or boot replacement | |
I had a hole in the CV boot so just replaced the 2 boots.
STEPS
1. Jack car and take tyre off, release steak nut locking device (half shaft retaining nut) with screw driver/chisel and pound hammer taking care not to damage axel thread. Must have a 12point M36, 1/2” socket to undo the steak nut and tighten the new steak nut to spec. You will need the biggest breaker bar you can get (long piece of pipe to fit over drive) to release nut and discard the nut.
2. Release stabiliser link 18m
3. Unscrew break hose clamps to loosen from suspension
4. Release wires from wheel (leaving only break cable in place and be careful not to stretch when doing work)
5. Release 2 x handbrake cable/supports
6. Undo toe arm with 22m and 10ml spanners
7. Undo and remove shock absorber bolt at bottom arm.
8. Undo bolt on lower arm bush and tap out bolt
9. Take off half shaft from wheel hub and support wheel hub at the bottom whilst supporting half shaft so that it does not damage the seal in the differential. Careful not to put too much pressure on break cable, my break cable was tight so I couldn’t pivot wheel hub very much. I removed wheel hub by tapping back of wheel hub with pound hammer but in future I would consider getting hold of wheel hub puller tool or make a tool myself.
10. I attempted to remove the CV from the half shaft at the wheel hub end without pulling the half shaft from the differential housing, however there was not enough room to get the force required to remove the CV.
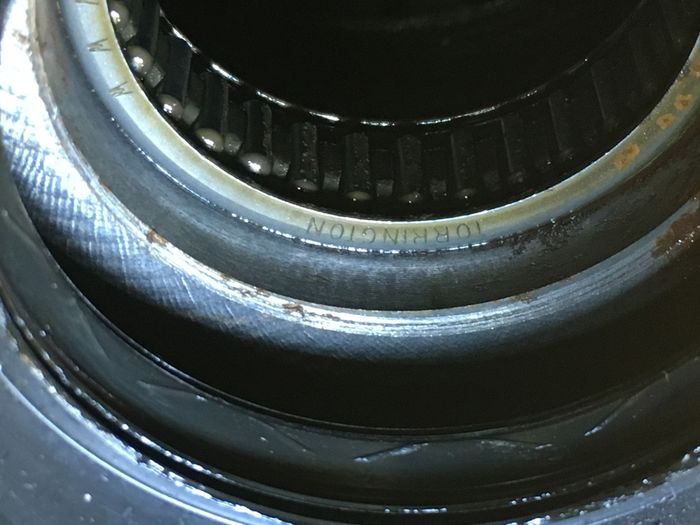
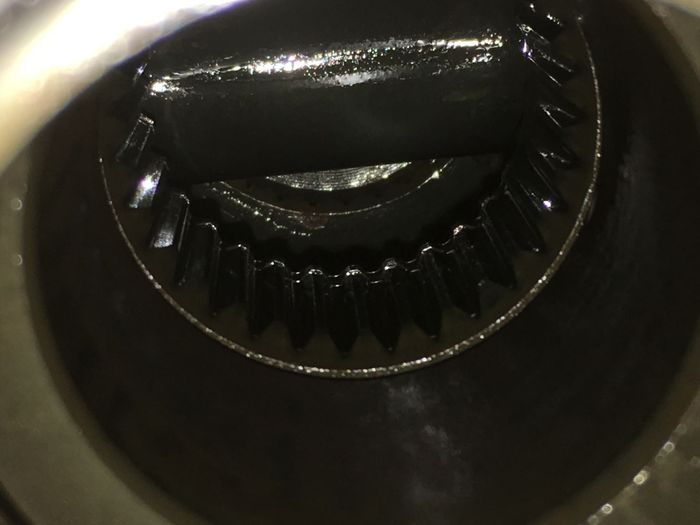
11. As I know now, it is much easier to remove the half shaft from the differential housing with assistance in order to keep it level so as not to damage the seal in the differential housing, the seal is at the very front edge (I didn’t replace the seal but of course you could replace the seal if leaking). To remove the half shaft from the differential housing do it in two stages. First, from the differential housing I placed a piece of timber onto the CV housing where CV goes into the differential and gave it a good firm hit with a pound hammer and you will feel it click and release the snap ring which is at the bottom of the half shaft inside the differential housing. When released, the half shaft came out about ½” and is OK to sit until you can reset to remove half shaft completely without damaging the seal. Second, carefully remove half shaft completely from differential housing by keeping it straight (need two people) so it won’t damage the differential seal which is located at the entry point of the differential housing. Make sure you remove without letting shaft touch the rubber seal as any damage will cause a leak. See photo of seal.
12. With shaft on the bench, cut off 2 clamps on CV boot (careful not to damage CV when cutting) and cut off boot (if reusing boot, slide it down the half shaft in order to access CV).
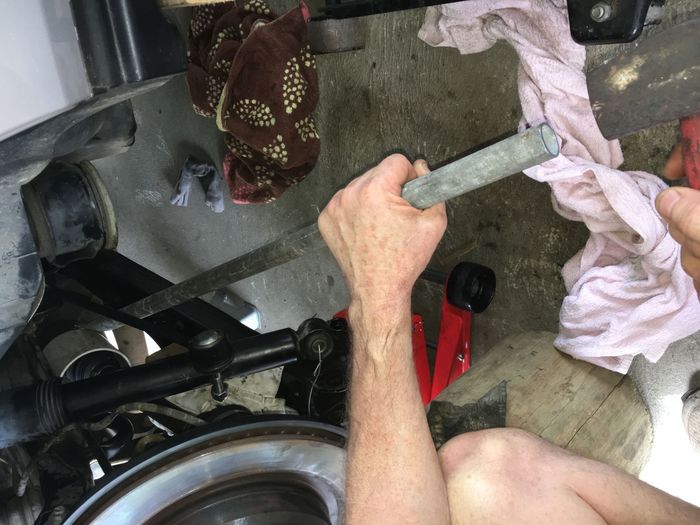
13. Remove CV from half shaft by placing half shaft in vice. I used a coal chisel and pound hammer hitting CV at a point closest to the half shaft without scratching the half shaft. Takes quite a bit of force to remove CV. It needed a good sharp hit to release.
14. The manual says to remove the snap ring however I would not do this step in the future, leave the old snap ring in place if it is not damaged.
15. At this point you can also remove the other CV clamps and boot.
16. Clean the CV’s with petrol to get rid of old grease and repack with grease.
17. Replace CV boots, differential end first. The CV Boot Kit I purchased comes with 2 CV boots, 4 Oetiker clamps and 2 snap rings. The CV boots are different size so be sure to attach largest one to differential end of half shaft and smaller one to wheel end of half shaft. You need a Oetiker style clamping tool to install CV clamps. For wheel end CV boot, place smaller clamp on first then put CV boot on, then CV joint. When I tried to replace the CV, it smashed the new snap ring and I had to use the old snap ring. To get the CV joint on, I made a shim by cutting a thin piece of steel placing it around the snap ring securing it down with wire in order keep the snap ring snug down in the grove and in order to allow the CV to slide back over the snap ring without damaging the snap ring. I taped the CV on using a piece of hardwood and pound hammer giving it a good sharp hit. This pushed the steel shim away but the CV joint went over the snap ring at the same time.
18. If you aren’t a confident DIYer, I would take out the half shaft from the differential and take it to a work shop for replacement of new CVs and or CV boots.
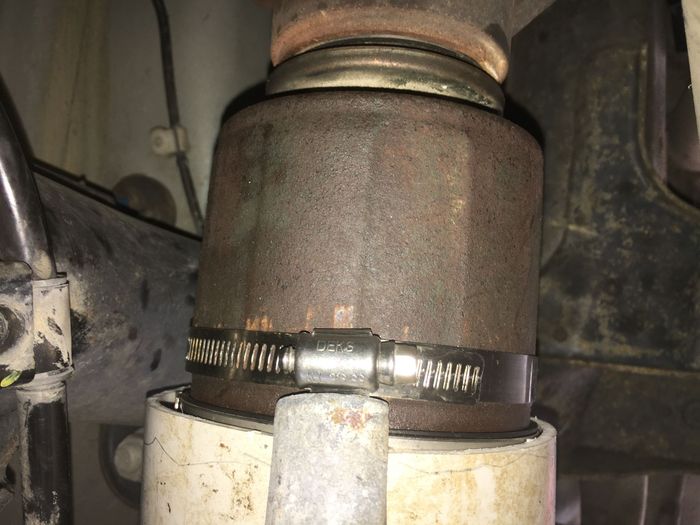
19. Replace half shaft into differential being careful not to place the shaft on the seal which is located at the front of the entry point into the differential. Best with two people in order to keep shaft straight and direct it into the differential without touching the seal.
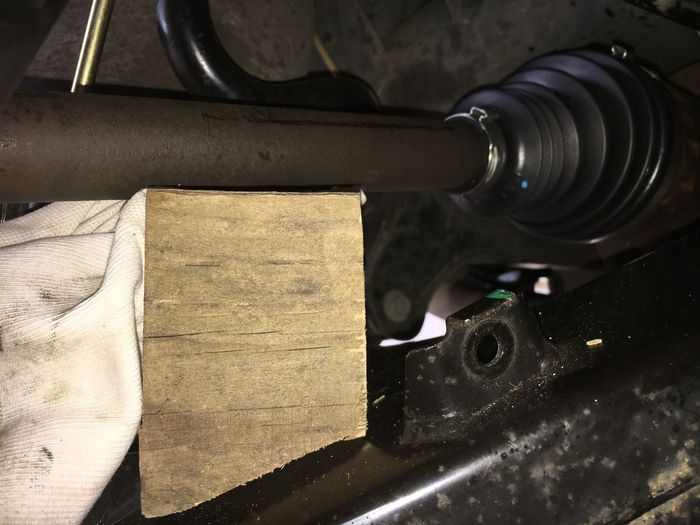
20. Once the half shaft is in differential housing it rests on the inner part of the differential without touching the seal so it is possible to support the half shaft with a piece of wood to keep in in place while you prepare to tap it in so the snap ring seats in place inside the differential. See photo.
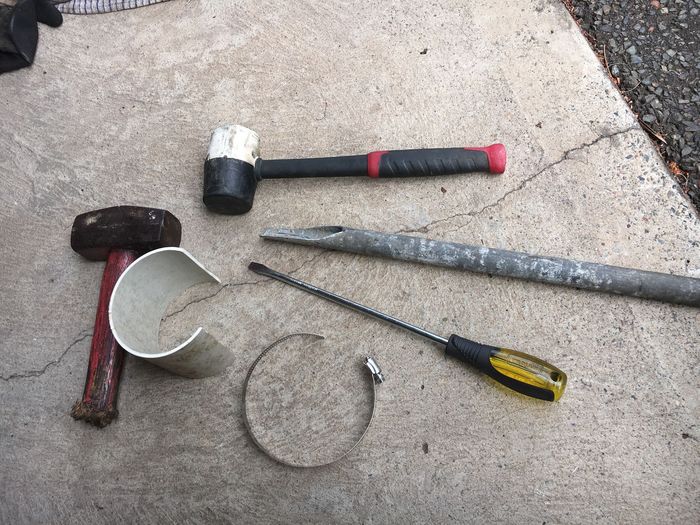
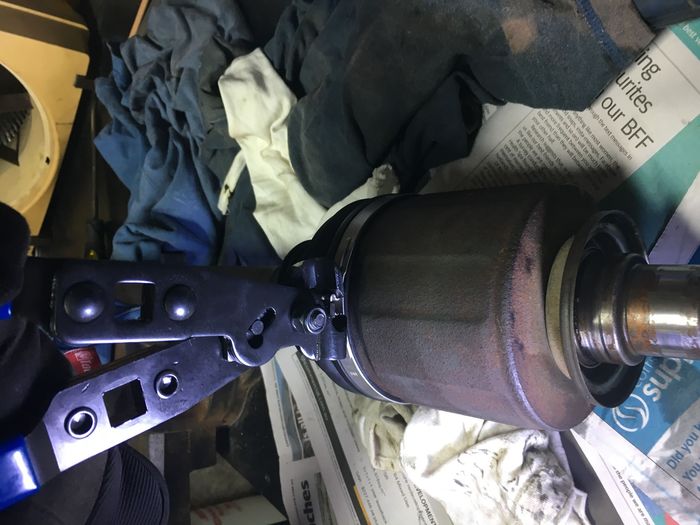
21. I tapped the half shaft into the differential by placing a large steel hose clamp (110ml) behind the CV boot at the differential end (there is a slight depression) and using a cut down long piece of pipe placed pipe on the depression against the screw part of the hose clamp and tapped the pipe with a pound hammer placing the pressure on the CV not so much on the hose clamp. The hose clamp only holds the pipe in the depression. I also cut down and placed a piece of PVC pipe over the CV boot to protect it in case the pipe came off and damaged the boot. See photos.
22. Now just replace all components in reverse.  If needed you could also replace the 2 bushes and toe arm. If needed you could also replace the 2 bushes and toe arm.
|