 | Home > Technical (L322) > Steinhof Tow bars. Now a review. |
 
|
|
|
| northernmonkeyjones Member Since: 24 Mar 2012 Location: derby Posts: 8775  
|
Have a look at PF Jones. Plenty of tried and tested options.
|
||
|
| Anvil Member Since: 18 Jan 2019 Location: Dorset Posts: 140
|
Thanks NMJ, had a look, and have decided to go for the Steinhof detachable version with 7 pin electrics to match my rack. It is made to EU standards apparently, and will only be used for a bike rack so thothing too heavy. No cutting of the bumper involved etc. Will try to document the installation and give a review, as they are quite a bit cheaper than others on the market.
|
||
|
| Anvil Member Since: 18 Jan 2019 Location: Dorset Posts: 140
|
Hi All, for anyone that may be interested in these.....
|
||||||||
|

| northernmonkeyjones Member Since: 24 Mar 2012 Location: derby Posts: 8775
|
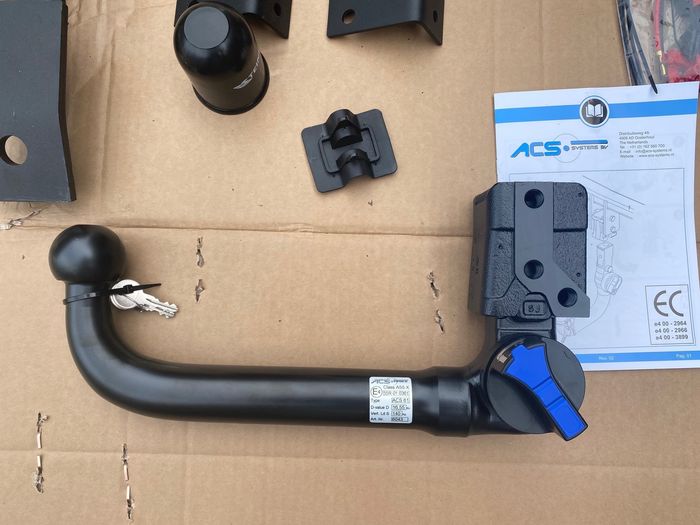
The detachable bit seems to be made by ACS, which are a ductch company who specialise in detachable tow bar bits. from the look of some of their couplings they look similar to ones Brink use. Otherwise looks pretty solid.👍🏻 There is nothing that can't be fixed with a hammer😜😜
|
||
|
| Anvil Member Since: 18 Jan 2019 Location: Dorset Posts: 140
|
Yep, seems to be so far. I'll keep everyone posted with how easy/difficult it is to install if anyone's interested! |
||
|
| Gsxr1250dave Member Since: 20 Oct 2018 Location: London Posts: 1040 
|
I'm watching this as I'm still in the market for one at some point so I can mount my spare wheel to the tow hitch.
|
||
|
| Anvil Member Since: 18 Jan 2019 Location: Dorset Posts: 140
|
|
||
|
| Anvil Member Since: 18 Jan 2019 Location: Dorset Posts: 140
|
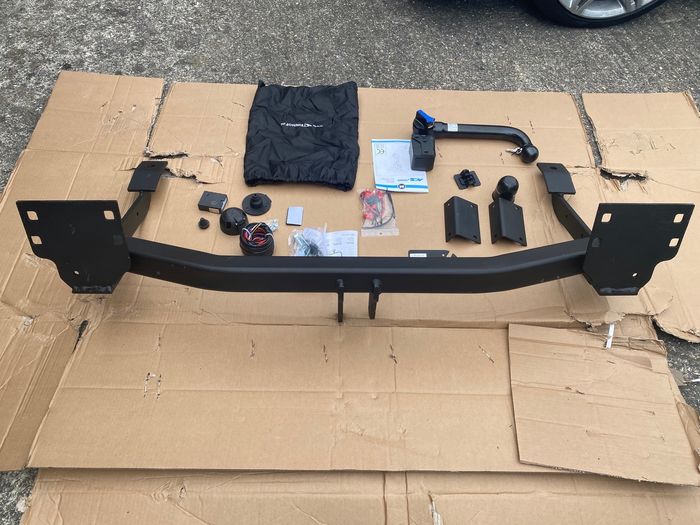
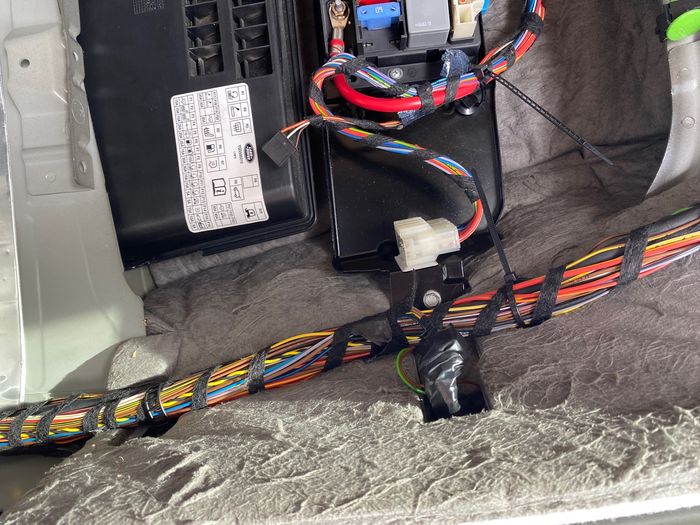
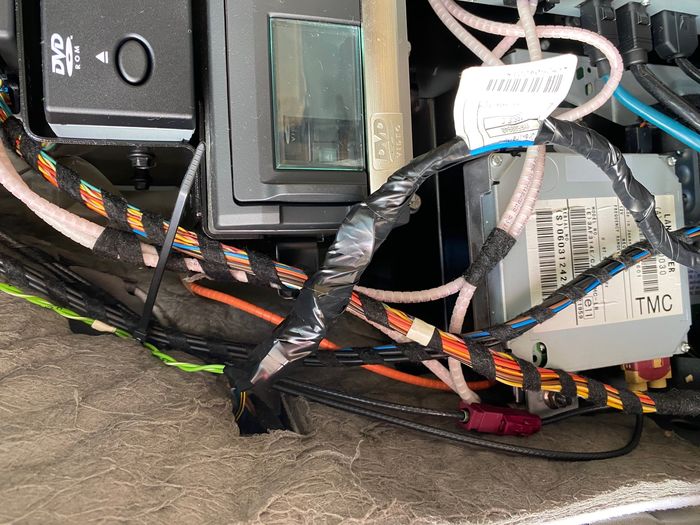
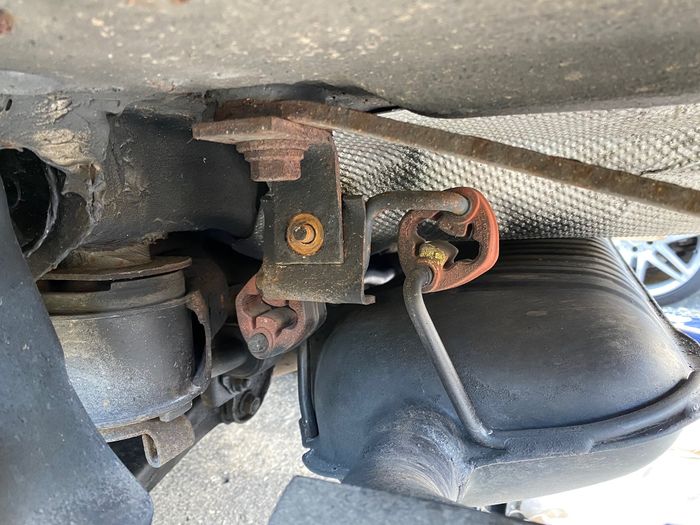
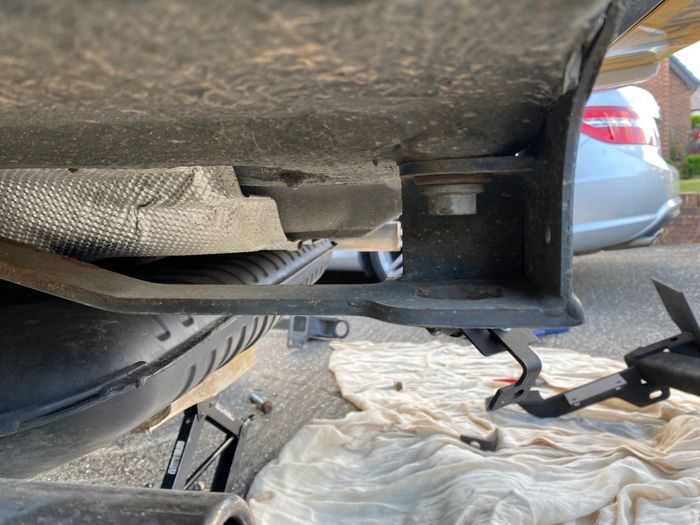
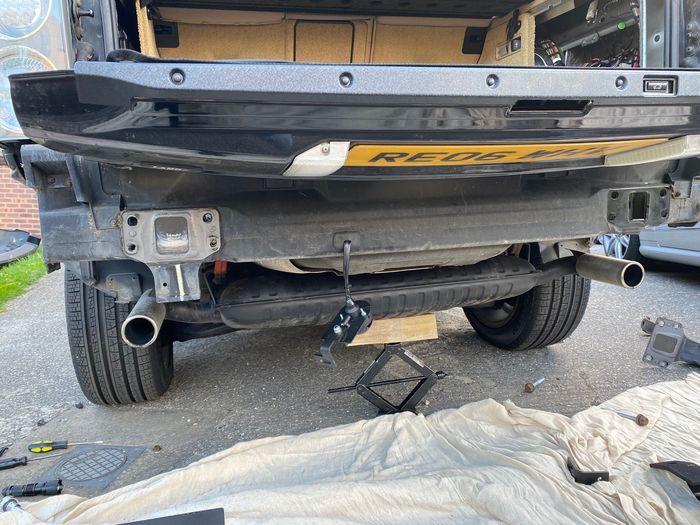
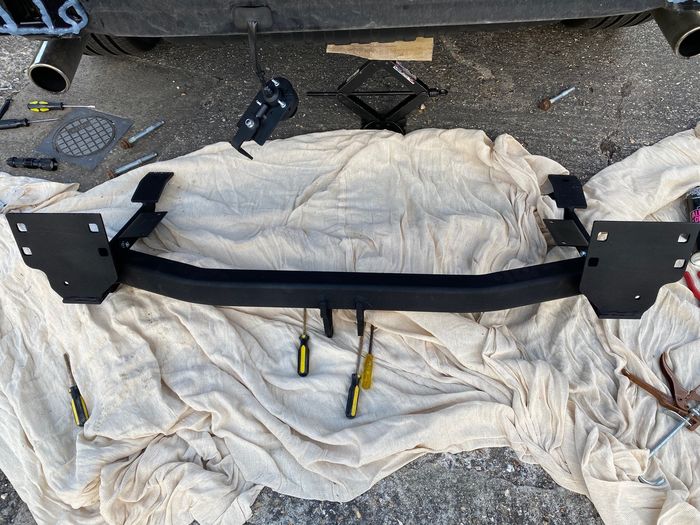
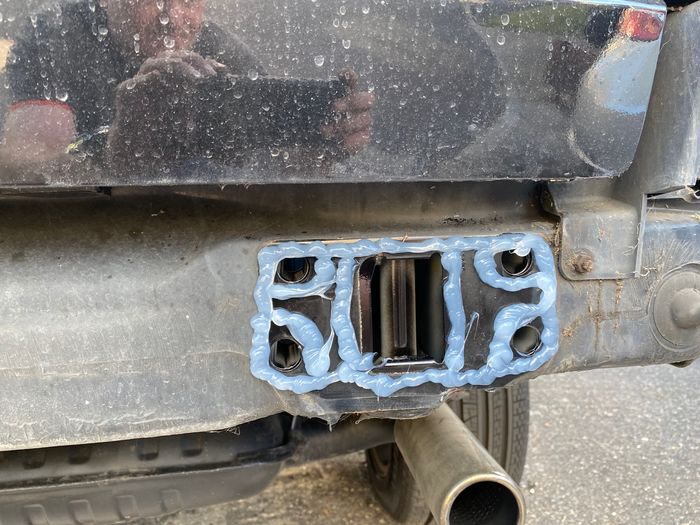
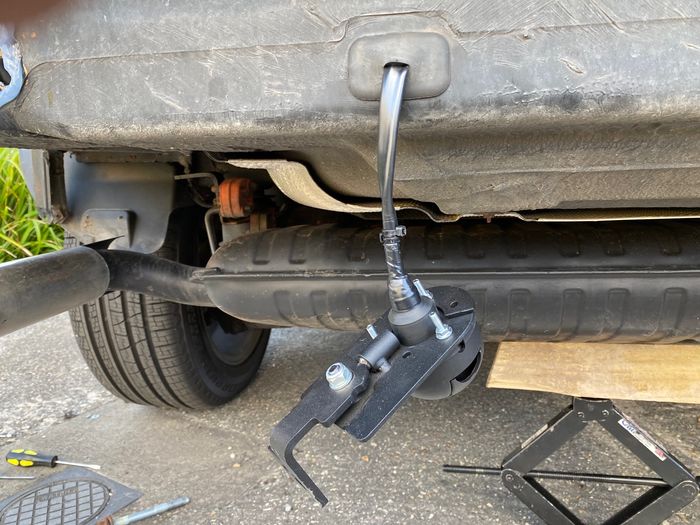
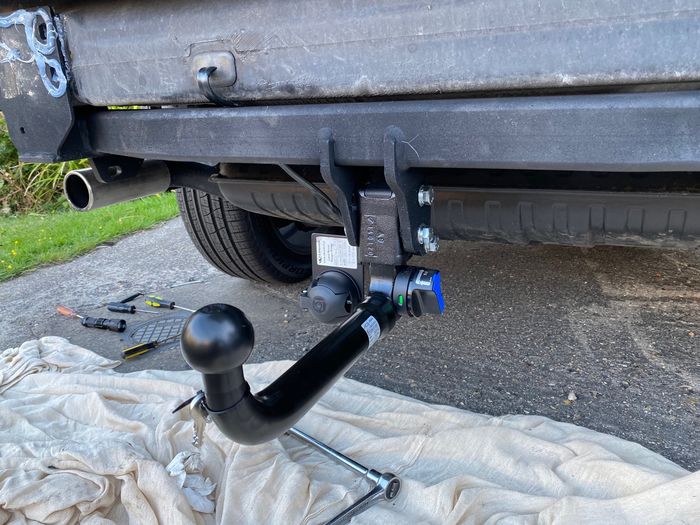
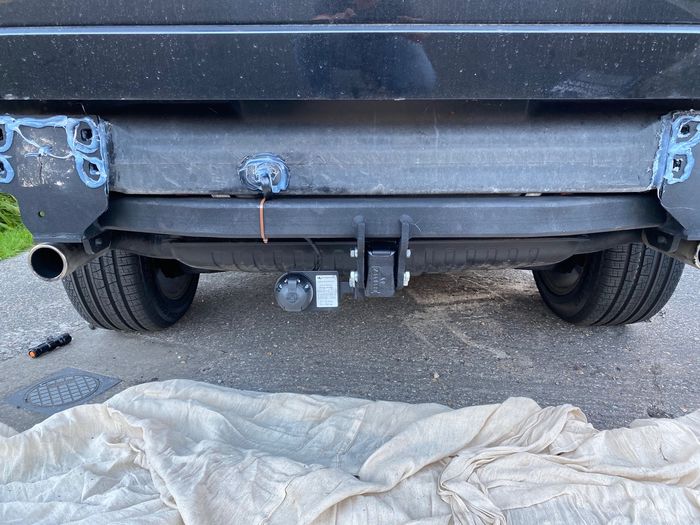
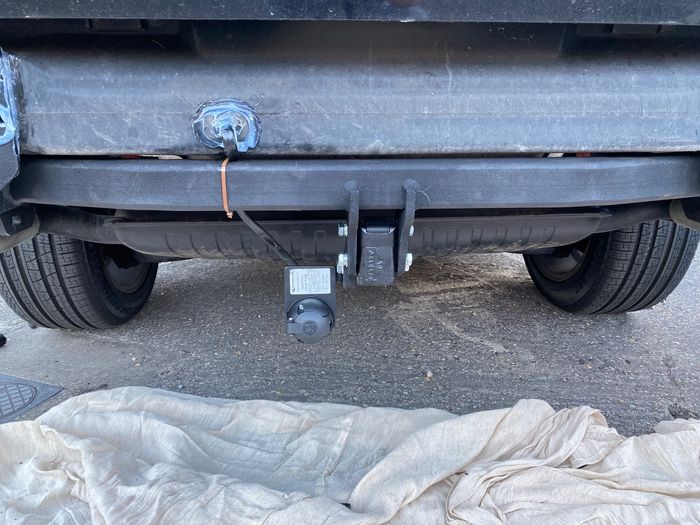
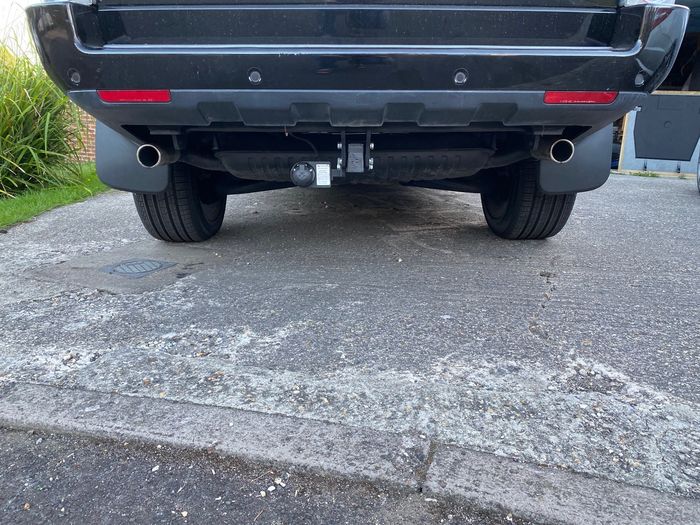
Hi All, So I got around to installing the tow bar over the weekend. Spent quite a bit of time doing it as I'm a bit anal about cabling and stuff, but if you plan to do it properly, and you're doing it alone, I'd set about a day aside.
|
||||||||||||||||||||||||||||||
|
| Gsxr1250dave Member Since: 20 Oct 2018 Location: London Posts: 1040
|
Very nice right up that man......well done!!! |
||
|
| Anvil Member Since: 18 Jan 2019 Location: Dorset Posts: 140
|
Thank you!
|
||
|
| stuart_2006 Member Since: 18 Jul 2018 Location: Holsworthy, Devon Posts: 133 
|
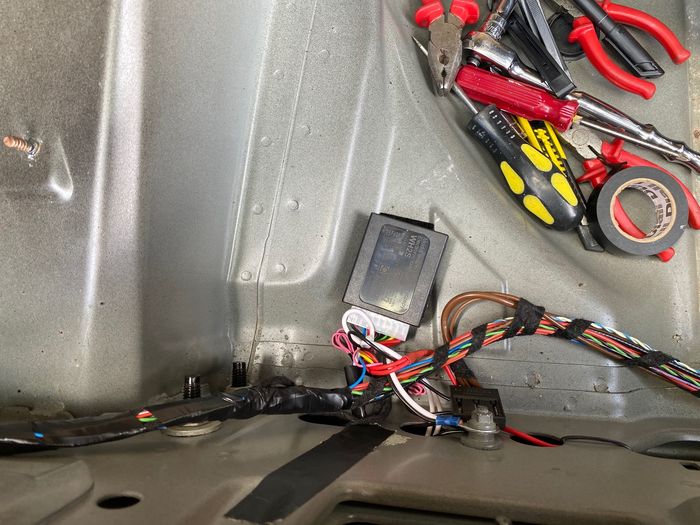
You do have a prewired towing socket - it's the white connector in the second of your photos. I was fortunate with the towing kit I got from PF Jones that it came with the socket to fit this, so I didn't have to play with splice connectors. Phew! |
||
|
| 4434Morrison Member Since: 02 Mar 2020 Location: Folkestone Posts: 185 
|
Excellent write up - thank you.
|
||
|
| Anvil Member Since: 18 Jan 2019 Location: Dorset Posts: 140
|
Ahhh, interesting! Thanks. That may have been an alternate point to splice in the connectors all in one place then. The loom that came with the kit aligned nicely with the exit grommet etc, so I'm quite happy with the results. Worth noting for others who need a splice point though. Cheers. I guess that plug would be handy if I ever wanted to run a 13 pin set up too, and all I'd have to do would be to buy the electrics kit. Last edited by Anvil on 23rd Jun 2020 9:28am. Edited 1 time in total |
||
|
| Anvil Member Since: 18 Jan 2019 Location: Dorset Posts: 140
|
No Problem. You're welcome. The only thing I could pick it up on was the finish and coverage on the powder coating in some of the difficult to reach areas. If you're prepared to paint it yourself before install, its otherwise a quality product as far as I can see. There are several variants available in detachable/fixed ball, 7 and 13 pin electrics. Make sure you get the right one, as the ebay photos are all the same which is a little misleading. |
||
|

|
|
| All times are GMT + 1 Hour |
< Previous Topic | Next Topic > |
Posting Rules
|
Site Copyright © 2006-2025 Futuranet Ltd & Martin Lewis
![]()
