garyRR
Member Since: 13 Mar 2021
Location: Hampshire
Posts: 1494


|
| MOD -How To: LED Comfort/Mood Lighting Install L322 Amazing! | |
Ok so, I've cracked it and what an amazing mod!
The new Range Rovers have convenience lighting in them, which some people also refer to as 'mood lighting'. Having just had a new L494 for 6 weeks, I was glad to get back into my 2011 4.4 TDV8 L322. Despite being 10 years old, I was suddenly reminded why I bought the car when I picked it up from the bodyshop. The moment I sat in her and those sumptuously comfortable aniline seats and the sublime ride (yes, the ride is noticeably more comfortable than the L494), I remembered what I was missing.
(The L494)
Now, one thing I did miss from the L494 was the internal convenience lighting. It just makes the car feel a bit more special. And that got me thinking how I could replicate it in my L322. Whilst the aftermarket light strips would be difficult to pull off well and most likely look tacky, I thought it would be best to see if I could replicate the bluey/white footwell lighting.
So, can it be done? Absolutely. Here's how.
Difficulty: Medium
Time Required: 3 hours for a professional looking job
Cost: £40
What you need:
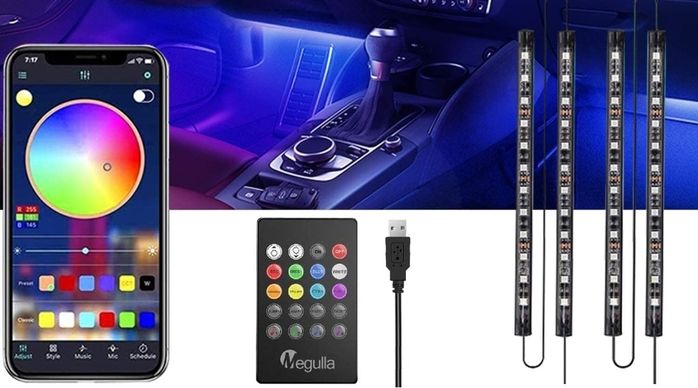
- Internal LED car kit. I chose one with both an RF remote and Bluetooth so, it gives maximum versatility. There's a few other good things about this kit. An RF remote means you can hide the module behind trim and it will still work. Additionally, each LED strip has independent cabling - many others i looked at were daisychain which just increases the amount of cable everywhere. Finally, the controller is silent - one I tested made a faint noise.
https://www.amazon.co.uk/dp/B09DYN7FJZ/ref...&psc=1
- Hardwire kit (I used the Nextbase dashcam one)
- 10mm spanner
- Crimp connectors
- Black electrical tape
- Cable ties
- Flat trim tool
- Screwdriver with T20 Torx bit
Step 1: Remove trim (30 mins)
To make steps 1 to 3 easier, refer to my other guide on how to wire a dashcam
https://www.fullfatrr.com/forum/topic60391.html
This step is pretty straightforward. First off, you want to remove the wheel arch trim in the footwell. Just pull this towards you slightly and then lever it out.
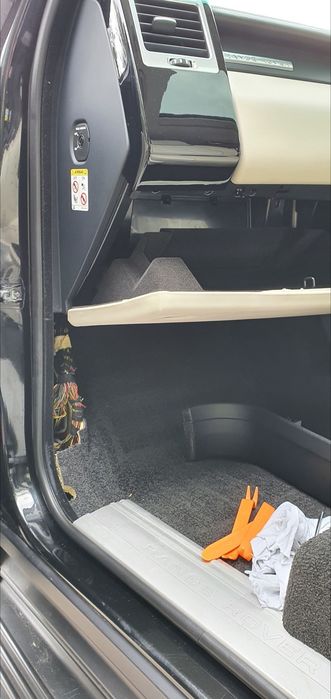 | | Click image to enlarge |
Now you want to remove the trim on the side of the centre console. There's 1x T20 screw and just begin gently pulling it from the bottom of the piano black/walnut/wood trim and the piece will come right off.
Thirdly, you want to drop the upper footwell trim with the courtesy light in it. Remove the torx screws and the multiplug on the light then, this trim will pull off.
On the driver's side, all you need to do is remove the trim on the side of the centre console.
Step 2: Wire in the hardwire kit (30 mins)
You have several options here based on when you want the lights to be on. On all vehicles, the heated steering wheel fuse is ignition controlled so, if you want the lights to be on whenever the car is running but off when it's locked, then this is the fuse you want to pick. It's also the fuse to use for dash cams.
For me though, I found I didn't really see the lights in the L494 during daylight and instead saw them at dusk or when dark so, I wanted my lights to only be on in the dark so, I immediately looked for the headlight and sidelight fuses. In my 2011, fuse 25 is marked "rear lights, tail light, number plate lights". A quick check with a multimeter confirmed this circuit is only live when the tail lights and numberplate lights are on and read 0V when they were off. I also checked the brakes wouldn't accidentally turn them on. Perfect!
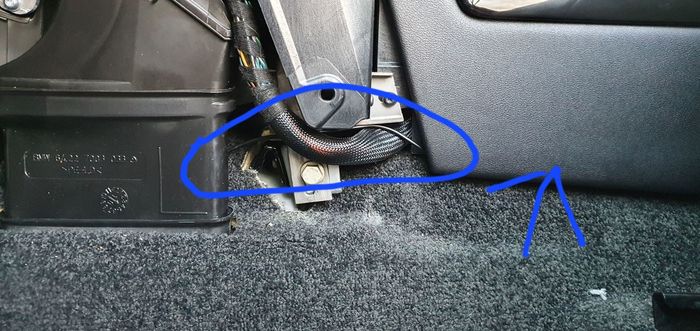
Push the black ground cable through the left of the fuse box enclosure. At the same time, put your hand up through the wheel arch area and you'll be able to pull your ground cable through. This needs attaching to the grounding point here (this is in the same location on 2006-> and 2010> vehicles):
 | | Click image to enlarge |
Now remove F25 (check your diagram and owner's manual which fuse it is on 2006-2010 cars) and push it into the piggyback fuse. Don't fit this into the fuse box quite yet because, you need to be working on a dead circuit.
My kit came with a USB to power it, like most kits. Hence, needing the hardwire kit. If your kit is 12V supplied then, you need only a piggyback fuse. Hardwire kits tend to have male mini USB and I needed a female full size USB. You can buy converters online but I just cut the cables and put on crimp and heatshrink connectors. USB operates on 5V and hardwire kits supply 5V so, it was just a case of cutting the cables and joining them.
Step 3: Hide the transformer and wiring (15 mins)
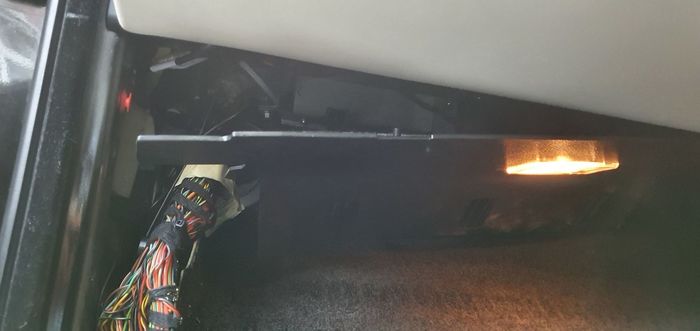
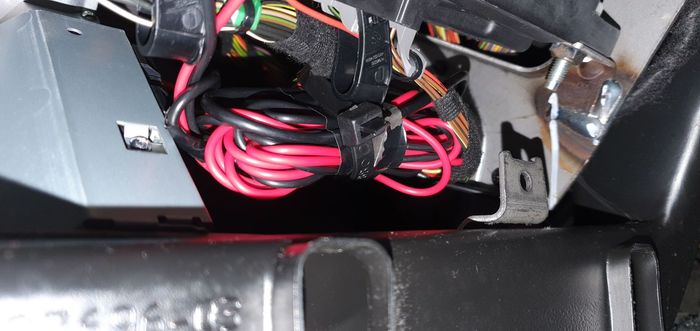
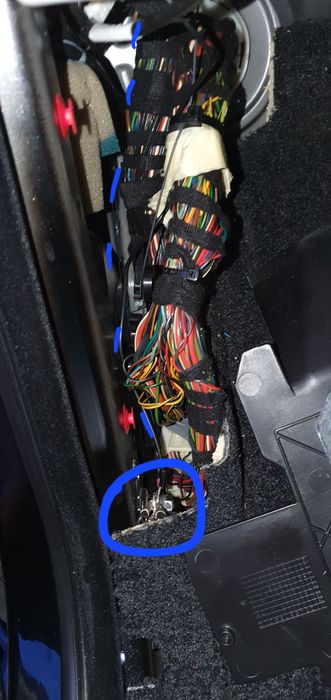
These are refined cars. Bundle and tape up all the cabling so it can't rattle around and find somewhere to secure it all. There's quite a few options. If you look at the dash cam guide, you can hide it here (side of dash behind the vent), find your own place or on my 2011 vehicle, there's plenty of space you can easily reach behind the fuse box, with wiring looms you can cable tie to:
Step 4: Dry fit the rear LEDs (20 mins)
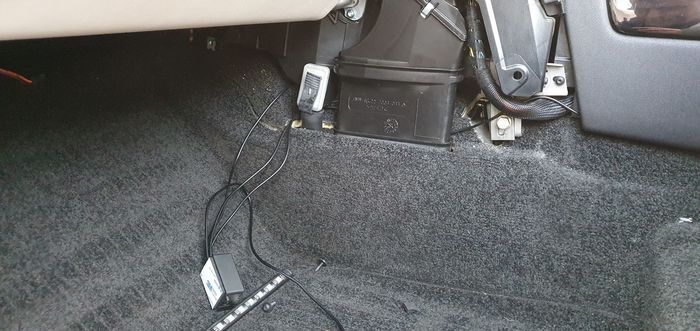
Find a place for the control unit. I found a good place just behind the centre console and 3M padded the control unit to the back of some ducting. This gave the best place for all cables to reach.
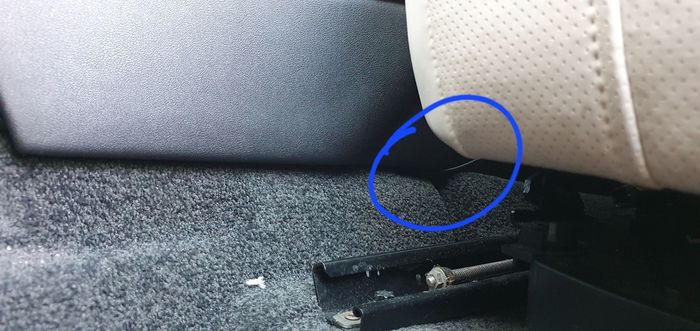
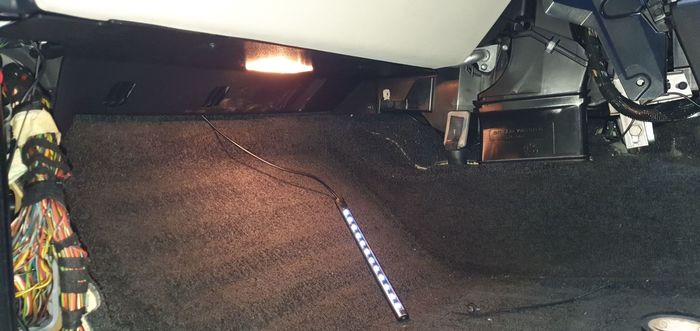
Now, start feeding the LED strips to the rear footwell. You can see I just tucked the cable through the centre console and then up the side of the transmission tunnel, exiting where there's a gap tucked down the side of the seats, as this location is never actually visible.
Now push the LED strip through and do exactly the same on the driver's side.
Step 5: Dry fit the front LEDs (20 mins)
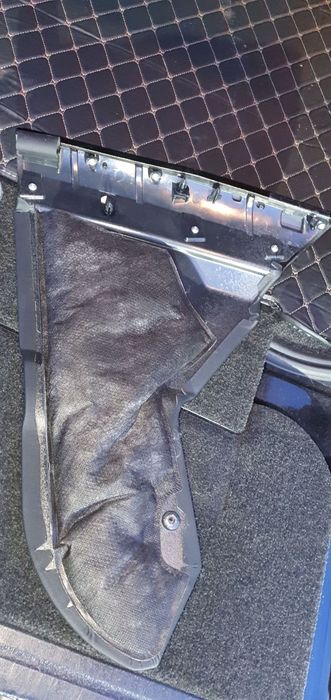
This is fairly straightforward. Bind up excess cable with tape and find somewhere to secure it . On the passenger side, this can be secured to the footwell duct. On the driver's side, it can be tucked behind the centre console.
I wanted minimum cable visible so, the cable enters from behind the trim facing the centre console. You can start re-fitting the upper footwell trim to start holding it all in place:
Step 6: Secure the rear LEDs (30 mins)
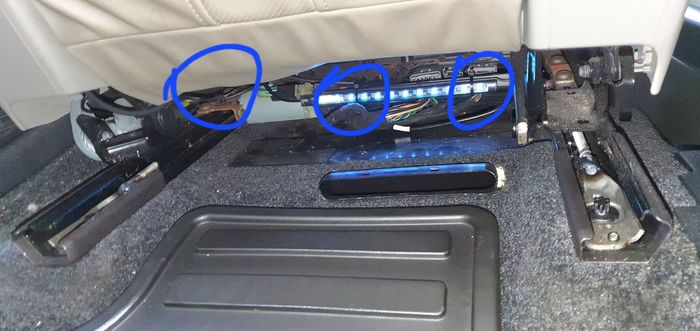
These are best cable tied. Below each seat is a plastic bar protecting one of the motor spindles. It moves with the seat and seemed ideal for securing the LED strips to. I fitted one at each end. This is very fiddly so, take your time.
Use a third cable tie to secure the cable to the underside of the seat so, it doesn't get snagged in the seat mechanism. Remember to leave slack here so the seats can still be adjusted.
Step 7: Secure the front LEDs (10 mins)
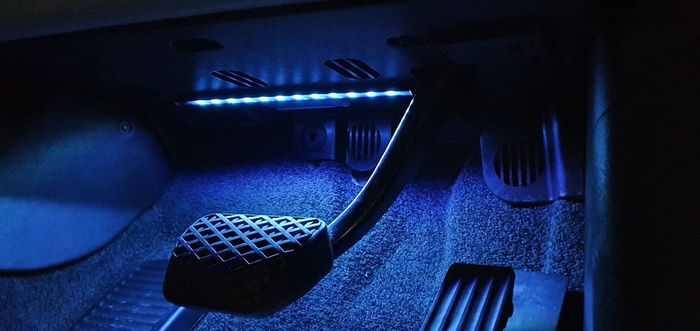
This is really straightforward. On the driver's side, I put the strip 1cm behind the footwell light, where it has a flat surface to mate to.
On the passsenger side, I put the strip 1cm in front of the footwell light.
Make sure you use alcohol cleaner to clean the locations first and allow to dry. If fitting in winter weather, start the engine and put the heating to 24C to aid adhesion. When sticking each strip, hold it in place for 60 seconds.
Step 8: Re-fit all trim (20 mins)
Re-fit any remaining trim. The side console trim has 3 panel clips. Start by pushing the piano black/wood section up as far as it will go and align with the panel clip holes then, give it some gentle whacks and the panels will go back on. Put in the T20 screw.
 | | Click image to enlarge |
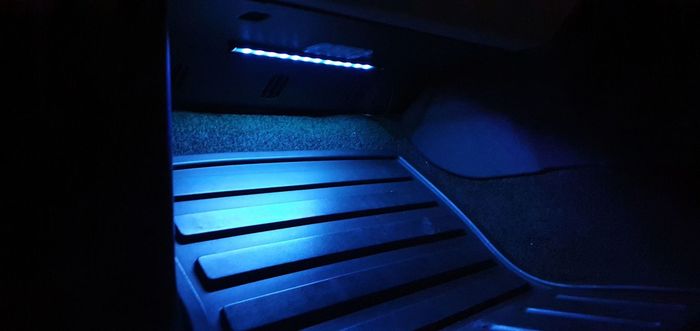
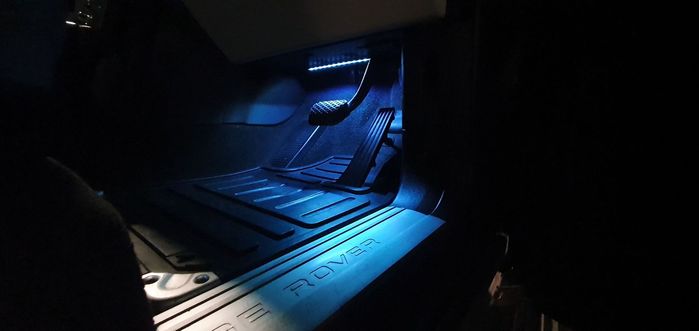
YOU ARE DONE! JUST LOOK AT THE TRANSFORMATION!! (brightness increased for the camera. I have them heavily dimmed so they just provide a hue)
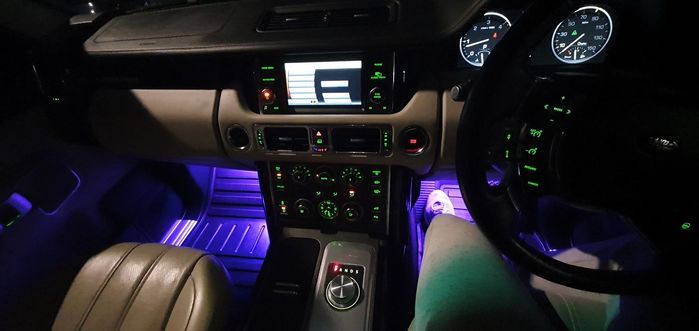
(No cables visible)
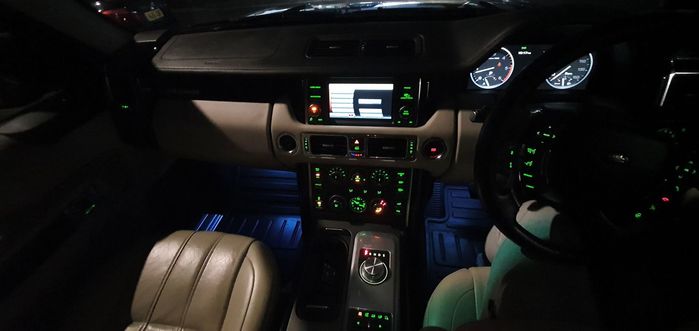
Having to increase the brightness for the pictures just doesn't do it justice. A soft hue of white light really looks like it was supposed to be.
|