Advertise on fullfatrr.com »

Home > Maintenance & Mods (L405) > Touch Up Side Steps
Post Reply  Down to end
Page 1 of 1
Print this entire topic · 
Ragingrover


Member Since: 05 Oct 2019
Location: Malvern
Posts: 152

United Kingdom 2014 Range Rover Autobiography SDV8 Nara Bronze
Touch Up Side Steps

Hello folks

Has anyone touched up their side steps and made it look respectable ?

Mine are looking a bit scabby so need a touch up for now. I'm happy to remove them in spring and get them fully blasted and painted but for now want to improve the visuals.

I'll get the brass brush on the drill and clean up the areas, use some acid etch primer and then paint, has anyone done this before and did it look ok ? The problem from my own experiance (saying more about me than anything!) is that touch up repairs can often end up looking worse than the probel area to start with !

Anyone been here before ?

Thanks

Click image to enlarge


Click image to enlarge


Click image to enlarge

Post #649608 1st Dec 2022 1:31pm
View user's profile Send private message View poster's gallery Reply with quote
Skipper


Member Since: 02 Sep 2022
Location: Bangor
Posts: 14

United Kingdom 

It’s tempting to use a wire brush for speed and convenience but it can end up introducing rust into freshly exposed metal. Maybe your acid etch will be enough to give you a clean surface to prime and hold off the rust until the spring?

Post #649618 1st Dec 2022 2:26pm
View user's profile Send private message View poster's gallery Reply with quote
Gremlin500


Member Since: 11 Mar 2022
Location: Newcastle, UK
Posts: 1222

United Kingdom 2017 Range Rover Vogue TDV6 Corris Grey

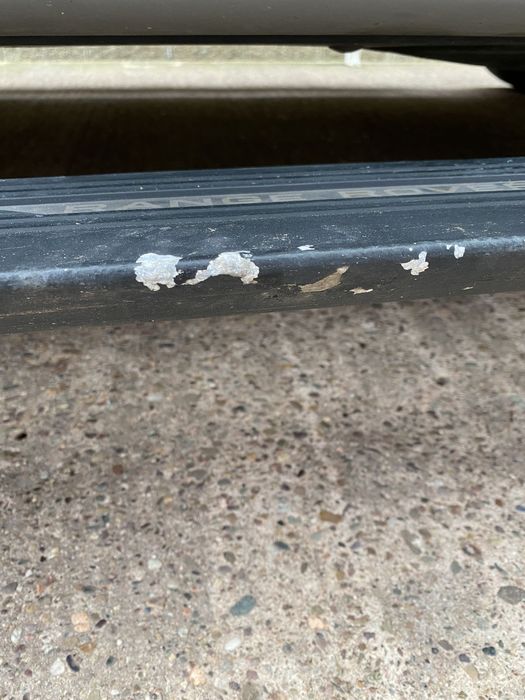
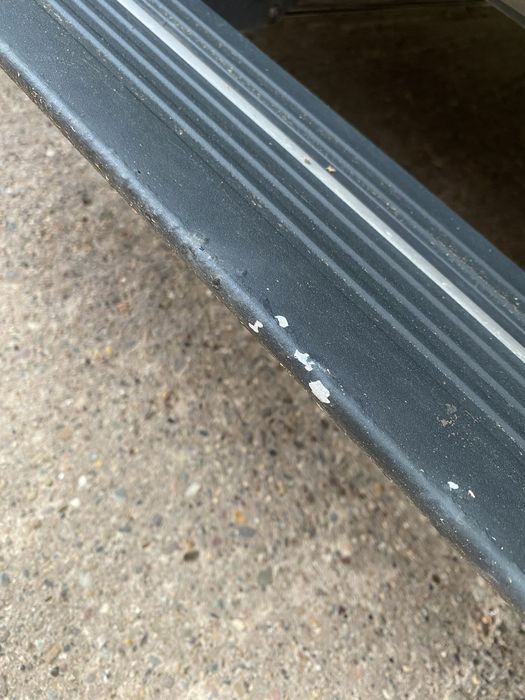
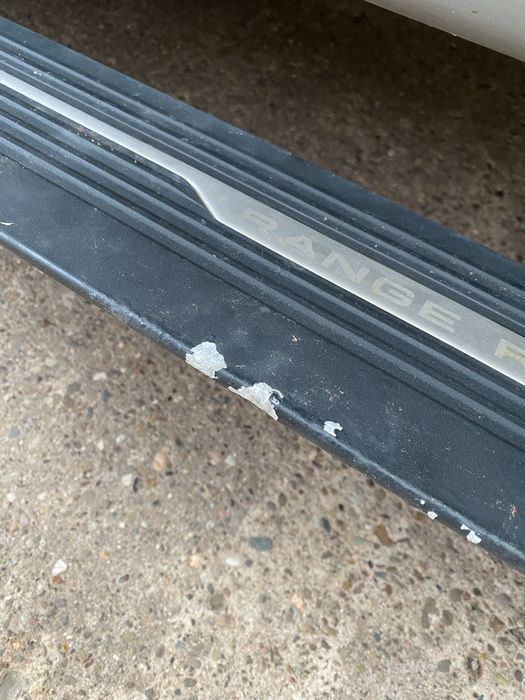
I tried to remove mine which looked similar, but despite soaking with Plus Gas many times I simply could not get them off with all bolts out, despite bashing away with a large rubber mallet, so I rubbed them down where the paint had blistered, masked off the trim, and brush painted them with black smooth Hammerite. Not ideal, but they look OK and at least have some protection for now. I guess they’ve corroded themselves to the brackets?

The only proper way is to do as you say, there is a very good 2-pack paint called “TANK” on eBay, which is a super-tough truck bed epoxy paint. The original JLR paint is woeful, or at least the prep must have been, with blistering in areas with no paint damage apparent.

It’s a Summer job if you DIY, I sprayed some similar large alloy speaker trims, and got an amazing silky-smooth finish in rattle-can Satin Black, with crazy amounts of prep and wet sanding between many coats, but it has to be a labour of love, tbh.

Best of luck! “If it ain’t broke, don’t fix it” -where’s the fun in that?

Post #649619 1st Dec 2022 2:39pm
View user's profile Send private message View poster's gallery Reply with quote
Ragingrover


Member Since: 05 Oct 2019
Location: Malvern
Posts: 152

United Kingdom 2014 Range Rover Autobiography SDV8 Nara Bronze

Much appreciated, my assumption was corriosion due to a mix of paint errosion on the top edge and maybe stone ships from the edge and beneath. I'll look out the Tank stuff you mentioned.

Thumbs Up

Post #649624 1st Dec 2022 3:59pm
View user's profile Send private message View poster's gallery Post Reply
Post Reply  Back to top
Page 1 of 1
All times are GMT + 1 Hour

Jump to  
Previous Topic | Next Topic >
Posting Rules
You cannot post new topics in this forum
You cannot reply to topics in this forum
You cannot edit your posts in this forum
You cannot delete your posts in this forum
You cannot vote in polls in this forum


Site Copyright © 2006-2024 Futuranet Ltd & Martin Lewis
fullfatrr.com RSS Feed - All Forums


Switch to Mobile site