Advertise on fullfatrr.com »

Home > Technical (L322) > Getting ready to overhaul L322 BMW era front diff
Post Reply  Down to end
Page 1 of 1
Print this entire topic · 
kanikune


Member Since: 29 Oct 2017
Location: Teerijarvi
Posts: 28

Finland 2004 Range Rover Vogue 4.4 V8 Epsom Green
Getting ready to overhaul L322 BMW era front diff

I've been having some time what I believe is front differential whine.
So, to beat the bullet I ordered used differential from the ebay.
The idea is to overhaul this unit to perfection Laughing and then install the unit into the car.


So far the with process:

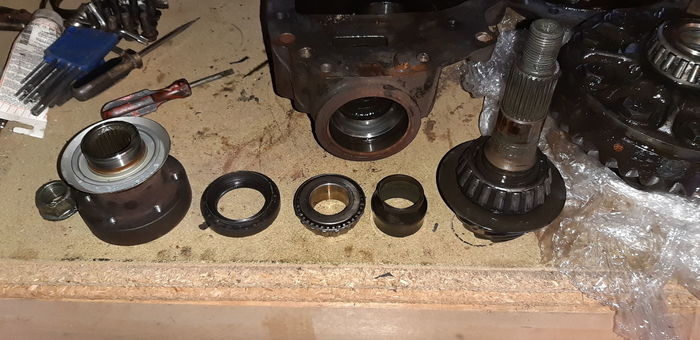
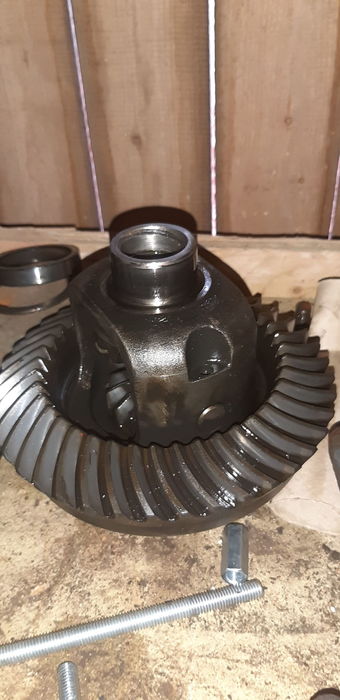
Dismantled the differential, so no turning back.


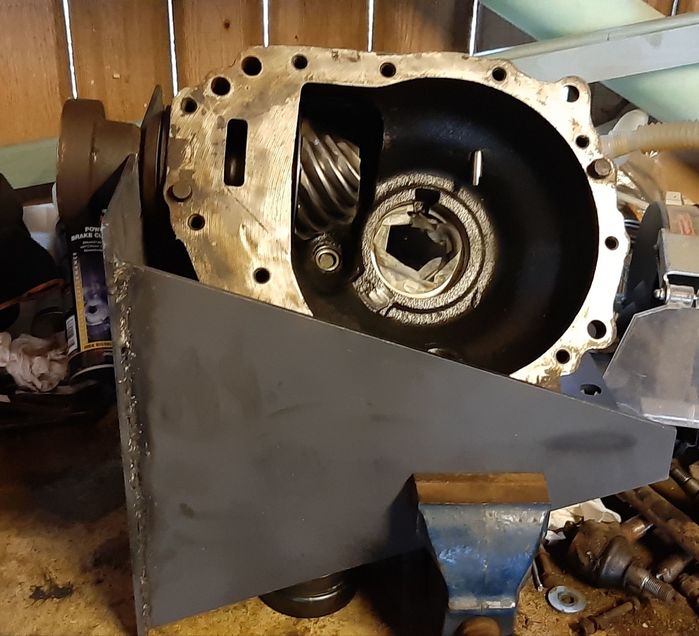
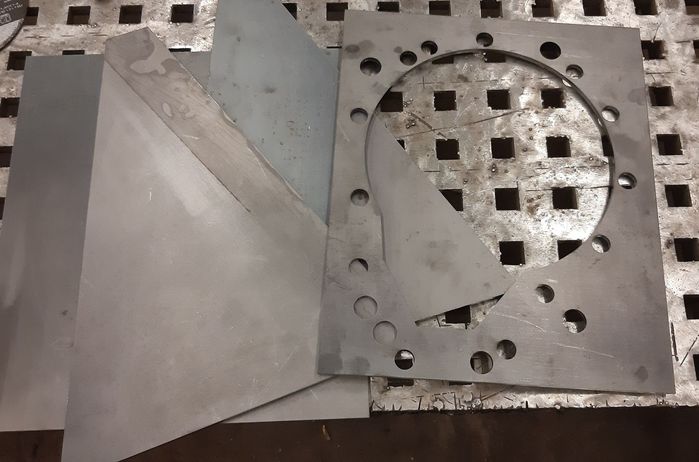
Laser cut some metal plates.


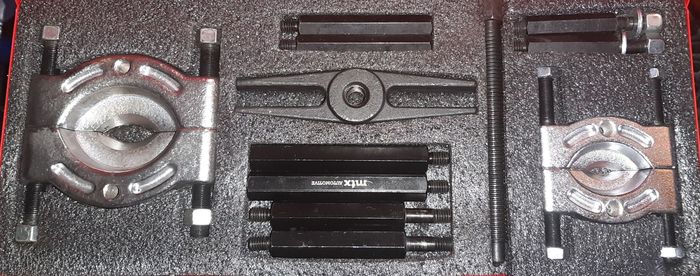
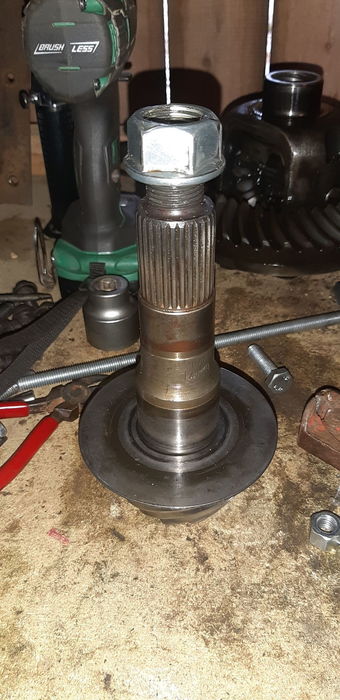
Last night was able to peel of the bearings from the pinion and the crown wheel (?).

Click image to enlarge

Click image to enlarge


with the help of this set.


First took out the outer cages of the bearings. Taking a grip of the inner body of the bearing was easier job. They are super tigtht!


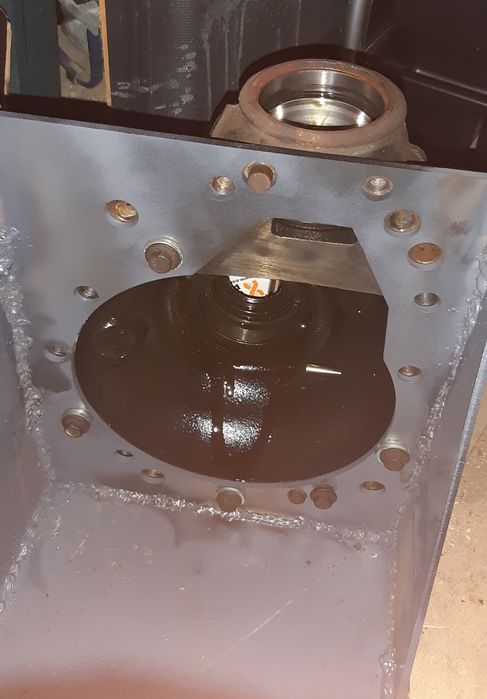
If you are wondering, what the laser cut plates are doing, they are for the assembly process.
This is copied directly from the manual. With this stand bearing cup can be bench pressed and also this unit can be secured to the bench vice easily to make the super accurate tightening of the pinion nut easier to manage.
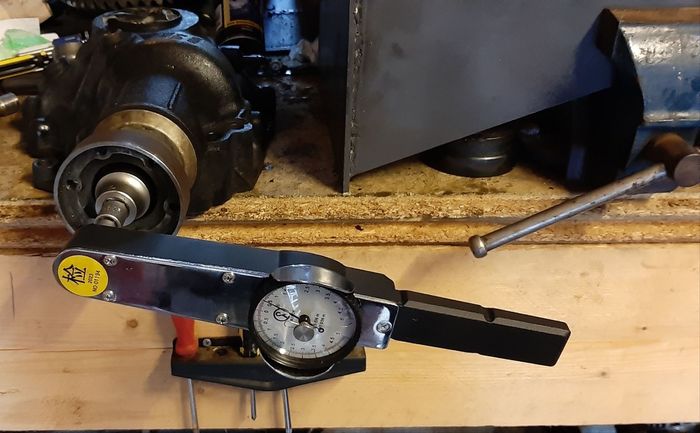
I have the torque dial wrench ready, as I do with complete bearing and gasket set not to forget crush sleeve.
Click image to enlarge

Post #664444 18th May 2023 6:19pm
View user's profile Send private message View poster's gallery Reply with quote
Haylands


Member Since: 04 Mar 2014
Location: East Yorkshire
Posts: 7908

England 2014 Range Rover Autobiography SDV8 Loire Blue

Excellent work, that should save you some money... Thumbs Up Pete

__________________________________________________
2014 L405 Autobiography SDV8 4.4 Loire Blue Ebony interior
2011 L322 Vogue SE 4.4 TDV8 Baltic Blue. Parchment over Navy Interior. Sold
2012 L322 Autobiography 5.0 Supercharged Ipanema Sand, Jet Interior. Sold
2002 L322 Vogue 4.4 V8 Epson Green, Ivory over Aspen Interior (Fatty Offroader) Sold
-Click for Project Fatty off roader-

Post #664462 19th May 2023 8:17am
View user's profile Send private message View poster's gallery Reply with quote
RRPhil


Member Since: 22 Aug 2011
Location: Blackburn, Lancashire
Posts: 911

United Kingdom 

Great stuff. I’m sure you already have a copy of the Q041 Service Action (definitely-not-a-recall) rebuild procedure, but it’s here, just in case :

https://www.fullfatrr.com/forum/post529425.html#529425

Phil

Post #664503 19th May 2023 4:01pm
View user's profile Send private message View poster's gallery Reply with quote
kanikune


Member Since: 29 Oct 2017
Location: Teerijarvi
Posts: 28

Finland 2004 Range Rover Vogue 4.4 V8 Epsom Green

Small progress and I don't know yet if this was success, but thoughts so far..
Pinion has 48.5 -> ~ 49 mm slots for getting grip of the pinion.

New bearings and old shims in place, you cannot tighten the pinion nut easily to the point, where side play of the bearings have been eliminated. This means that it is quite easy to ruin the oil seal of the pinion.
You need massive force to overcome the crush sleeve. Manual says that crush sleeve requires 8-10 tonnes to alter shape. What this meant in real life?
I had to have 1.5 meter leverage to turn the nut!

To sum two previous notes I think it is best to assemble everything, put the whole thing hanging from the 49 mm holder from the pinion. Then turn the nut little by little.

Pics to follow sometime soon.

I have the dial gauge for the rotational force, so I was able to check rotational force as per manual suggests.

Post #668881 11th Jul 2023 12:20pm
View user's profile Send private message View poster's gallery Reply with quote
kanikune


Member Since: 29 Oct 2017
Location: Teerijarvi
Posts: 28

Finland 2004 Range Rover Vogue 4.4 V8 Epsom Green

Here's the progress.
Took the angle grinder and cut 49 mm slot to the laser cut frame Rolling Eyes


After the slack of the bearing was tightened off, the whole unit was lifted to table and while rotating the meter once per second, force was read. This process was iterarated three times and the 1.5Nm force was there. The bearing actually tightens quite fast. Small increments should be done.


I test assembled the unit with crown wheel and almost zero slack can be felt in the pinion. Seems promising so far.

Post #669126 14th Jul 2023 7:32pm
View user's profile Send private message View poster's gallery Post Reply
Post Reply  Back to top
Page 1 of 1
All times are GMT + 1 Hour

Jump to  
Previous Topic | Next Topic >
Posting Rules
You cannot post new topics in this forum
You cannot reply to topics in this forum
You cannot edit your posts in this forum
You cannot delete your posts in this forum
You cannot vote in polls in this forum


Site Copyright © 2006-2024 Futuranet Ltd & Martin Lewis
fullfatrr.com RSS Feed - All Forums


Switch to Mobile site