| How To: Front and Rear differential oil change | |
I found the guide in the Wiki is incorrect in places and lacks photos. I was due to change my differential oils, so have written a step by step guide how to do it, with pictures.
Difficulty: Easy
Time: 2 hours
Tools Required:
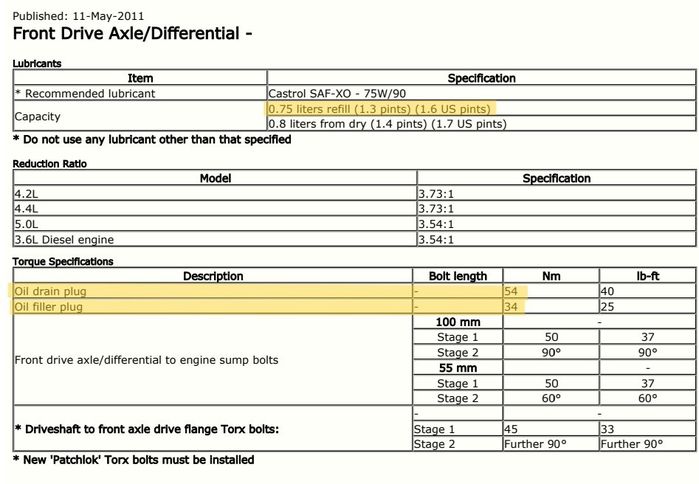
2 litres of 75W90 Fully Synthetic Oil (If you have the electronic rear differential [has a cylindrical motor on top with a cable coming from it], you will need a different specification and quantity as per the workshop manual - see specifications and quantity in the table below) https://www.smithandallan.com/product/smit...r-oil-4065
Small ratchet
Torque wrench
Small extension bar
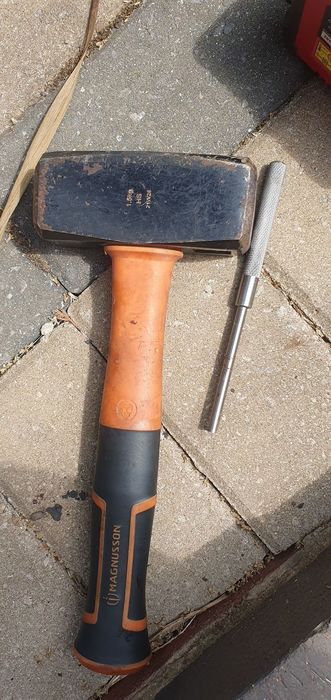
Hammer
Punch
Impact driver with socket bits / Impact wrench (optional but will make life considerably easier if rusted)
Blow torch (optional but will make life easier considerably easier if rusted) Any blow torch will help with this job, even a cheap kitchen one for those occasional creme brulees (£15)!
A MAPP gas gun would be one step better (kit available at Toolstation for £80) and Oxy-Acetylene would be best (however most of us at home don't have access to that).
Pair of palm gloves (wear https://www.toolstation.com/palm-gloves/p64335 these, they'll save your hands)
Latex gloves
Eye protection
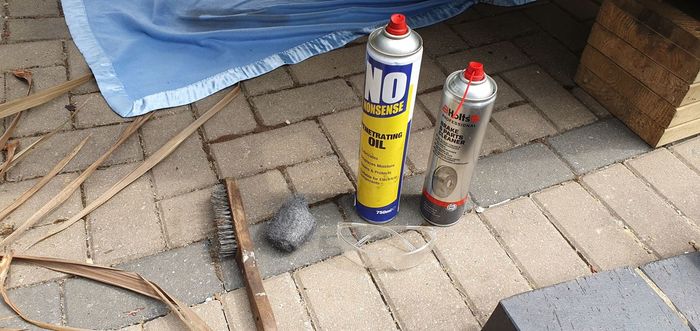
Brake cleaner
Wire brush
Wire Wool
Penetrating oil/WD40
Oil Drain pan
Your choice of anti-seize (optional but will make life easier when the next change is due)
Ramps and/or axle stands
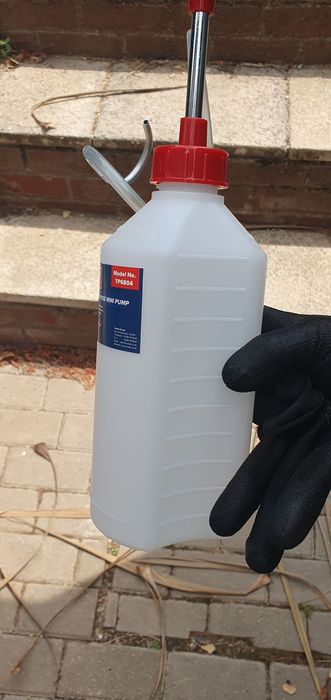
Mini oil fill pump https://www.sealey.co.uk/product/563720353...-mini-pump
Degreaser/White spirit
 | | Click image to enlarge |
Rear differential specific:
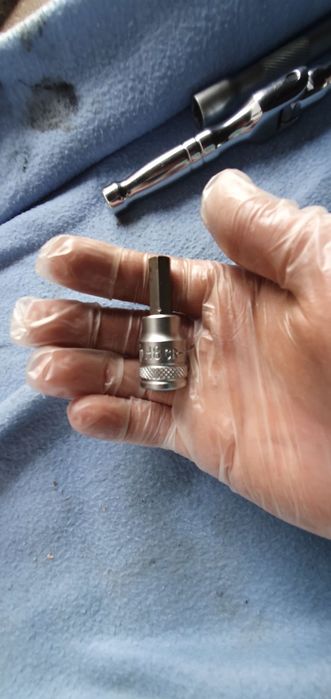
H8 Allen Bit for fill plug
3/8" ratchet head or extension bar for drain plug
 | | Click image to enlarge |
Front differential specific:
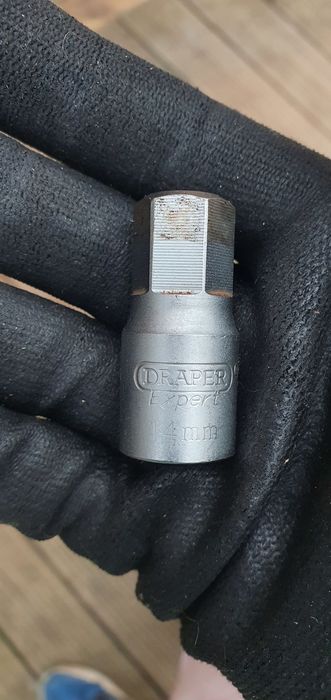
14mm Allen Bit (socket fitment) for both the fill and drain plugs
https://www.amazon.co.uk/dp/B0002BUTBW?psc...ct_details
 | | Click image to enlarge |
Persuasion Technique (Will be referred to in steps below)
A) Use a small ratchet on the relevant plug and attempt a slight tighten (1/32) of a turn and then attempt to loosen (1/16). If it doesn't move, don't force it and acknowledge it will require some persuasion.
- Apply some penetrating oil and allow to soak
- Firstly use the hammer and punch to give a few "shocks" to the plug and surrounding thread
 | | Click image to enlarge |
- Apply some more penetrating oil
- Re-attempt step A
- Use the blow torch to apply heat for 20-40 seconds to 1/4 of the stuck plug
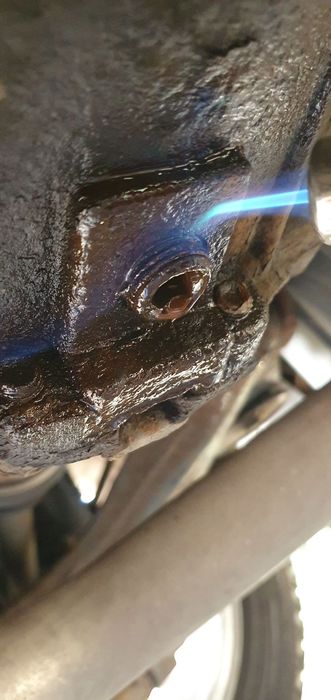 | | Click image to enlarge |
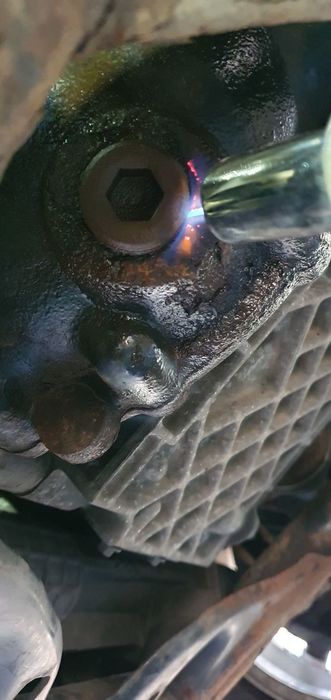 | | Click image to enlarge |
- Use the impact driver / impact wrench. Tighten slightly and watch closely for any movement. As soon as you see movement, stop. Now set the driver/wrench in reverse and watch for movement
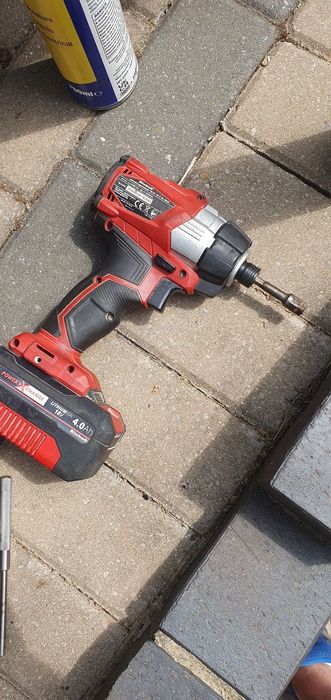 | | Click image to enlarge |
- If no movement, use the hammer and punch to apply a few more shocks
- Re-attempt the impact driver / impact wrench
- Apply some more penetrating oil
- Use a long bar (e.g. breaker bar) to encourage movement. Stop as soon as you see movement and return to using the impact driver/wrench in reverse. The knocking these devices provide will help shock the threads loose, whereas a breaker bar risks damaging the threads
 | | Click image to enlarge |
- Repeat the above steps until it comes free
All of my fill and drain plugs required the persuasion method - on the rear i only had to cycle once. On the front, i had to cycle 4 times. Gently does it and will ensure your plugs come out clean and with no damaged threads.
//// End of Persuasion Method \\\\
Steps Involved:
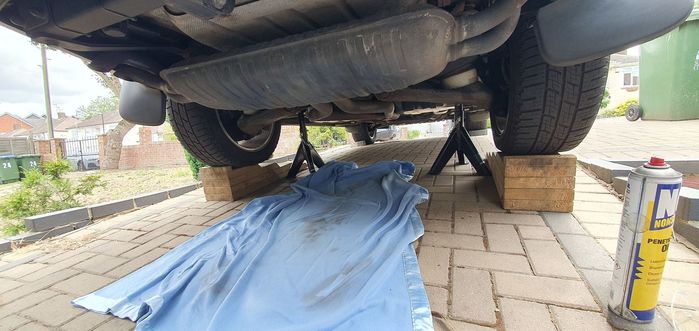
Step 1: Raise and secure the vehicle (15 mins)
Ramp the vehicle, put in off-road height, and place axle stands beneath the subframe on which you are currently working.
In this guide, I did the rear differential first, so i placed the axle stands beneath the rear sub frame.
Step 2: Clean around the fill and drain plugs (5 mins)
You don't want any rust or dirt making its way inside your diffs, so clean the surfaces around them with the wire brush and wire wool. This will also aid releasing the plugs. Spray some penetrating oil and allow to sit for a while.
-------- Rear Differential --------
Step 3: Loosen the plugs on the rear differential (20-30 mins)
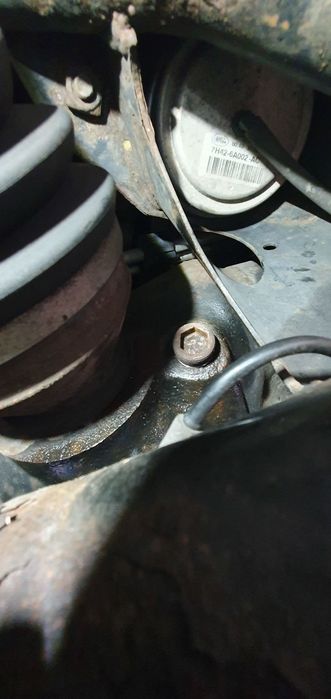
The rear differential plugs are easily accessible. The drain plug is on the bottom of the diff. The fill plug is on the right hand side of the diff.
First loosen the FILL plug. If you cannot remove the fill plug, you won't be able to fill the diff with new oil and should therefore stop and book the car into a garage.
Follow the Persuasion Method above. You require the H8 bit.
Once the plug can be loosened by hand, stop.
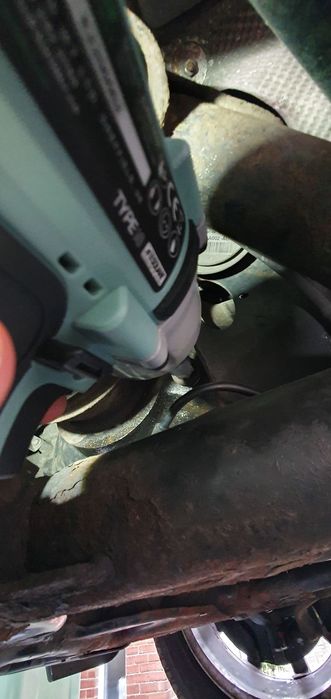
Now it's time to loosen the drain plug. Have an oil pan underneath in case of any escaping fluid. Follow the Persuasion Method above. You require the head of a 3/8" ratchet or socket bar. Once loosened, position the relevant drain pan or funnel underneath.
Step 4: Drain the rear diff oil (5 mins)
Now put on a plastic glove and gently unscrew the drain plug to drain the oil.
Now remove the fill plug.
 | | Click image to enlarge |
My waste oil was still clear, despite not having been changed in my ownership.
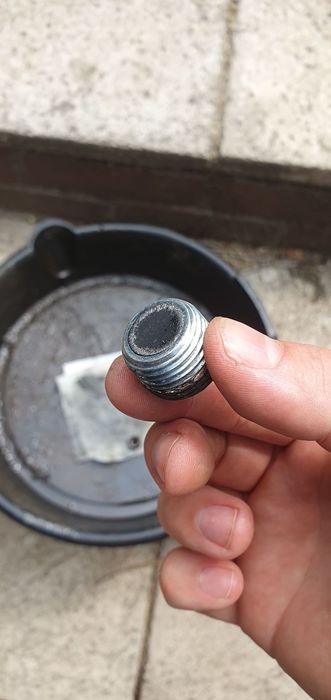
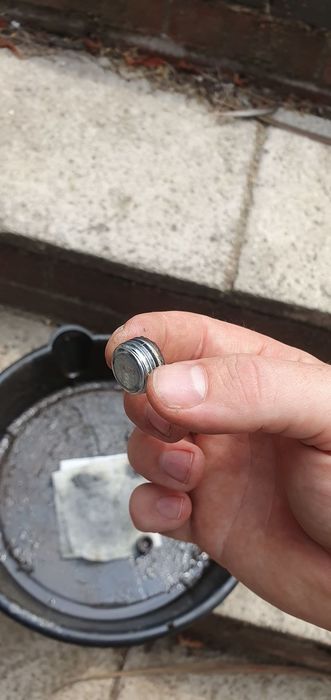
Step 5: Clean up the drain and fill plugs (2 mins)
The plugs will have old oil on, and the drain plug has a magnet on it. Use a cloth or paper towel to wipe this clean. Then give the plugs a good degrease in some brake cleaner.
 | | Click image to enlarge |
 | | Click image to enlarge |
Step 6: Re-fit the Drain plug (2 mins)
I recommend placing some anti-seize on the thread of the drain plug to make life easier for the next change.
Screw in the drain plug as far as you can by hand. Use the torque wrench with a 3/8" head or extension bar to tighten the drain plug to 28Nm.
 | | Click image to enlarge |
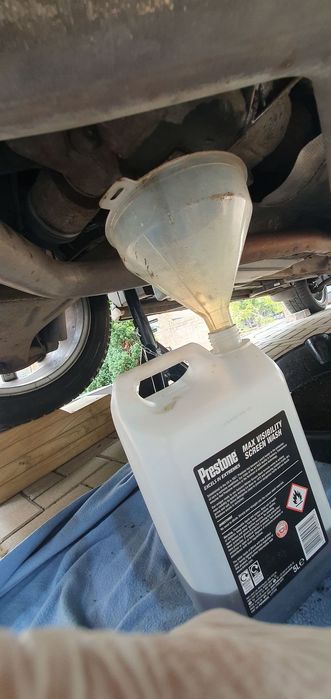
Step 7: Fill the rear differential (10 mins)
Use the correct fluid and quantity. Most vehicles have the open differential. The electronic differential can be identified due to a cylindrical motor on top, with an electrical cable.
Hook the fill hose from your fill bottle into the fill hole and pump in 1.14L of 75W90 (open differential). This will take a number of pumps, so switch arms once tired. I recommend filling 1.2L in the pump, as some oil will remain in the bottom of the pump and in the hose.

 | | Click image to enlarge |
Warning! Do NOT fill the diff until you begin getting drips from the fill hole. This is not the correct method and will result in your diffs being over-filled. You must fill them with the specified quantity, as stated in the specifications.
Step 8: Re-fit the fill plug (2 mins)
I recommend placing some anti-seize on the thread of the fill plug to make life easier for the next change.
Screw in the fill plug as far as you can by hand. Use the torque wrench with a the H8 bit to tighten the fill plug to 34Nm.
 | | Click image to enlarge |
Step 9: Clean Up (5 mins)
Now clean around the fill plugs with some cloth or paper towel, and douse the diff with brake fluid to remove any residue. Wipe any remaining residue from the bottom of the diff.
You are done with the rear differential.
-------- Front Differential --------
Warning! Remember to re-locate the axle stands to the front subframe.
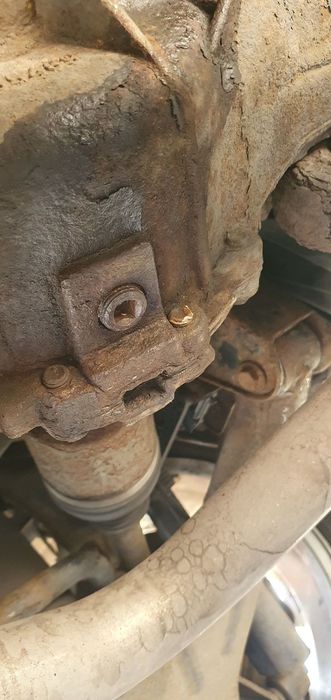
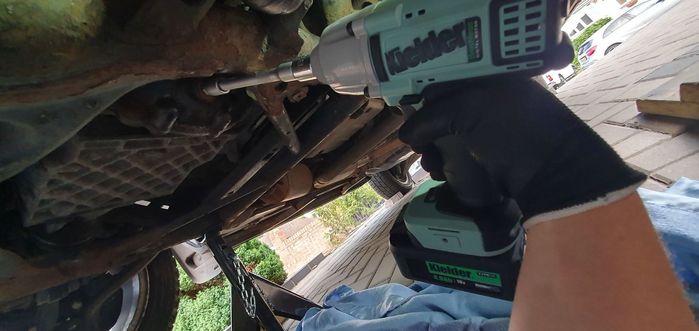
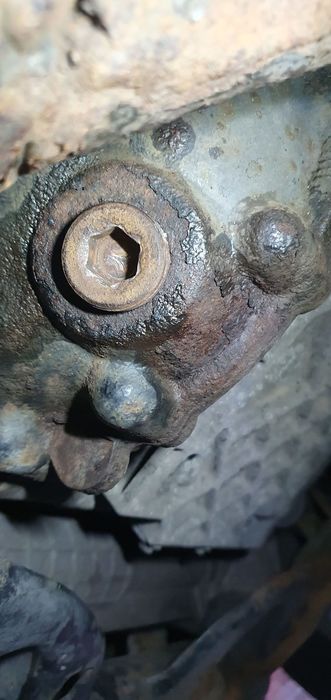
Step 10: Loosen the plugs on the front differential (20-30 mins)
First loosen the FILL plug. If you cannot remove the fill plug, you won't be able to fill the diff with new oil and should therefore stop and book the car into a garage.
Follow the Persuasion Method above. You require the 14mm Hex Allen socket bit.
The fill plug will require a small/medium socket extension, and can be accessed above the suspension arm, adjacent to the steering rack.
 | | Click image to enlarge |
 | | Click image to enlarge |
Once the plug can be loosened by hand, stop.
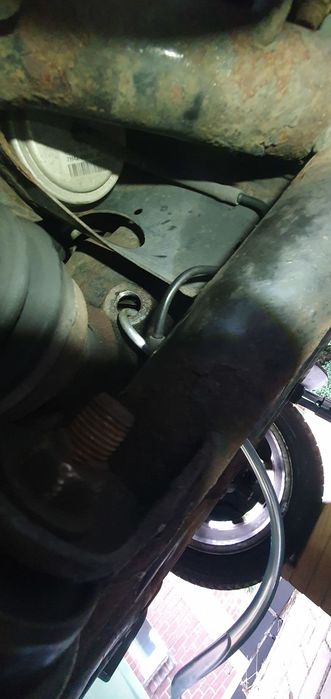
Now it's time to loosen the drain plug. Have an oil pan underneath in case of any escaping fluid. Follow the Persuasion Method above. You require the 14mm Hex Allen socket bit. Once loosened, position the relevant drain pan or funnel underneath.
The drain plug will require a small socket extension as below, pictured with the torque wrench:
Step 11: Drain the front diff oil (5 mins)
Now put on a plastic glove and gently unscrew the drain plug to drain the oil.
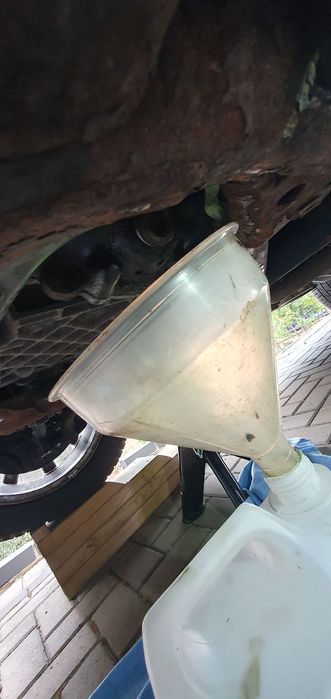 | | Click image to enlarge |
Now remove the fill plug.
You will notice the front diff drain point isn't right on the bottom, unlike the rear differential. I placed an oil extraction pump in here and only a few CM3 came out, so i would say draining is more than sufficient.
My waste oil had darkened. It is known that the front differential breather can take on water and there therefore be a mix of oil/water in the diff. In which case, no cause for concern, but do change the oil in the front diff again after driving a short distance, to help remove any remaining residue.
Step 12: Clean up the drain and fill plugs (2 mins)
The plugs will have old oil on, and the drain plug has a magnet on it. Use a cloth or paper towel to wipe this clean. Then give the plugs a good degrease in some brake cleaner.
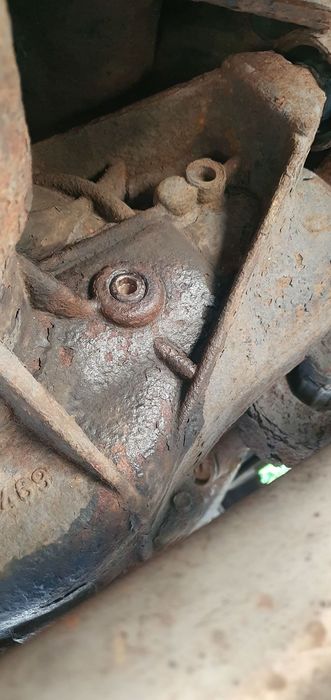
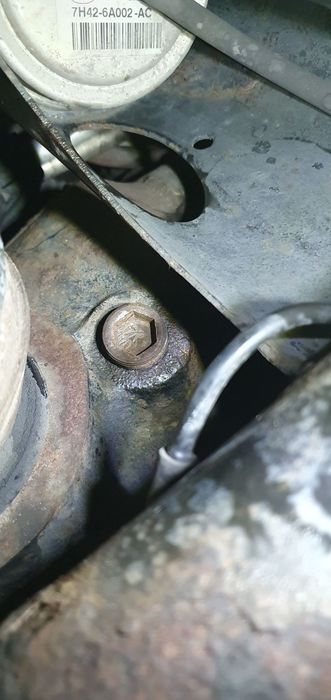
Step 13: Re-fit the Drain plug (2 mins)
I recommend placing some anti-seize on the thread of the drain plug to make life easier for the next change.
Screw in the drain plug as far as you can by hand. Use the torque wrench with the 14mm Hex Allen bit to tighten to 54Nm.
 | | Click image to enlarge |
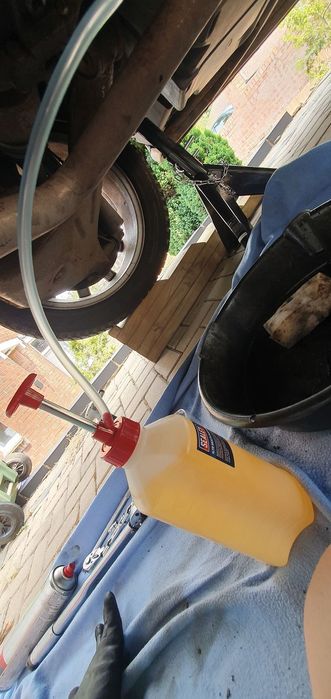
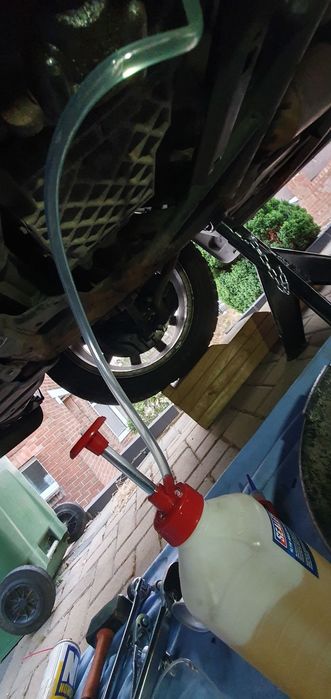
Step 14: Fill the front differential (10 mins)
Hook the fill hose from your fill bottle into the fill hole and pump in 0.75L of 75W90. This will take a number of pumps, so switch arms once tired. I recommend filling just over 0.8L in the pump, as some oil will remain in the bottom of the pump and in the hose.
 | | Click image to enlarge |
 | | Click image to enlarge |
Warning! Do NOT fill the diff until you begin getting drips from the fill hole. This is not the correct method and will result in your diffs being over-filled. You must fill them with the specified quantity, as stated in the specifications.
Step 15: Re-fit the fill plug (2 mins)
I recommend placing some anti-seize on the thread of the fill plug to make life easier for the next change.
Screw in the fill plug as far as you can by hand. Use the torque wrench with the 14mm Hex Allen bit and a small extension bar to tighten the fill plug to 34Nm.
 | | Click image to enlarge |
Step 16: Clean Up (10 minutes)
Now clean around the fill plugs with some cloth or paper towel, and douse the diff with brake fluid to remove any residue. Wipe any remaining residue from the bottom of the diff.
It's also time to clean up the mini oil fill pump. Pour some degreaser or white spirit inside the pump and pump through the fluid, plus give the unit a shake (whilst blocking the breather hole) to give it a good clean. Now leave the top off and allow to dry. Blow through the pick-up point of the pump to flush through any remaining fluid.
You are done with the front differential. 2015 Range Rover Autobiography 4.4 SDV8
Last edited by garyRR on 29th Jun 2023 10:15am. Edited 2 times in total
|