| First Successful Repair-Coolant Line | |
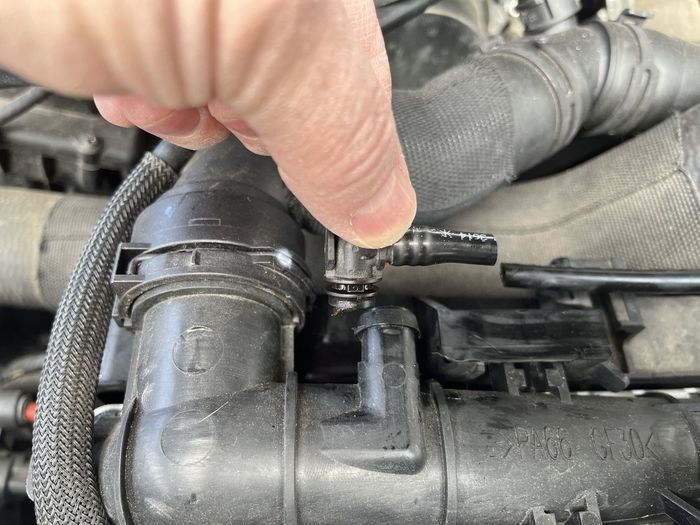
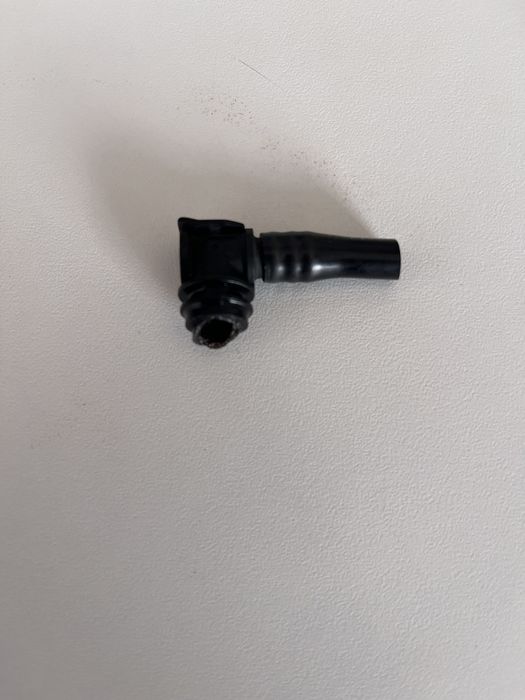
After a perfect run of 2000km across Europe to bring home The Duchess (of Bay Ridge), I had my first warning light. It was the dreaded low coolant. After checking the coolant level I discovered it was indeed low. I topped it up, the light went off and all was good. Until, I saw coolant dripping a few days later and the light reappeared. I resisted panicking and watched a couple YouTube videos beginning with how to remove the three front plastic covers. Having done that I immediately discovered the problem. Coolant was leaking from the connector connecting the line running from the coolant reservoir to the radiator, at the radiator. After removing the clip the connector immediately fell out and for fun, I managed to snap the very brittle 9-year-old plastic line. On inspection I noticed the plastic part which fits inside the radiator tube had simply disintegrated. I then searched YouTube and found a video posted by Robb’s Garage. ?si=yRQjtITEtPRD2Sua. Thank you, Robb! He had the same leak from the same location, different cause but that’s OK. I took a pic of the part number, went to my local JLR dealer in Romania who ordered it for around $40. It came in today and when I got it home, the angle where the line connects to the reservoir was a bit different than the original. As a result, the little clips didn’t supply enough pressure to keep it from leaking. I found some plumbing repair tape, gave it one wrap and replaced the clip. Worked perfectly. My first L405 repair complete! 😁
 | | Click image to enlarge |
|