Advertise on fullfatrr.com »

Home > Maintenance & Mods (L322) > HOWTO: TD6'02 FFRR "Changing" Glow Plugs
Post Reply  Down to end
Page 1 of 1
Print this entire topic · 
Joe90


Member Since: 29 Apr 2010
Location: Hampshire
Posts: 6399

England 
HOWTO: TD6'02 FFRR "Changing" Glow Plugs

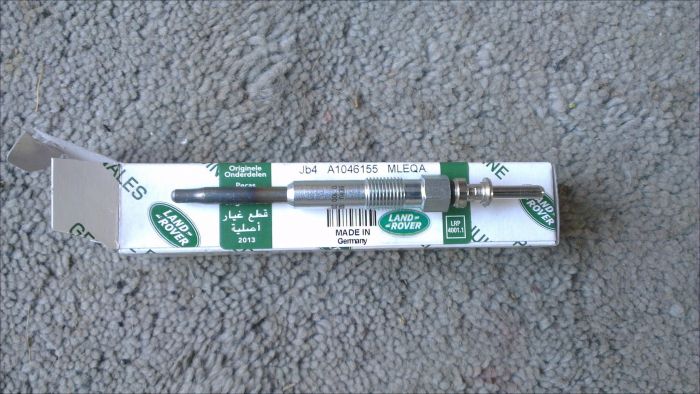
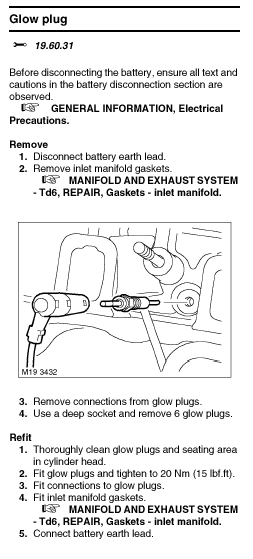
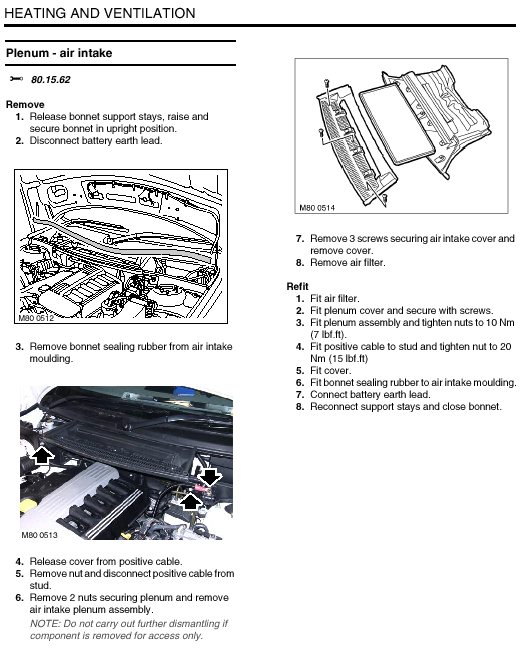
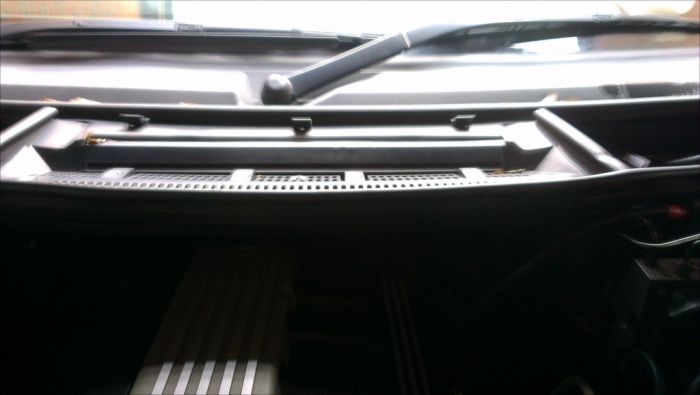
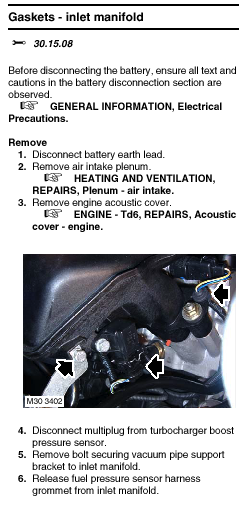
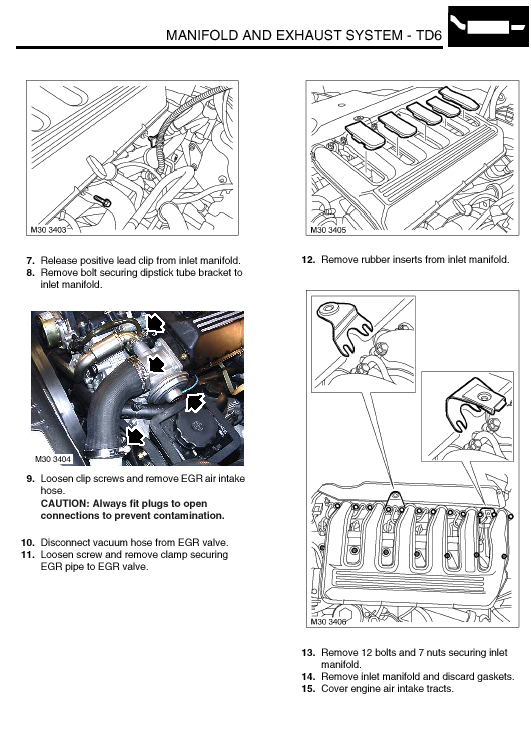
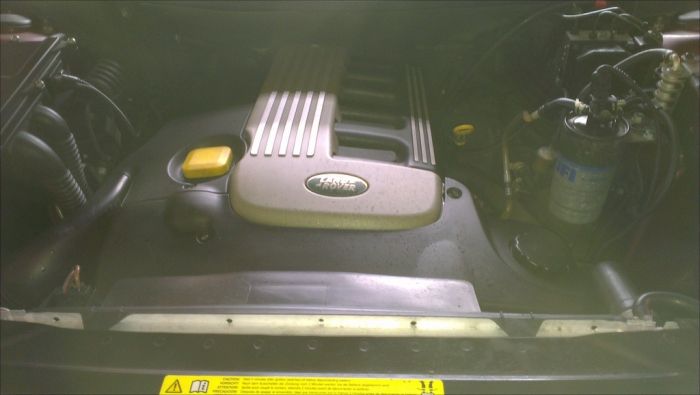
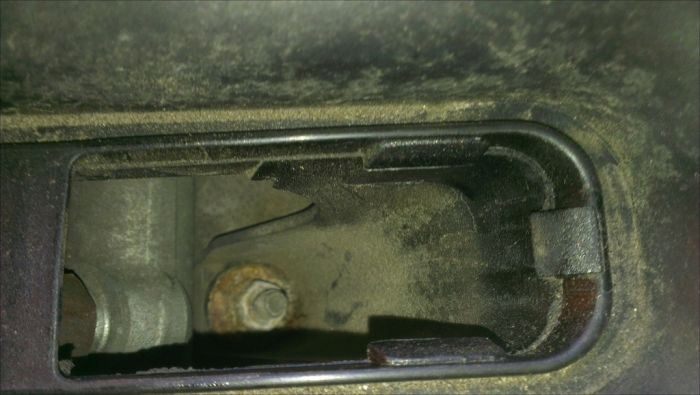
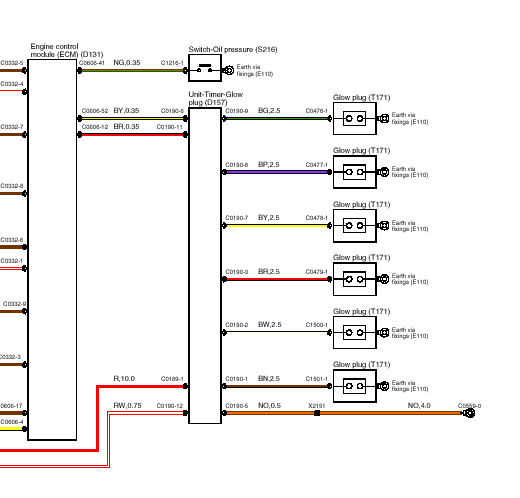
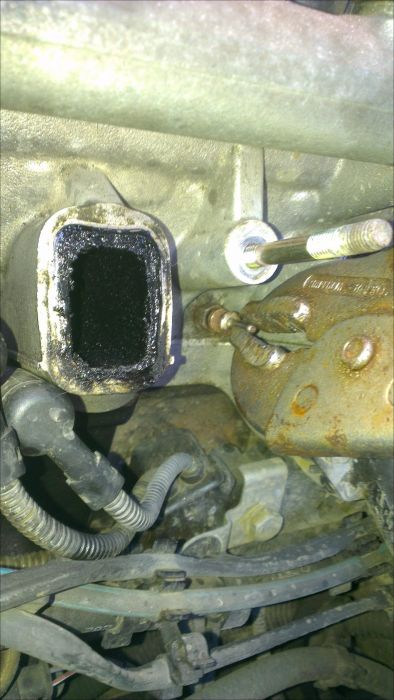
Since I have had the car (5 years +) diagnostics have always thrown up a glow plug relay code, but I have never done anything about it as everything has been working fine. This year, @ December 2013, the car started to take longer to start, several turns of the starter motor instead of almost instant start up. So I checked the relay, and there was a nice big click/clonk when the ignition was turned to start the car. So I then had the relay connector off and tested the juice to each of the glow plugs. No juice running through 4 out of the 6, so this seemed the likely problem (although others had pointed to fuel problems, but car was running well aside from startup). New glow plugs duly purchased from Dan @ Duckworths @ ฃ16 a pop ( I did find cheaper afterwards on the bay of e ). I have included extracts from RAVE to assist with instructions and visuals (my efforts at taking photos down the back of the engine were pants!)

This is what a new one looks like:


A fine Saturday in March found me tackling the swap out, all was going so well......

Click image to enlarge


Tools needed:

10mm socket
10mm ring and open ended spanner
10mm long socket with 1/2" drive (this fitted over the end of the glow plug properly)
Click image to enlarge

11mm socket
Socket extensions
Socket Ratchet
5.5mm allen key
Flat bladed screwdriver
Crosshead screwdriver
13mm ring spanner
19mm ring spanner
7mm ring spanner


1. Get car up to running temperature, set car at access height, bonnet up, put in service mode if you want for easier access
(Disconnect battery if you want - not necessary if careful)
2. Remove air intake plenum chamber
Click image to enlarge

2.1 Remove the rubber strip across the front of the air intake
2.2 Undo the two 13mm nuts holding the plenum chamber in place
2.3 Undo the start cable running from the emergency startup point, and set aside
2.4 Pull on the plenum chamber andit should come off the bolts up and out


Click image to enlarge

Click image to enlarge


3. Remove front and centre acoustic covers from engine
3.1 Release air intake from side of car to air filet casing
3.2 Undo the 3 allen keys holding front acoustic cover in place
3.3 Remove power steering fluid lid
3.4 Remove front cover and replace PAS lid
3.5 Undo allen key and remove at the back of the centre (grey) acoustic cover and remove cover


4. Disconnect exhaust and air intake from EGR
4.1 Undo large jubilee clip on rubber hose and release hose from EGR
4.2 Undo jubilee clamp from EGR pipe and release pipe


5. Release dipstick retainer and starter cable from inlet manifold
5.1 Undo and remove 10mm bolt to release dipstick support
5.1 Pull on starter cable clip to release


6. Release turbo charger pipe retainer, multiplug and grommet at back of inlet manifold
This is fun! Easiest way is to place something thick and soft over the top of the engine that you can lie on, then with a mirror, inspection lamp and tools on the scuttle, lie on top of the engine with head almost in the air intakes at the front. I used a folded up poly tarpaulin and an old fleece. Comfy!
6.1 Use mirror to see, and 10mm spanner to undo and remove bolt
6.2 Use screwdriver to release wire clip (catch it!) and release multiplug
6.3 Release rubber grommet from housing
It all becomes clear when you get your head in there!
Click image to enlarge


7. Undo 12 bolts along the top of the inlet manifold
7.1 Use 10mm socket for these. They are all captive so just get them wobbling
7.2 There are two mountings one halfway along, one at the far end, make sure you grab these before they disappear off into the bowels of the engine bay


8. Remove the five rubber covers on top of the inlet manifold

9. Undo and remove the 7 nuts in the recesses below the rubber covers
9.1 Use 11mm socket for these, a standard one should be deep enough. If the nuts done come out with the socket, it is a fiddle to grab them out of the recess.


10. Remove the inlet manifold and EGR
10.1 Needed a bit of levering, I used wooden hammer handle under the forward end of the manifold and got it wiggling. Then lift up and off and set aside.


11. Find the glow plugs! They are down there. Look like spark plug caps, next to the lower row of holes.


12. Press on either side of the glow plug connector turn and lift off

12.1 You can now test the glow plugs again to find out exactly which cylinders are working/not working (not evident from RAVE wiring diagrams as to which coloured wire goes where)


Video of glow plug checking
www.youtube.com/embed/d7Pr5ihN5p0?rel=0

13. Clean around the glow plug seat area

14. Using the deep 10mm socket, extensions,ratchet etc., apply pressure and undo the glow plug

At this point one of two things will happen:

a) the glow plug will turn in its thread and come out
b) the hex on the glow plug will turn and break off the glow plug. It is either off to the indie/ specialist to have this removed, or to purchase an extractor kit of some kind and do it yourself. Can be done with head in place.

Two came out, as per a) and were the two that working already !!, the other four broke their hexes, as per b) but one of these appeared to come back to life in the process (but may have been a short!) Smile

(More on what I eventually do about the broken is another story)

15. Once glow plugs are removed have another clean up around the plug seats (suction is good).

16. If you have one, you can use a reamer on the glow plug shaft in the cylinder

17. Apply small amount of grease to the glow plug shaft and thread

18. Fit new glow plug

19. Refit is a reversal of dismantling

Job will probably take @ 2 to 2 1/2 hours. After my efforts, I was back where I started with 2 working glow plugs, and possibly a third. Starting up not improved a smidgen. Oh well...

More to come! .
Experience is the only genuine knowledge, but as time passes, I have forgotten more than I can remember Wink
Volvo V70 P2 2006 2.4 Petrol 170bhp Estate SE
MG Midget Mk1 1962

Previous: L322 Range Rover TDV8 3.6 2008; L322 Range Rover TD6 3.0 2002; P38A Range Rover V8 1999

Post #247297 9th Mar 2014 11:15pm
View user's profile Send private message View poster's gallery Reply with quote
Joe90


Member Since: 29 Apr 2010
Location: Hampshire
Posts: 6399

England 
PART 2 - Removing the Broken ones

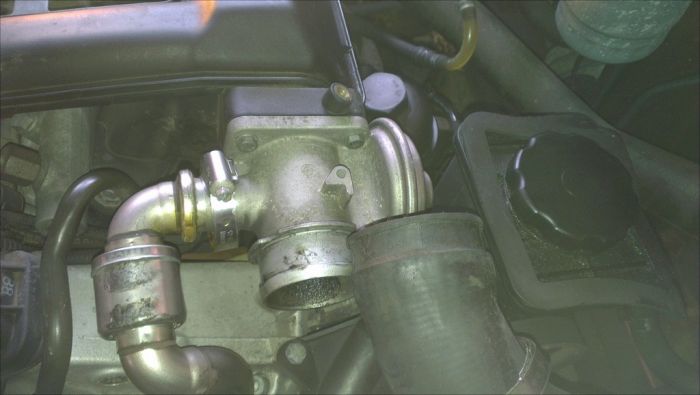
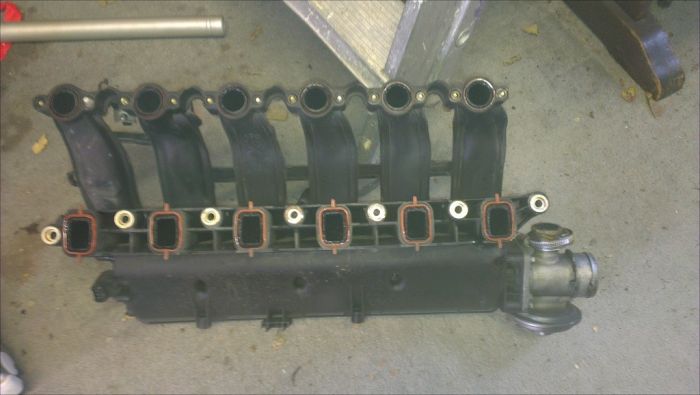
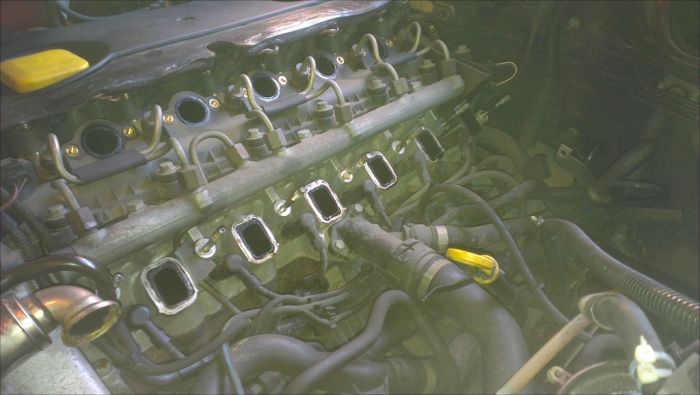
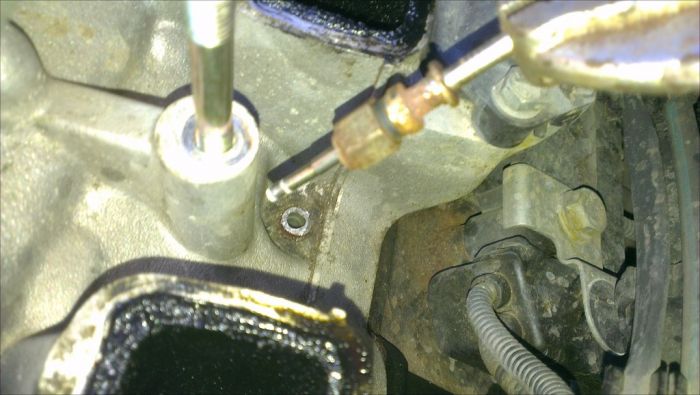
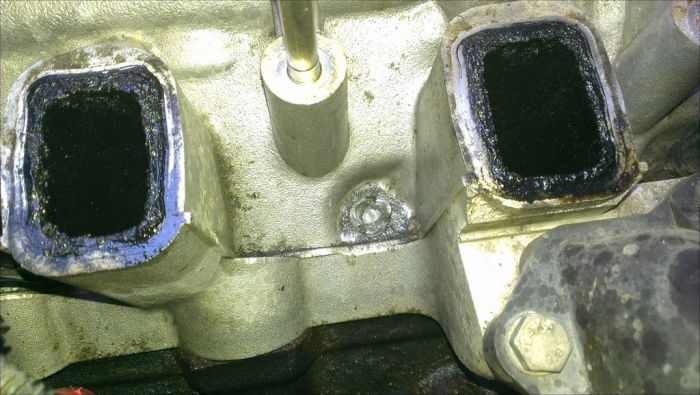
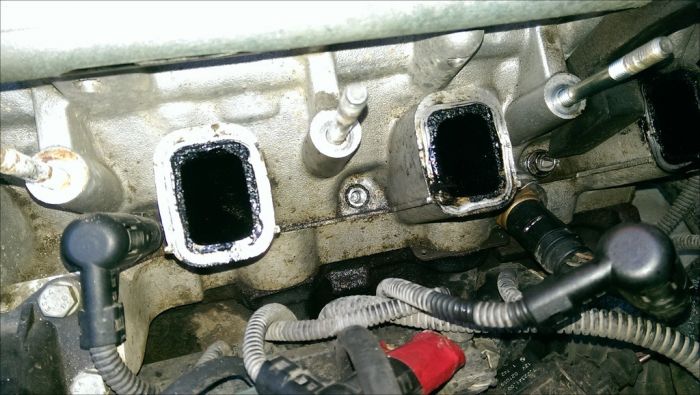
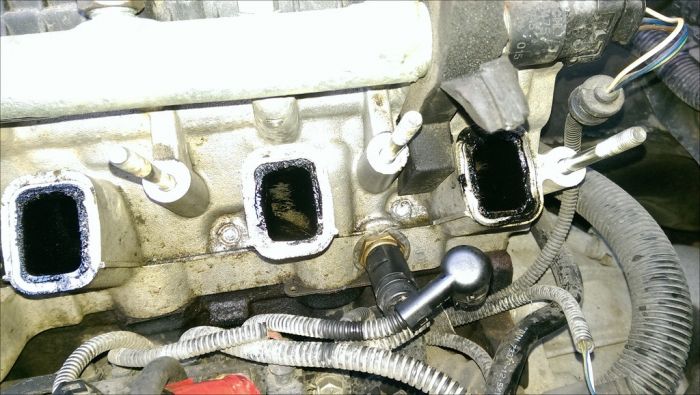
Inlet manifold off in a jiffy this week, and raising the bonnet to service mode helped a bit too (no more bumps on the head and better access over the wing)

Started on No. 2 glow plug, warm engine, lots of releasing fluid

I had bought a set of Sealey screw extractors (ฃ6) to try out as a starting point, often known as easyouts. Had to scrabble about in my toolbox to make up a socket to turn the thing, given it had a square end, 3/8" or 1/4". A bit of jiggery pokery with my mini socket sets and an allen key and I had something to work with.

More heat, more releasing fluid a few taps with a punch to help "vibrate" the area, and started applying pressure, by "bouncing" the turn without too much pressure. It started to squeak and move! Once the thread was undone, needed a tug to get the plug out of the hole. Cleaned up fiited new plug with a bit of copper ease, connector back on, on to number 3.

Affix mole grips to top of central core and twist, it will snap off, hopefully at the base down in the glow plug, saving you having to drill out a space for the extractor.

Click image to enlarge


Screw in extractor (anti-clockwise!) and start to tighten and bounce


Number 2 out!


Ah, screw extractor firmly lodged in the old glow plug. So out with the hacksaw to release!

Repeated procedure with No. 3 until - crack (I knew it would happen sooner or later) the screw extractor broke off in the hole.


Not what I wanted. However, now have three and not two working and new. Next instalment to follow Smile .
Experience is the only genuine knowledge, but as time passes, I have forgotten more than I can remember Wink
Volvo V70 P2 2006 2.4 Petrol 170bhp Estate SE
MG Midget Mk1 1962

Previous: L322 Range Rover TDV8 3.6 2008; L322 Range Rover TD6 3.0 2002; P38A Range Rover V8 1999

Post #248657 16th Mar 2014 7:51pm
View user's profile Send private message View poster's gallery Reply with quote
Joe90


Member Since: 29 Apr 2010
Location: Hampshire
Posts: 6399

England 
PART 3

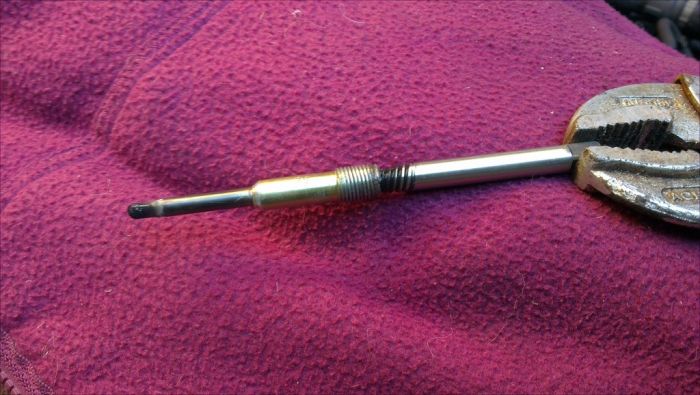
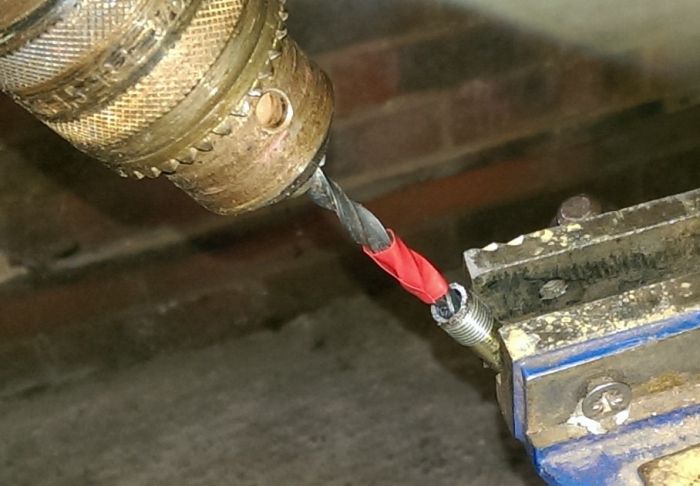
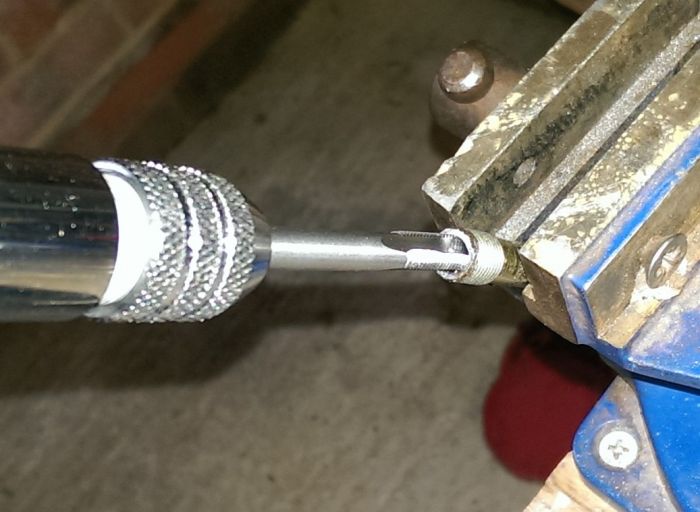
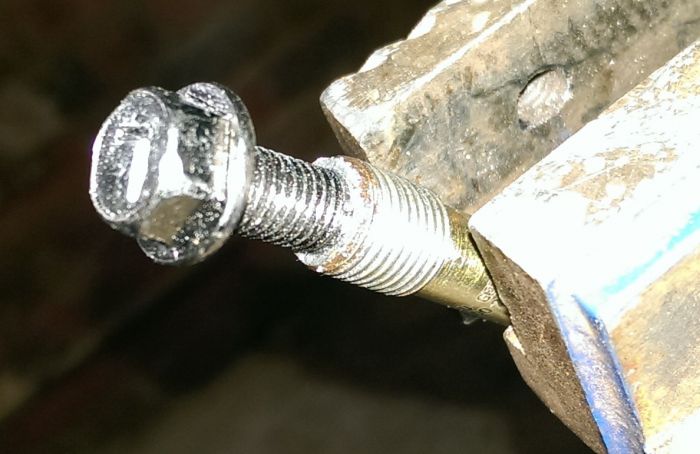
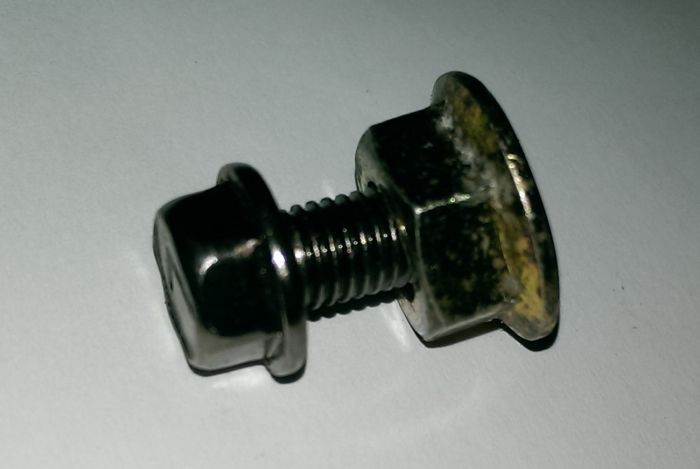
I sourced a left handed 7mm tap and some 7mm left handed bolts from eBay (China via Australia !) and decided to do a test run on the bench.

First off drill out the inside of the glow plug with a 6mm bit. Measure the depth you want to drill to and mark off your drill bit with a pen or tape.


Next tap out the resultant hole with the left handed thread. (I used a bit of WD40 for lubrication)


Then test out the bolt.


Finally a spacer is needed, I used an old flat bottomed flared nut I had lying around and drilled out the thread so the bolt would fit.


Now to tackle the ones on the car, once it stops raining"

One glowplug all nicely drilled out and tapped with left handed thread


Ah well, have to concede defeat at the moment. My left handed bolts sheared off under only a little pressure. ONe drilled out nice and quick, the other I couldn't get a centre on so is staying put for now.

Glowplugs 5 & 6 with sheared off left handed bolts Sad


The one with the sheared off "easyout" took a couple of hours of work to grind out with tungsten carbide burrs, but the hole is too big now for my left handed tapper thread, so it looks like either into a specialist workshop or buy the kit for ฃ120.

Therefore have a couple of brand new, from LR TD6 glowplugs going spare if anyone needs one Smile .
Experience is the only genuine knowledge, but as time passes, I have forgotten more than I can remember Wink
Volvo V70 P2 2006 2.4 Petrol 170bhp Estate SE
MG Midget Mk1 1962

Previous: L322 Range Rover TDV8 3.6 2008; L322 Range Rover TD6 3.0 2002; P38A Range Rover V8 1999

Last edited by Joe90 on 13th Apr 2014 3:20pm. Edited 3 times in total

Post #248658 16th Mar 2014 7:51pm
View user's profile Send private message View poster's gallery Reply with quote
northernmonkeyjones


Member Since: 24 Mar 2012
Location: derby
Posts: 8479

United Kingdom 2016 Range Rover Autobiography SDV8 Santorini Black

Could you reverse the extractor out, put a counter (left hand) threaded tap into the hole, then put a counter threded bolt into the hole with a nut on it, tighten the nut down onto the to the top of the plug, clamping the "extractor" in place, you could the use a socket bar to remove the whole lot by screwing counterclockwise. There is nothing that can't be fixed with a hammer๐Ÿ˜œ๐Ÿ˜œ
FFRR 4.4 SDV8 Autobiography Santorini Black.
Fiat 500x 1.4 multiair Lounge 2015
2010 LR D4 Commercial 2.7 TDV6

Post #248662 16th Mar 2014 8:58pm
View user's profile Send private message View poster's gallery Reply with quote
Joe90


Member Since: 29 Apr 2010
Location: Hampshire
Posts: 6399

England 

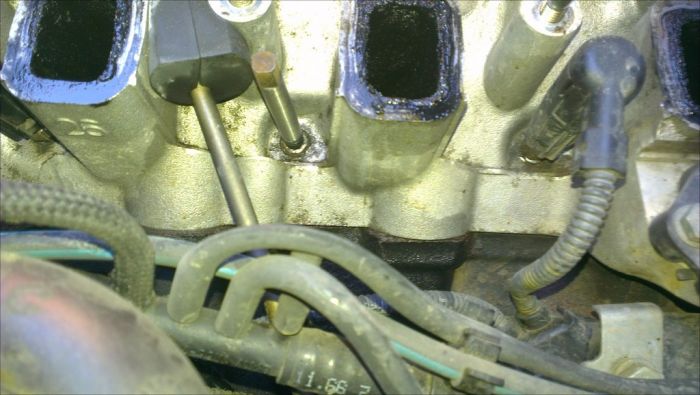
That's the plan, hopefully on order a left handed tap and some left handed bolts, a tungsten carbide drill and burr to get the broken off extractor out. The easyouts have their place, but it is not for things in tight! .
Experience is the only genuine knowledge, but as time passes, I have forgotten more than I can remember Wink
Volvo V70 P2 2006 2.4 Petrol 170bhp Estate SE
MG Midget Mk1 1962

Previous: L322 Range Rover TDV8 3.6 2008; L322 Range Rover TD6 3.0 2002; P38A Range Rover V8 1999

Post #248672 16th Mar 2014 10:07pm
View user's profile Send private message View poster's gallery Reply with quote
northernmonkeyjones


Member Since: 24 Mar 2012
Location: derby
Posts: 8479

United Kingdom 2016 Range Rover Autobiography SDV8 Santorini Black

Thumbs Up There is nothing that can't be fixed with a hammer๐Ÿ˜œ๐Ÿ˜œ
FFRR 4.4 SDV8 Autobiography Santorini Black.
Fiat 500x 1.4 multiair Lounge 2015
2010 LR D4 Commercial 2.7 TDV6

Post #248675 16th Mar 2014 10:12pm
View user's profile Send private message View poster's gallery Reply with quote
stan
Site Moderator


Member Since: 13 Jul 2010
Location: a moderate moderated moderator moderating moderately in moderation
Posts: 34915

United Kingdom 

excellent write up Tim [as usual Thumbs Up ]..........wiki'fied. ... - .- -.


click link for ,

FORUM WIKI

HOW TO ฦŽ๊“•โˆ€๊“•O๊“ค PICS

workshop manual downloads are in our wiki

.

Post #248677 16th Mar 2014 10:16pm
View user's profile Send private message View poster's gallery Reply with quote
nicedayforit


Member Since: 11 Jun 2011
Location: Beside the Solway
Posts: 3954

England 2004 Range Rover Vogue Td6 Giverny Green

Pity about the broken extractor but your pictures show just how much oily c Censored p the egr system introduces into the inlet manifold and beyond. Makes you wonder who dreamed up such a stupid idea to assist in reducing exhaust emissions.
I remember the days when inlet manifolds used to be relatively clean.

Post #248679 16th Mar 2014 10:24pm
View user's profile Send private message View poster's gallery Reply with quote
arron


Member Since: 22 Sep 2010
Location: lincolnshire
Posts: 123

United Kingdom 2005 Range Rover Vogue Td6 Java Black

can i offer some advise, if you start the engine and leave it to idle to get the engine up to temp without the manifold on then try and remove them. when i did mine they all where flexing and felt like they where going to break until i ran the engine up to temp then they came out nice and easy.

Post #248699 16th Mar 2014 11:41pm
View user's profile Send private message View poster's gallery Reply with quote
Joe90


Member Since: 29 Apr 2010
Location: Hampshire
Posts: 6399

England 

@ nicedayforit

Yes, a lot of oily muck. If I get the time the manifold will get a gunk bath but then there is all the mess in the head!

@ arron

Worth a try getting it up to temp that way, wasn't sure how it would run without the manifold in place? Also there is an electrical connector for a sensor at the back of the manifold. Had car at normal temp and running whilst I started dismantling, but I guess you can't ever have enough heat on the glow plugs can you!

Also, nice write up over on bimmerforums about the same problem

https://www.google.com/url?q=http://www.bi...2gc1vOFtUg .
Experience is the only genuine knowledge, but as time passes, I have forgotten more than I can remember Wink
Volvo V70 P2 2006 2.4 Petrol 170bhp Estate SE
MG Midget Mk1 1962

Previous: L322 Range Rover TDV8 3.6 2008; L322 Range Rover TD6 3.0 2002; P38A Range Rover V8 1999

Post #248704 17th Mar 2014 12:29am
View user's profile Send private message View poster's gallery Reply with quote
Cam-Tech-Craig


Member Since: 04 Aug 2011
Location: Gloucestershire
Posts: 16170

England 2015 Range Rover SVAutobiography SDV8 Loire Blue

Ya see Joe, everyone thinks my job is easy... Whistle Whistle Whistle

Next time, try changing turbo's on a TDV8 Shocked Shocked Shocked


Great write up sir Bow down Thumbs Up

Post #248706 17th Mar 2014 1:10am
View user's profile Send private message View poster's gallery Reply with quote
Joe90


Member Since: 29 Apr 2010
Location: Hampshire
Posts: 6399

England 

I'd have to get a TDV8 first Rolling with laughter .
Experience is the only genuine knowledge, but as time passes, I have forgotten more than I can remember Wink
Volvo V70 P2 2006 2.4 Petrol 170bhp Estate SE
MG Midget Mk1 1962

Previous: L322 Range Rover TDV8 3.6 2008; L322 Range Rover TD6 3.0 2002; P38A Range Rover V8 1999

Post #248734 17th Mar 2014 10:26am
View user's profile Send private message View poster's gallery Reply with quote
Joe90


Member Since: 29 Apr 2010
Location: Hampshire
Posts: 6399

England 
Update - see third post

FFRR 1 - 0 Joe90 .
Experience is the only genuine knowledge, but as time passes, I have forgotten more than I can remember Wink
Volvo V70 P2 2006 2.4 Petrol 170bhp Estate SE
MG Midget Mk1 1962

Previous: L322 Range Rover TDV8 3.6 2008; L322 Range Rover TD6 3.0 2002; P38A Range Rover V8 1999

Post #254219 13th Apr 2014 3:04pm
View user's profile Send private message View poster's gallery Reply with quote
yorkie3259


Member Since: 29 Apr 2012
Location: Bridgwater
Posts: 9

United Kingdom 2002 Range Rover Vogue Td6 Alveston Red
Snapped below the thread and stuck

Hi Joe did you ever remove or are you still running with reduced glow plugs.
I had an odd hesitation when the engine was cold. Autodata scan suggested faulty glow plug relay so changed that, no other fault codes (except erg which is disconnected) still happening, so I've just tried to change the glow plugs once I'd got to them, all except one were dead.
5 done one has snapped below the thread with the inner electrode still protruding.
Engine starts fine, it did with 5 dead glow plugs and I've just returned from a really cold trip.

Tried to pull the electrode out and with the engine running it won't move, soaked in penetrating oil carb cleaner and freezer spray, lots of bad language etc.. So tempted to put the threaded part back in and leave it.

Else it may be head off time, anyone done that?

yorks Do I really have time to tinker with one of these

Post #431632 19th Mar 2017 4:03pm
View user's profile Send private message View poster's gallery Reply with quote
Joe90


Member Since: 29 Apr 2010
Location: Hampshire
Posts: 6399

England 

@ yorkie, nice colour. Wink

Never went any further, have three working glow plugs or so I believe Shocked

Not really needed in our climate, but if you are having starting problems (e.g. engine turns over a fair bit before starting, problem is more likely to be injectors. Do a leak test. .
Experience is the only genuine knowledge, but as time passes, I have forgotten more than I can remember Wink
Volvo V70 P2 2006 2.4 Petrol 170bhp Estate SE
MG Midget Mk1 1962

Previous: L322 Range Rover TDV8 3.6 2008; L322 Range Rover TD6 3.0 2002; P38A Range Rover V8 1999

Post #431680 19th Mar 2017 10:36pm
View user's profile Send private message View poster's gallery Post Reply
Post Reply  Back to top
Page 1 of 1
All times are GMT + 1 Hour

Jump to  
Previous Topic | Next Topic >
Posting Rules
You cannot post new topics in this forum
You cannot reply to topics in this forum
You cannot edit your posts in this forum
You cannot delete your posts in this forum
You cannot vote in polls in this forum


Site Copyright © 2006-2024 Futuranet Ltd & Martin Lewis
fullfatrr.com RSS Feed - All Forums


Switch to Mobile site