Advertise on fullfatrr.com »

Home > Technical (L322) > Deployable Side Steps Fitting
Post Reply  Down to end
Page 1 of 1
Print this entire topic · 
JPHC


Member Since: 07 Sep 2015
Location: Kent
Posts: 303

United Kingdom 2007 Range Rover Supercharged 4.2 SC V8 Java Black
Deployable Side Steps Fitting

May or may not have bought some deployable side steps from ducky Dan today Whistle Whistle
They've been reduced to £450, so a real bargain as it will add that to the cars value i think.

Planning on fitting them myself! Has anyone here done it already and care to share the experience?

Also, where can i find a fitting guide for them? MY07.


Might do a little How-To if it isn't too hard. Jordan


'56 SC 4.2 β€˜21-Current
'56 SC 4.2 β€˜16-β€˜18

Post #417808 13th Dec 2016 11:10pm
View user's profile Send private message View poster's gallery Reply with quote
stan
Site Moderator


Member Since: 13 Jul 2010
Location: a moderate moderated moderator moderating moderately in moderation
Posts: 34916

United Kingdom 

theres info in the wiki Thumbs Up ... - .- -.


click link for ,

FORUM WIKI

HOW TO ΖŽκ“•βˆ€κ“•Oκ“€ PICS

workshop manual downloads are in our wiki

.

Post #417809 13th Dec 2016 11:14pm
View user's profile Send private message View poster's gallery Reply with quote
northernmonkeyjones


Member Since: 24 Mar 2012
Location: derby
Posts: 8479

United Kingdom 2016 Range Rover Autobiography SDV8 Santorini Black

Been there, done that, got the badge, wrote the wiki. Thumbs Up

Was for a 2010-> but the principle is the same, the wiring is slightly different but there best tip is to get a tap and die set! There is nothing that can't be fixed with a hammer😜😜
FFRR 4.4 SDV8 Autobiography Santorini Black.
Fiat 500x 1.4 multiair Lounge 2015
2010 LR D4 Commercial 2.7 TDV6

Post #417810 13th Dec 2016 11:19pm
View user's profile Send private message View poster's gallery Reply with quote
JPHC


Member Since: 07 Sep 2015
Location: Kent
Posts: 303

United Kingdom 2007 Range Rover Supercharged 4.2 SC V8 Java Black

Thanks Stan just seen them. I definitely checked the Wiki before i posted, even searched the forum. Perhaps i was spelling it wrong. It's been a log day Laughing Jordan


'56 SC 4.2 β€˜21-Current
'56 SC 4.2 β€˜16-β€˜18

Post #417811 13th Dec 2016 11:21pm
View user's profile Send private message View poster's gallery Reply with quote
andygts


Member Since: 16 May 2015
Location: Yorkshire
Posts: 336

United Kingdom 2013 Range Rover Autobiography SDV8 Luxor

the wiki stuff is for 2010>

this is 07-09 specific
https://topix.landrover.jlrext.com/topix/c...oupId=1660

You should get an installation guide and a user guide with the kit though Current
2013 Range Rover Autobiography SDV8
2001 Porsche 911 Turbo
_____________________________________
Previous
2007 Range Rover Vogue SE TDV8
2002 Range Rover HSE TD6
+ Many other non LR products


Last edited by andygts on 13th Dec 2016 11:27pm. Edited 1 time in total

Post #417813 13th Dec 2016 11:26pm
View user's profile Send private message View poster's gallery Reply with quote
stan
Site Moderator


Member Since: 13 Jul 2010
Location: a moderate moderated moderator moderating moderately in moderation
Posts: 34916

United Kingdom 

no problem jordon Thumbs Up mark has done a great diy write up and as he recommends , get a tap set for the rusted/dirty screw holes.. ... - .- -.


click link for ,

FORUM WIKI

HOW TO ΖŽκ“•βˆ€κ“•Oκ“€ PICS

workshop manual downloads are in our wiki

.

Post #417814 13th Dec 2016 11:26pm
View user's profile Send private message View poster's gallery Reply with quote
JPHC


Member Since: 07 Sep 2015
Location: Kent
Posts: 303

United Kingdom 2007 Range Rover Supercharged 4.2 SC V8 Java Black

You made it look easy Mark!!!! Hope i don't struggle too much.

You really recommend a tap and die then? I read your wiki, but without being at the same point in the process it's hard to visualise what you are doing. What exactly do you need to re-thread?

Never used a tap and die set, although i understand the concept. Not sure its a good idea for me Laughing Laughing


Andy - Thanks for that. Will look now. Jordan


'56 SC 4.2 β€˜21-Current
'56 SC 4.2 β€˜16-β€˜18

Post #417816 13th Dec 2016 11:31pm
View user's profile Send private message View poster's gallery Reply with quote
northernmonkeyjones


Member Since: 24 Mar 2012
Location: derby
Posts: 8479

United Kingdom 2016 Range Rover Autobiography SDV8 Santorini Black

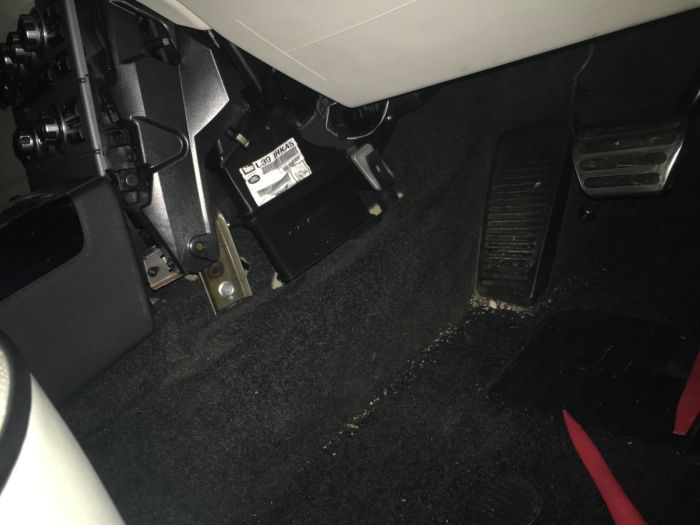
There are pre installed threaded holes on the cills and main rails that steps bolt to. These were rusted to the point that they wouldn't take a bolt, a quick run through with a tap and the bolts went straight in. Dead easy to tap out the rust. Thumbs Up on the main bolt holes and passenger side cill holes, the drivers side is a bit diffeeent as the air tank is blocking access slightly. There were some bolts in the rear holes on this side already so I used these on the front set of holes as they were easier to get in the rusted holes at the front. There is nothing that can't be fixed with a hammer😜😜
FFRR 4.4 SDV8 Autobiography Santorini Black.
Fiat 500x 1.4 multiair Lounge 2015
2010 LR D4 Commercial 2.7 TDV6

Post #417825 14th Dec 2016 12:39am
View user's profile Send private message View poster's gallery Reply with quote
JPHC


Member Since: 07 Sep 2015
Location: Kent
Posts: 303

United Kingdom 2007 Range Rover Supercharged 4.2 SC V8 Java Black
Update

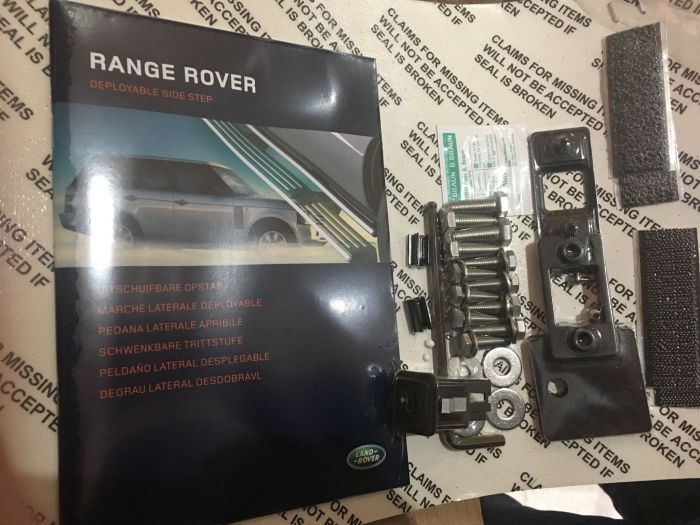
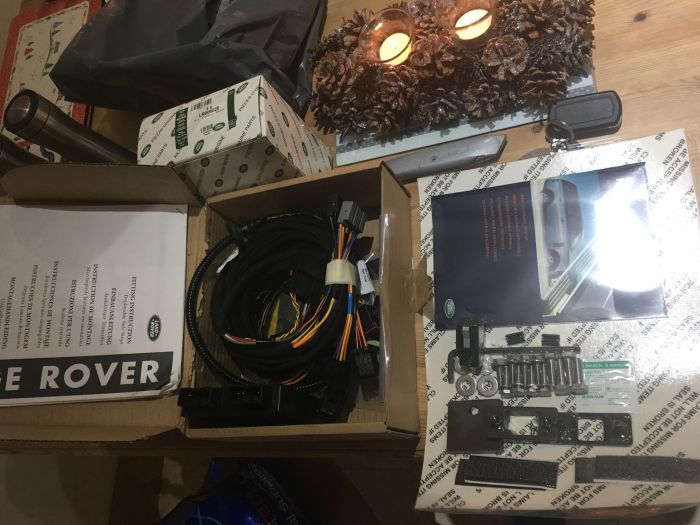
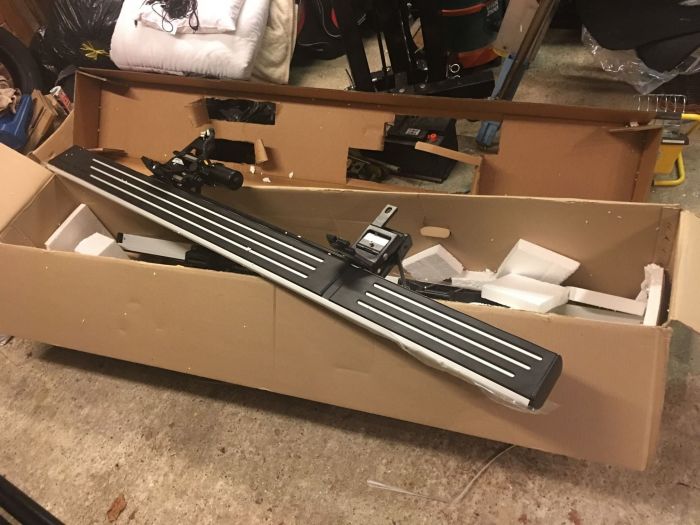
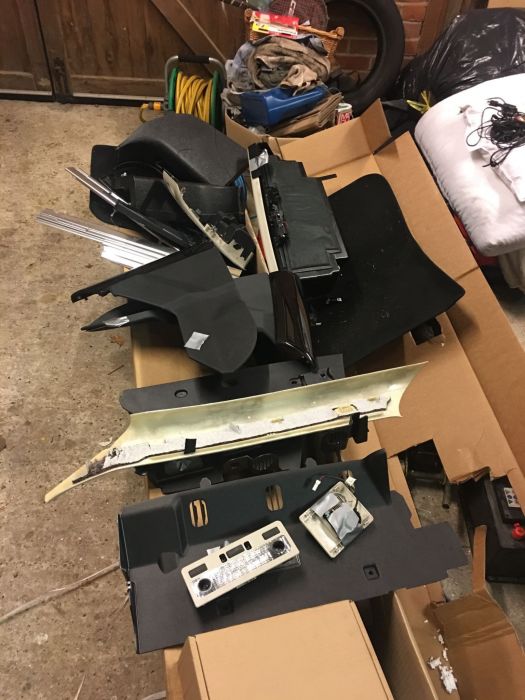
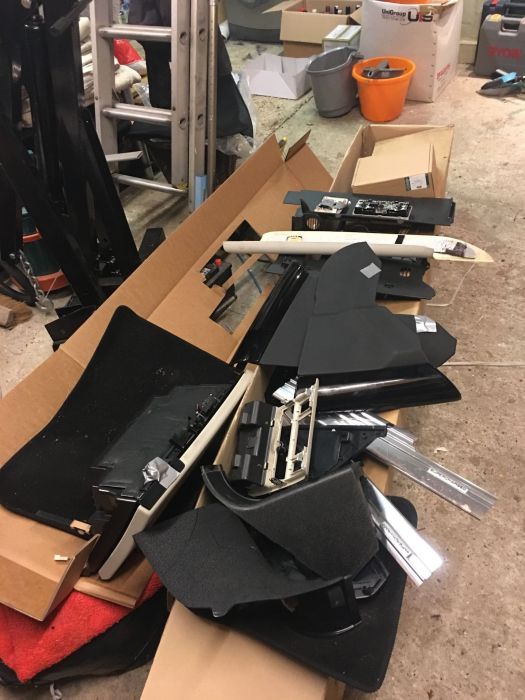
Got a delivery from Santa aka Dan From Duckworths yesterday! Thumbs Up

Very excited. Studied the very long install manual and feel confident. Finish work for the year Wednesday so will try and get them on ASAP! Very Happy


 Jordan


'56 SC 4.2 β€˜21-Current
'56 SC 4.2 β€˜16-β€˜18

Post #418813 20th Dec 2016 3:11pm
View user's profile Send private message View poster's gallery Reply with quote
stan
Site Moderator


Member Since: 13 Jul 2010
Location: a moderate moderated moderator moderating moderately in moderation
Posts: 34916

United Kingdom 

nice toolbox.. Thumbs Up

keeps the milk for the coffee nice and cold.. Laughing ... - .- -.


click link for ,

FORUM WIKI

HOW TO ΖŽκ“•βˆ€κ“•Oκ“€ PICS

workshop manual downloads are in our wiki

.

Post #418815 20th Dec 2016 3:22pm
View user's profile Send private message View poster's gallery Reply with quote
supershuttle


Member Since: 20 Mar 2011
Location: Lancashire
Posts: 3641

England 2013 Range Rover Autobiography SDV8 Luxor

Every time I see one of these posts about steps it serves to remind me I made the right decision (for me anyway) - get someone else to fit them Rolling with laughter Geoff

Post #418825 20th Dec 2016 3:51pm
View user's profile Send private message View poster's gallery Reply with quote
JPHC


Member Since: 07 Sep 2015
Location: Kent
Posts: 303

United Kingdom 2007 Range Rover Supercharged 4.2 SC V8 Java Black

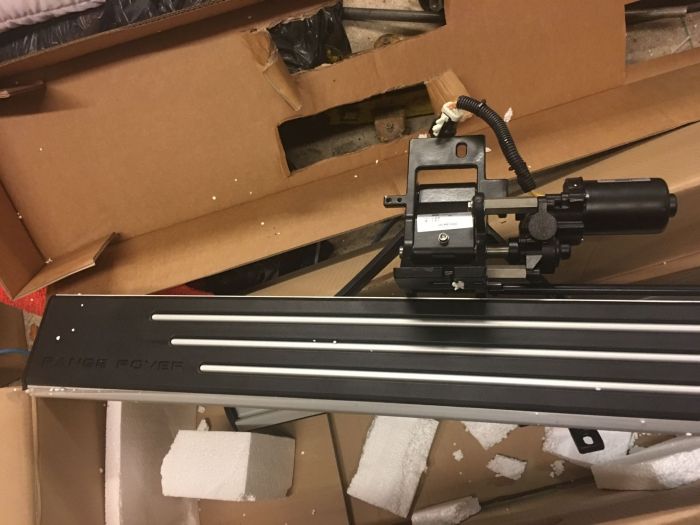
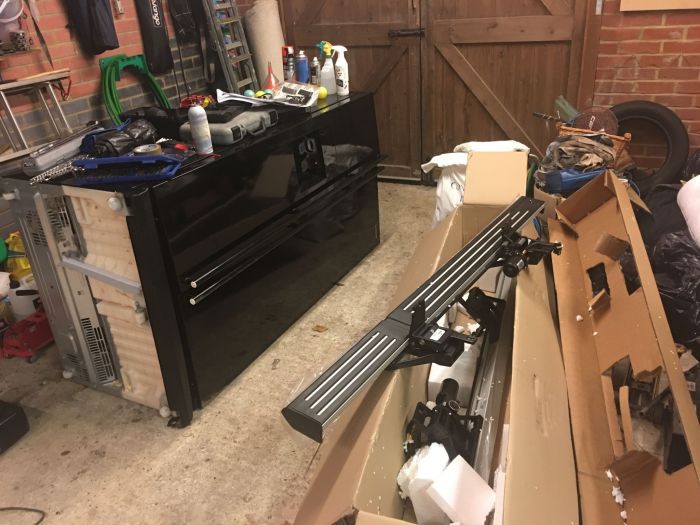
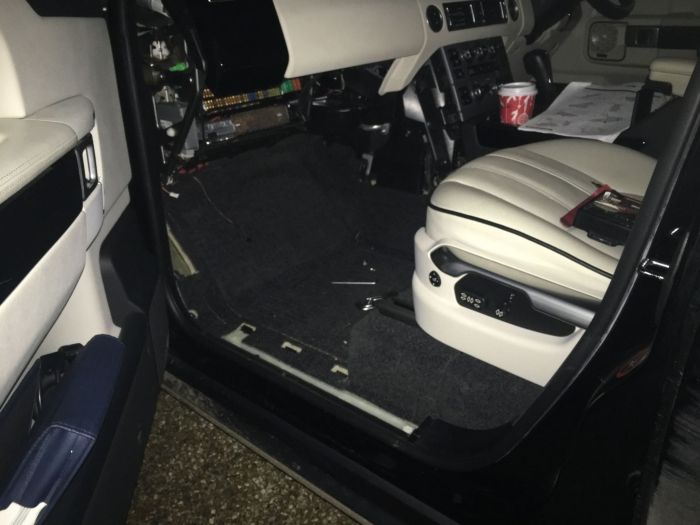
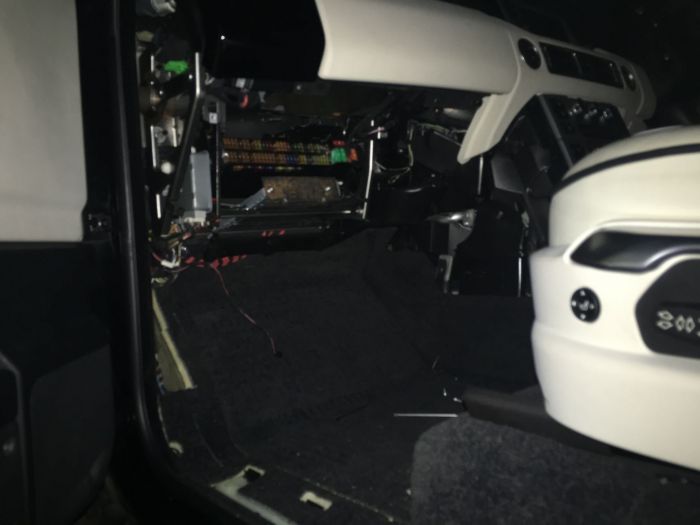
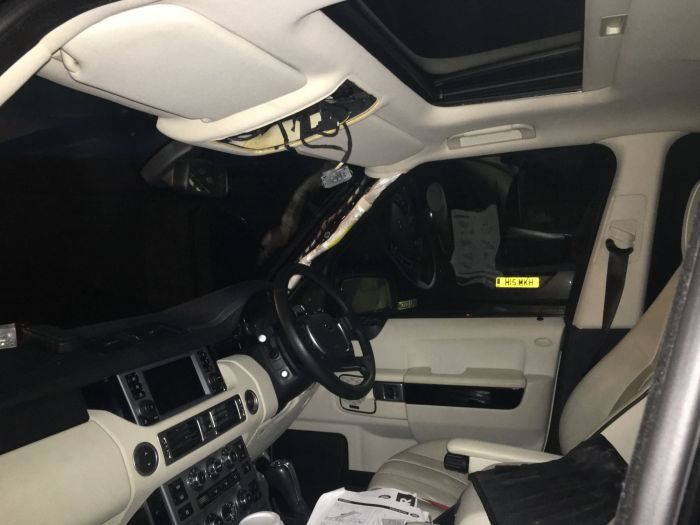
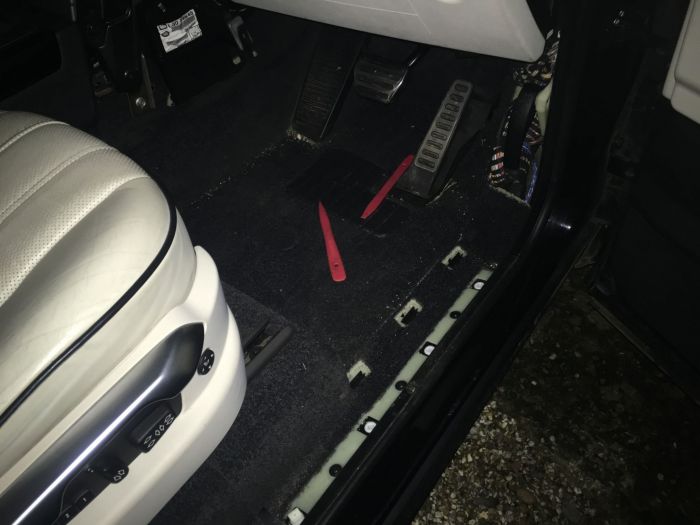
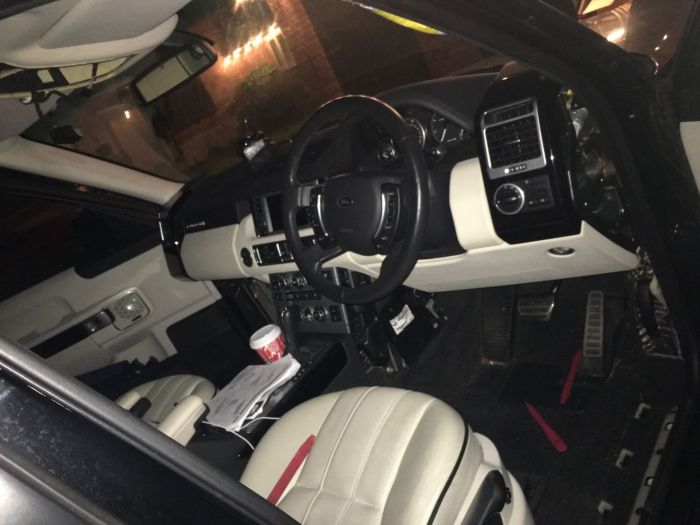
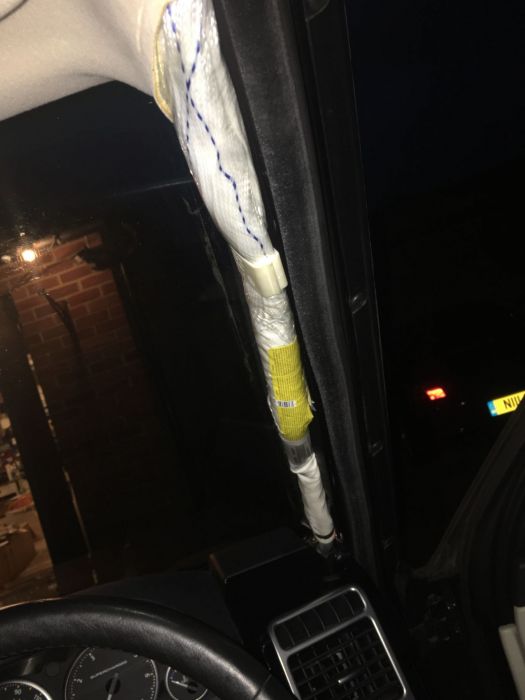
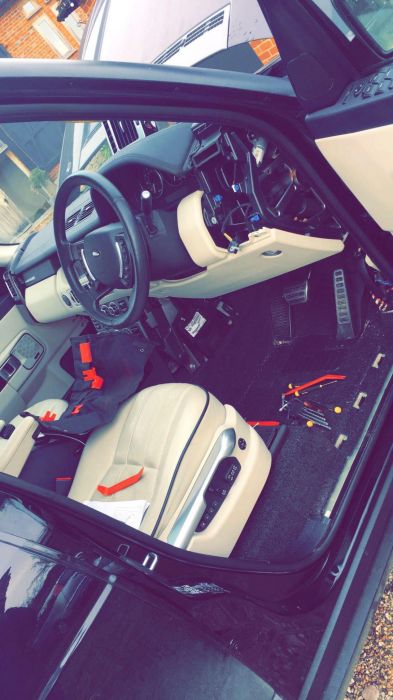
Ok. So I've got so far and now got stuck. It's been relatively easy and I've taken a few pics to document the process.


However, I've got to the point where you put the steps on the floor and connect them up to put them in access mode for fitting. Mine do nothing! No led on the button either Big Cry followed the instructions to the T. So just retracing my steps to work out if I've missed anything. How annoying! Jordan


'56 SC 4.2 β€˜21-Current
'56 SC 4.2 β€˜16-β€˜18

Post #419462 24th Dec 2016 3:32pm
View user's profile Send private message View poster's gallery Reply with quote
JPHC


Member Since: 07 Sep 2015
Location: Kent
Posts: 303

United Kingdom 2007 Range Rover Supercharged 4.2 SC V8 Java Black

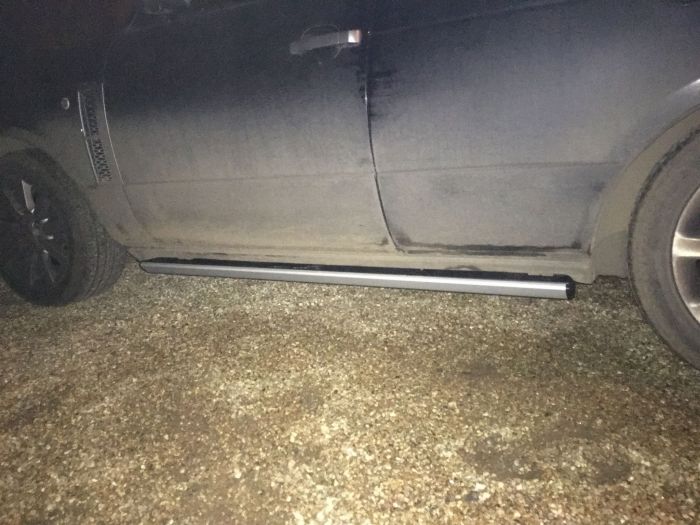
Completed the job. The problem i was having was with the instructions. When connecting the steps for the first time to put them in access mode. You need to keep the DSS button held WHILE you turn the ignition, which i wasnt doing. This will liven them up and they worked fine after that. Kind of like a initiation step!
The manual does show this but doesn't make it clear it needs to be held and i was letting go too early.

Took a break from the computer over Xmas hence the delay in reply but finished the job in 6-7 hours. LR quote 4 so didn't do too bad in my eyes. Definitely a 2 day job!

The manual is pictures only and none of them make much sense until you are on that step. A fair amount of assumptions and common sense required, but very happy with the end result!

I unfortunately lost all of the pics for the how-to but do have the pics from my phone:

This will give you a good idea of the sort of dismantling that is required.


These red trim removal tools really saved the day. I would recommend a set to anyone doing this job!


When you install the button to the roof make sure you pull as much slack through as possible. I didn't the first time and the button wasnt smooth in operation because the wire was taught. Run as much of the loom up the A pillar as possible and any slack can be stored in the roof.


This is once the A pillar trim is removed. This is part of the reason why you MUST disconnect the battery when performing these steps. This is the airbag. Although unable to go off without the power connected, still be VERY careful of it!

Click image to enlarge


Click image to enlarge


This is the majority of the parts that have to be taken off. Only broke a few interior clips and a part of the glove box. It looks scary, but just being gentle and taking your time is required.

Click image to enlarge


Click image to enlarge


All finished. Look funny being so clean with such a dirty car! Mine is a 07MY and the steps fitted without any modification to the car at all. Also, you will need 2 people to mount the steps to the underside of the car and i also recommend a ratchet spanner (10mm) to do them up as the space is very tight once they are mounted.
I didnt need to re-tap the holes on the underside of my car but i would suggest getting a tap and die set anyway as you wont want to be driving your RR to the shops when its half dismantled!


Looks much better now Thumbs Up They act as a nice bodykit/side skirt when not deployed!
They deploy at unlock and when a door is opened.

Click image to enlarge
 Jordan


'56 SC 4.2 β€˜21-Current
'56 SC 4.2 β€˜16-β€˜18

Post #420960 3rd Jan 2017 3:53pm
View user's profile Send private message View poster's gallery Reply with quote
stan
Site Moderator


Member Since: 13 Jul 2010
Location: a moderate moderated moderator moderating moderately in moderation
Posts: 34916

United Kingdom 

good job sir Thumbs Up

Post #420965 3rd Jan 2017 4:09pm
View user's profile Send private message View poster's gallery Reply with quote
proser


Member Since: 20 Jul 2015
Location: Stafford
Posts: 452

United Kingdom 2012 Range Rover Westminster TDV8 Orkney Grey

Nice job Thumbs Up

gives me inspiration for the weekend Regards
Mark

2012 Westminster
GONE - 2007 Java Black FF Vogue, with Ivory interior

Post #420973 3rd Jan 2017 5:17pm
View user's profile Send private message View poster's gallery Post Reply
Post Reply  Back to top
Page 1 of 1
All times are GMT + 1 Hour

Jump to  
Previous Topic | Next Topic >
Posting Rules
You cannot post new topics in this forum
You cannot reply to topics in this forum
You cannot edit your posts in this forum
You cannot delete your posts in this forum
You cannot vote in polls in this forum


Site Copyright © 2006-2024 Futuranet Ltd & Martin Lewis
fullfatrr.com RSS Feed - All Forums


Switch to Mobile site