j_rov
Member Since: 10 Jan 2017
Location: Warwickshire
Posts: 386


|
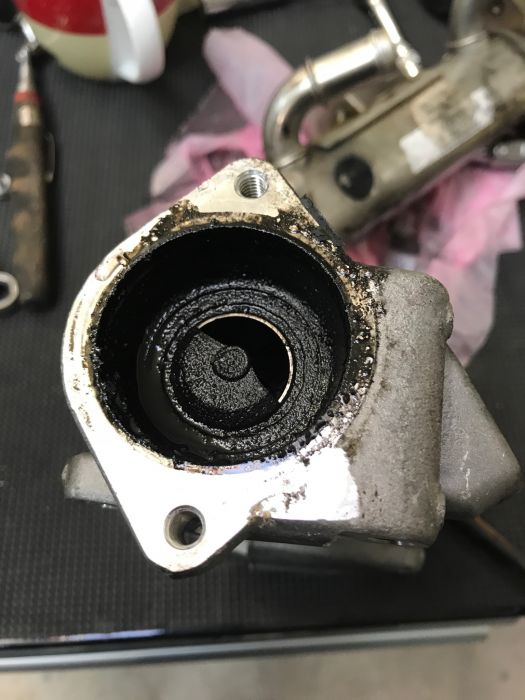
I recently had my EGR valve fail and get ingested by the induction system causing very rough running on the RH bank.
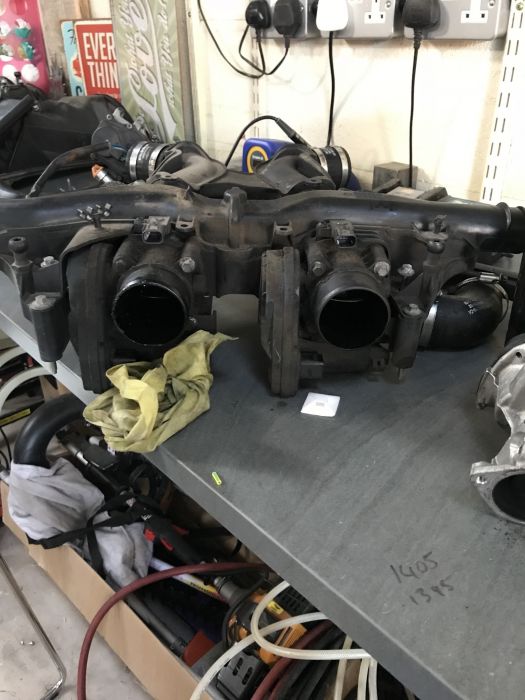
Since damage and contamination was caused to the RH turbo, EGR cooler, intake manifold, breather, intercooler and all hoses, I decided it was an engine out job to put it right and while I was at it, preventative maintenance on the other turbo etc.
Shopping around for quotes, it really was cost prohibitive even to use an specialist. An engine from a dealer was in the region of £10k and I had no trust for the £3k "all-in recon and engine swap out" eBay ads, and since I had so many ancillaries to change, thought their costs would escalate massively.
I sourced a replacement engine with heads and I decided my most cost-effective course of action was to do it myself. This started with research. A lot of it. This is a very informative forum and I quickly found members who had done what I was about to attempt. Also I used the Land Rover Workshop Manual from the Wiki which describes at “high level” each task that must be accomplished to remove, strip down, rebuild and reinstall the engine. I’ve highlighted high level because the manual is just that! Phrases like “To install, reverse the removal procedure” are prevalent, as they are in those Haynes manuals! That said, the manual has been a great resource. I’ve Googled what I couldn’t find out in there.
Firstly, I mentally removed the engine by following the steps in the engine removal section and cross-referenced sections within. This revealed to me just how complicated this was going to be and how many extra components, replacement parts & tools I was going to need. Not only that, but a lot of the procedures specify Land Rover special tools which are next to impossible to borrow and extremely expensive to purchase.
This task wasn’t going to be for the faint-hearted, but given my recent experience with the two “professional” organisations that had tried to diagnose and fix the issue, I decided to proceed and do it myself, not only saving thousands of pounds but to give me confidence that the job was done properly. There was one special tool I would definitely need – the engine removal brackets – so I ordered them over the net and while waiting for them to arrive, made a start.
Fortunately, I’ve got a double-width garage and collected a lot of tools over the years, so adequate room and pretty much what I needed to get started with the strip down.
I also had muscle on hand for when the going got heavy in the form of a couple of friends who lived locally and enjoyed getting stuck in.
Under an L322 bonnet, you’ll know that there is literally no room to do anything, and nowhere to get a hand or tool in without quite a lot of strip down.
One of the very first jobs is to recover the air-con refrigerant. I called a local firm who emptied my system for free, on the proviso that I’d use them again to refill it, which I thought was very far.
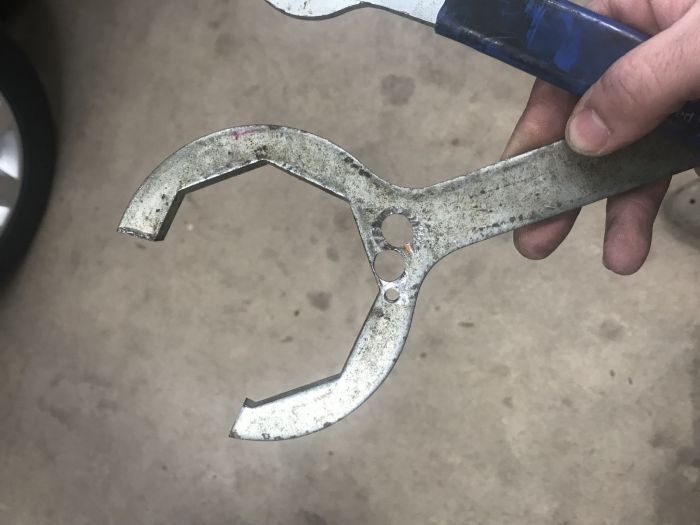
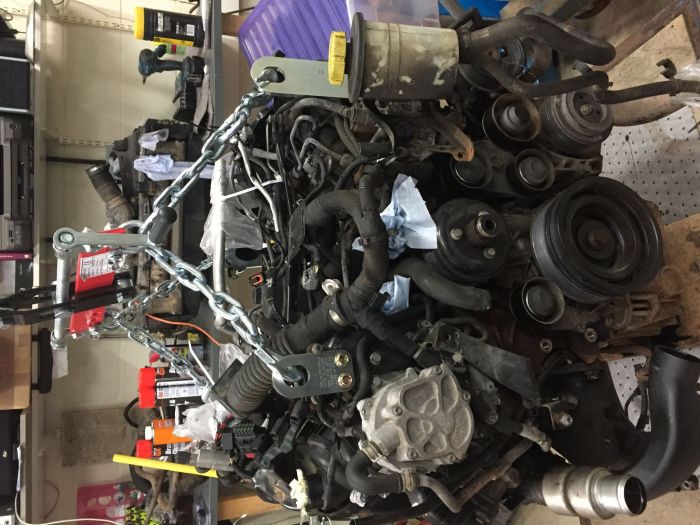
Next was to remove some of the engine trim, such as the engine cover and some rubber bonnet seals. Next, some of the air components, namely the plenum chamber (large plastic enclosure which houses the pollen filter and directs clean air from bonnet vents to passenger compartment), air cleaner box and cooling fan. The latter, was an absolute sod to undo. It’s a reverse thread, so clockwise to undo, but extremely tight. This is where Land Rover recommend one of their special tool combos. They specify a pulley holding bar and a viscous fan nut spanner. I had a spanner already (36mm with a cranked handle) but didn’t think I’d need the pulley holder. Trouble is, the nut is on so tight that I was able to turn the pulley round while undoing it! Now, normally I’d improvise and jam in a bar or large screwdriver to hold the pulley still, but there’s literally no room in there. Eventually, I made my own tool out of a central heating Magneflow spanner (see image) and extended it with my trolley jack handle. Then I used a 32mm spanner on the end of the 36mm spanner to get some torque on the nut. Still it was extremely tight and when it did eventually give way, I ended up punching myself in the face, giving myself a right shiner!
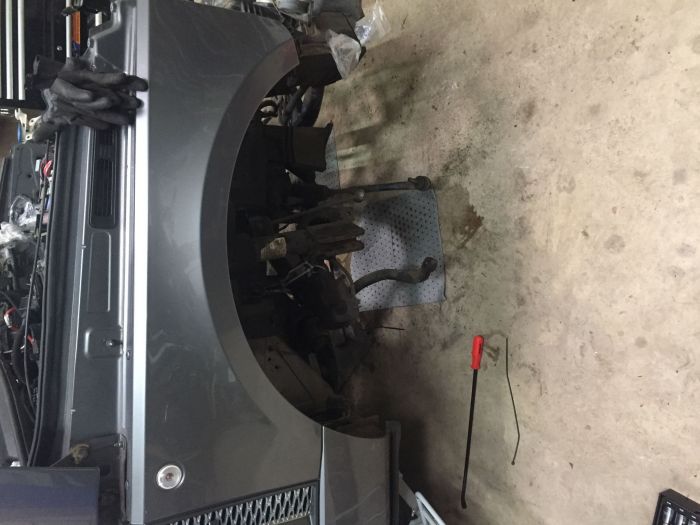
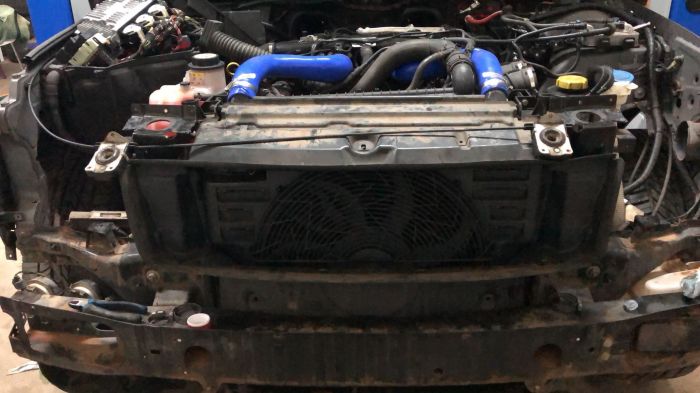
One bruised cheek bone later, I decided that there was no way my borrowed engine crane would lift the engine high enough over the radiator so decided that had to come out too. Easier said than done of course. Not only was my workshop manual not for my facelift model year, but it’s so tight under the bonnet that I had to remove headlights, bumper, and wheel well guards, bonnet slam panel and loads of ducts and shrouds to even get near the radiator.
Turns out the radiator is really heavy too. Even empty. In fact it’s 5 or 6 radiators sandwiched together as a “cooler pack” (2 or 3 aircon, steering, coolant and intercooler from memory). I had to remove it all anyway as you cant get the intercooler out without doing so.
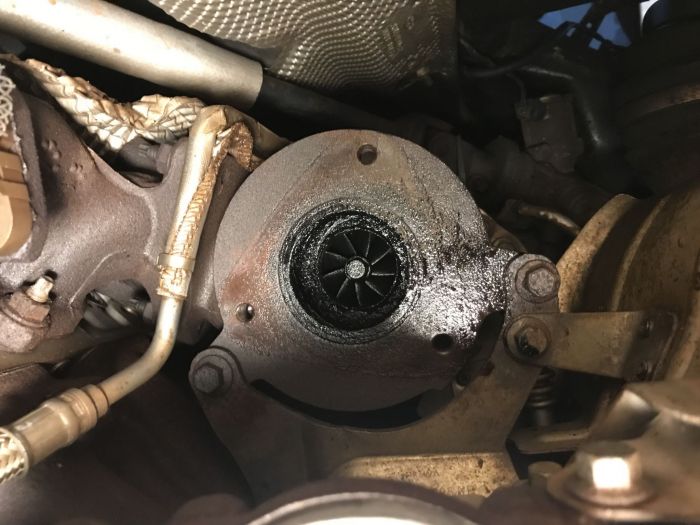
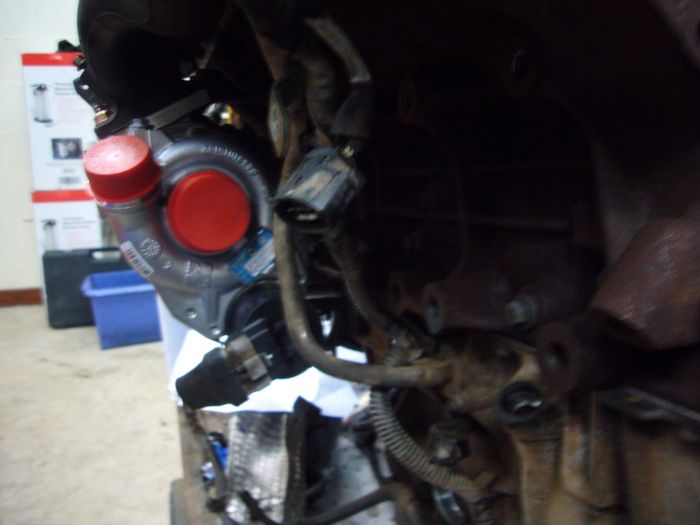
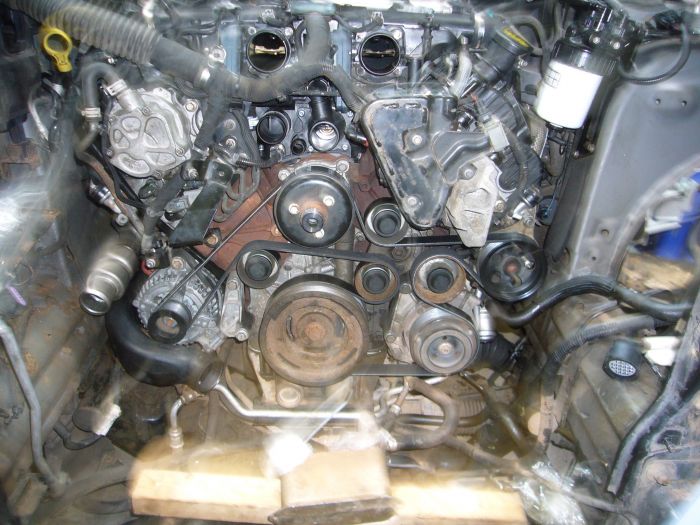
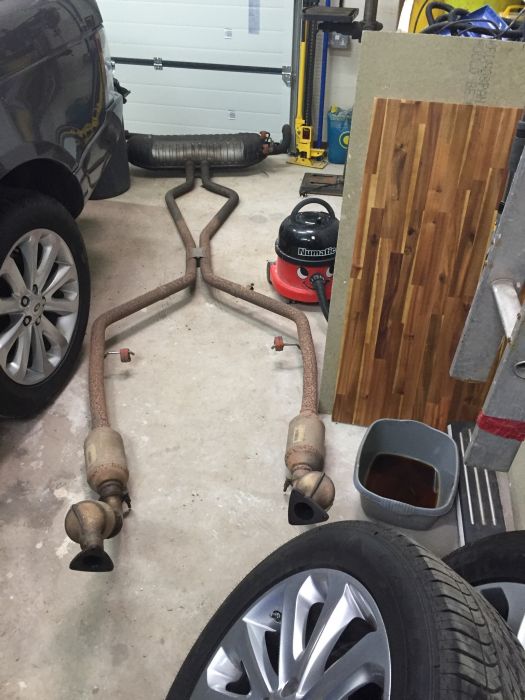
At this point what is left is much easier to get to, as the entire front of the car is removed, and you can even stand in the engine bay in-front of the engine, should you so wish! So now, it’s remove ECU and disconnect main engine wiring harness from its sealed container (leaving rest connected to the engine) and remove all hoses and pipes. As this was probably the first time the hoses have been disconnected, they were all pretty tight. Underneath, the exhaust had to be removed. This was pretty awkward as the near-side turbo is an odd angle and it’s nearly impossible to get to the nuts. I think I had 6 wobble bars and a UJ on my ratchet for one of the nuts! Of course, they are really tight and have a lot of thread to undo! The exhaust comes off as a single unit then, rather than splitting into front and back sections, which saves introducing problems later with blowing etc. I could now see the turbos and the off-side one was full of oil and metal so definitely scrap. Near-side one looked quite new, so perhaps already changed by a previous owner in the past?
Surprisingly (to me) the front diff is attached to the near-side of the engine sump, which has a hole through it for the opposite half-shaft to connect through. With help, the off-side half-shaft was removed, which involved removing road wheel, caliper, splitting the 3 ball joints on the hub, the half-shaft housing off the sump and a big tug! The assembly is very heavy and definitely not a job to tackle alone. Also unbolting the diff from the sump is a bit of a nightmare on the top rear bolt. Only a swan neck spanner could reach and turn 1/8th before needing resetting.
Ancillaries next, off came the auxiliary drive belt (fan belt!), then the alternator (a complete pain to get out and would be a nightmare to do in isolation). It’s basically 3 bolts, but doesn’t fit past the turbo clean air intake pipe without a lot of wiggling (which cant be done until the loom is removed, which you can’t get to unless you have very small hands!). Then the steering pump, I’d drained the steering fluid (needed it, it smelled bad) because the radiators came out, so just 3 bolts and that was out (one nasty hidden one, but not too bad once I’d got its location figured out). Then, the aircon compressor is exposed, which has to have the front, lower pipe removed as its tangled in the transmission cooler pipes which stay in place. Finally, a few other hoses (cabin heater etc) and engine bay trim panels removed and the engine is pretty much ready to come out.
The above took a few evenings after work and a Saturday, at a guess 12-16 hours. Repeating would be far quicker but I took my time in order not to rush anything and avoid unnecessary breakages. I also bagged all fixings up and labelled to make reassembly easier.
Next, I had to source the all the parts I needed. I used JMW 4x4 for parts who was a wealth of expertise and able to source pretty much everything I needed. Most have had to be genuine LR parts as aftermarket are just not made (yet). I have a list for anyone tackling similar projects, or just replacing turbos or EGRs etc.
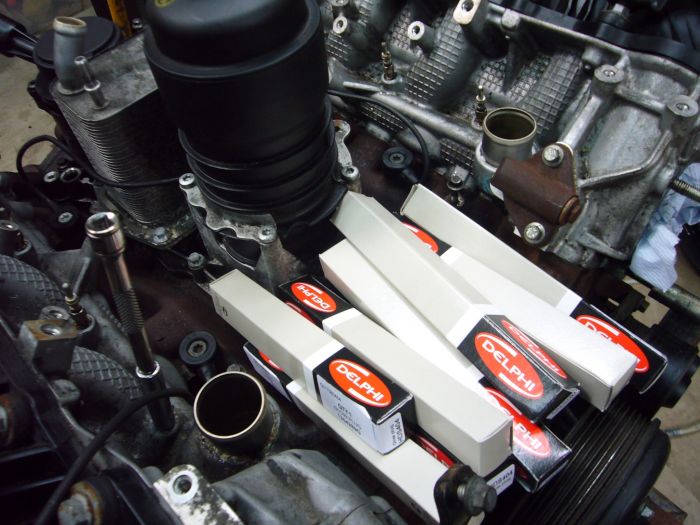
So, much to my very understanding wife’s annoyance, at this point I have 2 new turbos, new feed pipe, new drain hoses, new intercooler, a replacement EGR and cooler, a intake manifold, 8 glow plugs, a whole host of new hoses, o-rings, nuts, bolts and gaskets, 10L new oil, 3L steering fluid and 5L coolant all sitting in the kitchen ready for me to fit to the new engine.
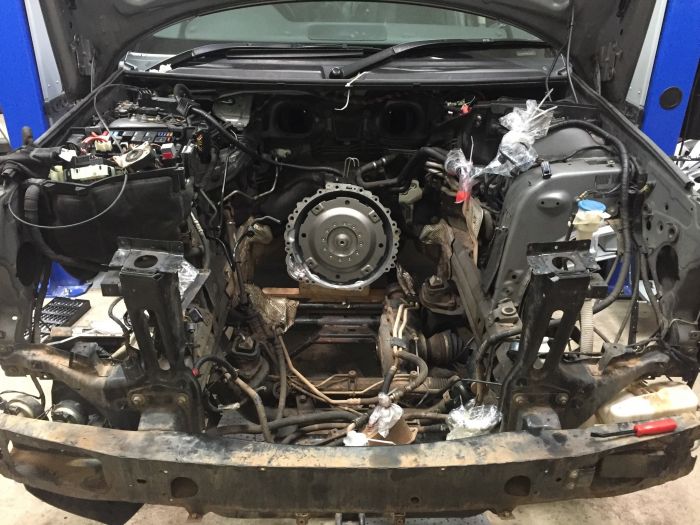
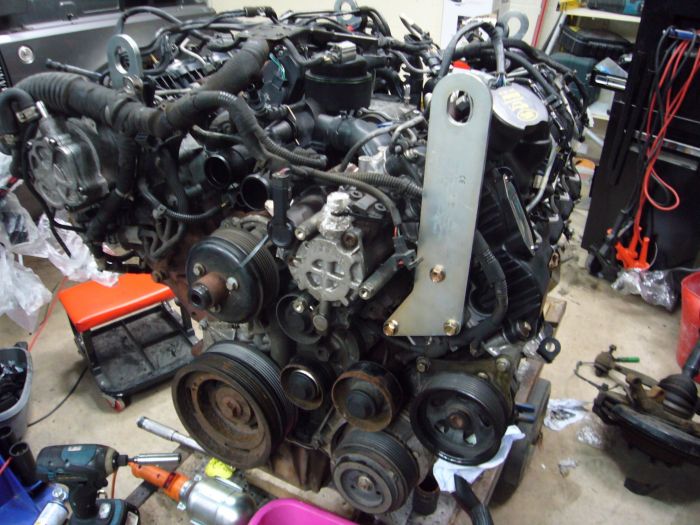
Extracting the engine is actually fairly simple at this point. You attach the lifting brackets to the locations (2 rear 2 front). The near side front one goes in place of the injector pump crash protector. Then, take the weight gently and remove the mounting nut (RH) and bolt (LH). Then, starter motor off, which is 2 bolts and 2 electrical connectors and easy to get to underneath, which reveals the flex plate. There's 4 bolts into the torque converter there, which you simply remove one at a time by rotating the crank 90 degrees with a big socket and ratchet.
Next, there's 14 bolts on the gearbox bellhousing to remove the engine is essentially free. (The diff which was already unbolted earlier). The diff needs prying out of the sump which was much easier once the engine was floating. Then just raise above the steering rack and remove.
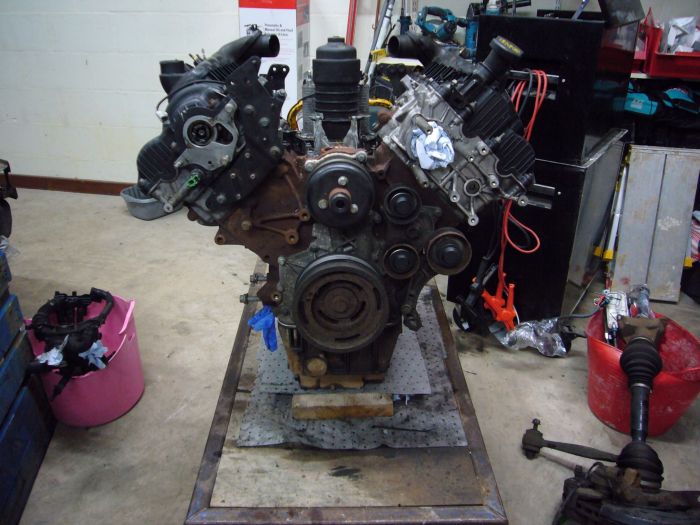
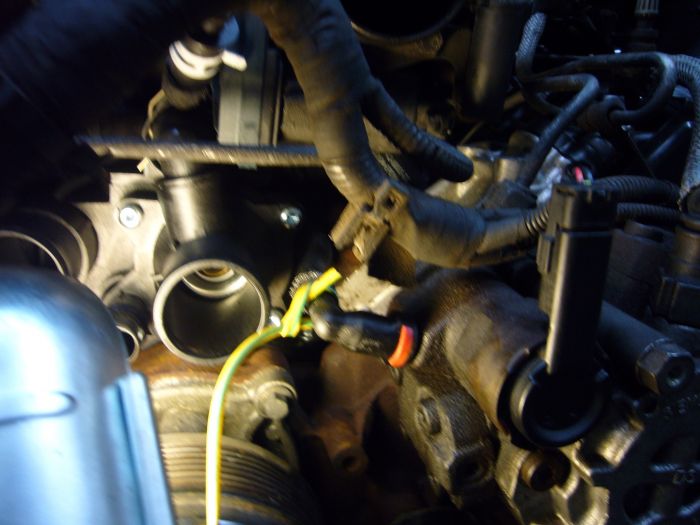
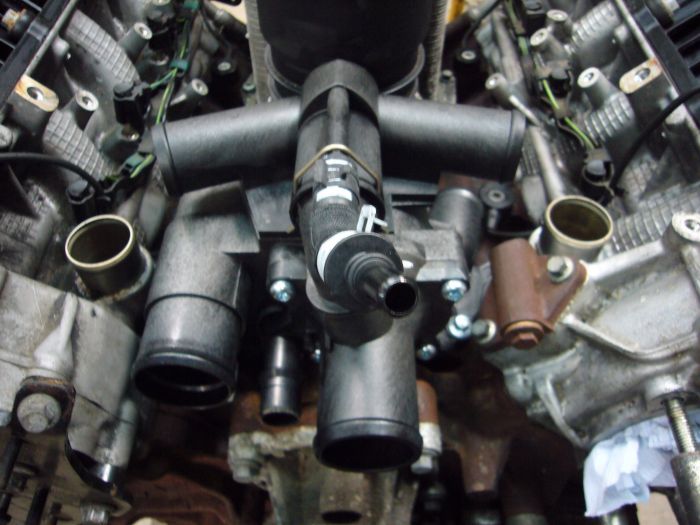
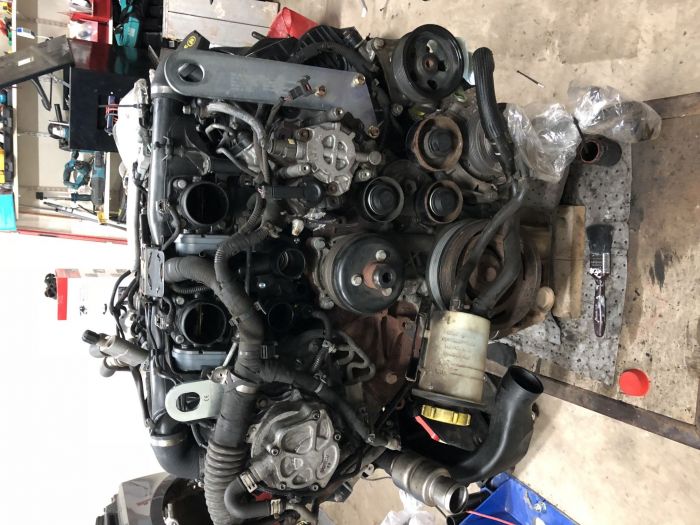
I stripped a lot of the components from the V valley to diagnose the EGR failure which need not be done to remove the engine so decided to build the replacement engine up almost entirely while out of the car. I cleaned up everything I was keeping and replaced everything that looked like it needed it, including things like exhaust manifold studs and nuts and many gaskets and o-rings. Stripping down is pretty easy. I just methodically removed components, cleaned them and replaced on the other block. The only part I forgot was the fuel pipe from the injector pump to the cooler under the EGRs which was an absolute sod to put right (there's a photo with some yellow/green cable which is me threading it through from the back of the engine once back in the car).
Once built up, refitting is literally the reverse of removal, so I wont bore you except the following tips:
If you do not support the gearbox, it will droop towards the near-side of the car and twist over. It's heavy so putting right afterwards on the floor is a nightmare. It took 3 of us to lift it to the right position.
Be really careful lowering the engine back in as there's an oil drain pipe which can get mashed on the diff on it's way down.
The half shaft should make a click when back in place. If not, it will "fall out" when driving along. If it's been out a few times, replace the spring clip.
Get help with the heavy bits (exhaust, diff etc) or you'll cripple yourself!
Take care on the injector pipes as they are rigid and can leak if not properly fitted
(I might add a few more here if I remember them)
Getting to this point took about another 8h on my own building it up and 3 of us for about 6h on a Saturday. Then I did a further 8-10h putting rads back in, hoses back on, wiring etc. etc.
After it was all back together, and fluids refilled, it was time to fire it up. First try, nothing. It cranked but didn't start. Turns out the battery only had 11v so needed a good charge. On the next evening, it started after about 3 turns of the engine and ran sweet as a nut. I had a huge cloud of smoke from the RH exhaust though, which I put down to unburnt diesel and oil from the failed engine's faults. All levels then checked, coolant bleeding procedure and steering fluid refill procedure followed and it was ready for a road test. Once hot, the smoke had burnt off and it was clear.
So at this point, I'm rather pleased with myself! The engine runs smoothly and sweetly, no smoke, no rattles and good power. Time for this FF to restart its life!
 | | Click image to enlarge |
 | | Click image to enlarge |
 | | Click image to enlarge |
__
2018 L405 3.0 TDV6 Vogue SE Fuji White
2000 4.6 V8 HSE Oxford Blue
1994 3.9 V8 Vogue Ardennes Green - resto project
Land Rover History:
2010 3.6 TDV8 Autobiography Stornoway Grey
2001 Discovery 2 TD5 GS
1999 Discovery 2 V8i XS
1994 Discovery 300Tdi
1993 Discovery 200Tdi
1989 Range Rover Vogue SE 3.5EFi
1976 Series 3 2.25
1977 Range Rover 2 door 3.5 Carb
Last edited by j_rov on 20th Apr 2018 12:02pm. Edited 1 time in total
|