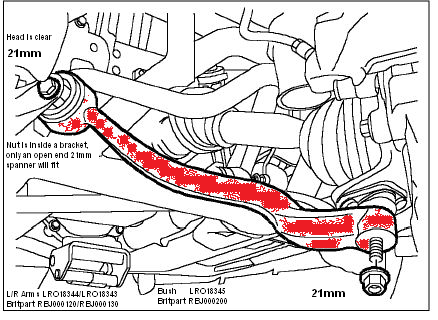
 | Home > Maintenance & Mods (L322) > Lower arm replacement |
 
|
|
|
| GGDR Member Since: 26 Nov 2016 Location: London Posts: 3519  
|
|
||||
|
| northernmonkeyjones Member Since: 24 Mar 2012 Location: derby Posts: 8479 
|
Big hammer....
|
||
|
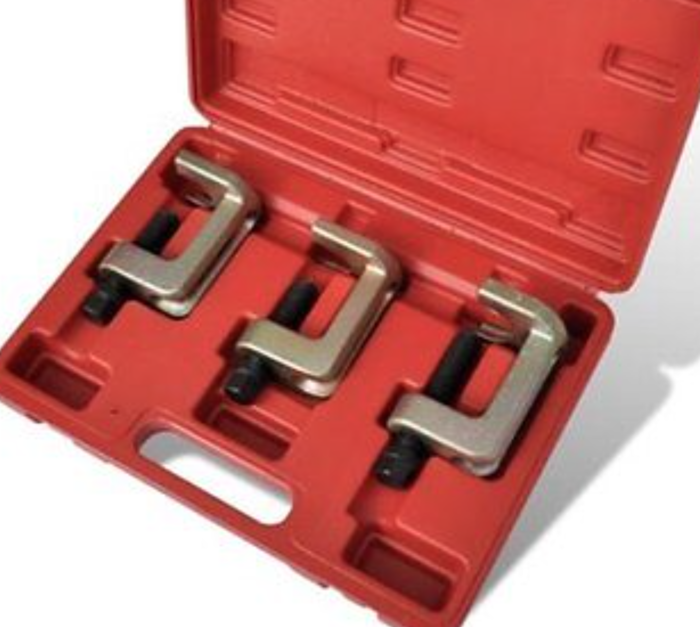
| GGDR Member Since: 26 Nov 2016 Location: London Posts: 3519
|
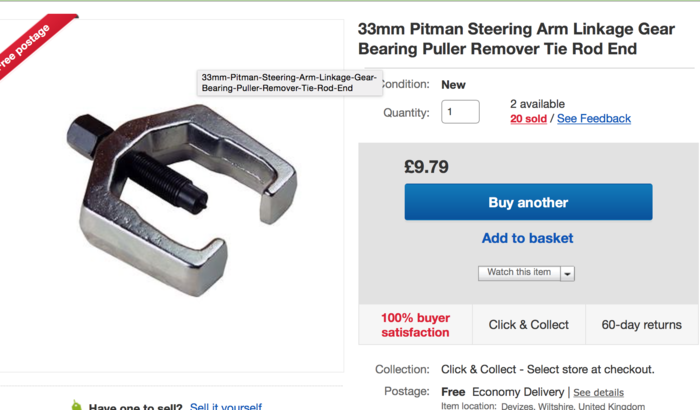
Looking at these
|
||||||
|
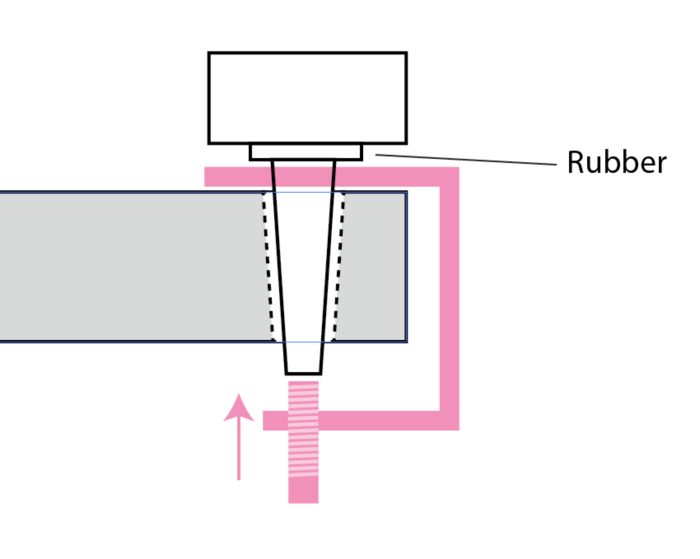
| northernmonkeyjones Member Since: 24 Mar 2012 Location: derby Posts: 8479
|
Worth a try, there’s not a lot of space between the rubber and the arm but they look quite slim. There is nothing that can't be fixed with a hammer😜😜
|
||
|
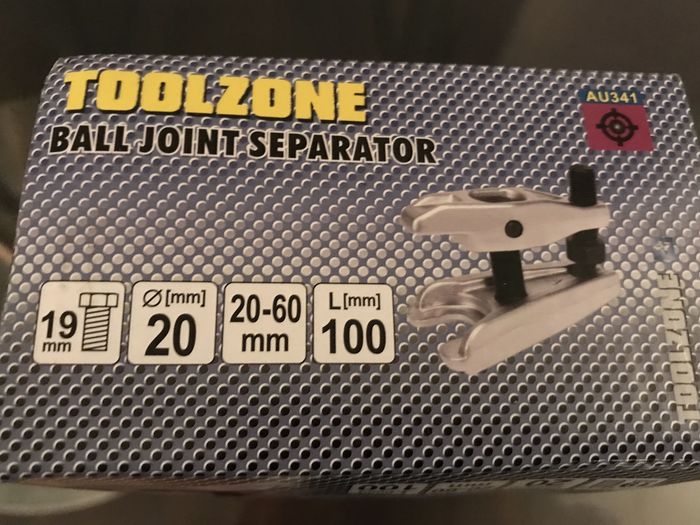
| GGDR Member Since: 26 Nov 2016 Location: London Posts: 3519
|
Bought this and it did work perfectly.
|
||||||
|
| northernmonkeyjones Member Since: 24 Mar 2012 Location: derby Posts: 8479
|
Yep, that looks scoobied...... There is nothing that can't be fixed with a hammer😜😜
|
||
|
| Goldstar Member Since: 04 Dec 2021 Location: Reading Posts: 114
|
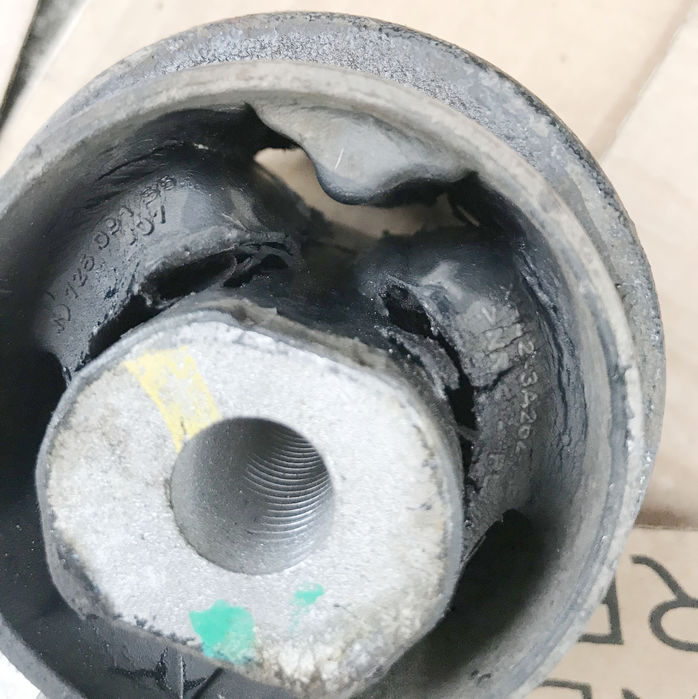
Thanks to all the previous contributors logging their experience I was able to do this job in 20 minutes today. Didn't need to take the caliper off. I loosened the arm at the bush end (21mm spanner as previously mentioned by others) and then the nut at the top of the ball joint (also 21mm) I then took my FBH and gave the ball joint housing a few (about a dozen) whacks and the taper went pop.
|
||
|
| kevinp Member Since: 28 Sep 2019 Location: Telford Posts: 1113 
|
Goldstar, did you remember to tighten the suspension arm nuts with the weight of the car on it's wheels? |
||
|
| Goldstar Member Since: 04 Dec 2021 Location: Reading Posts: 114
|
Good question. Belt and braces - I jacked the hub up to the correct height and tightened there first then checked the nut again after a test drive. Dec 2021- 2010 Facelift TDV8 4.4 AB in Stornoway Grey. |
||
|
| Goldstar Member Since: 04 Dec 2021 Location: Reading Posts: 114
|
I probably ought to anyway as I don’t know when it was last done but do I “need” a tracking check after changing this arm?
|
||
|
| Phoenix Member Since: 16 May 2022 Location: Gone Posts: 1631
|
As there is no adjustment points on it, then no. In practice, the bushes will be tighter so could pull everything in a bit. Think of how much an unevenly worn tyre will cost to replace vs. the cost of a wheel alignment
|
||
|
| kevinp Member Since: 28 Sep 2019 Location: Telford Posts: 1113
|
My track rods had to be turned in a total of one turn to bring the wheels back in line after changing my lower arms so I would if I were you. |
||
|
| Goldstar Member Since: 04 Dec 2021 Location: Reading Posts: 114
|
Booked in for Friday. Thanks chaps Dec 2021- 2010 Facelift TDV8 4.4 AB in Stornoway Grey. |
||
|
| bgennette Member Since: 13 Jan 2013 Location: Newcastle Posts: 73  
|
One question for the panel, why do you torque a nut then add a quarter turn?
|
||
|

|
|
| All times are GMT + 1 Hour |
< Previous Topic | Next Topic > |
Posting Rules
|
Site Copyright © 2006-2024 Futuranet Ltd & Martin Lewis
![]()
