Advertise on fullfatrr.com »

Home > Technical (L405) > Rocker panel removal
Post Reply  Down to end
Page 1 of 1
Print this entire topic · 
funnyguy1


Member Since: 11 Mar 2010
Location: Sun Valley, Idaho
Posts: 378

United States 
Rocker panel removal

Just noticed that the right front door rocker panel wasn’t installed
quite right and need to remove and reinstall. Does it
Just pop off??[/i]

Post #511155 6th Apr 2019 8:17pm
View user's profile Send private message View poster's gallery Reply with quote
Cam-Tech-Craig


Member Since: 04 Aug 2011
Location: Gloucestershire
Posts: 16165

England 2015 Range Rover SVAutobiography SDV8 Loire Blue

I presume you mean the plastic panel on the lower wing (or fender)? Take a look at the video below sir Thumbs Up

Post #511172 6th Apr 2019 10:20pm
View user's profile Send private message View poster's gallery Reply with quote
funnyguy1


Member Since: 11 Mar 2010
Location: Sun Valley, Idaho
Posts: 378

United States 

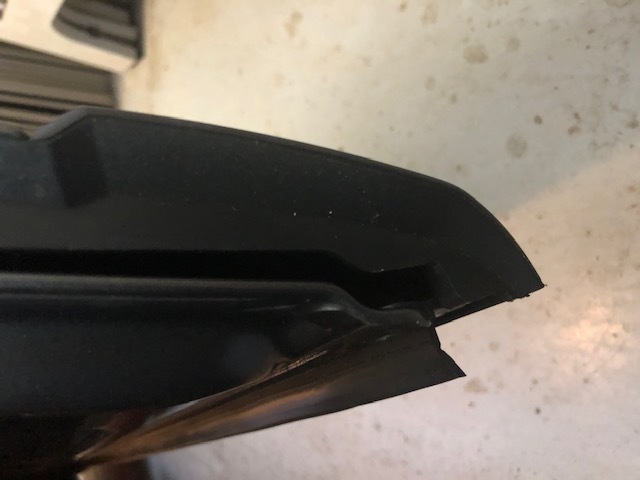
Hi Craig and thanks. It is the very bottom part of the rocker the one at 7:42 where he says don't pull this. It is not fitted correctly. The 1st 2 pics are the right side and the 3rd is the left side which is properly fitted. It needs to come off and then slid back up to hold it in. Mike


Post #511181 7th Apr 2019 2:38am
View user's profile Send private message View poster's gallery Reply with quote
funnyguy1


Member Since: 11 Mar 2010
Location: Sun Valley, Idaho
Posts: 378

United States 

It is the very bottom piece not the 2 plastic trim pieces above (he broke one in the video) . Mike
\Thanks again for your help!!!!

Post #511182 7th Apr 2019 2:47am
View user's profile Send private message View poster's gallery Reply with quote
funnyguy1


Member Since: 11 Mar 2010
Location: Sun Valley, Idaho
Posts: 378

United States 

Hi Craig,

This is the back of the exterior lower door trim panel I am dealing with. I am familiar with all the rear buttons except the 2 larger ones at the top of the top panel. Any idea how they release?
Mike

Post #511405 9th Apr 2019 1:48am
View user's profile Send private message View poster's gallery Reply with quote
funnyguy1


Member Since: 11 Mar 2010
Location: Sun Valley, Idaho
Posts: 378

United States 

The 3 top larger pins are guidance pins. It has to be removed very slowly starting at the bottom and then working upwards using a trim removal tool popping the small lower buttons 1st. The guys at Powerful UK could have used a little more information before they destroyed that piece. It was not necessary. Thanks for the video though, it pointed me in the right direction. This is a great website!

Post #511528 10th Apr 2019 3:54am
View user's profile Send private message View poster's gallery Post Reply
Post Reply  Back to top
Page 1 of 1
All times are GMT + 1 Hour

Jump to  
Previous Topic | Next Topic >
Posting Rules
You cannot post new topics in this forum
You cannot reply to topics in this forum
You cannot edit your posts in this forum
You cannot delete your posts in this forum
You cannot vote in polls in this forum


Site Copyright © 2006-2024 Futuranet Ltd & Martin Lewis
fullfatrr.com RSS Feed - All Forums


Switch to Mobile site