 | Home > Technical (L322) > HOW TO: L322 Centre console removal + ignition barrel/switch |
 
|
|
|


| Haylands Member Since: 04 Mar 2014 Location: East Yorkshire Posts: 8826  
|
Top job and nice write up... |
||
|
| p38arover Member Since: 16 Dec 2015 Location: Western Sydney Posts: 1587 
|
Good post. I hope I never have to do it.
|
||
|
| stan Site Moderator Member Since: 13 Jul 2010 Location: a moderate moderated moderator moderating moderately in moderation Posts: 35883 
|
good job, put in our wiki.. |
||
|
| mazza7282 Member Since: 10 May 2020 Location: Essex Posts: 99 
|
In reference to my "
|
||||||
|
| mazza7282 Member Since: 10 May 2020 Location: Essex Posts: 99
|
Ignore the above post, I missed removing the securing screws, i've amended this in the write up above.
|
||||||
|
| Corsica Member Since: 03 Jan 2019 Location: Corse Posts: 50  
|
Have you unplugged the battery |
||
|
| stan Site Moderator Member Since: 13 Jul 2010 Location: a moderate moderated moderator moderating moderately in moderation Posts: 35883
|
@mazza...anything you add to this thread is linked in the wiki entry.. ... - .- -.
|
||
|
| verydisco Member Since: 10 Dec 2009 Location: UK/US Posts: 2952 
|
Hi guys, woudl anyone know if anyone has used graphite as a temp soluiton? I have in my P38 and it works
|
||
|
| Haylands Member Since: 04 Mar 2014 Location: East Yorkshire Posts: 8826
|
J, Graphite would probably work but as you say will only be temporary, I removed the park lock mechanism as if it does fail you can't even tow or push the fatty as it will be locked into park... |
||
|
| p38arover Member Since: 16 Dec 2015 Location: Western Sydney Posts: 1587
|
Well I did - and I'd forgotten this thread. I needed to remove the whole centre console to replace the yaw sensor which is bolted to the floor at the back of the console. RAVE leaves out a few steps but it also only covers the HSE - not the Vogue which has a rear blower. This blower is above the yaw sensor and prevents access. I couldn't get the cubby box liner out because the cigar lighter socket wouldn't release and come out. With it in place the liner cannot be removed. In the end, brute force was required on the cigar lighter socket and the plastic retainer wouldn't come free. Before reassembly, I swapped it with the one in the front of the console (the one opposite the ignition key) which would release. One can't actually remove the centre console because one can't move it over the handbrake lever. The console needs to be rotated 90 degrees (horizontally) to be able to do that. One can't rotate it unless one removes the seats. Not mentioned in RAVE. Gaaah.. In the end, I gave up on removal and lifted the rear of the console up just enough to be able to get a 1/4" drive socket/ratchet in to loosen the nuts then used my fingertips to slowly work the bolts out. I had to use a magnet to retrieve the bolts. I was then able to wiggle the sensor out. Getting the replacement back in was a struggle as was using my fingertips to get the bolts in and started. In the end, the yaw sensor wasn't the problem even though the diagnostic software (Faultmate, GAP IID, and T4) all said it was faulty. It was the ABS module. Ron B. VK2OTC 2003 L322 V8 Auto 2007 Yamaha XJR1300 Previous: 1983, 1986 RRC; 1995, 1996 P38A; 1995 Disco1; 1984 V8 County 110; Series IIA Last edited by p38arover on 11th Jul 2023 4:32am. Edited 1 time in total |
||
|
| mazza7282 Member Since: 10 May 2020 Location: Essex Posts: 99
|
I forgot I even wrote this |
||
|
| stuart_2006 Member Since: 17 Jul 2018 Location: Holsworthy, Devon Posts: 136 
|
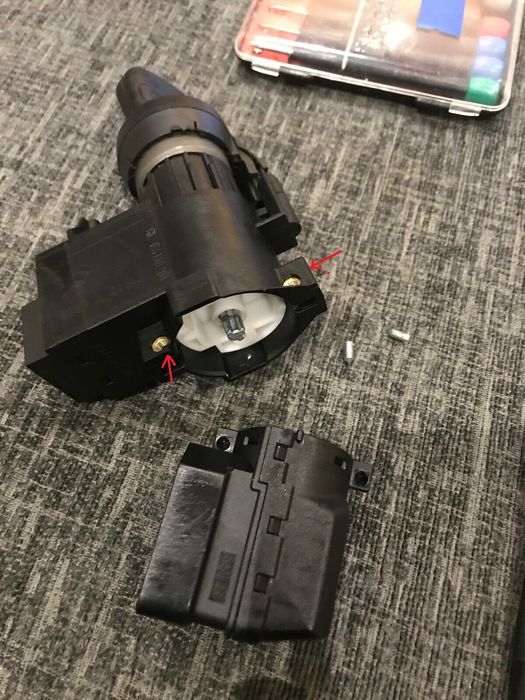
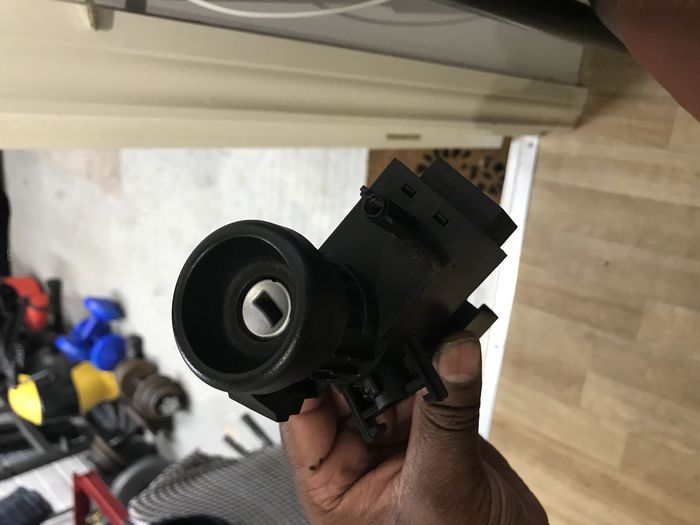
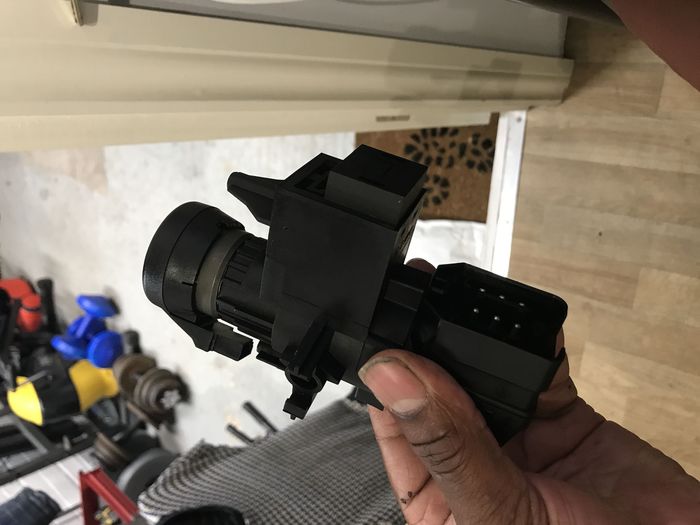
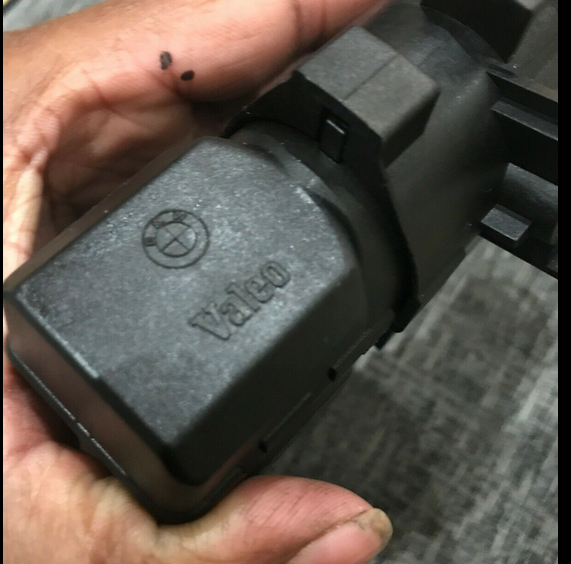
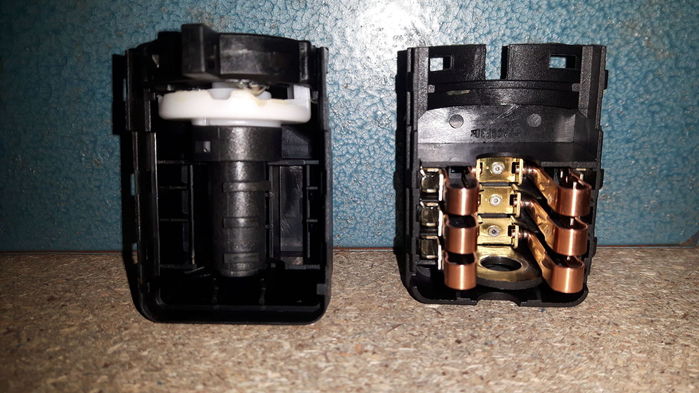
Just replaced the ignition switch contacts on my TD6 as power wasn't coming through properly in the AUX position. A few notes on Mazza's excellent procedure:
|
||
|
| Merchy Member Since: 14 Feb 2021 Location: North Wales Posts: 1238
|
Having used this excellent 'how to' guide a while back to change my failed ignition switch, the only other tips I would add to Stuart_2006's additional tips are -
|
||
|
| mazza7282 Member Since: 10 May 2020 Location: Essex Posts: 99
|
Thanks for the added steps on the guide 👍. I'll have to add that in the wiki at some point. For ease of use, I will say definately disconnect the battery first 👍. Unfortunately my range rover has rusted itself to bits, I wasnt able to keep up with all the rust. Despite the rear arches and various other welding jobs that have been done in the past. So I had to let it go as a spares or repairs on ebay. I covered this in a seperate thread some time ago. For now I have a "slightly" less rusty Shogun that I am using as a tow vehicle, absaloutely zero luxury but it goes the job, & its 7 seats ! Current Fleet FF L322 2.9TD6 SE BMW e46 330ci Msport Skoda Superb TDI Mk2, stage 1 Audi A3 8P 2.0 T 4x4, stage 2 Yamaha R6 13S Triumph Thruxton R Sold, but not forgotten WJ Jeep Grand Cherokee V8 |
||
|

|
|
| All times are GMT |
< Previous Topic | Next Topic > |
Posting Rules
|
Site Copyright © 2006-2025 Futuranet Ltd & Martin Lewis
![]()
