Advertise on fullfatrr.com »

Home > In Car Electronics (L322) > Latest NaviPlus install on a L322 2010+
Should I take photos and videos?
Yes please lots of them
86%
 86%  [19]
Nah really not interested
4%
 4%  [1]
Sure but keep yourself out of it
9%
 9%  [2]
What is Apple Carplay?
0%
 0%  [0]
Total Votes: 22

Post Reply  Down to end
Page 1 of 2 12>
Print this entire topic · 
Bl4ckD0g


Member Since: 16 Feb 2020
Location: 127.0.0.1
Posts: 1322

Netherlands 2010 Range Rover Autobiography 5.0 SC V8 Santorini Black
Latest NaviPlus install on a L322 2010+

Well, I received the latest kit from Australia last week. I bought the full package for my car including wireless carplay and steering wheel controls. But sadly the box arrived without any instructions at all.

Good thing I don't scare easily as there are lots of parts and cable in there. But I did ask them for the PDF's which I now have. So this weekend I'll dismantle my interior and give it a go...wish me luck Whistle

Does anyone want me to take photo's along the way? And/or video of the operation?

PS. I've got one advantage, I notice in their photos that they use the same cordless Milwaukee power tools and I even have the right angle heads for them to make it easier in certain places...I say hopefully...
PPS. This is the latest kit, it should be all plug and play with no splicing. Well let's hope that is the case...
PPPS. I really can't wait to have more than one line of text regarding the song I'm playing. It's crazy as there are two perfectly good large screens in our cars Rolling with laughter

Post #588742 24th Mar 2021 5:54pm
View user's profile Send private message View poster's gallery Reply with quote
=dj=


Member Since: 24 Oct 2020
Location: New forest
Posts: 66

United Kingdom 2012 Range Rover Autobiography 5.0 SC V8 Orkney Grey

All the best with the install - it's relatively straight forward, it just burns a lot of time, and there's a little bit of "dot puckering" while trying to fold the screen circuits back together without snapping the ribbon cable and somehow routing the touch input & LVDS cables back out without fouling anything...

robkuijpers mentioned the hardest part of the install was squirreling away the boxes behind the gloveboxes and I chuckled at that, how hard could it be? But he's right - things are pretty tight behind there! Haha. It will all go, though.

All the effort is well worth it, though. So much better Thumbs Up

Post #588918 25th Mar 2021 6:31pm
View user's profile Send private message View poster's gallery Reply with quote
Bl4ckD0g


Member Since: 16 Feb 2020
Location: 127.0.0.1
Posts: 1322

Netherlands 2010 Range Rover Autobiography 5.0 SC V8 Santorini Black

Awesome. Thanks. And yes there is a lot of cable and several boxes to hide. And then there is the antennas as well. At least I seem to have read a technique such that you don’t have to take the fuse box out.

I found the instructions a bit sketchy on the steering wheel controls as well. But we shall see.

Post #588933 25th Mar 2021 7:18pm
View user's profile Send private message View poster's gallery Reply with quote
=dj=


Member Since: 24 Oct 2020
Location: New forest
Posts: 66

United Kingdom 2012 Range Rover Autobiography 5.0 SC V8 Orkney Grey

Oh, yes you definitely don't need to remove the fuse panel - I certainly didn't.
It may even be possible to leave the head unit that's behind the fuse panel in place too, but it comes out easily and certainly makes plugging in the patch cables much easier!

I didn't order the wireless carplay extra, but it came with it anyway - I must admit I didn't bother with the antennas. That box I strapped to the top of the fuse panel - I think the antennas could have stuck to the top surface of the CD changer maybe?

Yes, I don't recall there being any instructions about the steering wheel control box, but there was an obvious connection on the loom for it. The volume controls on the wheel will work regardless (the whole system taps into the AUX audio connection, and the wheel volume controls that already of course!), so the SWC is needed only to learn the next-track and previous-track presses.

I didn't bother with the USB extension lead into the centre console cubby either, I have the USB port presented at the side of the passenger footwell area in the centre, and run a short lightning cable up to a a dashmount plate (with a magnet) to the side of the centre screen. I can grab a pic of that if it would be helpful...

Post #588967 25th Mar 2021 10:04pm
View user's profile Send private message View poster's gallery Reply with quote
Bl4ckD0g


Member Since: 16 Feb 2020
Location: 127.0.0.1
Posts: 1322

Netherlands 2010 Range Rover Autobiography 5.0 SC V8 Santorini Black

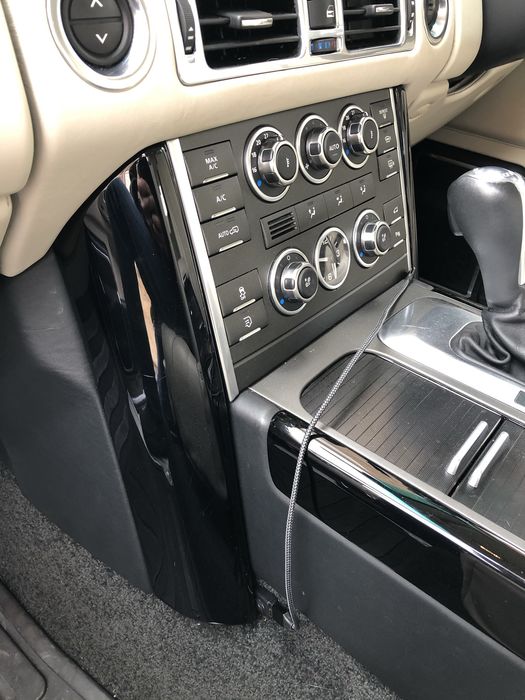
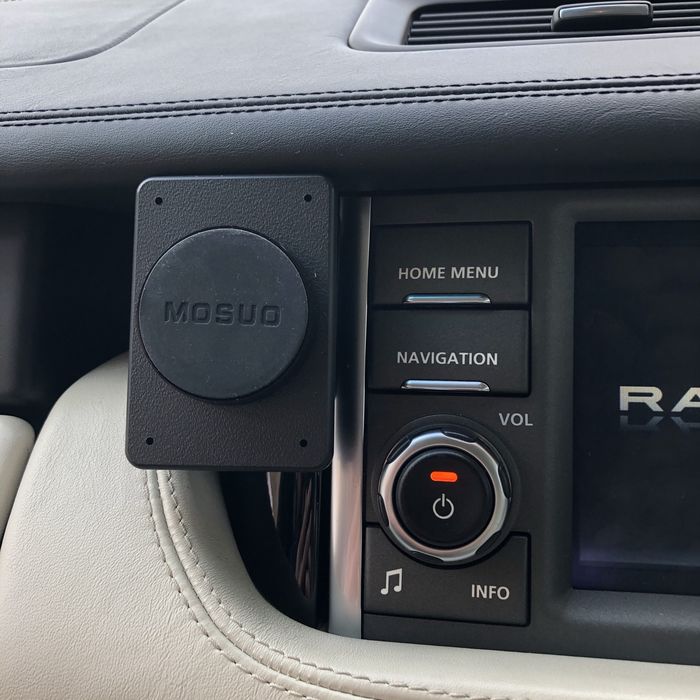
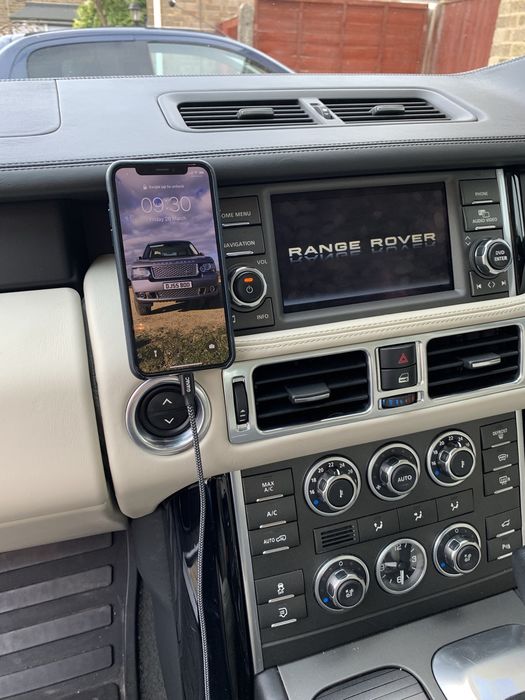
If you don’t mind that would be awesome. Part of me was wondering whether to run it to like the new MagSafe connector for easy wireless charging I’ve got currently a wire running out of the arm rest cubby, but the standard usb socket is not that powerful so I use a longer cable from the rear cigarette lighter with a rapid charger.

Post #588971 25th Mar 2021 10:19pm
View user's profile Send private message View poster's gallery Reply with quote
=dj=


Member Since: 24 Oct 2020
Location: New forest
Posts: 66

United Kingdom 2012 Range Rover Autobiography 5.0 SC V8 Orkney Grey

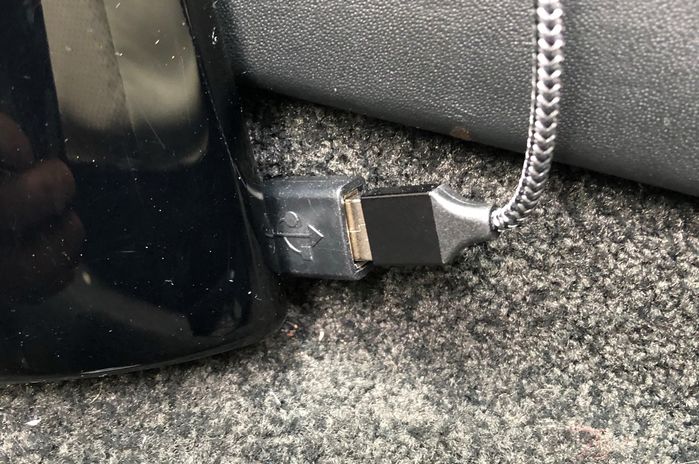
OK, here's where I have the USB socket emerge from the dash in the passenger footwell:


Click image to enlarge


The mount beside the display is a Brodit mount - it just clips on, no modification required. Magnet then stuck on to its flat surface:

Click image to enlarge


In use:

Click image to enlarge


I plan to use some clips to hold the cable in place neatly when the phone is not connected, it's all a bit thrown in at the moment Wink

Post #589008 26th Mar 2021 10:48am
View user's profile Send private message View poster's gallery Reply with quote
Landmark


Member Since: 22 Nov 2020
Location: Hampshire
Posts: 118

United Kingdom 2010 Range Rover Vogue TDV8 Stornoway Grey

Video would be great. And if by chance yours is a face-lift 2010 model would be nice to see top dash panel removal in close up ie clips etc. Hope all goes well I really want it just can't afford at the mo. I brought a Bovee as a sort of stop gap make do but it didn't work.

Post #589010 26th Mar 2021 10:53am
View user's profile Send private message View poster's gallery Reply with quote
=dj=


Member Since: 24 Oct 2020
Location: New forest
Posts: 66

United Kingdom 2012 Range Rover Autobiography 5.0 SC V8 Orkney Grey

Once the end caps have been removed, the dash top was pretty straight forward to remove. The only thing I remember burning far too much time on was releasing the centre vent - it has those metal spring clip things holding it in place along the edge nearest you.

The Naviplus instructions talk about the front and rear of the vents - it's referring to the front of the vehicle and rear of the vehicle, not the front and rear of the vent as you're looking at it (took me a lot longer to realise that than it should have!)

Post #589014 26th Mar 2021 11:07am
View user's profile Send private message View poster's gallery Reply with quote
Bl4ckD0g


Member Since: 16 Feb 2020
Location: 127.0.0.1
Posts: 1322

Netherlands 2010 Range Rover Autobiography 5.0 SC V8 Santorini Black

Awesome...That last comment will safe me a lot of time I think Rolling with laughter

Yes I love Brodit mounts. I've been using them for many years. I notice they do one with a placeholder for the Apple MagSafe mount/charger which I might integrate and use for that...

Post #589025 26th Mar 2021 11:48am
View user's profile Send private message View poster's gallery Reply with quote
Bl4ckD0g


Member Since: 16 Feb 2020
Location: 127.0.0.1
Posts: 1322

Netherlands 2010 Range Rover Autobiography 5.0 SC V8 Santorini Black

Well I'm burning lots of time getting those glove boxes out Big Cry Laughing

The instructions are nothing like my car. Heck even the workshop manual on here seems to gloss over large parts...Any tips?
* How do I put the glovebox into 'service mode' so I can get to those T-20 screws to get it out?
* My door side panel has the airbag lock on it, how do I remove that one?

Post #589215 27th Mar 2021 1:53pm
View user's profile Send private message View poster's gallery Reply with quote
Bl4ckD0g


Member Since: 16 Feb 2020
Location: 127.0.0.1
Posts: 1322

Netherlands 2010 Range Rover Autobiography 5.0 SC V8 Santorini Black

Finally found it, to get the glovebox to fully open in the service position you need to move the hinge that is closest to the centre console outwards. So for Uk cars to the passenger door.

FFS The naviplus manual says push down, and the workshop manual is silent.

It’s only easy when you know it 🤣

Post #589217 27th Mar 2021 2:02pm
View user's profile Send private message View poster's gallery Reply with quote
Bl4ckD0g


Member Since: 16 Feb 2020
Location: 127.0.0.1
Posts: 1322

Netherlands 2010 Range Rover Autobiography 5.0 SC V8 Santorini Black

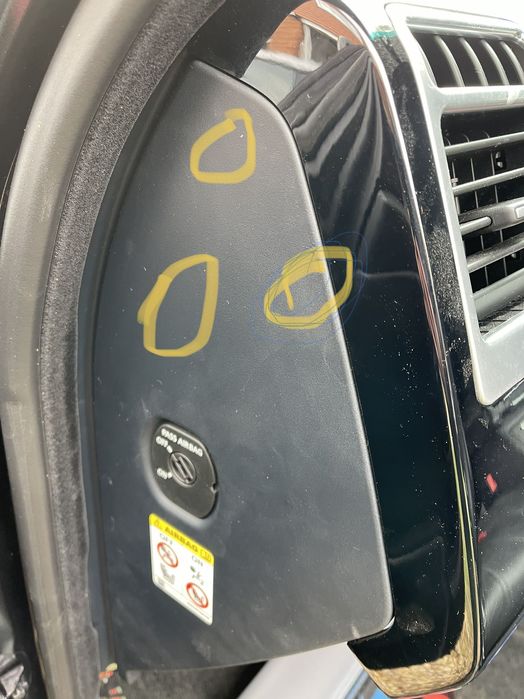
But I can’t figure out the “easy” part which is taking this bit off Sad It seems to be stuck on those highlighted points way more that just those pop clips can do. I’m wondering whether these later cars are different somehow. I need to apply way to much force for my liking such that I don’t want to proceed in fear of snapping it. I looked at the wiki workshop manual but that is as good as useless for this.


Click image to enlarge

Post #589223 27th Mar 2021 2:44pm
View user's profile Send private message View poster's gallery Reply with quote
Bl4ckD0g


Member Since: 16 Feb 2020
Location: 127.0.0.1
Posts: 1322

Netherlands 2010 Range Rover Autobiography 5.0 SC V8 Santorini Black

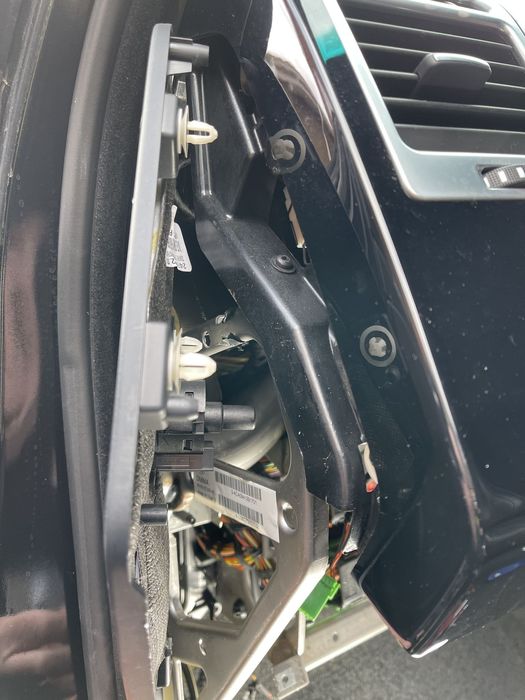
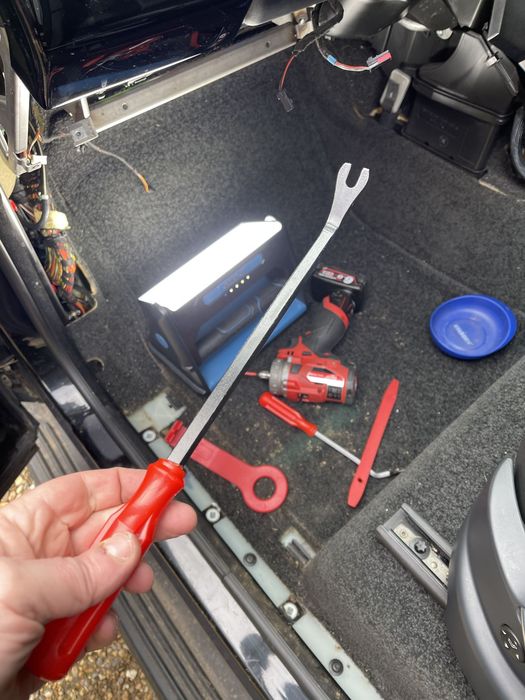
Ok got it. It’s flipping scary though, I really didn’t like pulling that hard on plastic. I tried to get more leverage from inside with my large trim tool.


Click image to enlarge


Click image to enlarge

Post #589227 27th Mar 2021 2:57pm
View user's profile Send private message View poster's gallery Reply with quote
stan
Site Moderator


Member Since: 13 Jul 2010
Location: a moderate moderated moderator moderating moderately in moderation
Posts: 34915

United Kingdom 

have you read this, might help your instal,

https://www.fullfatrr.com/forum/topic56194.html ... - .- -.


click link for ,

FORUM WIKI

HOW TO Ǝꓕ∀ꓕOꓤ PICS

workshop manual downloads are in our wiki

.

Post #589229 27th Mar 2021 3:03pm
View user's profile Send private message View poster's gallery Reply with quote
Bl4ckD0g


Member Since: 16 Feb 2020
Location: 127.0.0.1
Posts: 1322

Netherlands 2010 Range Rover Autobiography 5.0 SC V8 Santorini Black

Thanks.

Sadly they all “moan” about the trim as well but it isn’t covered either on how to do it. I’ve got to say, this is very very different and unnecessary complex how the interior trim is put together compared to the mainly German cars I’ve worked on.

Damn at this rate I’ll be running out of daylight just to strip a small part of the interior. It’s crazy.

Post #589240 27th Mar 2021 3:42pm
View user's profile Send private message View poster's gallery Reply with quote
Post Reply  Back to top
Page 1 of 2 12>
All times are GMT + 1 Hour

Jump to  
Previous Topic | Next Topic >
Posting Rules
You cannot post new topics in this forum
You cannot reply to topics in this forum
You cannot edit your posts in this forum
You cannot delete your posts in this forum
You cannot vote in polls in this forum


Site Copyright © 2006-2024 Futuranet Ltd & Martin Lewis
fullfatrr.com RSS Feed - All Forums


Switch to Mobile site