garyRR
Member Since: 13 Mar 2021
Location: Hampshire
Posts: 1486


|
| L322 3.6L TDV8 EGR and Cooler Tear Down, Refurb and Re-Build | |
Ahead of an upcoming job, I thought I'd make an article that may be useful to others to understand how an EGR works and show how to clean and refurb them.
First thing's first, I absolutely swear by ultrasonic cleaners. I bought mine on eBay years ago and it's still going strong today. I have a 3L one, which is actually large enough to clean the overwhelming majority of stripped down engine components. Otherwise, you'll need a load of brushes, pipe cleaners and degreaser. My next point, I find the Screwfix 5L degreaser brilliant when used in conjunction with an ultrasonic and, it's cheap as chips.
So, how does an EGR work?
An EGR is used to lower the emissions of vehicles. Put simply, it recycles some of the gases coming out of the combustion chamber and puts them back in for re-combustion.
But, because the exhaust gases are the result of an explosion, these are very hot and ideally, need cooling before being put back into the combustion chamber - just like cool air enters the manifold system. So, with most EGR assemblies, you have a stage 1 exhaust cooler and a stage 2 control valve, controlled by a motor and a position sensor so, the ECU can dictate how much gas it wants.
Because the 3.6L is a V shaped engine, it has 2 EGRs - One for each bank of cylinders.
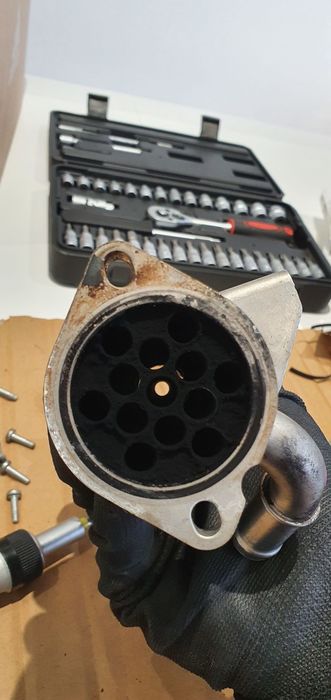
Here's a picture of my cleaned up one:
You can see the cooler. The yellow bit is a thermostat on the coolant entrance to the cooler. The gases run from the right to left through the cooler. They then progress to the valve. The small hole on the right is the outlet, back into the combustion chamber.
Let's start stripping it down
Part 1. The cooler
There's just 2x T27 torx screws to detach the cooler from the valve unit. They are mated by a metal and rubber gasket. You will need to replace this gasket because they perish. The part number is LR003831 and it's about £5.
 | | Click image to enlarge |
 | | Click image to enlarge |
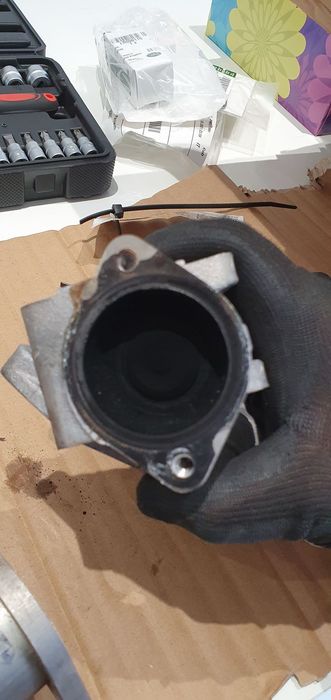
You can see how the cooler tubes really soot up. This can restrict gas flow and also carry soot into the combustion chamber under hard acceleration. How the cooler works is that if it's a cylindrical unit with a number of steel tubes inside. The steel tubes carry the exhaust gases and the engine coolant circulated around them inside the cylinder, to cool the gases. The little thermostat controls the temperature inside the cooler. By maximising surface area around the gases, they can be effectively cooled.
Here's the cooler post it's ultrasonic clean:
 | | Click image to enlarge |
 | | Click image to enlarge |
Notice how the tubes are now clean. It wouldn't photo but, the inside of the tubes are now also clean steel again.
Potential EGR cooler problems
If you have experienced problems with coolant leaking into the combustion system, even the smallest leak, the EGR coolers are, I think a good place to look. EGR coolers have been known to "crack" and leak coolant into the combustion, replacing coolant with exhaust gases and causing pressure build up in your coolant system. I think the most likely way this could happen is the stainless steel tubes inside the cooler. They are thin corrugated stainless steel pipe which could generate tiny cracks over time.
However, I think one of two causes of an EGR cooler cracking is previous owners of these vehicles topping up or replacing their coolant with tap water or, not changing the coolant regularly enough. This would cause contaminants to build up in the cooling system and weaken the thinnest parts of metal. I haven't a cracked EGR to pressure test however, my bets would be exactly in this location. It's a cheap thing to try vs some of the other alternatives!
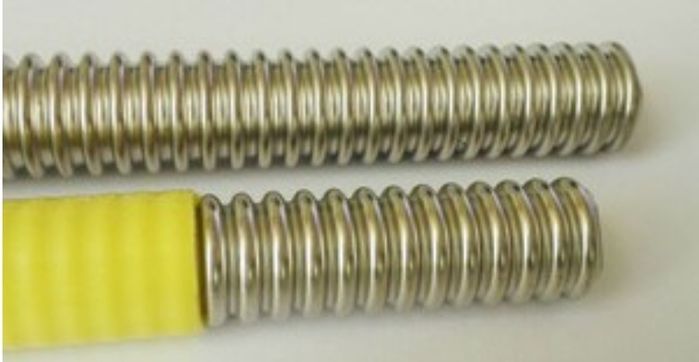
The below picture is similar to the pipes carrying the exhaust gases. They're designed to flex so, they're thin and therefore more prone to damage.
The other potential cause is end of life thermostats. Both EGRs have a thermostat. I work on boat engines and the service life of a thermostat in a Saltwater environment is 2 years. In automotive uses, with the correct grades of coolant, I would suggest life is around 10 years. Over time the springs become brittle and the element becomes less effective (these also have plastic casings which will become brittle and break). If you have a faulty EGR cooler thermostat, this may not let coolant into your EGR cooler. You then have hot post-combustion gases at over 500C on top of the block receiving no cooling, accumulating and building pressure... Again, thin stainless pipe is prone to cracking with repeated high heat.
Part 2. The EGR valve
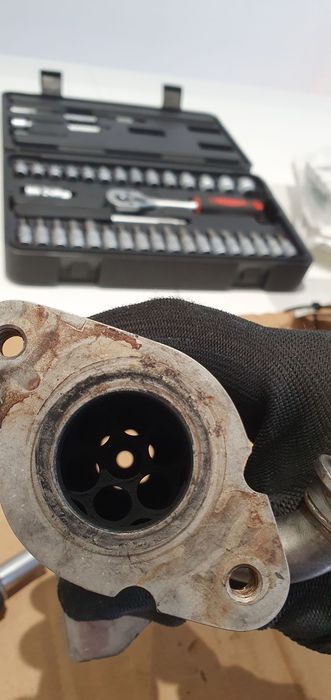
Now, this is the part which can really soot up. Let me first show you the before and after (because you can hardly see the valve beforehand).
 | | Click image to enlarge |
 | | Click image to enlarge |
Wow! What a difference. There was a deep accumulation of soot. Given the valve only opens by around 7mm in total, a couple of mm will really affect the flow.
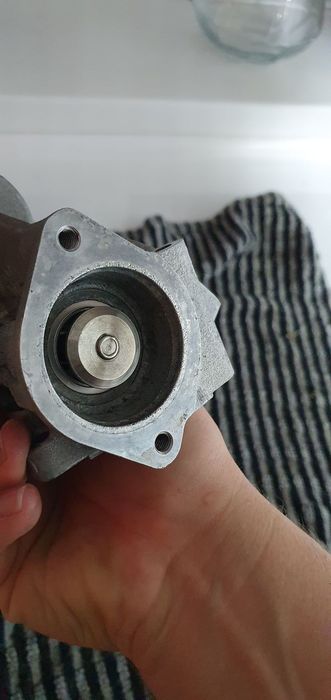
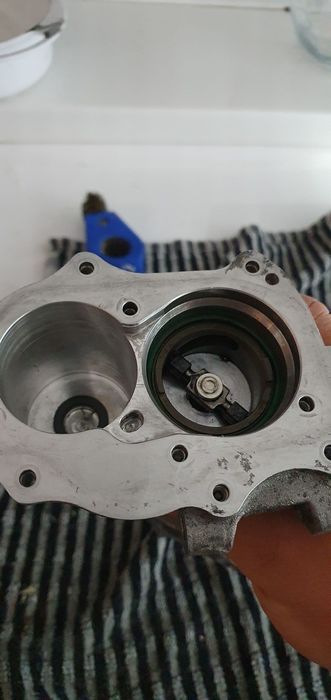
You can see how the ultrasonic clean removes almost all carbon deposits inside the assembly (view from the outlet back to the engine):
 | | Click image to enlarge |
But, there are sensitive electrics within the EGR valve so, let's first look at the steps.
1. Remove the plastic cover. This is simple. 6x T20 torx screws and it just lifts off (gently). You'll probably find the orange gasket stick to the valve so, remove this and put it back into its slot in the cover.
Once you've got the cover off, you'll find this (you can see how the orange gasket sticks):
 | | Click image to enlarge |
Notice how exhaust gases get up here too so, it will all need a clean.
So, what's happening?
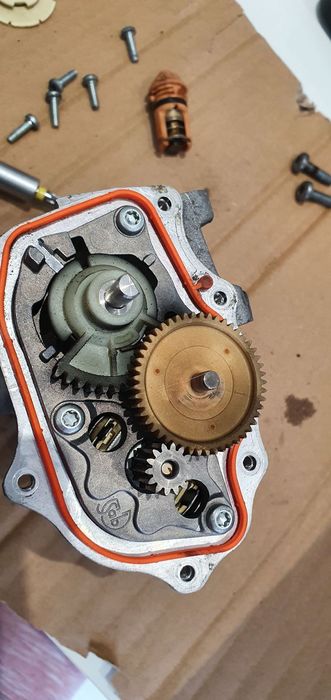
The engine commands how far open it wants the EGR. It does this by sending a current to a little electric motor (interesting fact: I Googled the part numbers and these motors originate from photocopiers!). The little electric motor is the cog at the bottom of the picture (you'll also see its power terminals). This is joined by the yellow plastic cog to the wedge shaped cog. The wedge shaped cog is spring loaded (so when there is no power to the valve, it is naturally closed). This cog is connected to the valve underneath.
The yellow plastic cog simply lifts up to reveal 4x T20 torx screws. Remove these and underneath, you will see this (the motor and the valve mechanism):
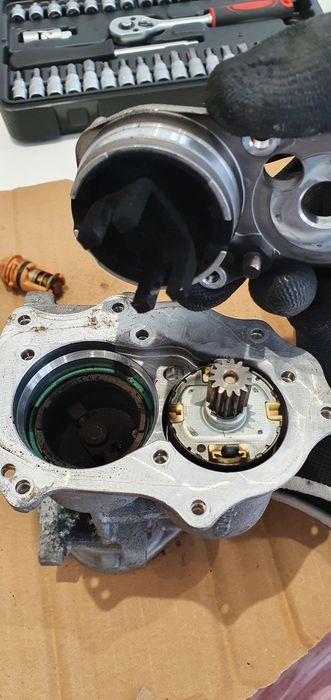 | | Click image to enlarge |
The motor simply lifts out (put this aside) but, see how dirty the top of the valve gets!
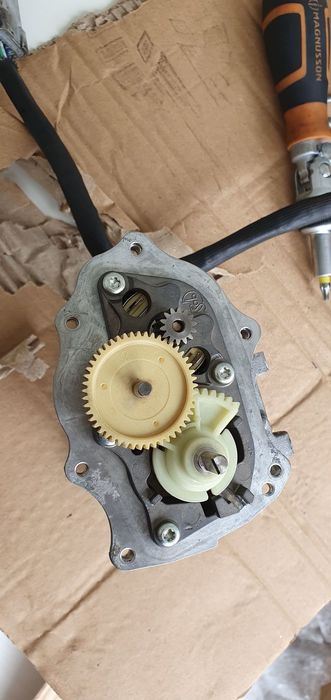
Straight into the ultrasonic for both the section with cogs and the valve unit:
 | | Click image to enlarge |
Check for free operation of the valve. That's the servicing done!
Part 3. The electronics
Going to the EGR are 4 cables. 2 go to the motor, 2 go to the position sensor.
Inside the plastic cover are 2x terminals. These can be clearly seen and attach to the motor when you put the cover back onto the EGR unit.
If you are experiencing EGR problems with the valve not acting as commanded, it could be the spring under the wedge shaped cog or it could be the motor. I doubt you can buy the Motors individually but, you can replace them individually.
Also inside the cover is the position sensor. This tells the engine how open the EGR valve is. Inside the plastic cover is a beige coloured cover. When you put the cover on, this attaches to the top of the rod for the valve. Remove this plastic cover and inside is a spring and a couple of brushes onto a track. This actually forms a potentiometer I.e. a certain resistance tells the ECU how open the EGR is. It's entirely possible for this to go open loop or for the brushes to be damaged. You can potentially get away with just replacing the plastic cover for this type of problem.
Re-assembly
Ensure all gasket surfaces have been cleaned with wire wool so, they seal properly. Ideally do this before cleaning or now, being sure to remove all wool debris.
Firstly, use electrical contact cleaner to clean up the contacts on both the motor and In the plastic housing.
To re-assemble the valve, re-install the motor with the notch in the above cog plate matching its position.
Next, ensure the wedge shaped cog is installed fully restracted so that the valve is forced closed. Then, check it opens and install the 4x T20 screws. Re-install the yellow cog.
 | | Click image to enlarge |
Then, simply gently push the plastic cover back on (with orange gasket in place) and install the 6x T20 torx screws. Because you're dealing with a gasket, be sure to tighten screws at opposites.
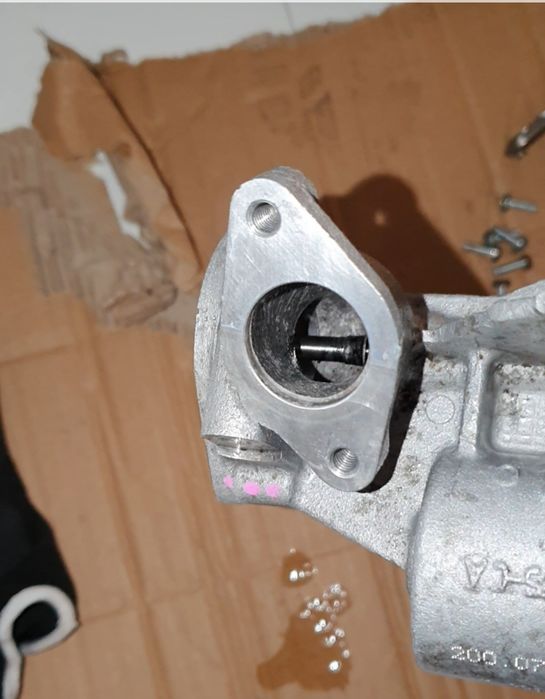
Next, get the new gasket joining the cooler to the valve and align the cut out notch. Then install it the correct way around with the 2x T27 Torx screws. Correct way around is with the gas outlet adjacent to the coolant exit.
Now, insert the new thermostat into the coolant inlet (wider than the outlet). It has 2 little lugs on it that fit into 2 little holes on the cooler. The part number is LR006115 and it's about £10.
Be sure to also replace the two gaskets at either end of the assembly. The exhaust gasket is LR004250. It's about £6. The gas-out gasket is LR003828. They're about £11.
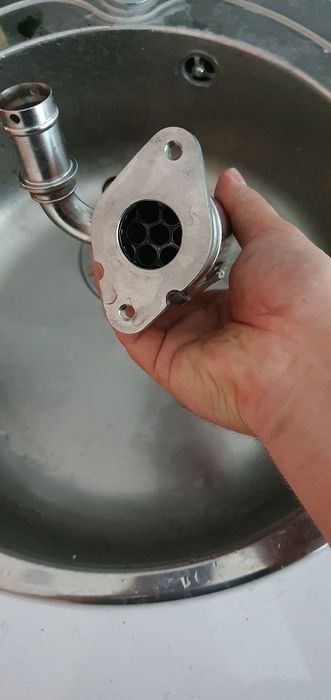
You should now end up with a nice clean and refurbed EGR and cooler!
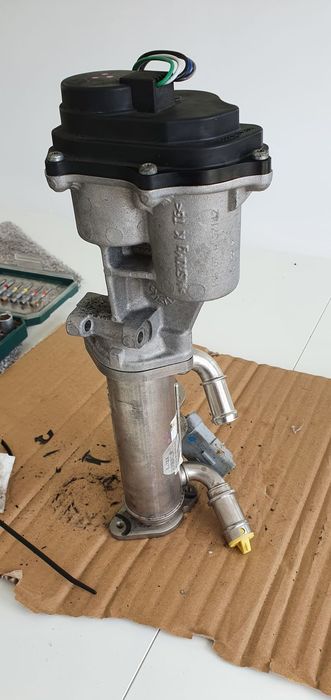 | | Click image to enlarge |
I hope this helps anyone looking to do the job. 2015 Range Rover Autobiography 4.4 SDV8
Last edited by garyRR on 12th Feb 2022 12:31pm. Edited 5 times in total
|


