garyRR
Member Since: 13 Mar 2021
Location: Hampshire
Posts: 1494


|
| How To: Replace Fan Blower Motor on all models L322 02-12 | |
Here's the step by step guide with photos on how to replace the interior fan / blower motor on the L322. My vehicle is a 2011 (covers vehicles 2009-2012), however the steps are broadly similar for all models between 2002 and 2012. For the important part - the access area for the fan, I have included photos for all models.
Thanks massively to this thread here, where a number of other forum members have posted their experiences and tips: https://www.fullfatrr.com/forum/topic14961-90.html
Thanks also to JS Norman for sending me the guide they use for their own reference. Linked here.
Taking the dash out looks daunting, however it genuinely isn't too bad, so long as you keep track of all of the screws. Follow my tip (you'll see this in my photos), and loosely screw every screw back into its respective location once that part of trim is removed, so you know where it goes. Any screws that will be in the way, tape with masking tape to that item.
Symptoms:
- Failed blower motor
- Noisy blower motor
- Bearing noises coming from inside the dashboard
- Squeaking when the fan is running (can be diagnosed by turning off to confirm it is coming from the fan)
On all models, the part number is JNB000060. A genuine blower costs in the region of £300. A cheap aftermarket part costs in the region of £40. I settled for the Nissens blower direct from Nissens UK for £79. Nissens are a trusted manufacturer of all kinds of auxiliary engine components and electrical running gear for various big manufacturers.
Difficulty: Moderate
Time: 3-5 hours
Tools Required:
Torx bit set with extensions. This set from Screwfix is perfect for this job: https://www.screwfix.com/p/1-4-drive-stand...eces/2497v
Plastic trim tools
Flat blade screwdriver
Pick set
Pry bar / L bar
Masking tape (lots of screws - to tape the screws to the items you remove)
MUST HAVE - Pair of palm gloves such as these https://www.toolstation.com/palm-gloves/p64335
Steps Involved
Step 1: Disconnect the battery (5 minutes)
Move the front seats and steering wheel into accessible positions and release the upper and lower glove box latches and then disconnect the battery (M10 sockets).
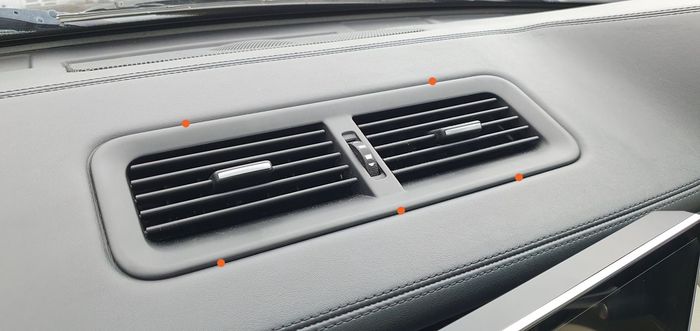
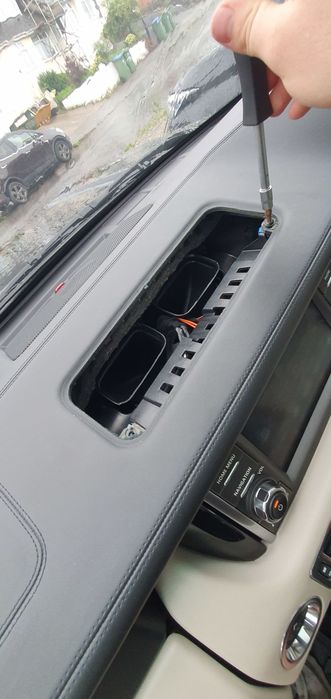
Step 2: Remove the dash top speaker and top air vents (10 minutes)
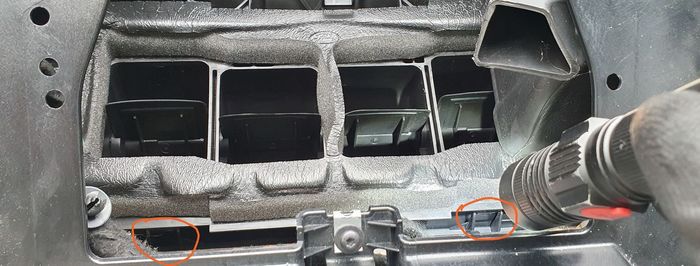
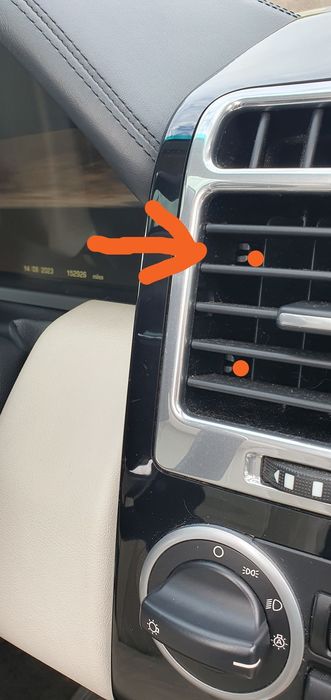
Start by removing the air vents. This is really simple. Put your plastic trim removal tools at the following points and the vent will clip out. Pull up and slightly towards you to remove.
Remove the 2x T25 screws and tape to the underside of the vent.
 | | Click image to enlarge |
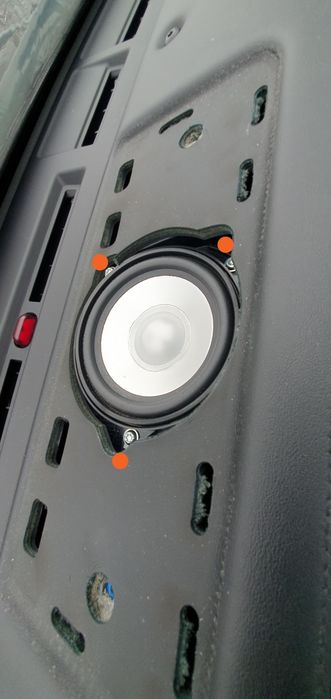
Now remove the speaker grille by using the plastic trip tools at the points marked and then hinge out. You will see there are hooks on the back edge.
Remove the 3x T20 screws and lift out the speaker.
 | | Click image to enlarge |
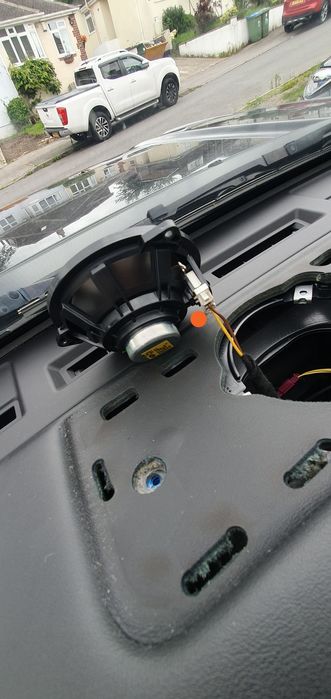
Push in the two white clips on the speaker plug to remove. Tape the 3x screws to the speaker and store safely in the boot.
 | | Click image to enlarge |
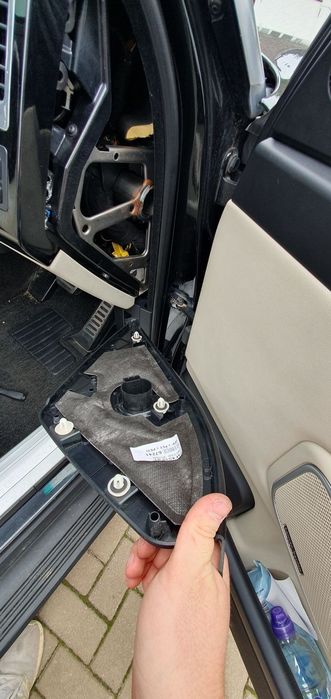
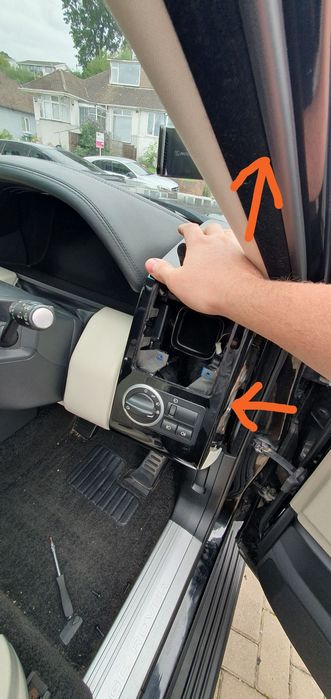
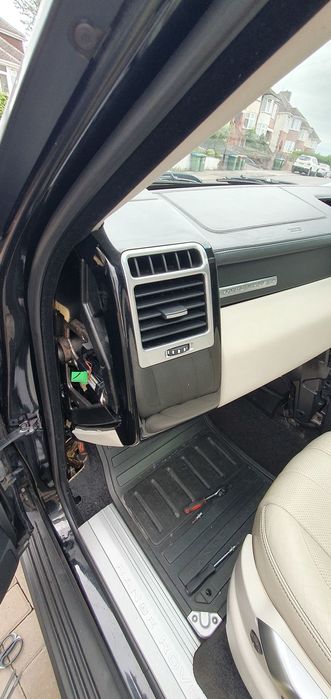
Step 3: Remove the two end dash trim pieces (10 minutes)
Now push your trim tools into the widest section of each of the end trim panels (the first clip is located here) and gently unclip in the locations seen on the panel below:
 | | Click image to enlarge |
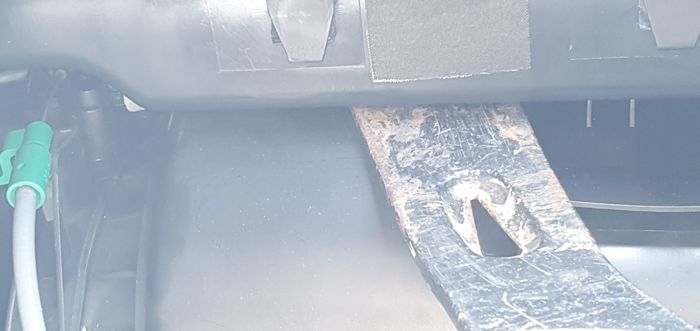
If your vehicle is fitted with the passenger dashboard airbag, also remove the green multiplug.
 | | Click image to enlarge |
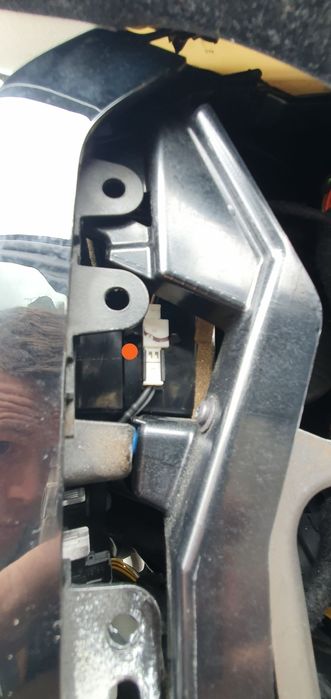
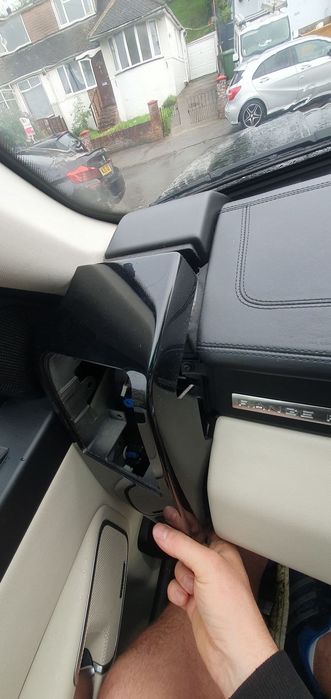
Step 4: Remove the end dash air vents (20 minutes)
Disconnect the plug on each side vent through the side panel which is now open.
 | | Click image to enlarge |
Push in the clips from the side with a flat-bladed screwdriver.
 | | Click image to enlarge |
You're aiming for these clips:
 | | Click image to enlarge |
Now use your pick to pull in these two clips. They helpfully have a little hole for the pick to secure into.
 | | Click image to enlarge |
Now the vent should be slightly loosened. Position a plastic trim removal tool top and bottom.
 | | Click image to enlarge |
Now repeat the above process of releasing the 4 clips whilst levering the trim removal tools and the vent will pop right out.
This should reveal the following view:
 | | Click image to enlarge |
Remove the 2x T20 screws visible now the vent has been removed.
 | | Click image to enlarge |
Remove the T20 screw on the side of each of the air vent fascias.
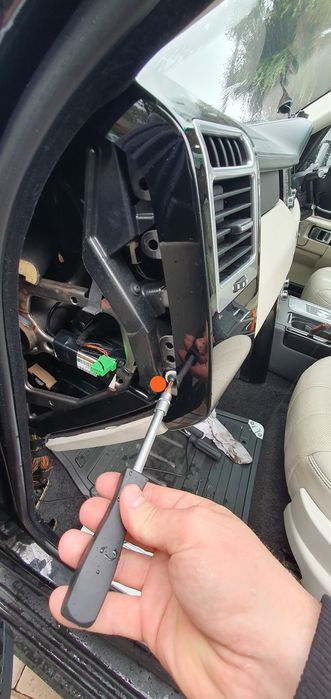 | | Click image to enlarge |
Now it's time to remove the vent fascias. Place your hand on top of the fascia, pull towards yourself and then upward, and it should come free.
 | | Click image to enlarge |
 | | Click image to enlarge |
Now remove both panels, unplugging the multiplug to the lighting controls on the driver side.
 | | Click image to enlarge |
 | | Click image to enlarge |
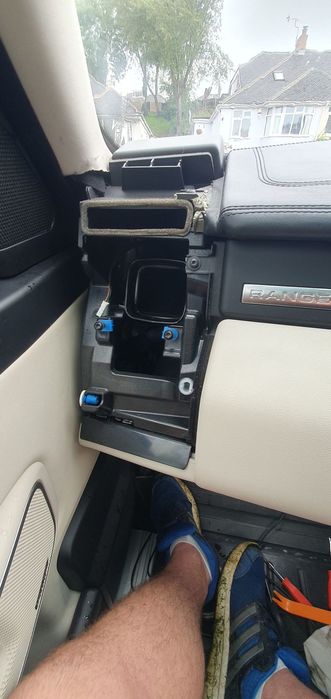
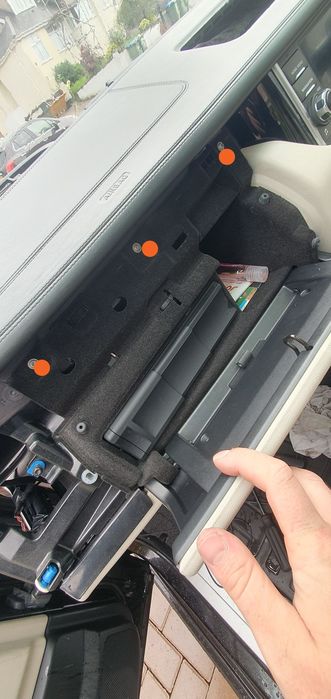
Step 5: Remove the lower glove box (15 minutes)
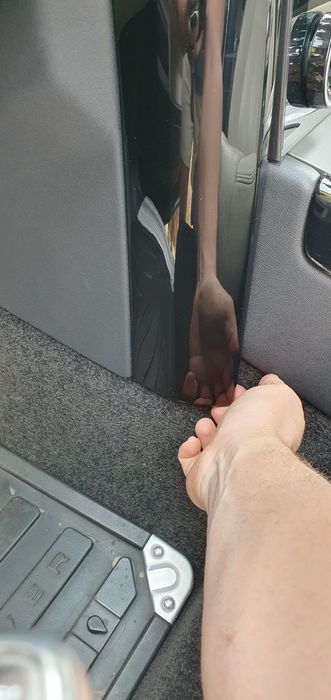
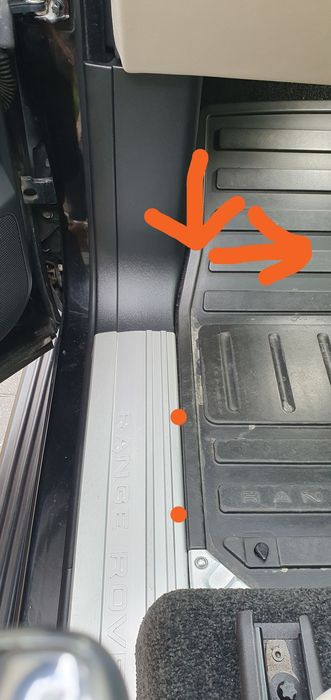
First, you need to remove the lower footwell panel. by removing the 4x T25 screws as shown.
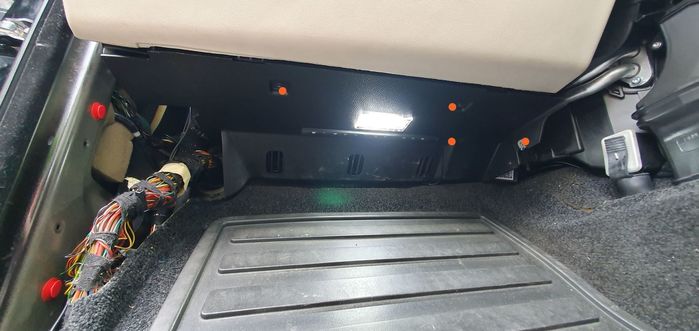
Remove the trim panel along the transmission tunnel by pulling at the bottom of the trim.
 | | Click image to enlarge |
Next, remove the footplate by using a flat bladed screwdriver under its lip in the areas marked. Once removed, pull the trim backward and towards the centre of the car to remove.
 | | Click image to enlarge |
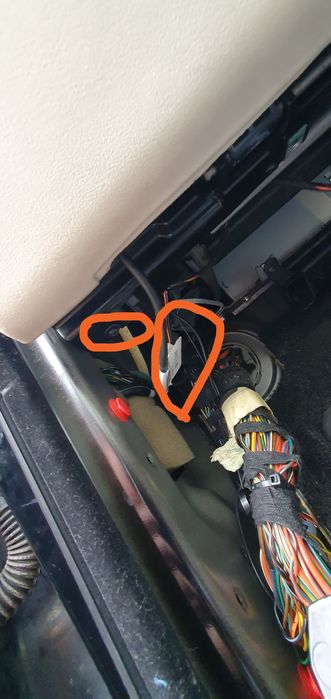
Once removed, you will find this screw and multiplug to the courtesy light. Unplug the courtesy light and remove the T20 screw.
 | | Click image to enlarge |
Now open the lower glove box and on the right hand side, press the plastic stop inwards to drop it further.
Remove the 8x T20 screws.
Now pull out the lower glove box. As you remove, unplug the two plugs going to the glove box light (black and red) and the latch.
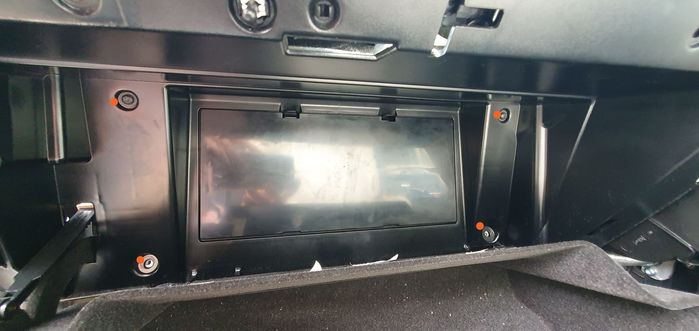
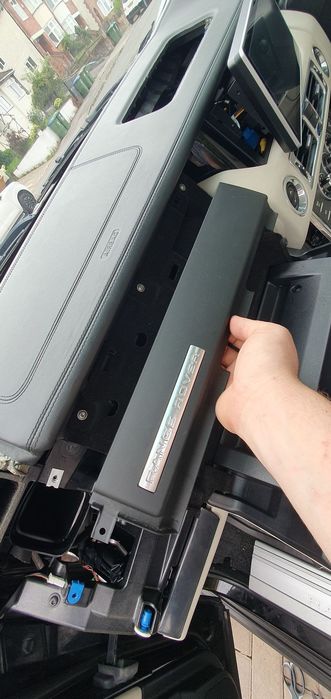
Step 6: Remove the upper glove box and CD changer (10 minutes)
Remove the T25 screw and pull off the Range Rover trim panel by pulling at the bottom.
 | | Click image to enlarge |
Unscrew the 3x T25 screws.
 | | Click image to enlarge |
Disconnect the fibre optic connector by pressing the tab inwards and pulling the plug out.
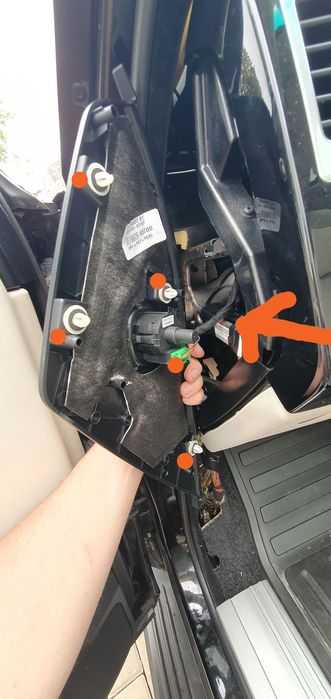
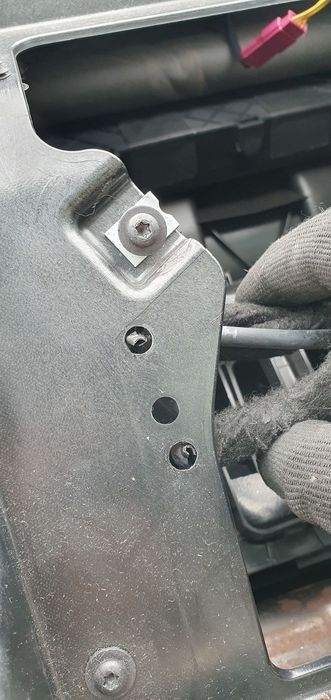
Remove the 2x T25 screws from the bracket marked and begin pulling the top glove box outwards.
As you do, disconnect this connector to the latch.
 | | Click image to enlarge |
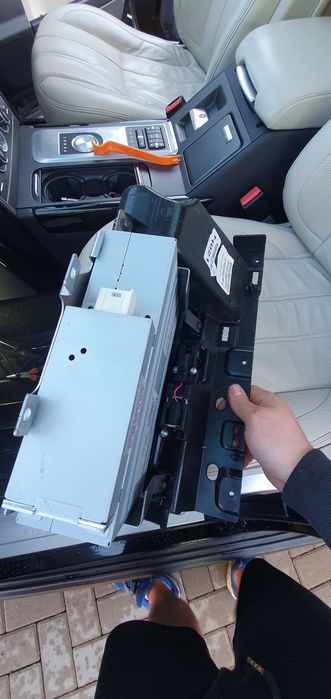 | | Click image to enlarge |
You have now removed both glove boxes.
Step 7: Disconnect the dashboard passenger airbag (for 2006-> models only) (10 minutes)
Unplug the airbag.
Now remove the tack.

Remove both bolts marked.
As the airbag is now disconnected, if you need to reconnect the battery to lock the car and come back to it another day, you can do so. Just make sure it is disconnected again ahead of re-installing the airbag later.
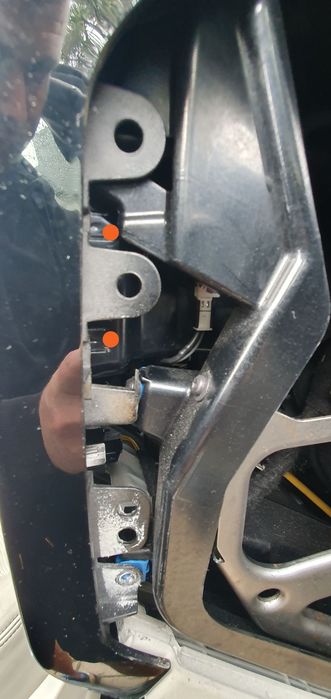
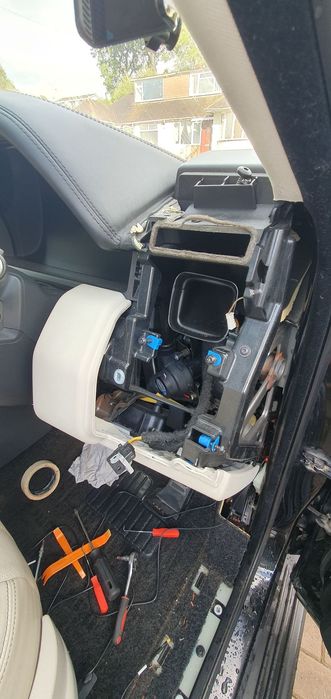
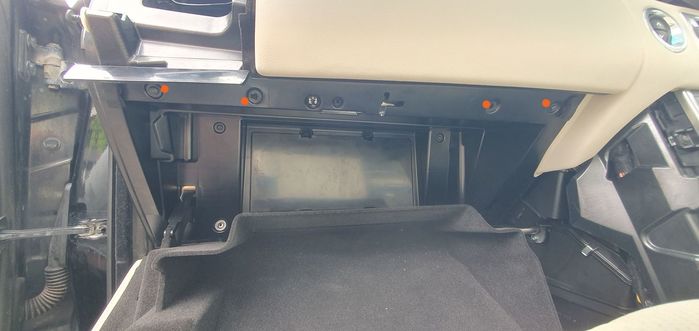
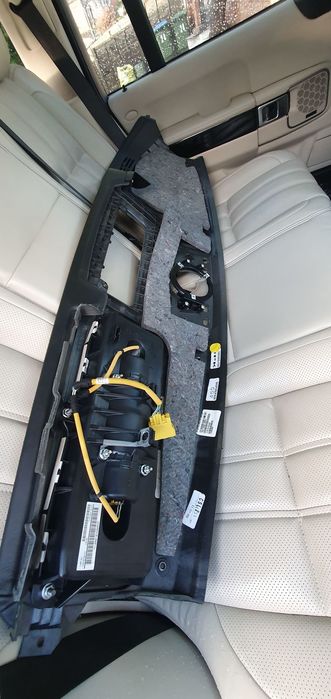
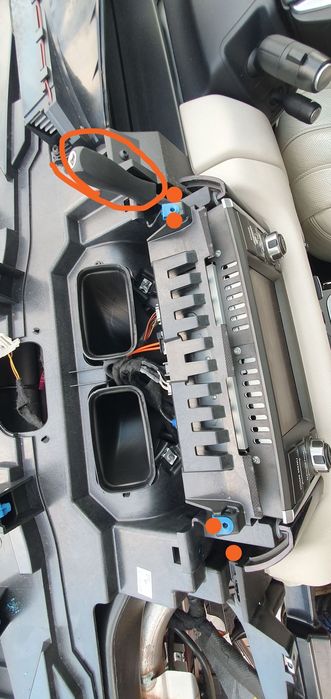
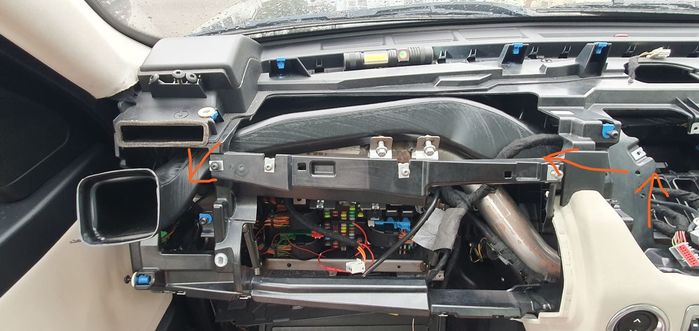
Step 8: Remove the dashboard (10 minutes)
Remove the 4x T30 screws (blue) and 4x T25 (orange) screws marked.
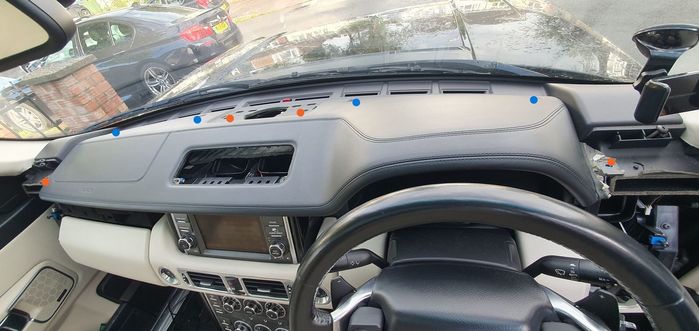
The dashboard is now ready to remove. Pull towards yourself by approximately 2cm and then lift up to remove.
The back seats are an ideal place to store the dashboard for the time being.
 | | Click image to enlarge |
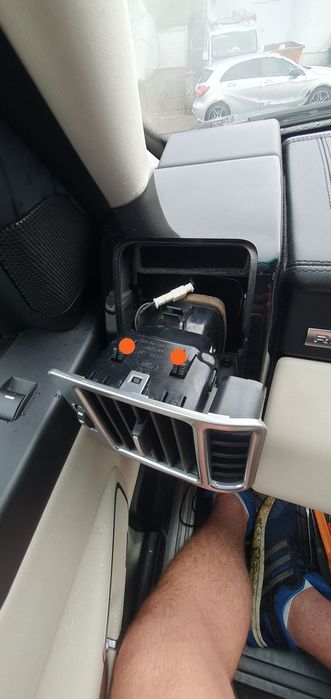
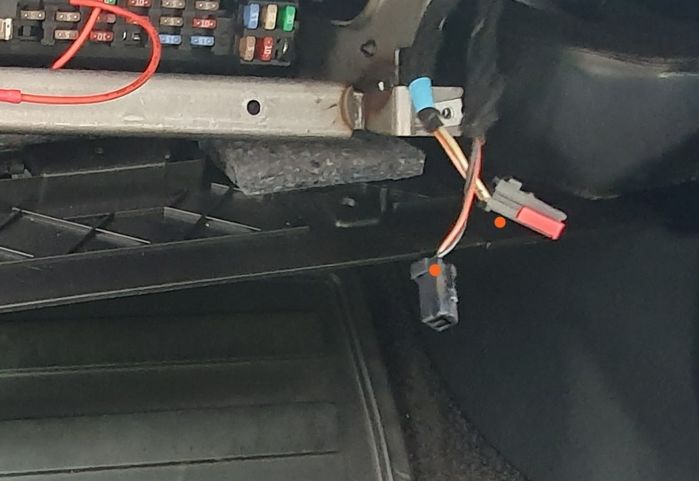
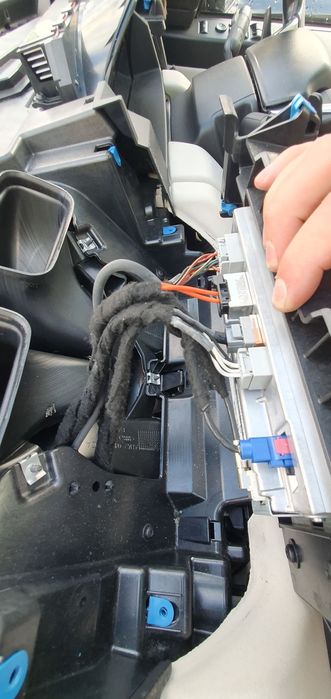
Step 9: Remove the infotainment system touch screen (10 minutes)
Remove the 4x T25 screws (two are on top and horizontal and two in a well, running vertically). Note the screwdriver in the well removing the vertical screws.
 | | Click image to enlarge |
Take a photo of the connections to remind yourself which plugs in where and then remove the plugs and store the screen somewhere safe.
 | | Click image to enlarge |
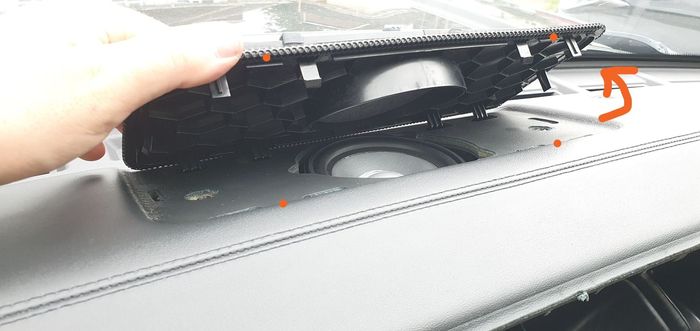
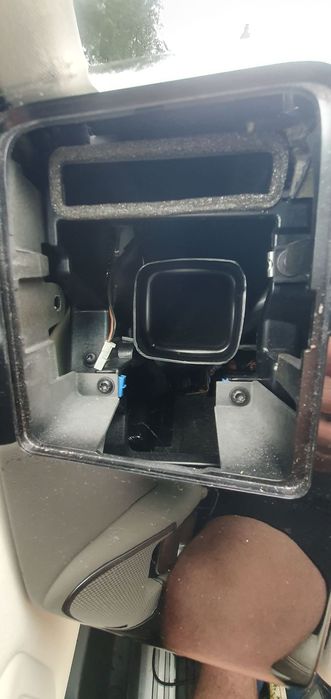
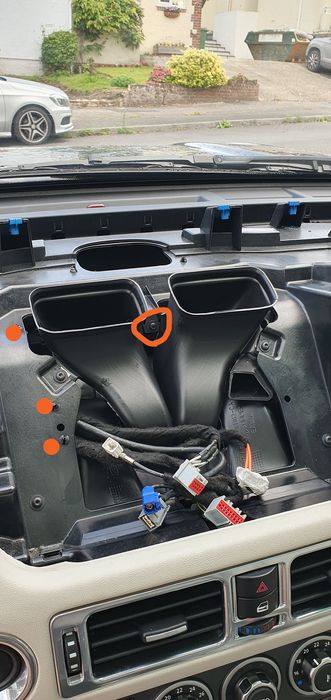
Step 10: Remove the centre air vents ducts (30 minutes)
Note, this is actually one of the most difficult parts of the job.
First, remove the screw marked. The cooling vent for the infotainment system can be moved around to help you with access to the other vents.
 | | Click image to enlarge |
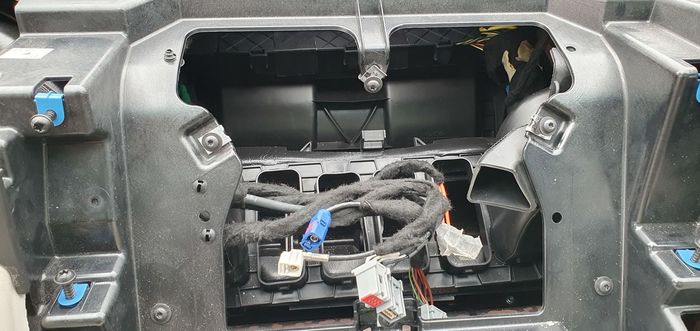
You will see the centre air vents are screwed from behind.
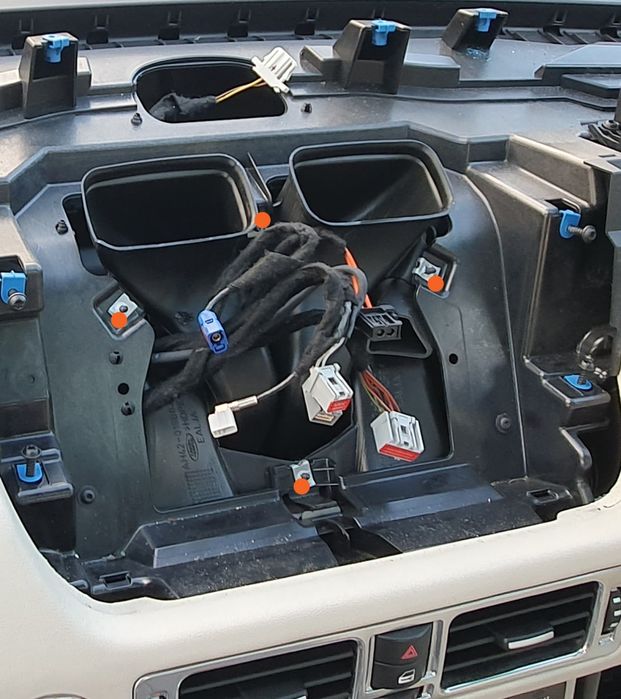 | | Click image to enlarge |
2 of these you will need to reverse with a pair of pliers. 2 can be accessed from behind.
Using the top screw (as an example only), use mole grips or pliers to unscrew the BOTTOM and RIGHT screws. Put your fingers behind to catch the screws as they release.
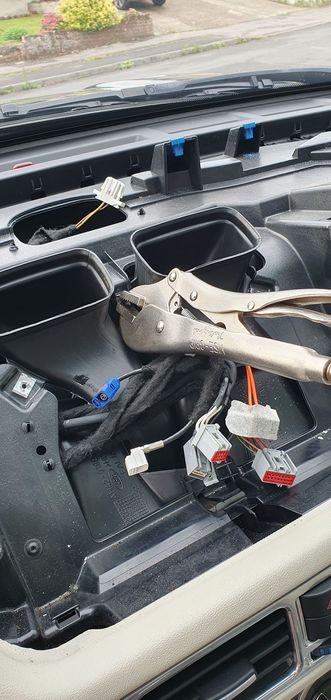 | | Click image to enlarge |
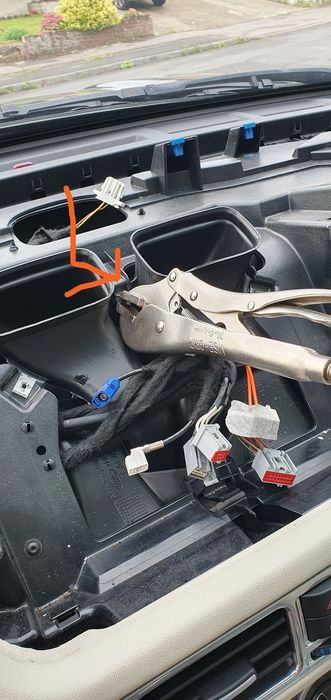
For the TOP screw, reach in through the top speaker port with a small socket and extension and unscrew.
 | | Click image to enlarge |
For the LEFT screw, this can be accessed through the side where the top glove box has been removed. Access is tight, but it is possible.
Pull out the central two vent ducts followed by the centre console vent ducts. Also pull the driver side vent off the manifold but accept access is tight, so for this one, it's as far as you dare bend it.
 | | Click image to enlarge |
Now, loosen the passenger side vent duct. This is done by removing the following two screws and then lifting the vent off the manifold and pulling it through the dashboard.
 | | Click image to enlarge |
 | | Click image to enlarge |
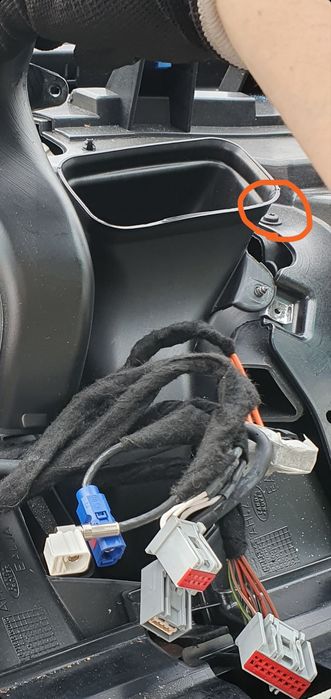
Pull the cables going to the touch screen out of the way, by also temporarily removing their tacks (pictured here).
 | | Click image to enlarge |
Step 10b:Cut the dashboard to create an access hole (30 minutes) (ONLY APPLIES TO VEHICLES PRE 2009)
section to follow
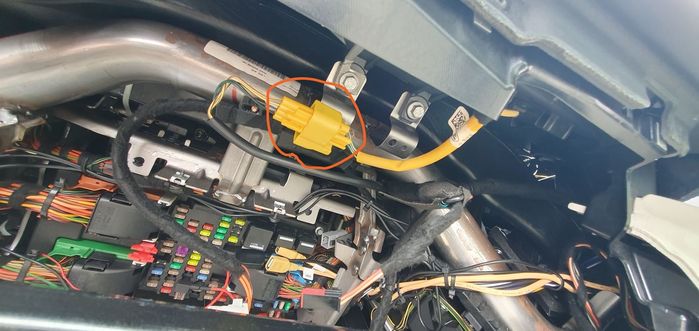
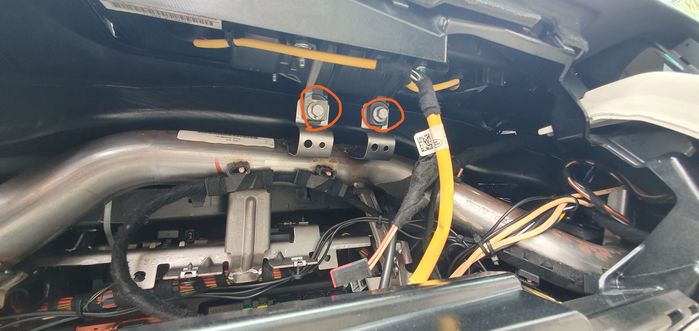
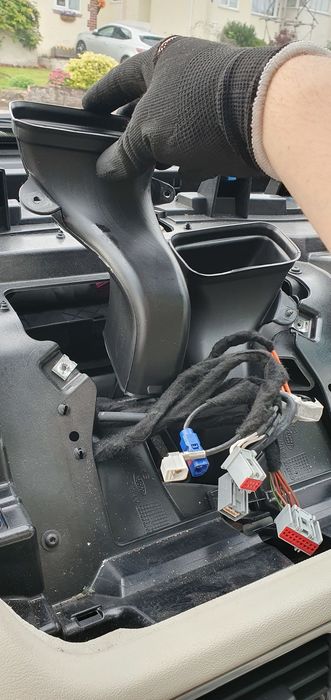
Step 11: Remove the air vent manifold (5 minutes)
With 3 of the 4 vents out of the way, and the driver side vent loosened (can be bent as required), it's time to remove the manifold.
Lift up the left side and angle towards the front of the car. Then wriggle off the driver side vent and pull it out.
 | | Click image to enlarge |
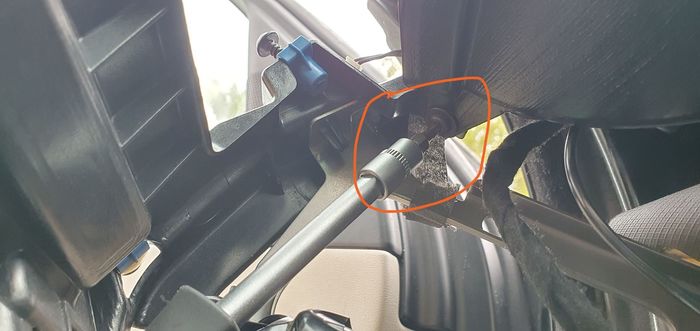
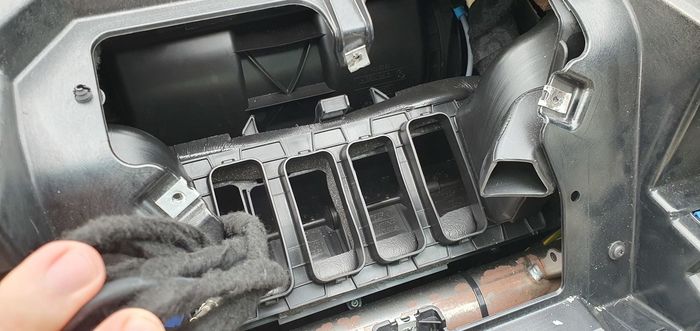
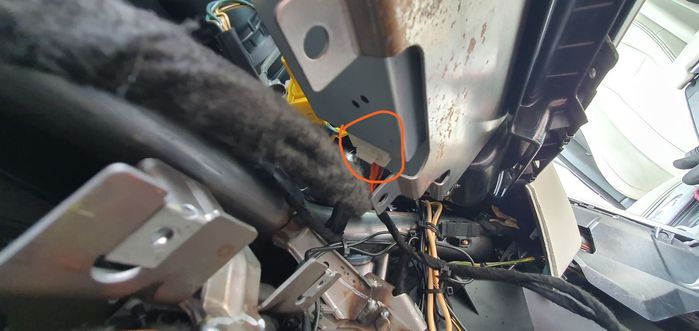
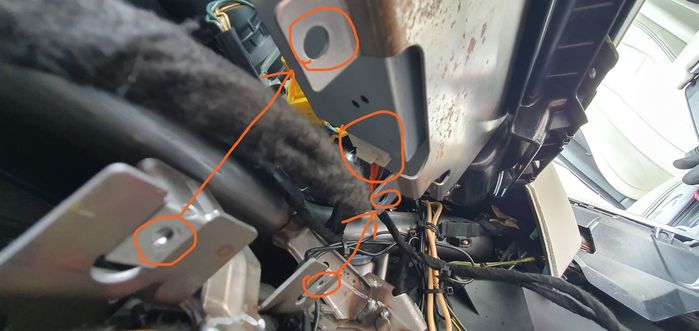
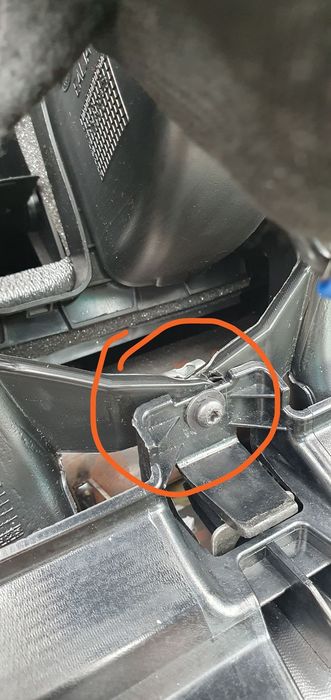
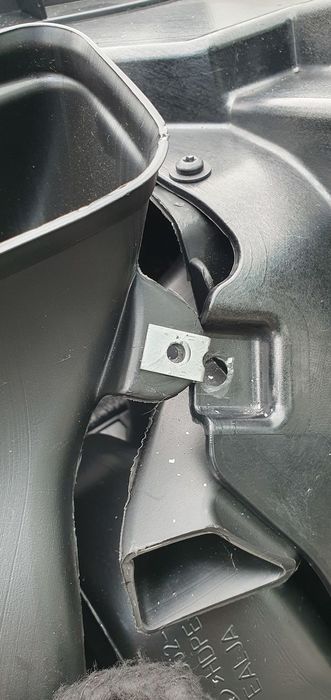
Step 12: Remove the flap panel (10 minutes)
The flap panel is held on by a T25 screw on both the left and right, and has a metal adjuster rod also attached.
There is a screw on the left, accessed through the area where the top glove box goes.
 | | Click image to enlarge |
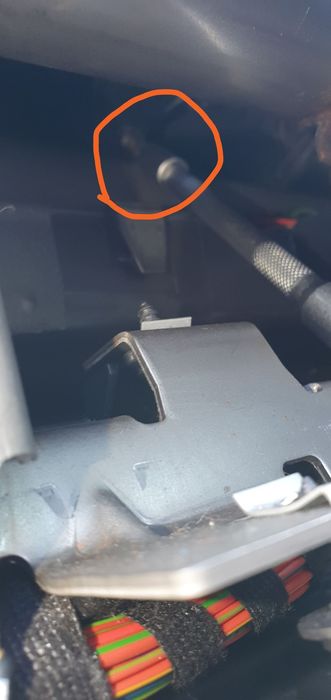
On the right, the screw is hidden by the vent and a wiring loom. Use a camera to help identify the location. Push the loom out of the way and force a screwdriver into position.
 | | Click image to enlarge |
Marked is the loom with 'L' and the vent duct with 'V'. Force both out of the way. Use a smaller T20 bit if required, as your screwdriver is at a slight angle.
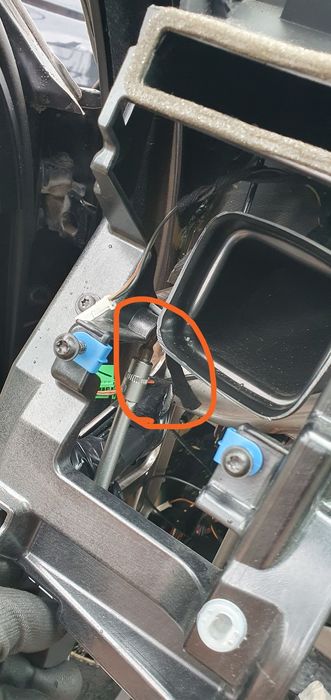
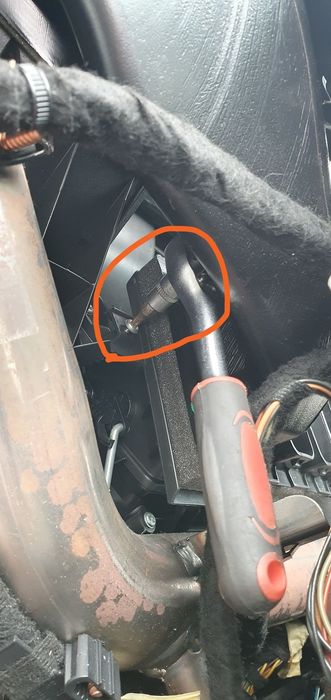
The adjuster rod assembly can be clearly seen.
Here's a trick to get the adjuster rod off in a few seconds (the reverse is true for re-installing later).
Lift the flap panel up by about 5mm-1cm and then rotate it until the plastic tab allows you to pop the rod off. There's plenty of space to do this.
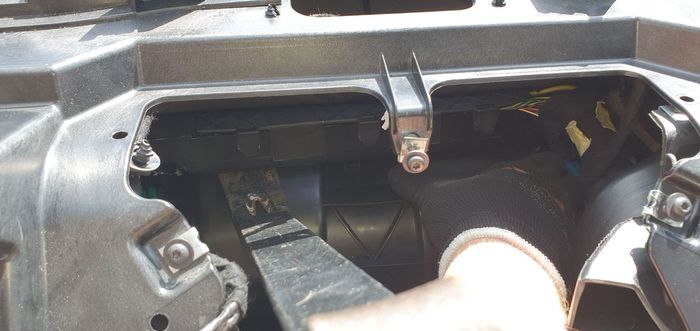
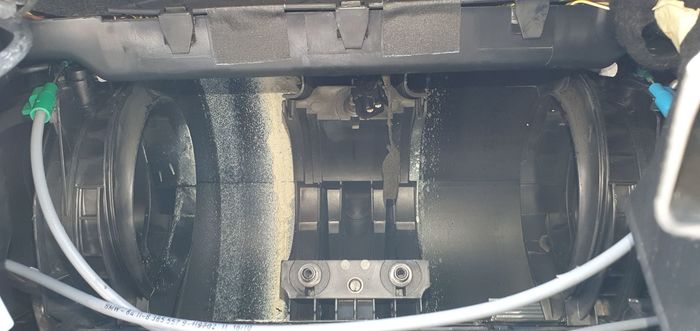
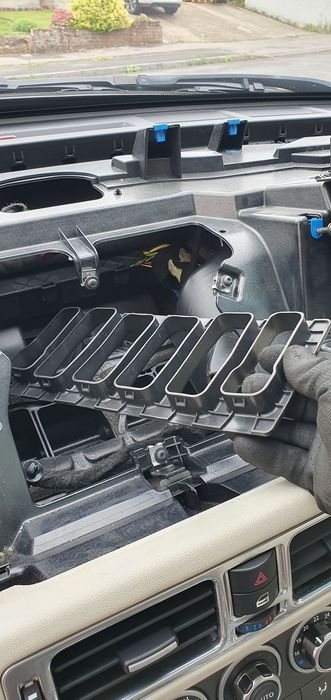
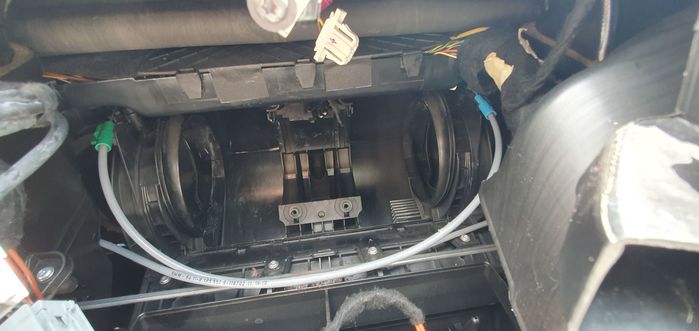
Lift the flap panel out and you now have enough room to work and remove the blower.
You now have access to the fan housing. Time for a much needed break.
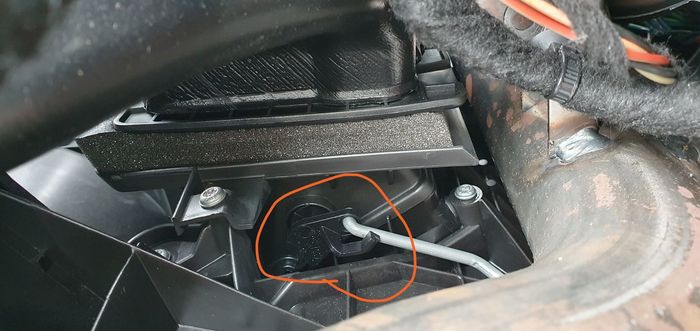
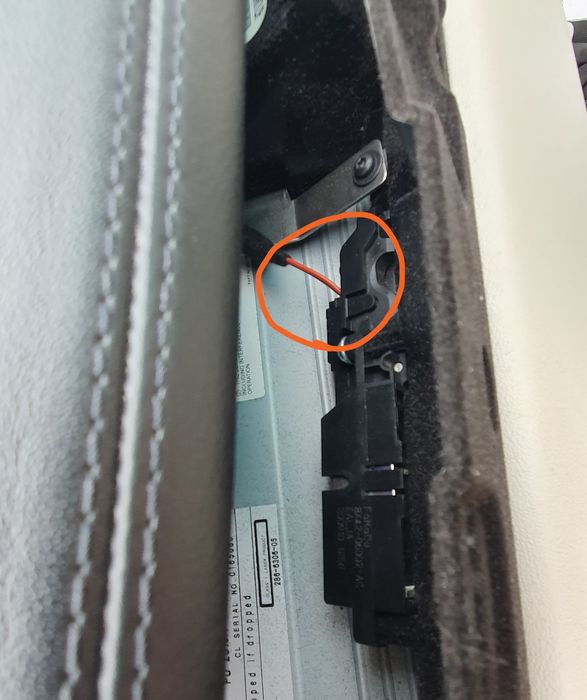
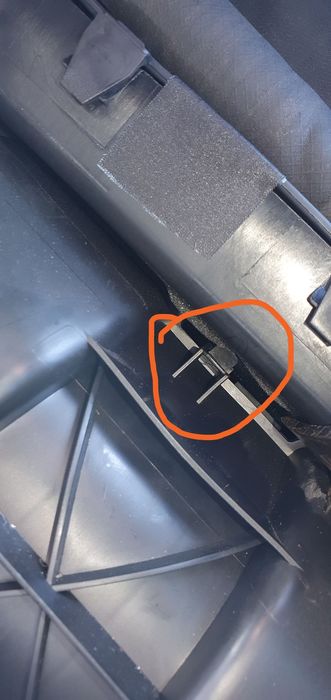
Step 13: Unclip the fan housing cover (10 minutes)
There is a single top plastic clip (note it's off centre to the left) and there's 2 metal retaining clips either side of the housing.
First, pop off the top clip by putting your pry bar either side of it.
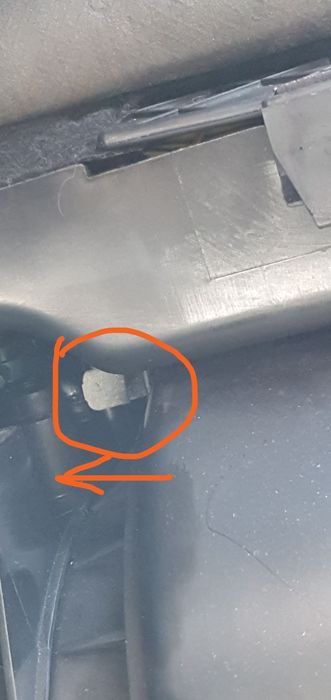
 | | Click image to enlarge |
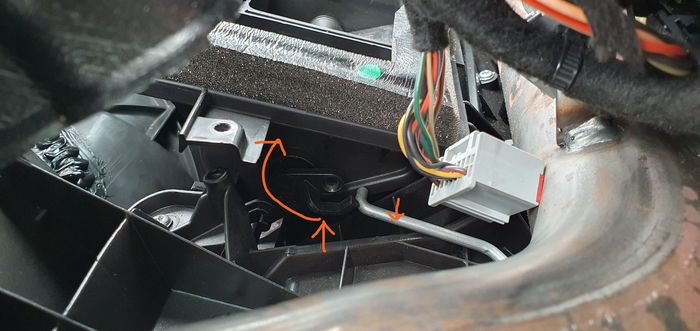
Now, reach in and clip off the metal clip either side of the cover. This takes a few seconds.
 | | Click image to enlarge |
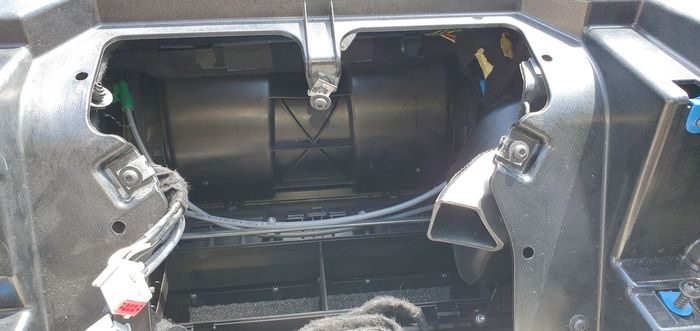
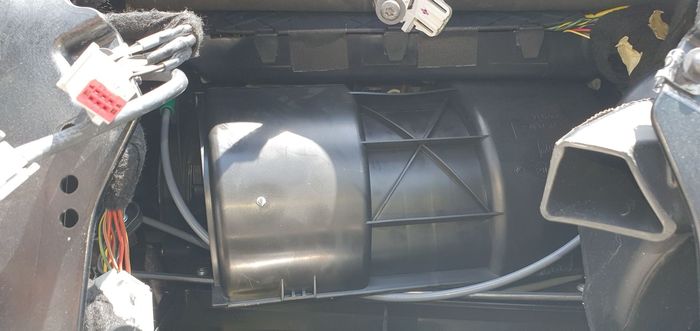
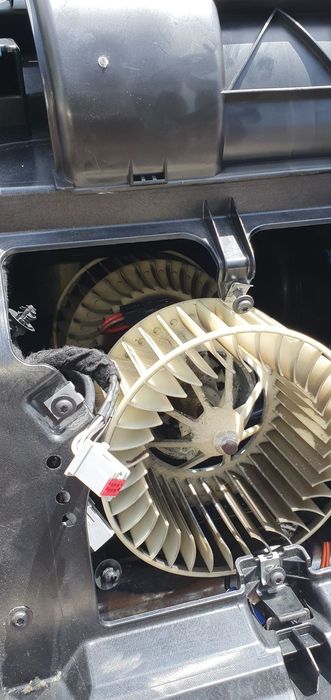
Step 14: Lever out the fan housing cover (10 minutes)
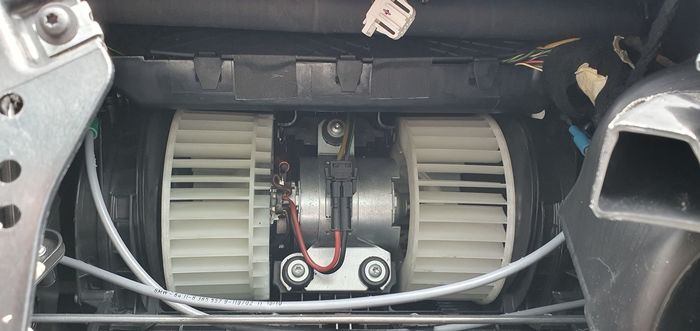
Back to the pry bar. Locate it fairly central and lift up the wiring loom box slightly. Keep levering and pulling the cover and it will come free. It's very flexible, so can easily be man-handled out.
You can now see the fan.
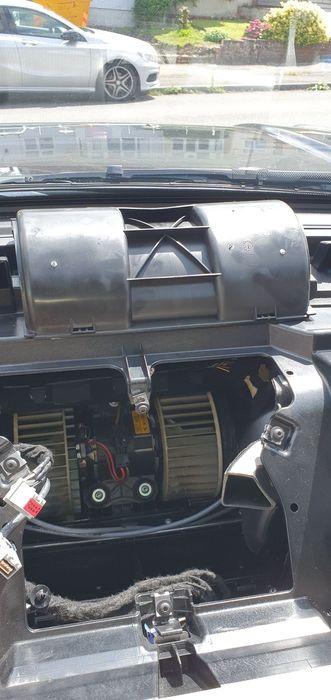 | | Click image to enlarge |
Note the two hinges on the bottom of the cover. When re-fitting, it needs to go bottom first.
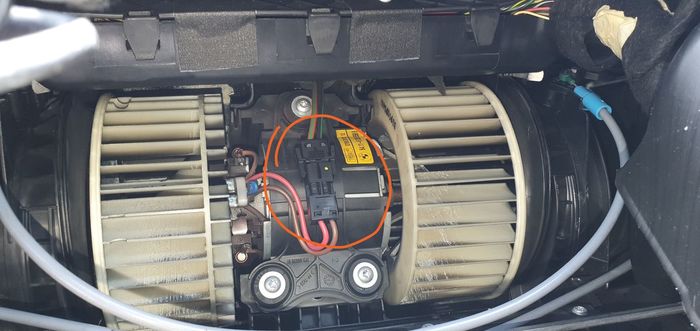
Step 15: Remove the fan (20 minutes)
Start by unplugging the fan.
Use a socket and extension to remove the 3 bolts on the fan.
As this fan is going to be discarded, you don't need to be so precious about removing it particularly gently.
Start by removing the right hand side of the fan. If you look at the grey cables running by, there's more room on the right hand side than the left. Bend the plastic fan blades slightly to pull the fan clear of the wiring loom box and then pull into the void in the dash.
 | | Click image to enlarge |
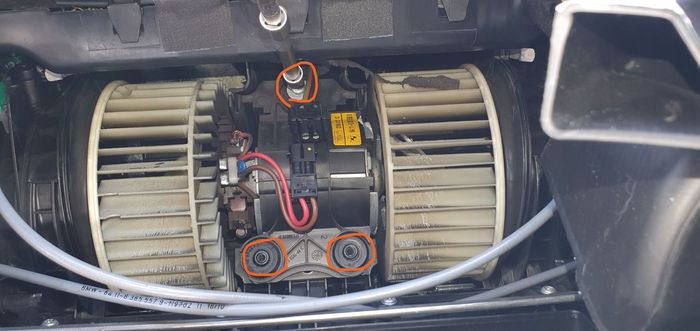
Now, bring the bottom clear of the screw hole and then raise the back of the fan motor to bring the fan blade clear of the top screw hole.
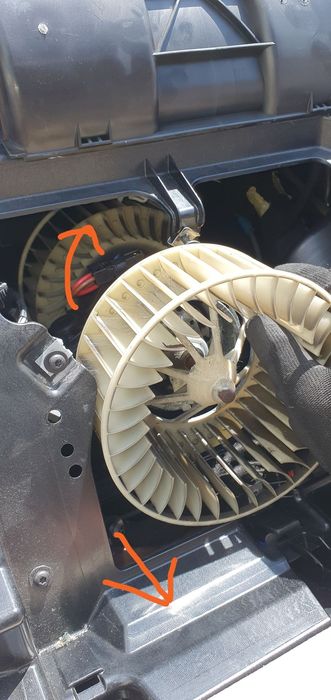 | | Click image to enlarge |
Do the same for the other fan blade and you have the fan out! Hooray!
Compare the old fan to the new fan. Another member said the fan blades on their new blower were slightly smaller. The Nissens is identical.
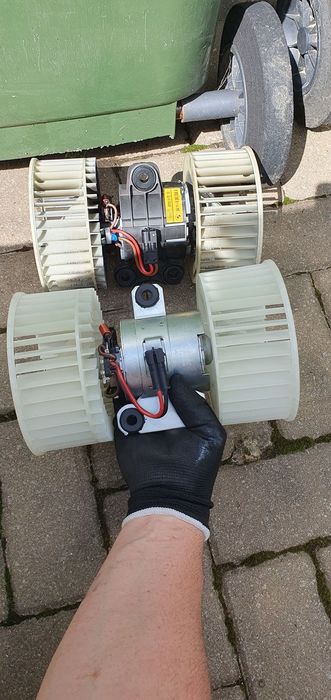 | | Click image to enlarge |

Step 16: Clean the fan housing (5 minutes)
Use some de-greaser, brake cleaner or other cleaning fluid to clean the fan housing (and cover) if it is dirty.
Step 17: Install the new fan and test (20 minutes)
Follow the reverse procedure as in Step 1, however being careful with the new fan, and avoiding touching the fan blades - hold the motor housing only (where possible).
Install through the right hand side of the fan housing, where the grey cables give more clearance, and then rotate. Use the pry bar to lift the cable box above this time and give enough clearance, instead of squeezing the fan blades through.
Reconnect the battery and test the fan works by using the climate controls. Disconnect ahead of airbag plug in later.
Step 18:Re-install the fan housing cover (15 minutes)
Re-install the fan housing cover bottom first. The clips is sits on can be seen.
| | Click image to enlarge |
Use the pry bar to clip the centre clip over.
Note, this may take some fettling to reinstall the clips, as it is a very precise fit. If the clips will not engage, gently massage the 2 ends of the cover along their seals. This will encourage the notches which take the clips to fall into place. Be patient, keep massaging. Eventually the clips will re-engage.
You'll be pleased to know, all tasks from here onwards are considerably quicker than when you removed these items, so the whole dash can be back together within an hour.
Step 19:Re-install the flap panel (10 minutes)
As before, place the flap panel in the void and rotate in order to fit the adjuster rod.
This time when installing, you'll need to be aware of the placement of the clips marked below. Install onto these clips first, then adjust into place and screw down.
Step 20:Re-install the air vent manifold (10 minutes)
Follow the reverse procedure as before.
Step 20b:Glue the dashboard cut out into place (30-45 minutes) (ONLY APPLIES TO VEHICLES PRE 2009)
Step 21:Re-install the air vent ducts (10 minutes)
This is a slightly different procedure to before.
Firstly, affix the driver side vent and then move the passenger side vent back into place (being sure to re-fit the 2x T20 screws). This will hold the manifold down also.
Now re-install the centre console ducts. Hold the metal screw clip behind the duct screw holes and insert the screw FROM THE FRONT this time.
 | | Click image to enlarge |
Next, install the two top vents, with the side metal clips as shown and then install the screw from the front.
 | | Click image to enlarge |
Finally, re-install the top screw similar to the bottom screw. Reach into the speaker void and hold the metal clip from behind, inserting the screw from the front.
 | | Click image to enlarge |
Remember to clip the cable tacks back in.
Step 22: Re-install the infotainment system touch screen (5 minutes)
Plug in all the cables as per the photo taken earlier and re-insert the 4x screws.
Step 23: Re-install the dashboard (5 minutes)
Follow the reverse of before. If the dashboard is not sliding back, check the air bag bracket isn't getting fouled.
Insert the 4x large screws and 4x smaller torx screws.
Step 24: Re-connect the dashboard passenger airbag (for 2006-> models only) (5 minutes)
Follow the reverse procedure as before.
Step 25: Re-install the upper glove box and CD changer (5 minutes)
Follow the reverse procedure as before. Remember to plug in the fibre optic cable and the connector to the latch.
Step 26: Re-install the lower glove box (5 minutes)
Follow the reverse procedure as before. Remember to plug the black and red plug into the glove box lamp, the multiplug into the latch, and the multiplug on the underside for the courtesy lamp.
Step 27: Re-install the end dash air vents (3 minutes)
Follow the reverse procedure as before. This time, the vents simply push into place with a satisfying click - it takes all of 10 seconds. Remember to reach into the side and plug in the multiplug.
 | | Click image to enlarge |
Step 28:Re-install the two end dash trim pieces (2 minutes)
Fit the door seal in front of the far end of the end panels. Align the rear upper and lower trim clips with their holes and whack into place with the side of your fist.
Step 29: Re-install the dash top speaker and top air vents (5 minutes)
Follow the reverse procedure of before.
Remember the speaker grille has little hinges toward the front of the car. Hinge this grille in on these clips first and then whack into place.
Remember the air vent slides away from you and down in order to re-fit. Do not install vertically.
YOU ARE DONE AND HAVE JOINED THE CLUB
Time to give your interior a good clean. You'll spot I took the opportunity to make a few upgrades whilst I was at it.
Testament to palm gloves, saved hands!
 | | Click image to enlarge | 2015 Range Rover Autobiography 4.4 SDV8
Last edited by garyRR on 7th Mar 2024 8:22pm. Edited 1 time in total
|