Advertise on fullfatrr.com »

Home > Technical (L322) > 2010 Heated/Cooled Seat not working
Post Reply  Down to end
Page 10 of 26 <123 ... 91011 ... 242526>
Print this entire topic · 
matthews


Member Since: 09 Aug 2016
Location: Leeds
Posts: 90

United Kingdom 2011 Range Rover Vogue TDV8 Buckingham Blue

Well that was too much to hope for , seat laid back and all connectors under seat and into controller unplugged and checked , plug em all back in and just the same !!!, shuts down with base and back on , keeps running but produces very little warmth with just back on . Hand in pocket time by the looks of it .

Post #496173 21st Nov 2018 12:40pm
View user's profile Send private message View poster's gallery Reply with quote
GGDR


Member Since: 26 Nov 2016
Location: London
Posts: 3519

United Kingdom 2011 Range Rover Vogue SE TDV8 Stornoway Grey

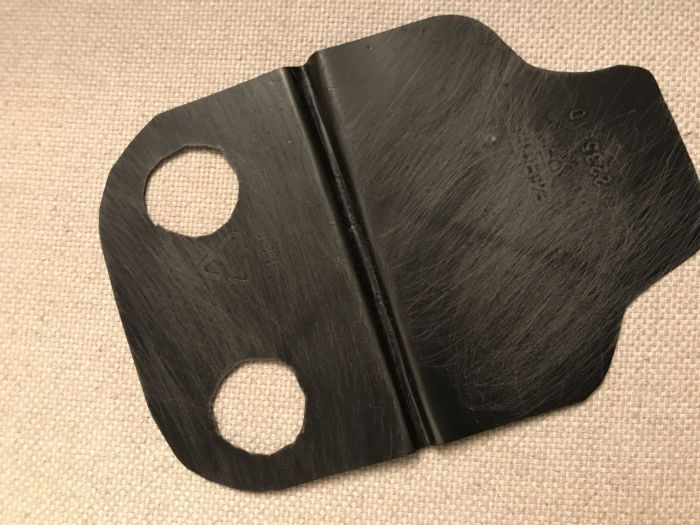
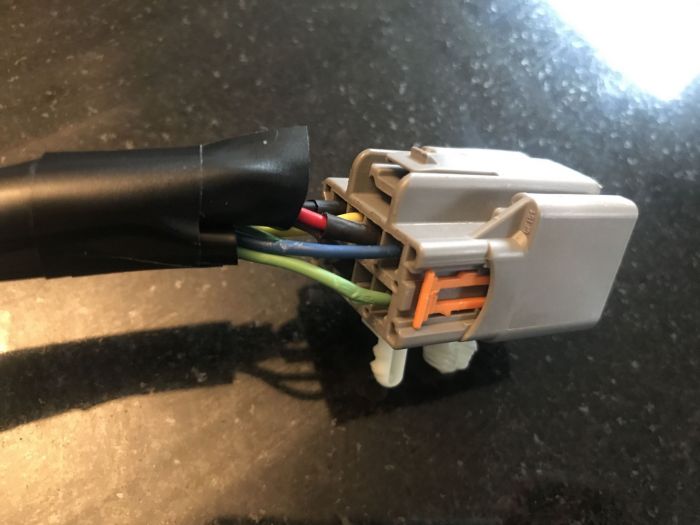
It's been a while, I've had a US-sourced Ford Mustang heat/cool unit sitting there, together with a brand new foam base, ready to attack and fit to get my drivers seat base working....

You can't remove the heat/cool unit without removing the foam, so I thought two jobs in one and I'd treat myself to a new foam base. Many people said it'd made a world of difference, and my seat does looks a little deflated.

As far as the heat/cool goes, I've been putting up with back only heat, achieved by turning the dial on, then immediately switching to back-only. This avoids the whole thing shutting off.

So with the Christmas break, and ok weather I had a go yesterday and got it out. By the way, I wanted to avoid removing the whole seat and it is possible. My seat is still in the car.

John W said:

Quote:
or in the case of the base something restricting sufficient air flow.


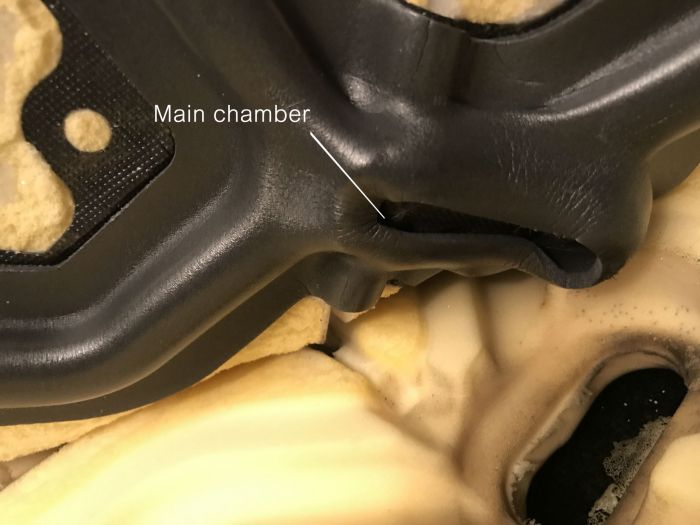
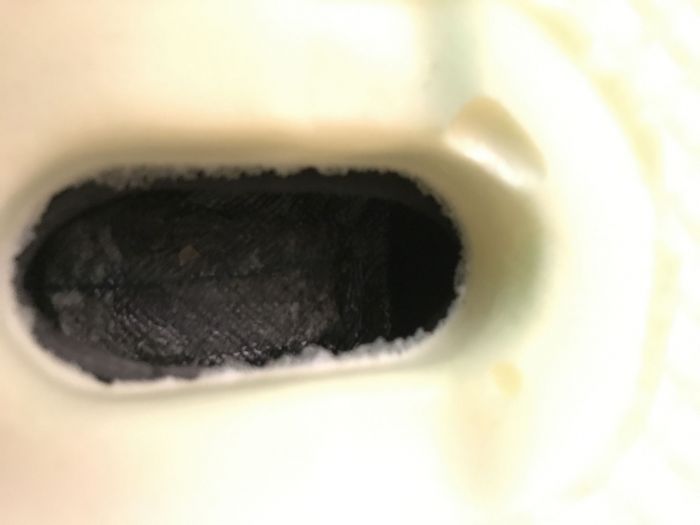
....well you're absolutely right John.

The main seat pad has channels grooved into the moolding. Into those channels sits a folded foam ducting piece, then a soft foam topper with holes that let the air through:


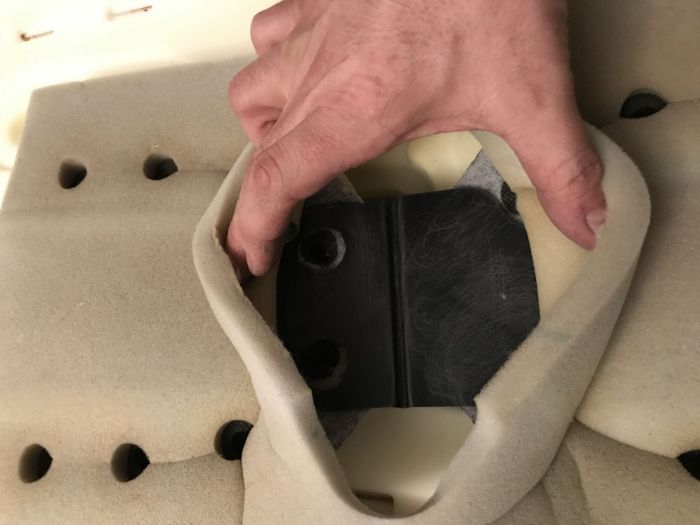
Mine has totally collapsed. The whole thing is squished, distorted and a mess.


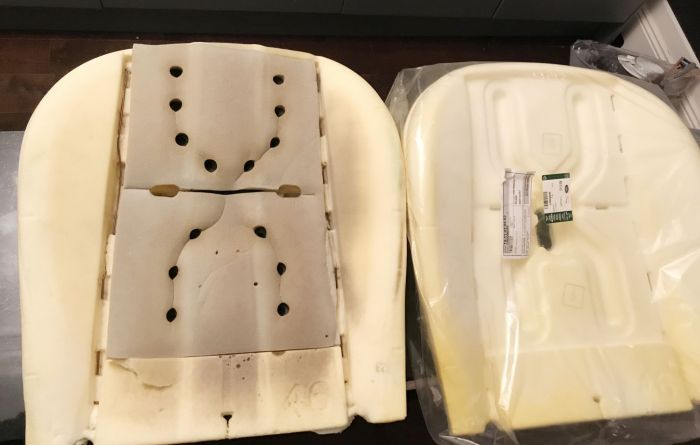
This seat's done over a 100k miles.

Inside the ducting was worse, the 'roof' of the main chamber, the bit inside the hole you see had completely caved in too. You can't see that in the photos but the air had absolutely no chance of getting directed along the ducting. That's what's killed the heat/cool unit. No doubt causing an overheat.

Once I realised I only had one of three pieces I'd really want I phoned Dan and the ducting and the foam topper, which don't come with the seat foam, cost another £130. (the duct is £75). But Dan didn't have in stock and, this time of year, it'll be a week before I could get either.

So I started a repair.

Here's the new vs old.


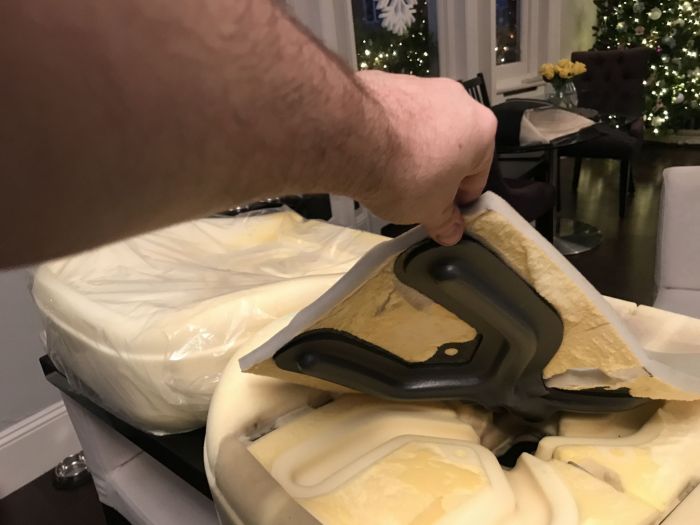
First step pull apart these three pieces and discard old seat base:


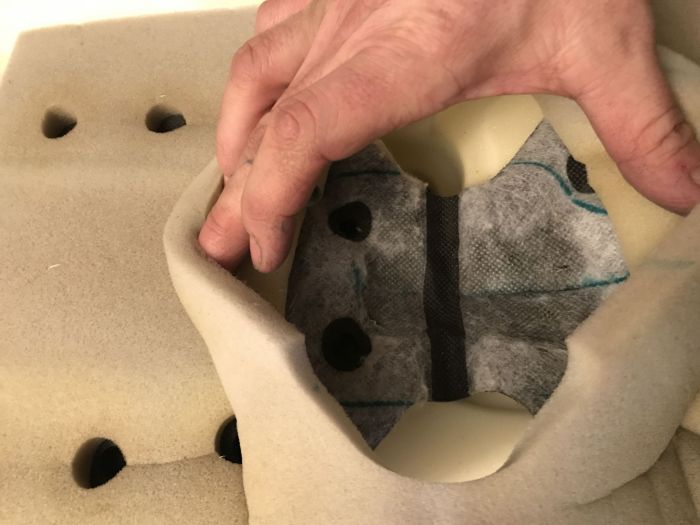
Then pull away the topper from the duct, I need to get to the collapsed roof:


Next I made a new roof from a plastic food box. It's oven safe so I figure can take a good amount o heat. Roughed it up with 80 grit. Note the crease I put in it, you need that because the seat cover has an attachment pipe sewn in which needs a recess. This material is more rigid than normal. I tested it to see if I could feel it. I need something stiffer, but this is a soft seat. I don't want something hard down there! It seems good. It's flexible but rigid enough and there are enough soft layers on top of it:


Here it is in place, glued in with contact cement:


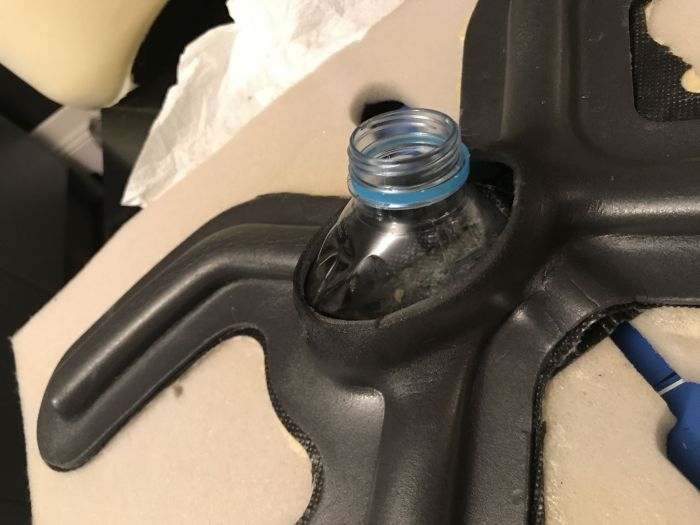
Turning it over, I now need to try to re-shape the opening.
I got a water bottle and stretched it in to use as a former.
Then I got a blowtorch, and heated as much as I dared:


The plastic water bottle melted but the ducting took the heat ok.
It seems to have worked and it holds it's shape now:


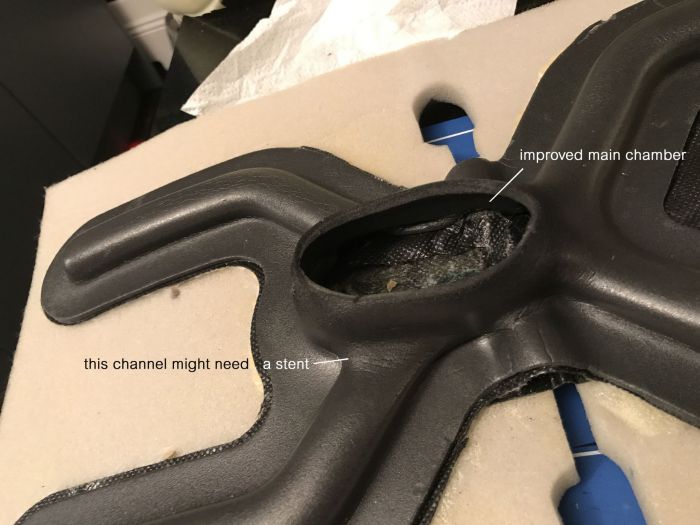
This chamber takes an 80kg hit every time I sit on it. That's why it collapses over time. One of the ducts still looks a bit crushed, plus I'm wondering what I can do to stiffen up the camber. I'll not want to add anything rigid there....

I have a bit of glue still drying so can't reassemble it yet.

Turning it over, there is now a clear channel for the air to travel through A bit hard to see from this pic but million times better than before:


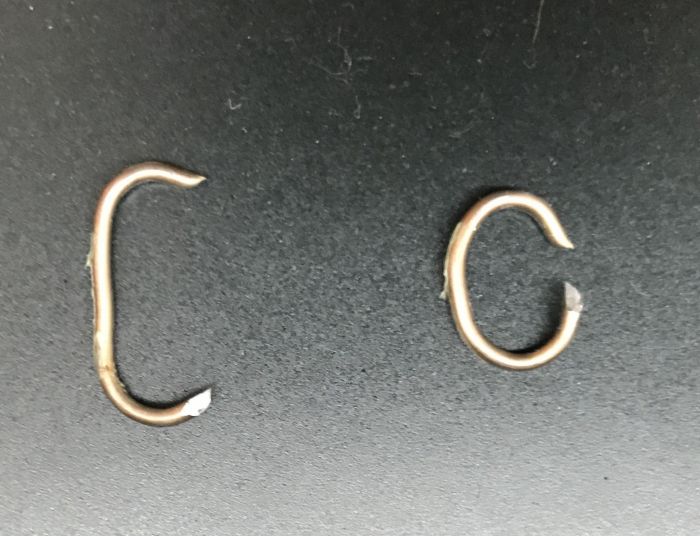
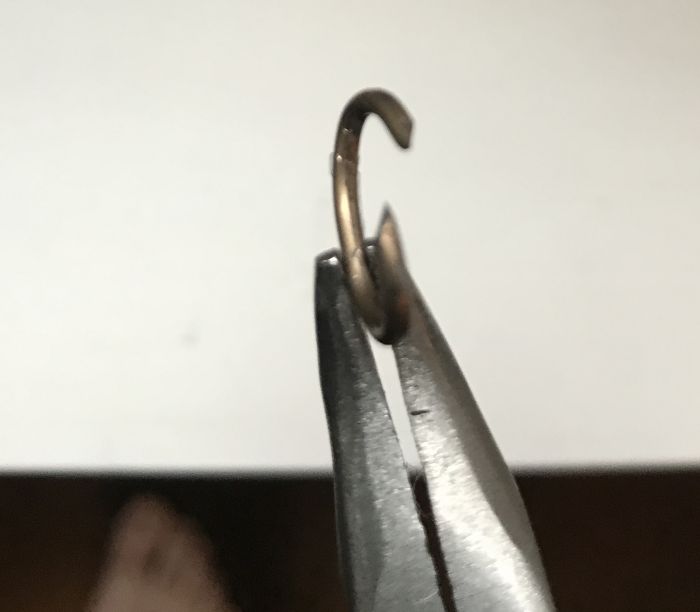
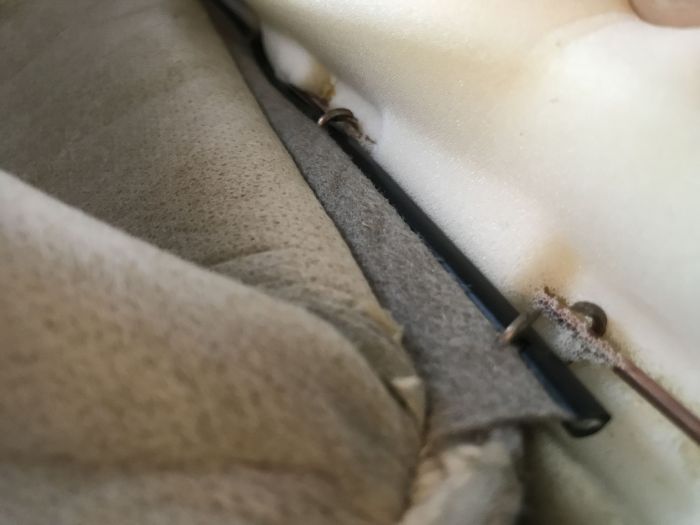
Next step, refit the seat cover, not looking forward to the hog rings...

Then: adapting the Mustang heat/cool unit. Stay tuned.

. Cheers, Greg
- - - - - - - - - - - - - - - - - - - - - - - - - - - - - - - - - - - - - - - - - -
2011 Vogue SE 4.4 with lots of toys in Stornaway


Last edited by GGDR on 29th Dec 2018 10:57am. Edited 1 time in total

Post #499952 29th Dec 2018 9:17am
View user's profile Send private message View poster's gallery Reply with quote
Bushy30


Member Since: 03 Jun 2018
Location: Oxfordshire
Posts: 1097

United Kingdom 2011 Range Rover Vogue SE TDV8 Galway Green

Brilliant work Greg Thumbs Up Current: 2011 FFRR Vogue SE 4.4 TDV8
Previous: -
2004 FFRR Vogue 4.4 V8 with LPG
1997 P38 4.0 SE with LPG
1997 P38 4.6 Vogue with LPG

Post #499959 29th Dec 2018 10:48am
View user's profile Send private message View poster's gallery Reply with quote
Clabs


Member Since: 08 Mar 2017
Location: Watford, Herts
Posts: 125

United Kingdom 

Fantastic info Greg - really interesting/useful to see how the air is ducted through the seats like that.

So far as the hog rings go, it makes life a whole lot easier if you have a pair of long-nose hog ring pliers. I paid about £25 for mine a while back but they are available on fleabay for about £12 these days. Failing that, you are welcome to borrow mine - pm me your address and I will pop them in the post to you.

Cheers, Mark Current Cars:
MY11 5.0 SC Stornoway - sold
MY06 TD6 Zambezi - sold
1997 BMW E36 M3 Evolution Convertible Estoril

Post #500016 29th Dec 2018 9:04pm
View user's profile Send private message View poster's gallery Reply with quote
GGDR


Member Since: 26 Nov 2016
Location: London
Posts: 3519

United Kingdom 2011 Range Rover Vogue SE TDV8 Stornoway Grey

Thx Bushy30.

And what an offer Clabs! Thank you very much, actually I got it done yesterday.

The hog rings were not as difficult as I'd thought. Given people's reports, I had cable ties ready. Didn't need them.

I didn't have hog ring pliers, only a selection of 'standard' pliers.

To remove, I used small pointy nose pliers, push inside ring and then
force the ring open by opening the pliers.

A couple of hog ring tips:

Once removed they look like this (left):


Tip 1: Before trying to put back in, pre-prepare them by squeezing back into a 'C' shape (right above).

Tip 2. Also make sure they are not inline. You'll be wanting to squeeze them and the ends need to cross past each other:


Doing these two tips made re-using the hog rings without hog ring pliers absolutely fine.

Hook one end onto the piping of the seat cover, using the holes that were already there. Then hook onto the metal rod in the base foam. You may find this easier using pliers to hold the ring and a screwdriver to pull up on the rod.

Here you see the near the bottom of the frame a hooked hog ring.:


Then it needs a heavy pinch with blunt nose pliers to close up the ring (like the other one in the pic.

Next: the Mustang Heat/Cool unit...
. Cheers, Greg
- - - - - - - - - - - - - - - - - - - - - - - - - - - - - - - - - - - - - - - - - -
2011 Vogue SE 4.4 with lots of toys in Stornaway

Post #500050 30th Dec 2018 9:11am
View user's profile Send private message View poster's gallery Reply with quote
nino_nino


Member Since: 29 Mar 2015
Location: pocitelj
Posts: 690

Bosnia Herzegovina 2012 Range Rover Autobiography Black TDV8 Santorini Black

Excellent write up Greg, thanks, Thumbs Up

Nino, 2012 TDV8 Black Edition
2000 Disco. TD5
1975 series III

Post #500067 30th Dec 2018 11:33am
View user's profile Send private message View poster's gallery Reply with quote
Baltic Blue


Member Since: 13 Aug 2015
Location: North Wales
Posts: 3673

United Kingdom 2011 Range Rover Vogue SE TDV8 Baltic Blue

+1 Greg.
Thanks, it’s only a matter of time before my fullfat figure flattens mine Rolling with laughter
Cheers
Mike. G reg 2.5VM Vogue Portofino red 1991- 1999
V reg 2.5td P38 Rioja red 1999- 2006
53 reg td6 Vogue Oslo blue 2006- 2015
11 reg 4.4 TdV8 Vogue SE. Baltic blue 2015- date.
https://www.fullfatrr.com/forum/topic56162...tty+affair

Post #500069 30th Dec 2018 11:37am
View user's profile Send private message View poster's gallery Reply with quote
GGDR


Member Since: 26 Nov 2016
Location: London
Posts: 3519

United Kingdom 2011 Range Rover Vogue SE TDV8 Stornoway Grey

Thanks chaps.

Ok next stage: Adapting the Mustang unit.

Mustang unit details:
The unit was bought from mpsautosalvage@gmail.com off ebay.
Item name: OEM RH RIGHT PASSENGER SIDE TEMPERATURE CONTROLLED SEAT BLOWER MOTOR 2010-16 MKT
Cost $60USD = £48 at the time. Shipping and import duties £27.82 so that's £75.82.

Comparing the LR and the Mustang units:
LR Left and Mustang Right:


There are seven cables.
Three go to the motor end, these are identical:


Four go to the Peltier unit. slight difference.

LR has
YELLOW GREEN GREEN BLUE
Mustang has
YELLOW GREY GRREN BLUE

(bit hard to see in the above photo)


Mounting points:
The screw mount arms are in different positions Sad


Ok let's go:


Step one, I need the LR connector off the old unit.
Took me a while to work it out. Inserting a jewellers screwdriver into the rear in the right place releases the pins.
Black art these connectors, every one seems different.


I labelled the colours / positions as before carefully removing each:


Next I thought the flexible ducting of the Mustang unit would do it ok, but I studied both and thought why not use the LR duct. So here is the Mustang unit with the LR rigid duct:

Click image to enlarge


The duct fittings are exactly the same, a simple push fit and a cable tie around the outside. Easy.

Back to cables and I had grand plans of de-cabling the crimp pins, but this was nearly impossible.
I did three and they went back into the LR block connector.
The remaining four I spliced:


Once the cables are attached, getting the used crimp pins back in the LR block connector is a right pain, takes ages to work out how it's retained. You've got to make sure they catch on a barb somewhere otherwise they'll push out backwards when you go to connect the block to it's corresponding block. You'll also want to make sure the pins when back in the block form neat lines. Inserting and fiddling can twist and bend them but if they don't line up inside their receiving block, they may bend.

Also, you can see in the above pic the green is not done yet. That's because I still needed to work out the GREEN GREEN vs GREEN GREY differences in the cabling. Took a while but I think (hope) I've sussed it.


Next lash it all up as OE as I could make it and this part of the job is done:


The motor and peltier ends are Mustang, the connector and ducting are from the original unit.

I've still got to sort out the difference in the mounting points.
But before I do that, I'll be firing it up. Will it work?

I am a little apprehensive because the Peltier units look a little different.

Stay tuned for the next instalment and I'll tell you if it's worth all the trouble.
. Cheers, Greg
- - - - - - - - - - - - - - - - - - - - - - - - - - - - - - - - - - - - - - - - - -
2011 Vogue SE 4.4 with lots of toys in Stornaway

Post #500081 30th Dec 2018 2:00pm
View user's profile Send private message View poster's gallery Reply with quote
matthews


Member Since: 09 Aug 2016
Location: Leeds
Posts: 90

United Kingdom 2011 Range Rover Vogue TDV8 Buckingham Blue

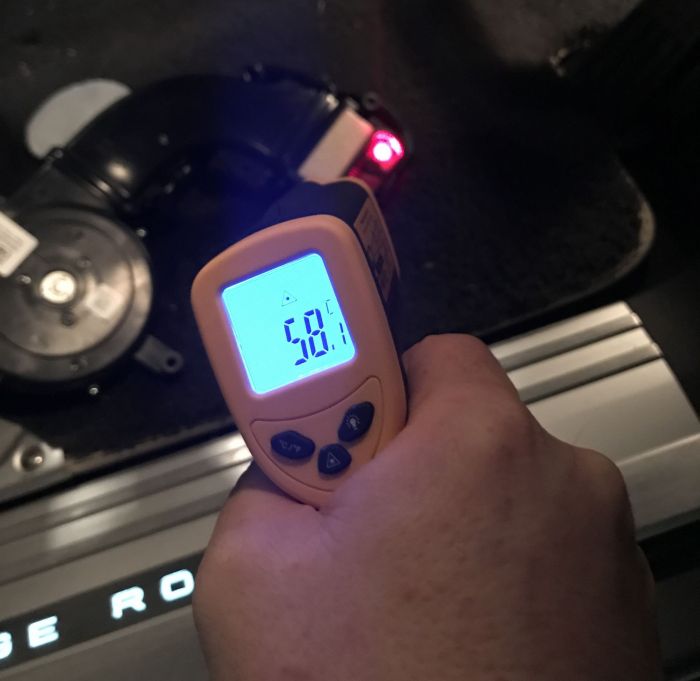
Did you try testing your original base heater with the squashed ducting disconnected ? Trying to ascertain if your Peltier unit is dead or just shutting the system down due to no air flow .

Post #500111 30th Dec 2018 6:47pm
View user's profile Send private message View poster's gallery Reply with quote
GGDR


Member Since: 26 Nov 2016
Location: London
Posts: 3519

United Kingdom 2011 Range Rover Vogue SE TDV8 Stornoway Grey

Yes I did test the unit off the seat (but still wired in) before I started. It'll run for around a minute then shut off.

So here it is folks:


W O R K I N G ! ! ! ! Razz Razz Razz

The unit is connected, just sitting on the floor. My infrared temperature meter is pointed into the heater end.
Notice the red laser dot pointing into the peltier. Little furnace that! 58 degrees. Pretty pleased with the reading at 58 degrees! Toasty!

These things are so small, pumping out all that heat, any blockage or restriction and I can see why these things overheat.

I'll need to fit it in, reassemble the seat and fingers crossed!

The Mustang fan has different mountings. So needs a little fettling to get it in. But fine.

If I did it again:

- I'd not pull apart the connector and redo the pins.
- I'd leave the duct and fan off the original, remove the heat end and just swap that . It would speed up the job, (as long as your fan was working).
- Identify the two green cables. Mark them YELLOW GREEN1 GREEN2 BLUE
- You need to do this as the Mustang is different and you need to be 100% sure before you snip.
- Trace and check which green goes into the peltier and is next to YELLOW.
- Check again. It's not easy to see. Be 100% sure.
- Mark the one next to yellow on the LR Peltier as GREEN1
- Do this by making two masking tape flags and wrap two one GREEN1 leaving a small gap between.
- Now mark the other GREEN as GREEN2 the same way . Check that goes to the terminal next to BLUE
- The gap between the flags is where you will cut. With four flags on each GREEN cable:
- Snip all four cables connecting the peltier.
- Discard the LR Peltier and get the Mustang one. Snip all four cables, you don't need to mark these.
- Splice and solder the corresponding Mustang unit cables onto the LR cables.
LR:
YELLOW GREEN1 GREEN2 BLUE
Mustang:
YELLOW GREY GREEN BLUE
- Because you've traced and checked and rechecked, you'll know that GREEN1 connects to GREY on the replacement Peltier
- Don't forget to slip heat shrink over the cables before you splice and solder
- Refit and test.

Notes:
- Using the LR fan saves the fettling bit at the end because the Mustang mounts are different.
- Check the fan first by running a bit of 12v power into the BLACK and PURPLE cables.
- My fan cut out after about a minute. But that was the unit shutting itself down because the Peltier was gone. But the fan runs on 12v so I could have used it.

Do this and BOOM you've repaired a £240 unit for £78

Who knows you might be able to keep shopping around and get a better deal. I think any Ford unit may work. As far as I know they are fitted to Lincolns, F150 trucks and Mustangs. There maybe others. The Peltier units, although a touch different, are made by the same people, it's got the same stickers.

This was a big effort, but a lot of my time was spent sorting my collapsed ducting. But hope I helped others. Plus anyone (me) with front and rear heat/cooled seats has eight of these units in their cars, I've already replaced one at full LR price. Doing my Mustang method is satisfying from a saving POV. But more than that I love a challenge, and a problem to solve (luckily I bought a Range Rover hey?) - I've fixed it and beaten the system and that's where there's a lot of satisfaction.

So Land Rover what's the deal with these parts prices? Excluding shipping and duty I bought the same unit give or take fixings and shape to fit a different seat, which has come from the same third party supplier for £48 vs £240. There may be volumes involved that mean Ford US pay less than Land Rover for these things, but I think LR are taking the mick with their cost of spares.

I replaced an exhaust temp sensor a little while back. It ws around £80. The engine (4.4TDV8) is made by Ford in Mexico. That sensor should cost half what LR are charging. In fact the big brother of the 4.4TDV8 is the 6.7l Powerstroke, Exhaust sensors from Motorcraft (OE Ford parts) cast $35-40 USD. That's the real cost. And I'll bet it's the same sensor.

Rant over, I'll need to finish getting the seat back together tomorrow and I'll do one more post to make sure it all runs in the repaired ducting.

Any questions, please shout.

.
.

Post #500122 30th Dec 2018 8:38pm
View user's profile Send private message View poster's gallery Reply with quote
steveball


Member Since: 09 Jun 2011
Location: Corsham, UK
Posts: 208

United Kingdom 2010 Range Rover Vogue SE TDV8 Bournville

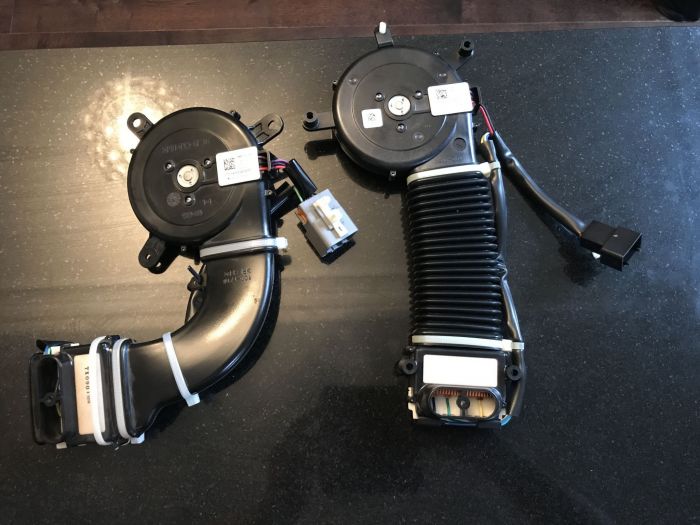
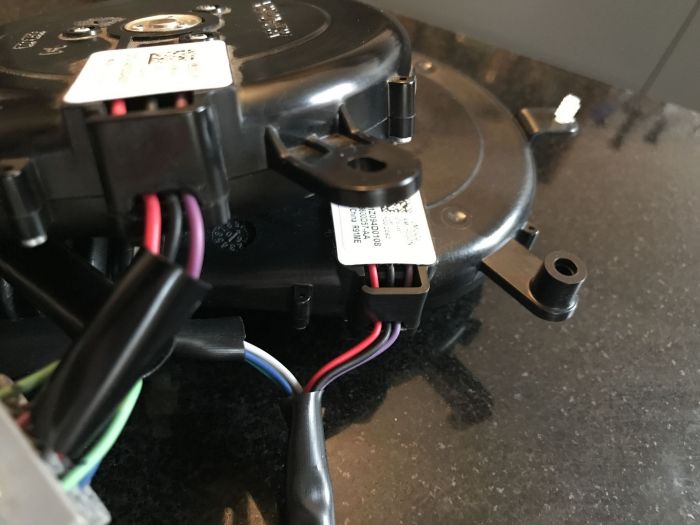
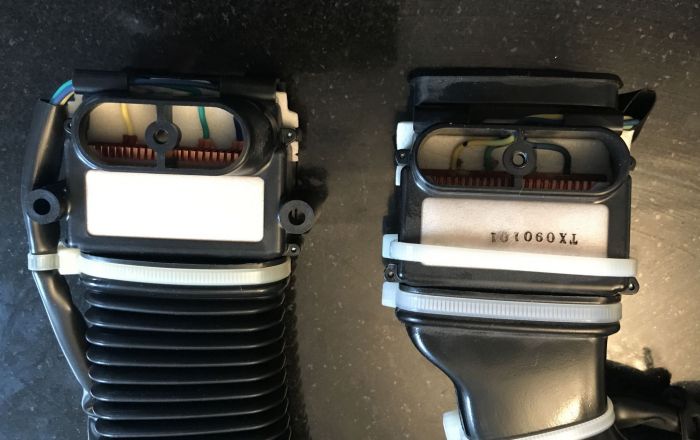
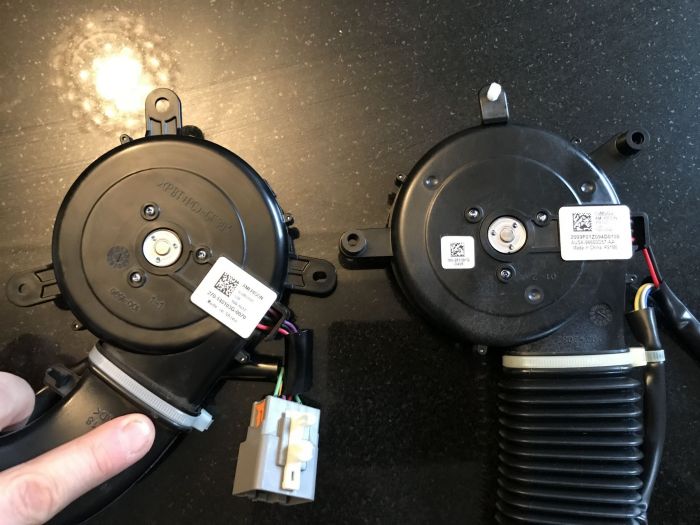
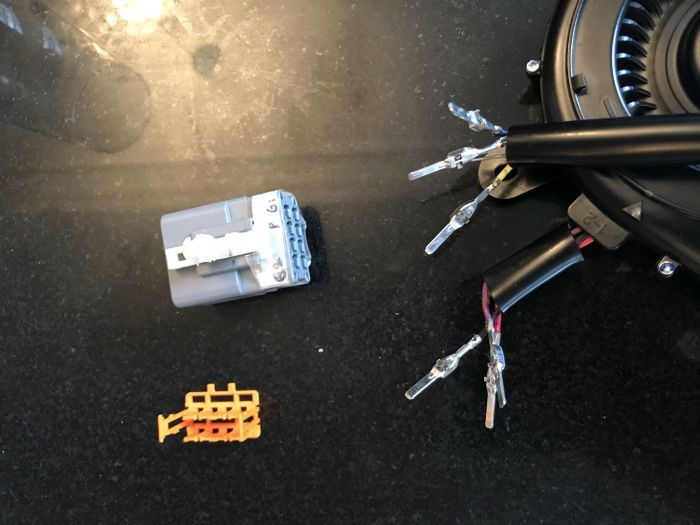
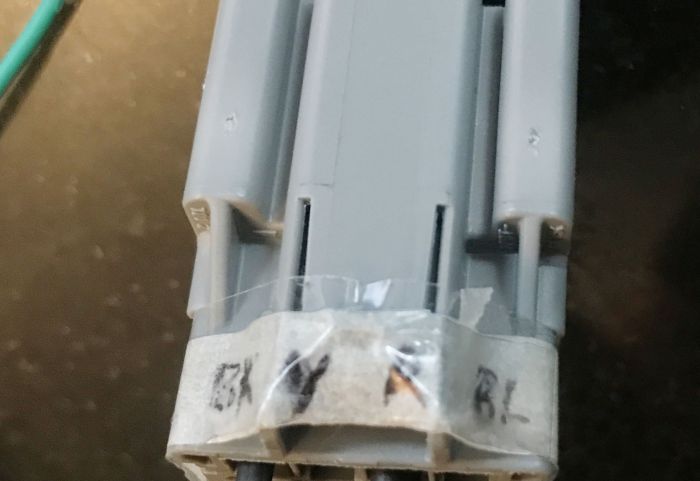
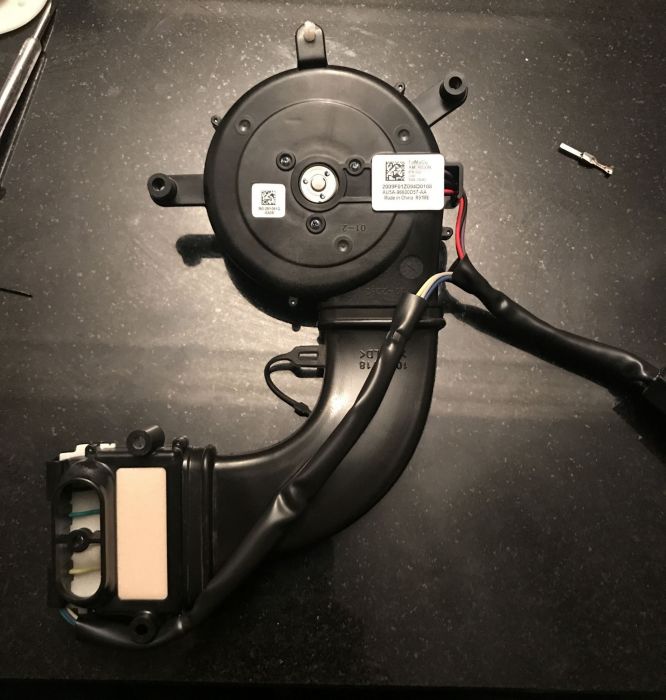
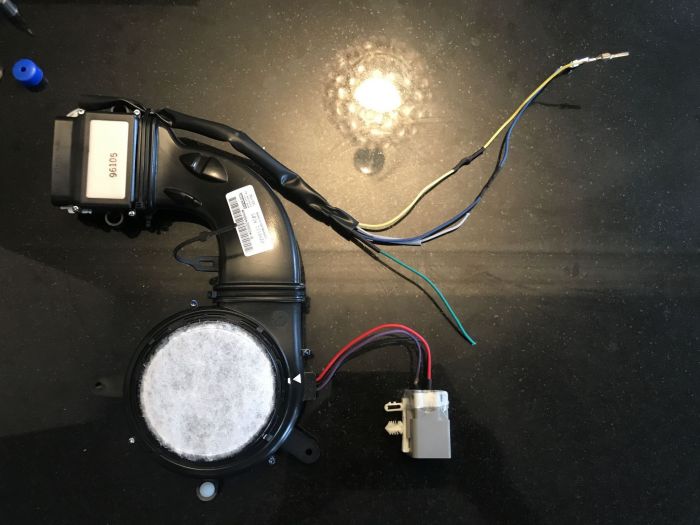
Inspired by your success, I've had a look at my non-functioning heated/cooled front seat.

As expected, ducting split on the back rest heater module on the driver's side. I've previously repaired with duct tape, which lasted more than a year. Tape has now lost its stickiness and needs replacing. However, even with tape replaced I'm getting the 'usual' symptoms, i.e. shuts off after a few seconds, although lights on the dial remain lit.

I've swapped the back rest unit from passenger to driver's seat, so now have a warm bum as the driver again Razz

I'm looking to see whether the unit with the split is repairable. I have a feeling that the Peltier unit in mine is OK, but not really able to test that. The thermistor resistance varies when I apply heat and looks to be in about the right range (green-green, about 1 k-ohm at 22 Celcius)

I wonder whether you'd be able to confirm test resistance on a known good fan, please? The workshop manual indicates that resistance should be in the following range, but as the quoted range is the same for both power and sensor circuit, I wonder whether there is a typo....

- Fan power - red to black - 290 k-ohms to 420 k-ohms (mine reads about 6 k-ohms)
- Fan sensor circuit - black to purple - 290 k-ohms to 420 k-ohms (mine reads about 300 meg-ohms)

If you have a spare working fan unit and tests confirm that mine is faulty, fancy selling it to me?

Steve Current: 2010 Range Rover L322
Vogue SE, TDV8 3.6, Bournville
-----------------------------------
Now gone: 2002 Range Rover L322
Vogue, TD6, Giverney Green

Post #500170 31st Dec 2018 11:06am
View user's profile Send private message View poster's gallery Reply with quote
GGDR


Member Since: 26 Nov 2016
Location: London
Posts: 3519

United Kingdom 2011 Range Rover Vogue SE TDV8 Stornoway Grey

Hi Steve,

I'm not sure about resistance, but when I feed 12v into the purple and black cables it runs like a charm.

I'd suggest you do that sing some probes carefully into the connector. That should just run the fan.

I have a spare LR fan yes. I also have a complete back unit that I replaced last winter. This has had duct repairs. I did use good quality cloth tape but I also used cable ties. Have a look at the pics, I'll PM them to you.

The base and the back units are different ducting-wise.

Regards,
Greg Cheers, Greg
- - - - - - - - - - - - - - - - - - - - - - - - - - - - - - - - - - - - - - - - - -
2011 Vogue SE 4.4 with lots of toys in Stornaway

Post #500173 31st Dec 2018 11:26am
View user's profile Send private message View poster's gallery Reply with quote
GGDR


Member Since: 26 Nov 2016
Location: London
Posts: 3519

United Kingdom 2011 Range Rover Vogue SE TDV8 Stornoway Grey

Another note: John W has kindly checked my (ducting) repaired unit.
He knows a lot more about these things than me.
The peltier checks out resistance-wise but still doesn't actually work.
This is the one I replaced with a 'full fat' LR unit.

My base unit went next and I thought this is going to get expensive so I started looking for alternatives.

John W might be able to offer an opinion on why the Peltiers seems to test ok, but don't end up working....

. Cheers, Greg
- - - - - - - - - - - - - - - - - - - - - - - - - - - - - - - - - - - - - - - - - -
2011 Vogue SE 4.4 with lots of toys in Stornaway

Post #500175 31st Dec 2018 11:33am
View user's profile Send private message View poster's gallery Reply with quote
GGDR


Member Since: 26 Nov 2016
Location: London
Posts: 3519

United Kingdom 2011 Range Rover Vogue SE TDV8 Stornoway Grey

Been running the Mustang butt warmer for a couple of days on my short commute to work and back.

I'm constantly feeling for the fan running with the filter off and it's tripped out once on heat setting #3.

Seems to run ok on heat setting #2

Later ran on #3 setting ok.

Was super toasty tonight. Seems like I have a bug to find.

Still investigating....
. Cheers, Greg
- - - - - - - - - - - - - - - - - - - - - - - - - - - - - - - - - - - - - - - - - -
2011 Vogue SE 4.4 with lots of toys in Stornaway

Post #500462 3rd Jan 2019 9:06pm
View user's profile Send private message View poster's gallery Reply with quote
gg2201


Member Since: 21 Oct 2013
Location: Callington
Posts: 158

United Kingdom 2011 Range Rover Autobiography TDV8 Santorini Black

Does all seem to be ok now with the Mustang replacements?

Our passenger seat seems to have randomly stopped working now none of the fans seem to kick in at all. But there is the reassuring relay click (or similar) when you turn the dial on or off at least.

Did a quick US ebay search and managed to get two similar ones delivered to UK inc charges for $79 (£65) thought for that money worth getting a spare.

If you search seat blower motor or climate seat blower etc and then narrow the search down to Ford/FoMoCo/Lincoln/Jaguar/Landrover there are plenty of new and used ones easily available for less then $70 was well worth doing a bit of Ebay digging there are certainly lots of slight variations on the designs but nothing that can't be modified to fit by the looks of things. The JLR ones in the USA are even more expensive then ours Laughing 2011 4.4 TDV8 Autobiography

Post #501358 12th Jan 2019 10:24pm
View user's profile Send private message View poster's gallery Reply with quote
Post Reply  Back to top
Page 10 of 26 <123 ... 91011 ... 242526>
All times are GMT + 1 Hour

Jump to  
Previous Topic | Next Topic >
Posting Rules
You cannot post new topics in this forum
You cannot reply to topics in this forum
You cannot edit your posts in this forum
You cannot delete your posts in this forum
You cannot vote in polls in this forum


Site Copyright © 2006-2024 Futuranet Ltd & Martin Lewis
fullfatrr.com RSS Feed - All Forums


Switch to Mobile site