 | Home > Maintenance & Mods (L322) > Plastic sill removal. |
 
|
|
|
| DrRob Member Since: 16 Apr 2015 Location: Petersfield, Hampshire Posts: 4351  
|
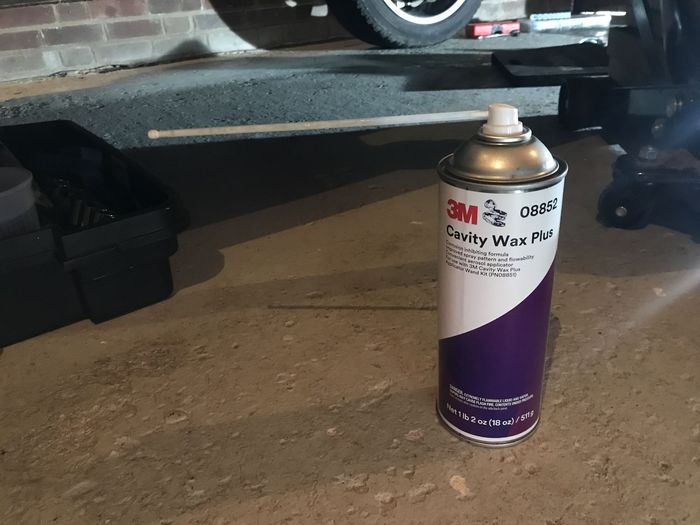
Yep, just ordered some
|
||
|
| DrRob Member Since: 16 Apr 2015 Location: Petersfield, Hampshire Posts: 4351
|
Cool. Waxoyl is good stuff. The rubber strips defo will help |
||
|
| GGDR Member Since: 26 Nov 2016 Location: London Posts: 3561 
|
The vid by Matt is great |
||
|
| Fox889 Member Since: 04 Jun 2019 Location: Bury St Edmunds. Suffolk Posts: 701 
|
NDFI (nicedayforit) used these rubber trims on a previous thread, the seller he bought from is away until 1st March so I found the identical ones for £1 extra from another seller, but should be here midweek. Others on here have used them apparently & seem fairly pleased so I thought I'd chance it.
|
||
|
| kevinp Member Since: 28 Sep 2019 Location: Telford Posts: 1364 
|
Hi Greg, could you cut out a shallow 'V' so it will bend inwards on the first kink then another 'V' so it can fold out on the other and fill the opened gap with some silicone adhesive? |
||
|
| fanders Member Since: 10 Jul 2013 Location: Hants, UK Posts: 322
|
Copy from My dead TDV8 / turbo failure / moving onto a 4.2SC thread, to add to the info here:
|
||||||||||||||||||||||||||||||||
|


| DrRob Member Since: 16 Apr 2015 Location: Petersfield, Hampshire Posts: 4351
|
Cheers Fanders |
||
|
| kevinp Member Since: 28 Sep 2019 Location: Telford Posts: 1364
|
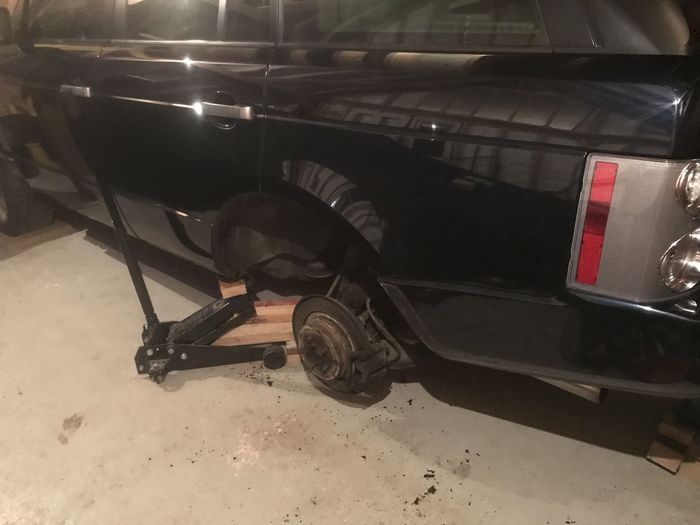
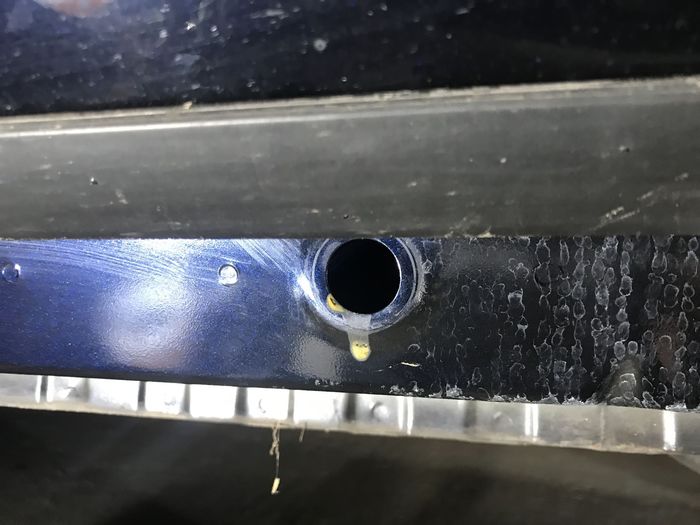
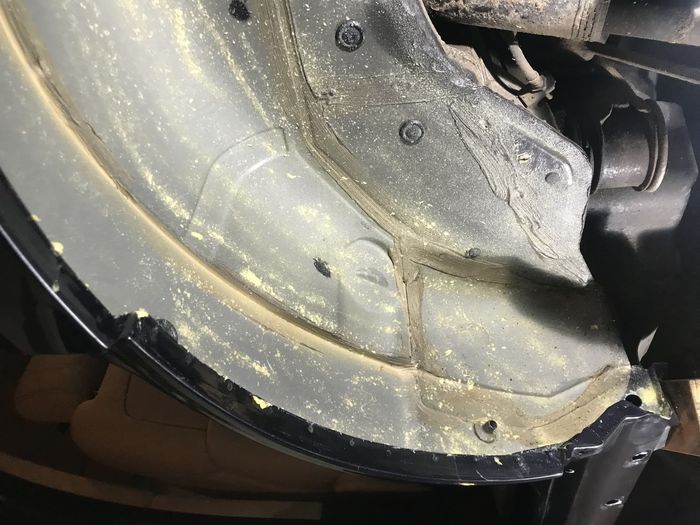
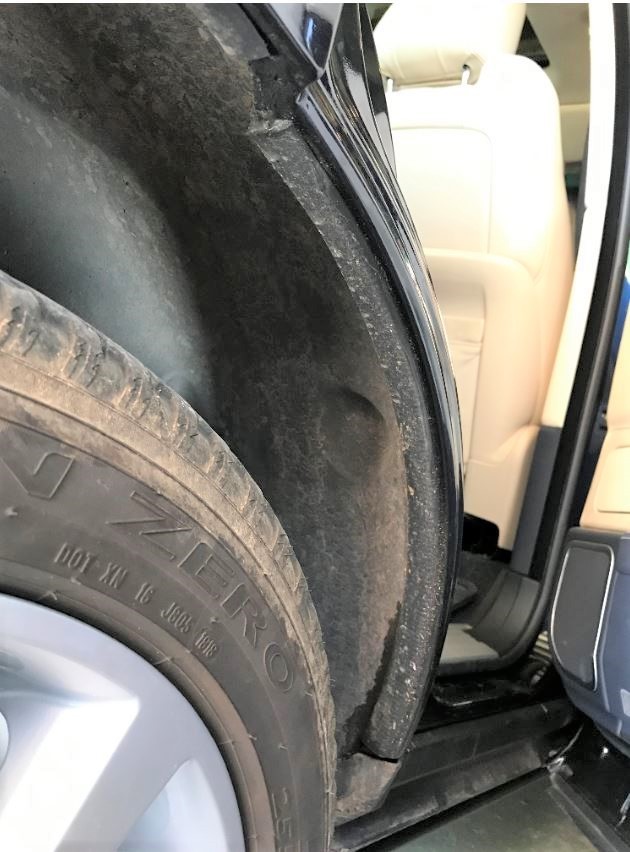
I've just finished doing one side and wondered if anyone can tell me what the electrical thingymajig is that fastens to the lower rear side of the wheel liner? Thanks Kev. |
||
|
| Baltic Blue Member Since: 13 Aug 2015 Location: North Wales Posts: 3882 
|
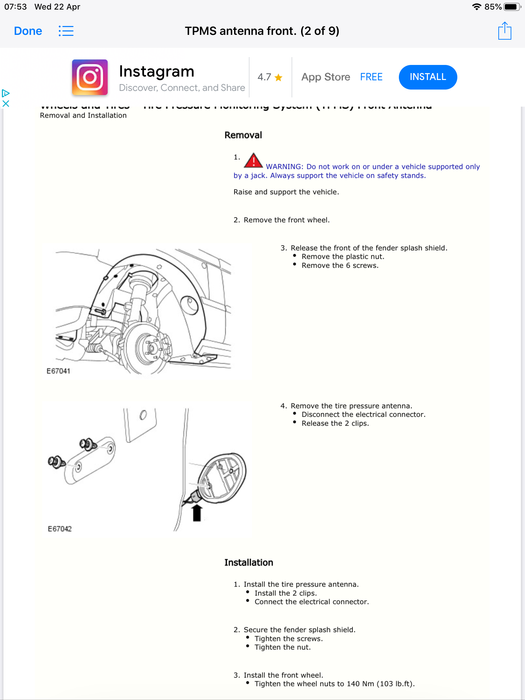
TPMS tyre pressure monitoring system antennas.
|
||||
|
| DrRob Member Since: 16 Apr 2015 Location: Petersfield, Hampshire Posts: 4351
|
Correct parts numbers for clips:
|
||||
|
| DrRob Member Since: 16 Apr 2015 Location: Petersfield, Hampshire Posts: 4351
|
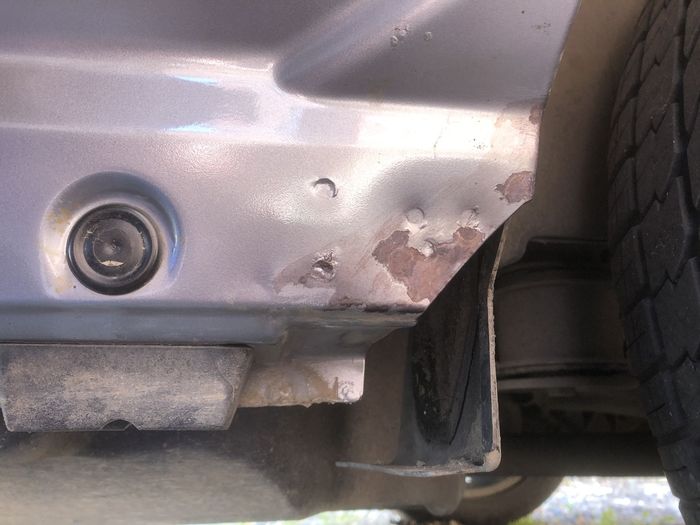
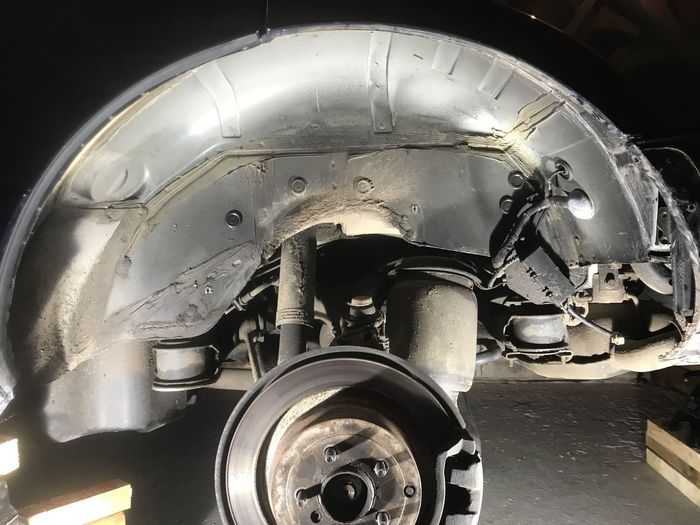
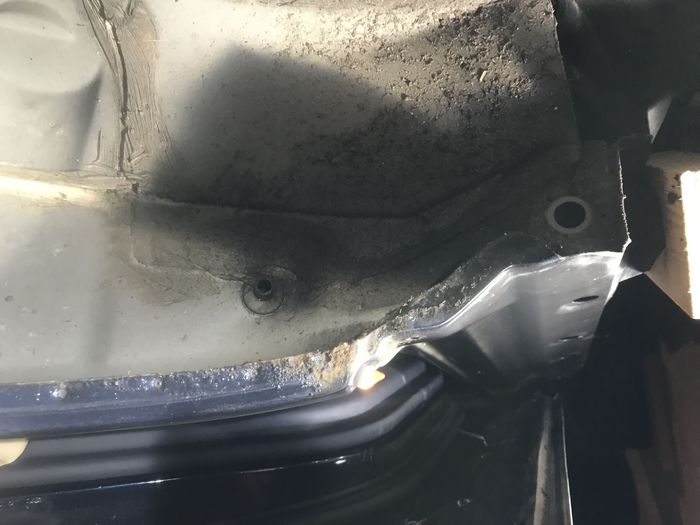
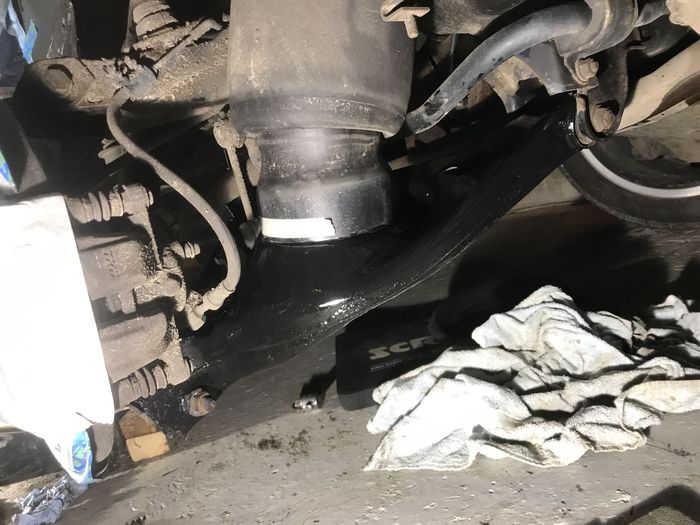
On the rear of the rear wheel arch liner? I saw that too. I didn’t remove my liner in the end. I removed all the small bolts to loosen the liner and was then able to pull the liner away to inspect behind it near the sill end. Cleaned with a dry brush and then brushed in some waxoyl by hand. I also hand waxoyled along the bottom of the wheel arch whilst pulling the plastic liner away from it if that makes sense. There is also a foam block at the rear of each sill cover that slip off and can be dry brushed. You can then get to the end face of the sill to clean and waxoyl Foam block before removal:
2025MY Defender D350 90 in Silicon Silver on coils 1974 Series 3 Lightweight = "Millie" Many, many other Landies over the years I use www.glenrands.co.uk Great independent specialist! -------------------------------------------------- |
||||
|
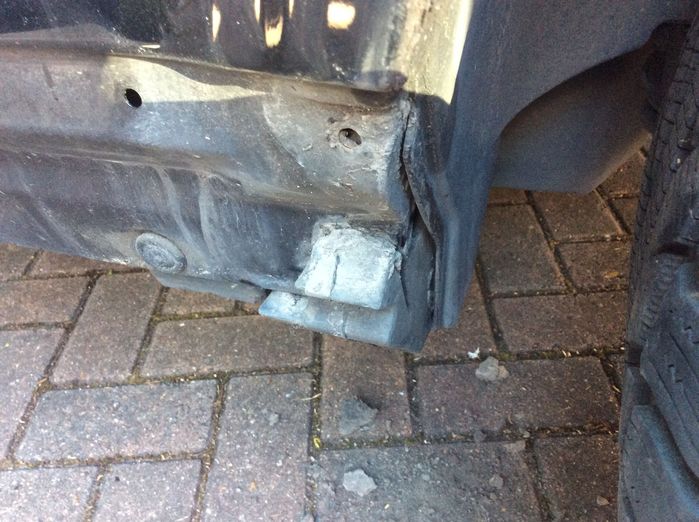
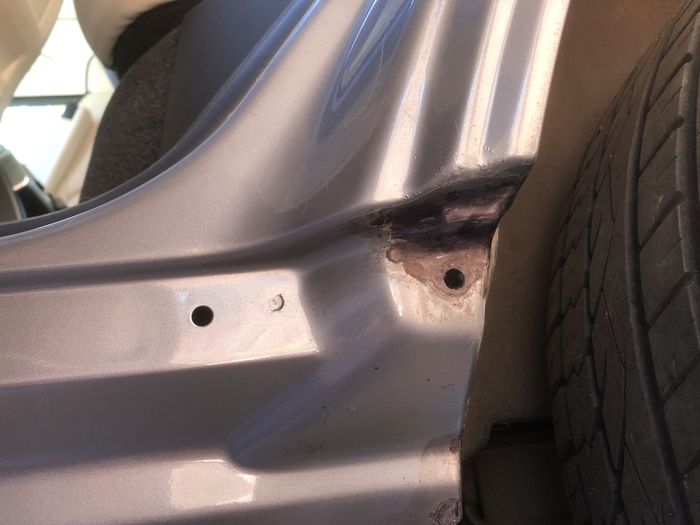
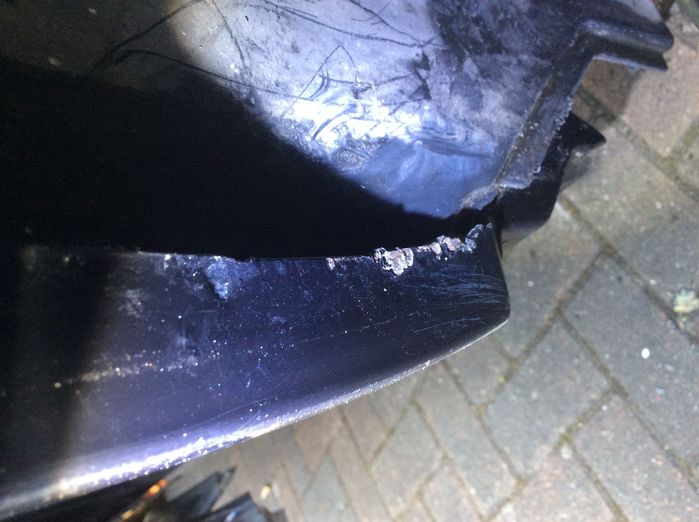
| DrRob Member Since: 16 Apr 2015 Location: Petersfield, Hampshire Posts: 4351
|
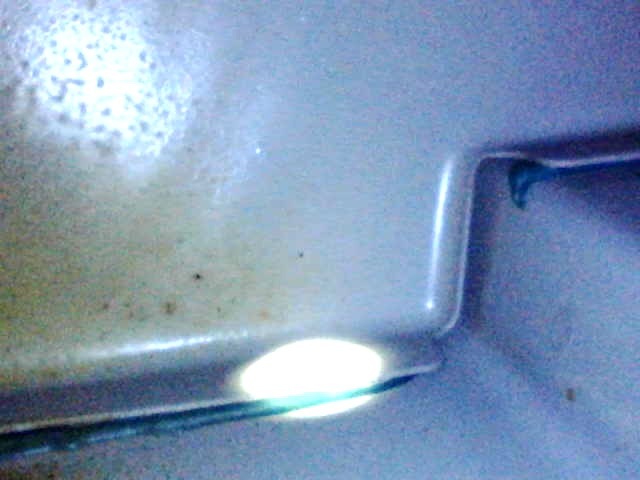
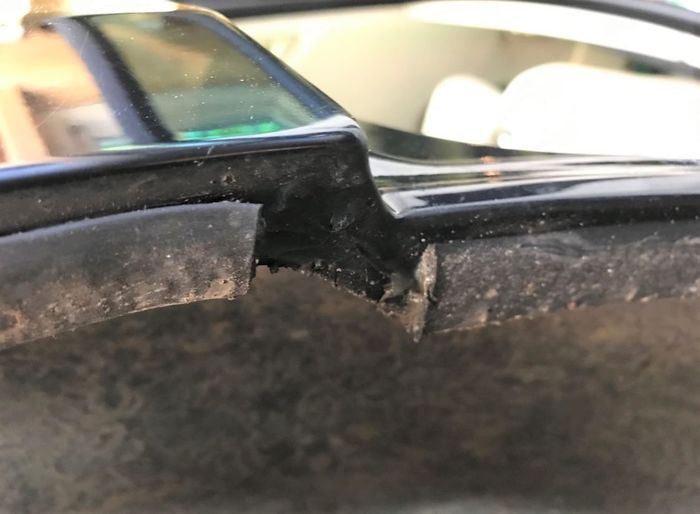
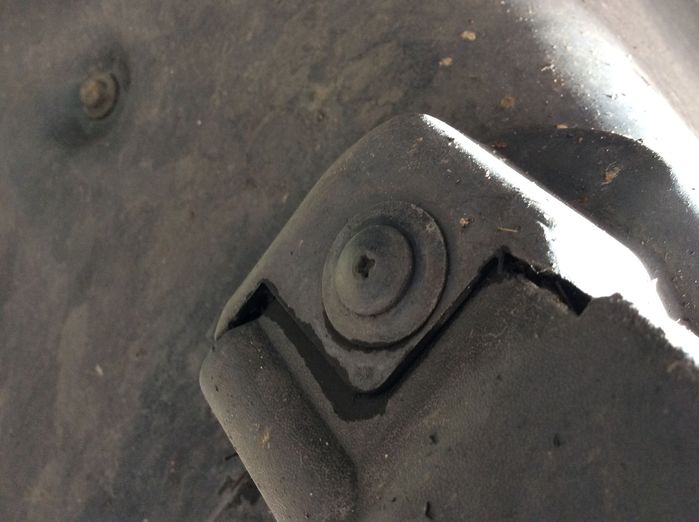
Little bit of rust each side.
|
||||||
|

| Fox889 Member Since: 04 Jun 2019 Location: Bury St Edmunds. Suffolk Posts: 701
|
It really is a stupid design & I hope the person responsible for not having a rubber lip was sent to Siberia & possibly still there! Yours Dr Rob doesn’t look too bad at all, do you think anyone has been there before? 2012 Orkney Grey Westminster 4.4TDV8 with Ivory interior.........nice!
|
||
|
| kevinp Member Since: 28 Sep 2019 Location: Telford Posts: 1364
|
Thanks for that mate. Very good of you. Although mine is an Autobiography, it had no options put on it. Wonder how much it would cost for all the bits and pieces? Mmmm. Never had a car with TPMS. Google here I come. |
||||
|

|
|
| All times are GMT + 1 Hour |
< Previous Topic | Next Topic > |
Posting Rules
|
Site Copyright © 2006-2025 Futuranet Ltd & Martin Lewis
![]()
