Advertise on fullfatrr.com »

Home > Technical (L322) > Air Conditioning Condensor TDV8 MY07
Post Reply  Down to end
Page 1 of 2 12>
Print this entire topic · 
noworries4x4


Member Since: 03 Oct 2013
Location: Newton Abbot
Posts: 156

United Kingdom 2012 Range Rover Vogue 4.4 V8 Orkney Grey
Air Conditioning Condensor TDV8 MY07

SWMBO was complaining last week that the full fat was hot and the air con was not working, I went out put it on max it cooled a little but I guessed it needed re-gassing. I am uber busy at work so she had to take it to the garage where I get my mot's done. They tried to gas the system but could not get any pressure. They used nitrogen and said there was hissing from the front of the car poss condenser leak stone / old age damage. They know I would want to do it myself and Mrs no worries was in a hurry to collect the grand kids so no further investigations were done.
I have done some searches on here and not found to much info on TDV8 condensers, there was a comment I found about removing the slam panel as the easiest way of extraction.
Who has done this what is the best procedure as the manual does not explain it very well, can they be repaired ? lots of people seem to be selling Nissen ones are these any good at approx. £130-£150 ish or is a genuine a must have at ??? did not make that call yesterday.
Any advice happily accepted If everything is under control you are not going fast enough.

MY 16 Discovery 4 Commercial Workshop and Escort Vehicle
MY 12 Full Fat TDV8
1952 Series 1 80" 3ltr 6cyl

Post #440585 4th Jun 2017 10:21am
View user's profile Send private message View poster's gallery Reply with quote
stan
Site Moderator


Member Since: 13 Jul 2010
Location: a moderate moderated moderator moderating moderately in moderation
Posts: 34918

United Kingdom 

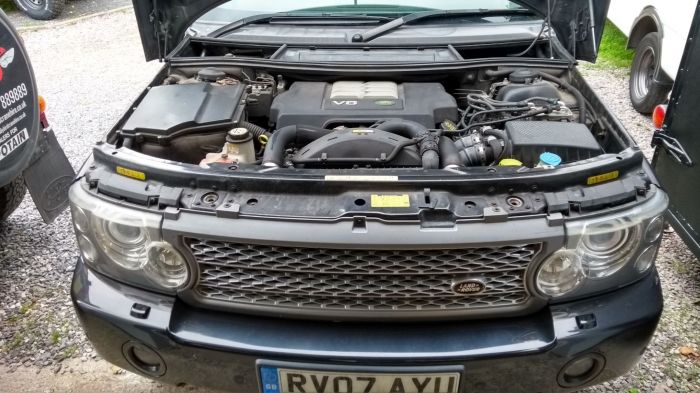
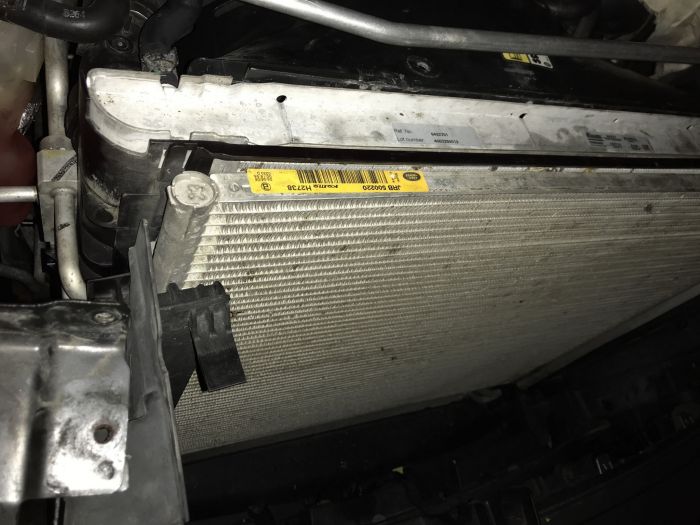
the td6 condenser is at the front so it gets loads of damage from stones etc, i gather yours must be in the same location..
the td6 one comes up from the top quite easily but i'm not sure how yours would be done...have you looked in the WM? ... - .- -.


click link for ,

FORUM WIKI

HOW TO Ǝꓕ∀ꓕOꓤ PICS

workshop manual downloads are in our wiki

.

Post #440620 4th Jun 2017 1:38pm
View user's profile Send private message View poster's gallery Reply with quote
noworries4x4


Member Since: 03 Oct 2013
Location: Newton Abbot
Posts: 156

United Kingdom 2012 Range Rover Vogue 4.4 V8 Orkney Grey

Workshop manual just says move oil cooler and fuel cooler unbolt et voila, lacking in how do you actualy get in there to start with. Through the front / back ?? Took the grill off and all you see is fan and covers. No doubt grill off headlights and surrounds out, slam panel off would seam the obvious way in to me but some reading I have done says engine fan and cowl and take the radiator out first. If everything is under control you are not going fast enough.

MY 16 Discovery 4 Commercial Workshop and Escort Vehicle
MY 12 Full Fat TDV8
1952 Series 1 80" 3ltr 6cyl

Post #440621 4th Jun 2017 1:50pm
View user's profile Send private message View poster's gallery Reply with quote
noworries4x4


Member Since: 03 Oct 2013
Location: Newton Abbot
Posts: 156

United Kingdom 2012 Range Rover Vogue 4.4 V8 Orkney Grey

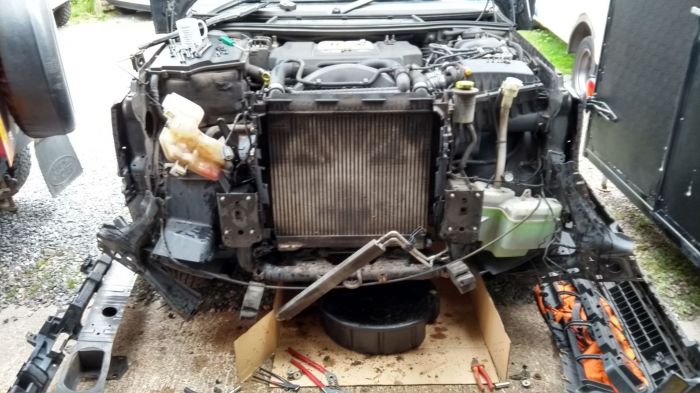
Well as no one on here had any ideas, I went in blind and yes you can get at it all from the front of the car but you do have to take a lot of car off to get at it all. Not a problem fairly easy as long as it is taken step by step.


 If everything is under control you are not going fast enough.

MY 16 Discovery 4 Commercial Workshop and Escort Vehicle
MY 12 Full Fat TDV8
1952 Series 1 80" 3ltr 6cyl

Post #442630 25th Jun 2017 8:44am
View user's profile Send private message View poster's gallery Reply with quote
rar110


Member Since: 09 Aug 2014
Location: Brisbane, Australia
Posts: 1119

Australia 2008 Range Rover Vogue TDV8 Atacama Sand

Well done. Bow down ______________________________
Vogue tdv8 08MY poverty pack - wow

Post #442640 25th Jun 2017 9:48am
View user's profile Send private message View poster's gallery Reply with quote
unsolicited


Member Since: 30 May 2016
Location: London
Posts: 123

United Kingdom 2017 Range Rover 5.0 SC V8 Mariana Black

Looks much harder than the supercharged. I only needed to remove the slam panel and ease the condenser out!

Post #442864 27th Jun 2017 3:39pm
View user's profile Send private message View poster's gallery Reply with quote
2006Rangie


Member Since: 26 Jan 2017
Location: Toronto and Melbourne Florida
Posts: 20

Canada 2006 Range Rover HSE 4.4 V8 Giverny Green

This looks like a phenomenal amount of work.

I plan to replace my compressor on my 2006 HSE 4.4L petrol engine and I am thinking of replacing the condenser at the same time. I don’t have a condenser fan but not sure if the condenser will come out the front or if the radiator has to be removed.

I am hoping that the condenser can be removed without touching the radiator.

Does anyone know the best way to tackle condenser replacement for the 4.4L petrol engine?

Post #489157 17th Sep 2018 9:13pm
View user's profile Send private message View poster's gallery Reply with quote
unsolicited


Member Since: 30 May 2016
Location: London
Posts: 123

United Kingdom 2017 Range Rover 5.0 SC V8 Mariana Black

If it's anything like the 4.2 (it should be), the A/C condenser can be removed carefully upward without removing radiator or disturbing coolant hoses. You will need to remove the front slam panel (not difficult really). There should be some threads around describing the procedure.

I did mine a few years ago... http://www.fullfatrr.com/forum/topic38578.html

Post #489252 18th Sep 2018 7:29pm
View user's profile Send private message View poster's gallery Reply with quote
2006Rangie


Member Since: 26 Jan 2017
Location: Toronto and Melbourne Florida
Posts: 20

Canada 2006 Range Rover HSE 4.4 V8 Giverny Green


I read your write up from 2 years ago. I have the same issue with the pipes connecting to the condenser. I was able to remove both bolts after a few days of coaxing with PB Blaster, but the clamps seem to have fused to the connecting block of the condenser; they won’t budge.

I am reluctant to cut the pipe as you did, so have been fiddling with it for a few days. Today, I tried to score the clamp/block interface with a knife and sprayed PB Blaster at the interface to see if that might penetrate into the joint. I am running out of time to get this blasted condenser out as I have to travel this weekend and need the car back into operation asap.

Is there a dowel in the clamp? If I can use a vise grip on the clamp, I might try twisting it to break any aluminum to aluminum corrosion.

Darn, this job was really to change the compressor but I extended it into a mini overhaul of the system by replacing the compressor drive belt, tensioner, and the condenser.

Any ideas for a non-destructive way of separating the condenser from the pipes?

Post #489888 25th Sep 2018 7:33am
View user's profile Send private message View poster's gallery Reply with quote
unsolicited


Member Since: 30 May 2016
Location: London
Posts: 123

United Kingdom 2017 Range Rover 5.0 SC V8 Mariana Black

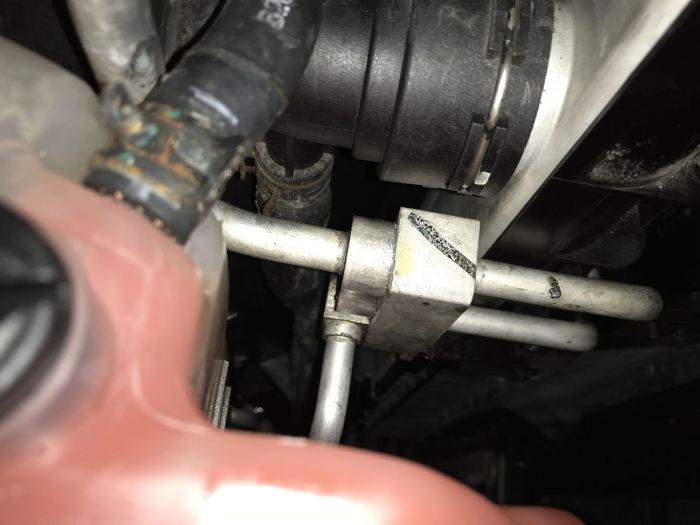
As I recall I think there was a dowel there, yes. I gave up at the bolt stage, the replacement pipe sections were not ruinously expensive - it was just easier.

Hope you manage OK.

Post #489937 25th Sep 2018 7:10pm
View user's profile Send private message View poster's gallery Reply with quote
2006Rangie


Member Since: 26 Jan 2017
Location: Toronto and Melbourne Florida
Posts: 20

Canada 2006 Range Rover HSE 4.4 V8 Giverny Green

Yes, I confirmed that there are dowels after I had posted the question. I wrestled with it again today and it is showing the tiniest signs of movement across the joint but it will still not come apart.

https://1drv.ms/v/s!AnnmZEt4LXEIhOwpgCwnZ6Z0_kjM-g

I am tempted to wait a day or so to see if I can separate the joint. There is no time to get replacement pipes before I go away this weekend for almost 2 weeks. But my GF would like to have the car running while I am away.

I must decide among a few pathways which intersect technical and social decisions and they basically boil down into timing issues.

1. Leave the car open and come back to the task in a few weeks.
2. Button it up without installing the new condenser and desiccant; vacuum the lines, etc. and call it a day, since the original objective was to troubleshoot and repair only as necessary.
3. Button it up and put it back into service for a month or so, then pull it apart again to finish replacement of the condenser and desiccant.

The biggest worry I have is whether it is necessary to change the desiccant. My understanding is that, having had the system open for 4 days now, I would be violating the recommendation to change the desiccant after a 24-hour open condition. From what I have read, it seems that failure to change the desiccant will likely result in corrosion throughout the system and early failure. However, is the risk of that happening very large? I am thinking that vacuuming the system down, then filling it with fresh refrigerant would remove almost all the water vapour and the risk of corrosion occurring would be low, barring leaks; of which there have been none to date.

Tomorrow, when I wake up, I hope to have a clearer head and must decide.

Comments always welcome.

Post #489976 26th Sep 2018 3:29am
View user's profile Send private message View poster's gallery Reply with quote
dingg1


Member Since: 29 Jun 2013
Location: PORTUGAL
Posts: 1271

2007 Range Rover Vogue SE 4.2 SC V8 Stornoway Grey

just put your dessicant in the oven for a few hours to regenerate

Post #489981 26th Sep 2018 7:42am
View user's profile Send private message View poster's gallery Reply with quote
2006Rangie


Member Since: 26 Jan 2017
Location: Toronto and Melbourne Florida
Posts: 20

Canada 2006 Range Rover HSE 4.4 V8 Giverny Green

Would love to do that, but the existing condenser (and the new one which is a Nissens) both have the access plug at the bottom of the condenser rather than the top where the manual shows access of the OE.

I have a new desiccant package and would use that if I could access the opening on the existing one.

Thanks for the suggestion.

Post #490012 26th Sep 2018 1:10pm
View user's profile Send private message View poster's gallery Reply with quote
unsolicited


Member Since: 30 May 2016
Location: London
Posts: 123

United Kingdom 2017 Range Rover 5.0 SC V8 Mariana Black

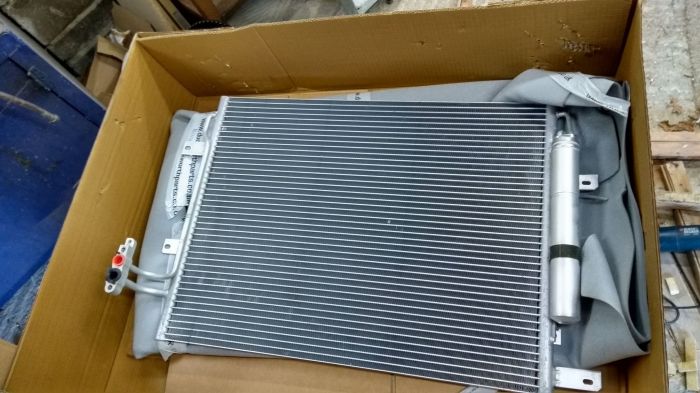
Strange, the receiver dryer was integral with the condenser unit on mine.

Post #490030 26th Sep 2018 5:29pm
View user's profile Send private message View poster's gallery Reply with quote
2006Rangie


Member Since: 26 Jan 2017
Location: Toronto and Melbourne Florida
Posts: 20

Canada 2006 Range Rover HSE 4.4 V8 Giverny Green

It is integral. It is a vertical cylinder about 40mm diameter full height of the condenser on the opposite side from the high- pressure pipe connection block. The problem is that they put the insertion cap on the bottom of the condenser instead of on the top.

Below are some pix taken today. 4 relevant ones; plus 1 irrelevant one that reflects my other passion (but off-topic)

https://1drv.ms/u/s!AnnmZEt4LXEIhOw0NVkR2KxEWx2VRw
https://1drv.ms/u/s!AnnmZEt4LXEIhOw9XCdWSThf99smIA
https://1drv.ms/u/s!AnnmZEt4LXEIhOw2Ei0nap9IAs6-cQ
https://1drv.ms/u/s!AnnmZEt4LXEIhOwyfTfZy8ubXmh8pQ

https://1drv.ms/u/s!AnnmZEt4LXEIhOw3aYeNNE9e_B149A

Post #490042 26th Sep 2018 7:00pm
View user's profile Send private message View poster's gallery Reply with quote
Post Reply  Back to top
Page 1 of 2 12>
All times are GMT + 1 Hour

Jump to  
Previous Topic | Next Topic >
Posting Rules
You cannot post new topics in this forum
You cannot reply to topics in this forum
You cannot edit your posts in this forum
You cannot delete your posts in this forum
You cannot vote in polls in this forum


Site Copyright © 2006-2024 Futuranet Ltd & Martin Lewis
fullfatrr.com RSS Feed - All Forums


Switch to Mobile site