Advertise on fullfatrr.com »

Home > My Range Rover > My L322 Project
Post Reply  Down to end
Page 3 of 8 <12345678>
Print this entire topic · 
Caesium


Member Since: 21 Sep 2021
Location: Essex
Posts: 451

United Kingdom 2012 Range Rover Vogue SE 4.4 V8 Santorini Black
Rear Brake Calliper Overhaul

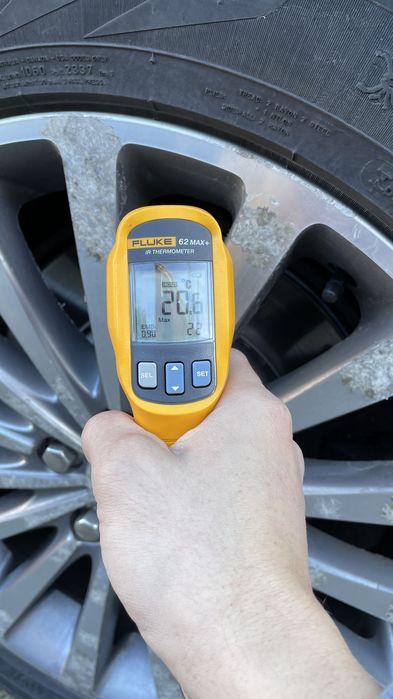
Following on from my propshaft overhaul to stop the droning, after a run to check it out I noticed the offside rear wheel was pretty warm so I decided to check the brake temps with my thermometer.

Nearside disc temp

Click image to enlarge


Offside disc temp

Click image to enlarge


I would say that my nearside rear calliper is most definitely sticking which wont be helping my fuel economy or the droning noise. I'm going to attempt to overhaul them in the first instance as an overhaul kit is about £30 all in and new TRW callipers are £250 each.

Straight on the phone to Rimmer Brothers and two days later:


 Christian.


Current Cars
2011 Range Rover Vogue SE
2020 BMW M4 Competition
2019 BMW X4

My RR Blog: www.facebook.com/L322Project
or
https://www.fullfatrr.com/forum/topic61540.html

Post #613701 24th Nov 2021 5:39pm
View user's profile Send private message View poster's gallery Reply with quote
Caesium


Member Since: 21 Sep 2021
Location: Essex
Posts: 451

United Kingdom 2012 Range Rover Vogue SE 4.4 V8 Santorini Black

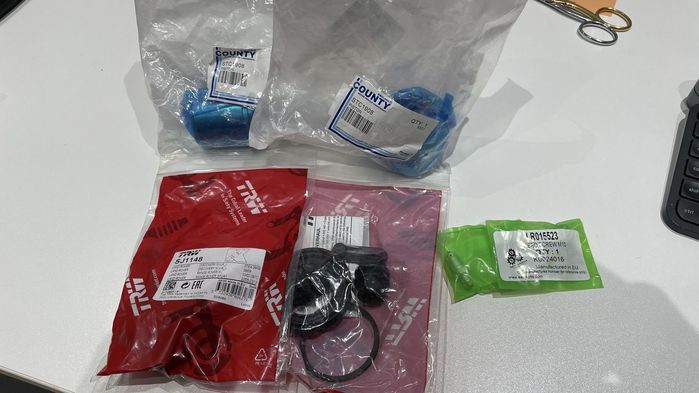
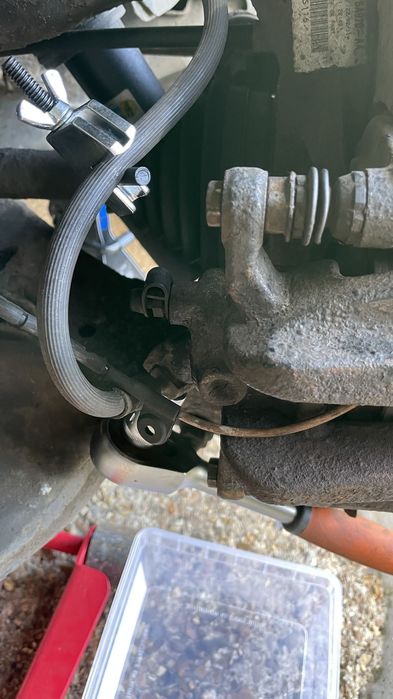
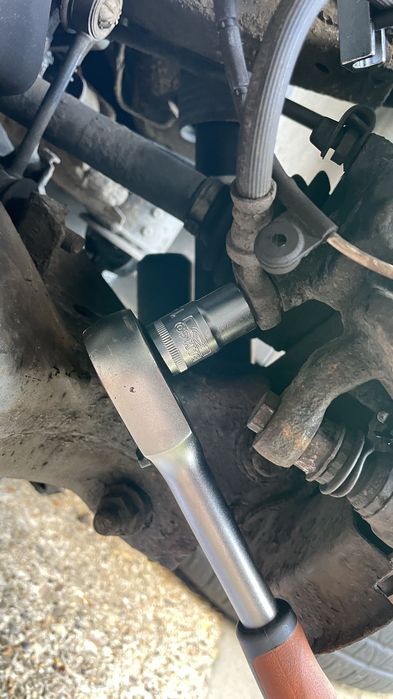
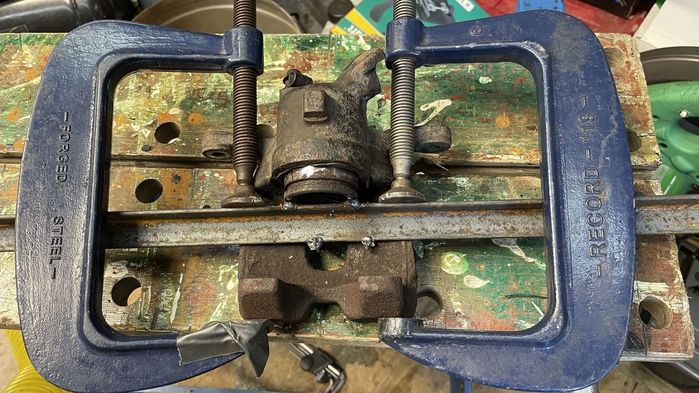
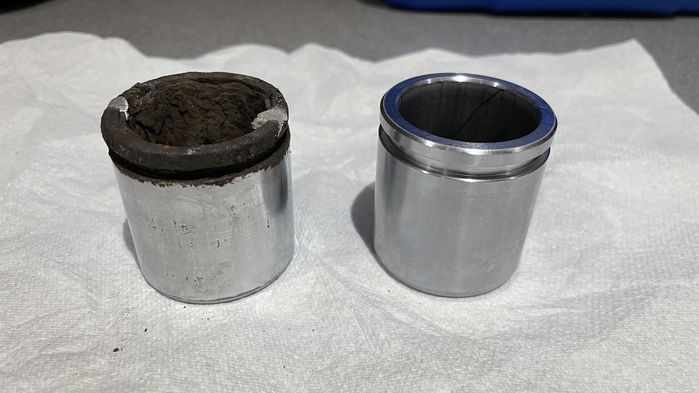
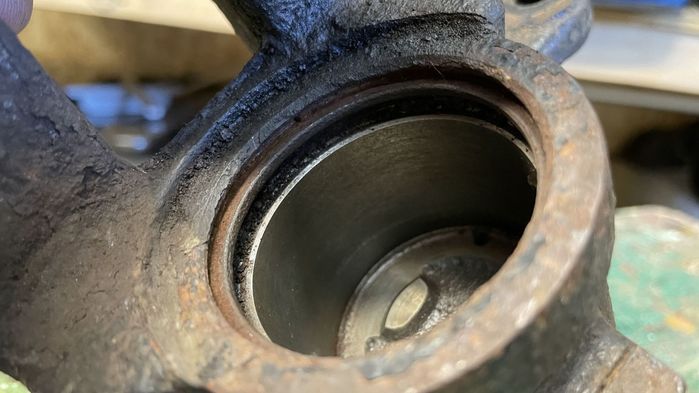
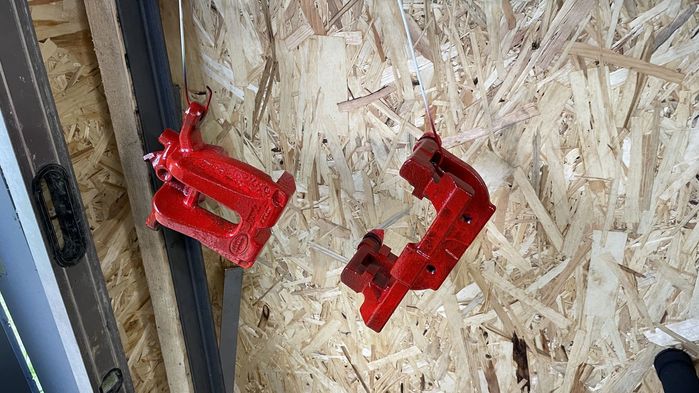
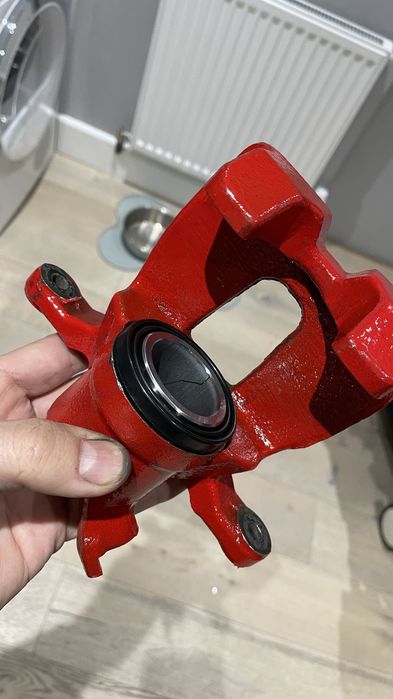
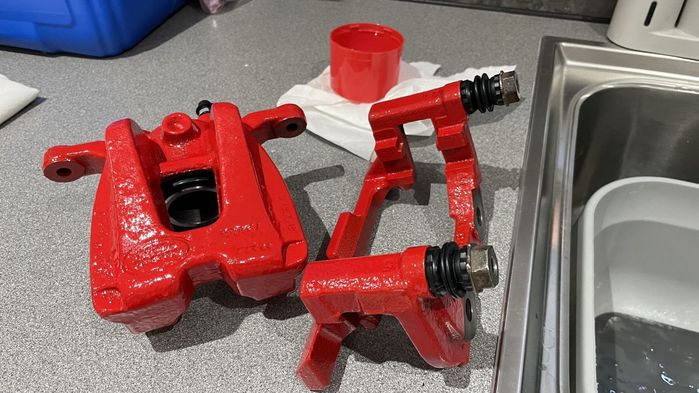
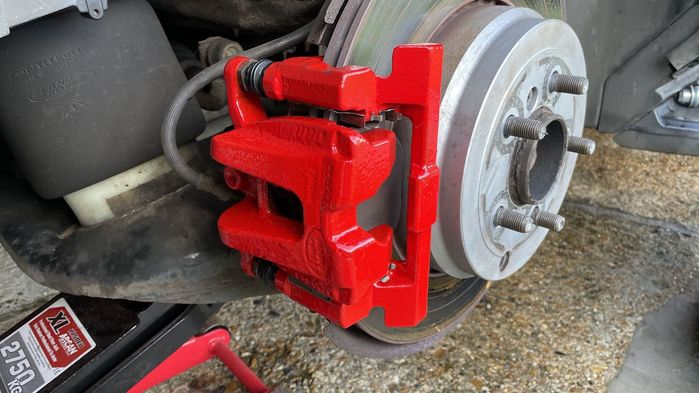
As the rear brakes are definitely binding I have decided to rebuild the callipers rather than replace them.

I stripped them off the car

Clamp the hose first

Click image to enlarge


Undo the banjo bolt

Click image to enlarge


Two securing bolts to the hub and then you can remove the calliper

Click image to enlarge


Here it is off the car


The piston was so stuck in the bore that an airline would not pop it out and I had to resort to welding a piece of angle steel onto the piston and using two G-Clamps to pull it out. It was well stuck.


Here's the piston out of the calliper and the new one next to it, the piston itself was in ok condition for the part behind the dust boot.


The bore looked nice and clean and undamaged so I continued with the rebuild


I used my wire wheel on the bench grinder to get off as much crud as I could and then gave it a good dosing of brake cleaner and wiped out all the bores. Cleaning the grooves for the dust boot and seal was nice and therapeutic as a small angled pick made light work of that. Followed by a brass wire brush to get them spotless.

Decided to paint them red to match the front ones, this paint takes forever to dry so I sped the process up a bit using a hot air gun as it was freezing outside and I am impatient.


Fast forward to paint dried and I have rebuilt the calliper with a new piston, seal and boot

Click image to enlarge


Calliper carrier new boots and pins re-greased


All back on the car


If it hadn't been for the painting I think this is a 45 minute job. Christian.


Current Cars
2011 Range Rover Vogue SE
2020 BMW M4 Competition
2019 BMW X4

My RR Blog: www.facebook.com/L322Project
or
https://www.fullfatrr.com/forum/topic61540.html

Post #613759 25th Nov 2021 9:50am
View user's profile Send private message View poster's gallery Reply with quote
DrRob


Member Since: 16 Apr 2015
Location: Petersfield, Hampshire
Posts: 4204

United Kingdom 2011 Range Rover Vogue SE TDV8 Buckingham Blue

Great thread! Some useful pointers for all of us Bow down 2011 4.4 TDV8 Vogue SE Buckingham Blue with Ivory and clear glass = "Rory"
New Defender D300 90 on order so "Rory" will be going to a new home....!
1974 Series 3 Lightweight = "Millie"
My preferred specialist: www.glenrands.co.uk
--------------------------------------------------

Post #613773 25th Nov 2021 11:12am
View user's profile Send private message View poster's gallery Reply with quote
dhallworth


Member Since: 10 Oct 2011
Location: Glasgow
Posts: 2951

United Kingdom 2012 Range Rover Autobiography TDV8 Baltic Blue

Great job, nicely done Thumbs Up

Given that rear calipers on them are known for seizing up, I'm almost tempted to order a couple of sets of them to keep on the shelf.

David. 2002 4.6 Vogue SE - Alveston Red with Lightstone Leather
2007 Range Rover Supercharged in Java Black with Ivory Leather
2012 Range Rover 5.0 SC Autobiography in Indus Silver with Jet/Ivory Interior
2012 Range Rover 4.4 TDV8 Autobiography in Baltic Blue with Sand Interior

Post #613783 25th Nov 2021 12:24pm
View user's profile Send private message View poster's gallery Reply with quote
Caesium


Member Since: 21 Sep 2021
Location: Essex
Posts: 451

United Kingdom 2012 Range Rover Vogue SE 4.4 V8 Santorini Black
Side Steps

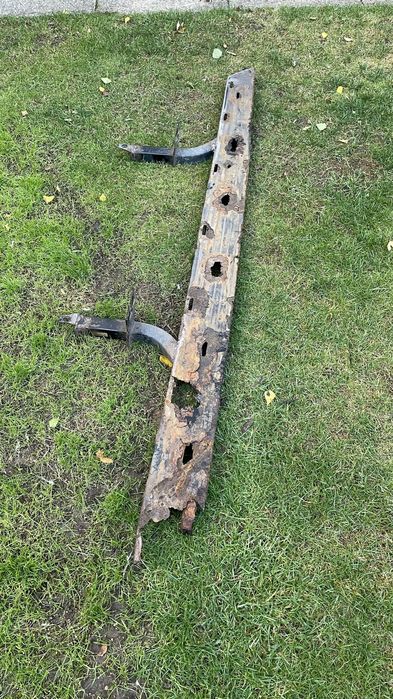
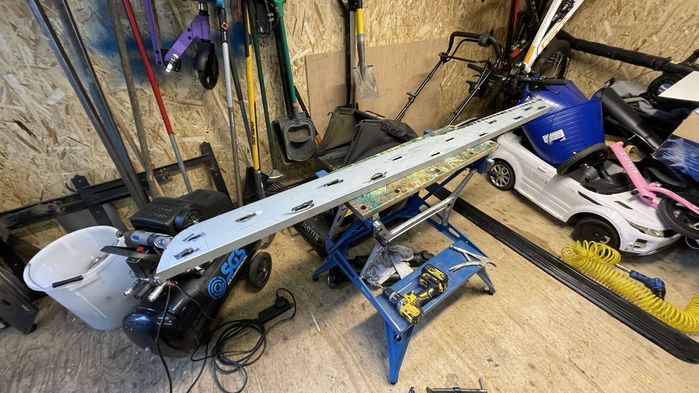
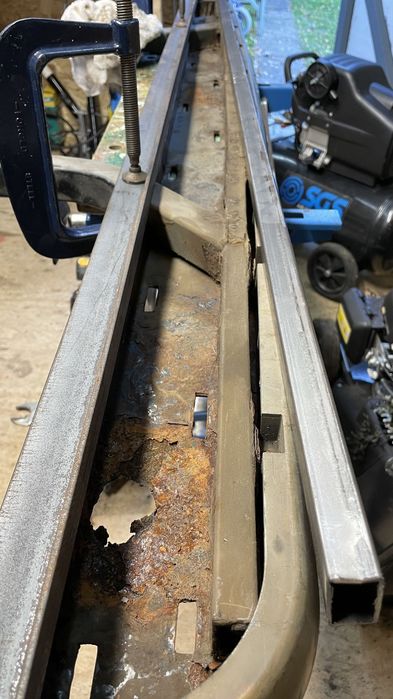
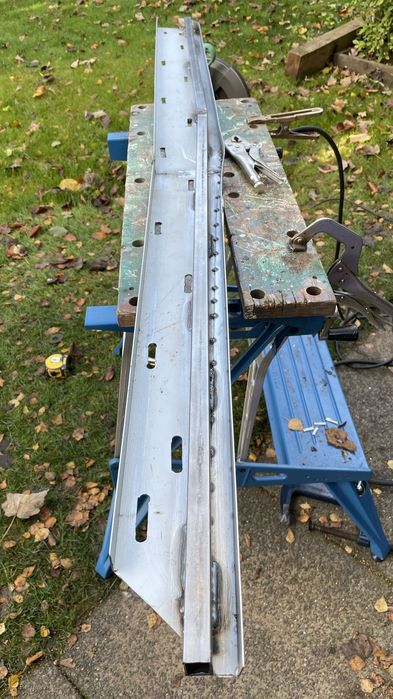
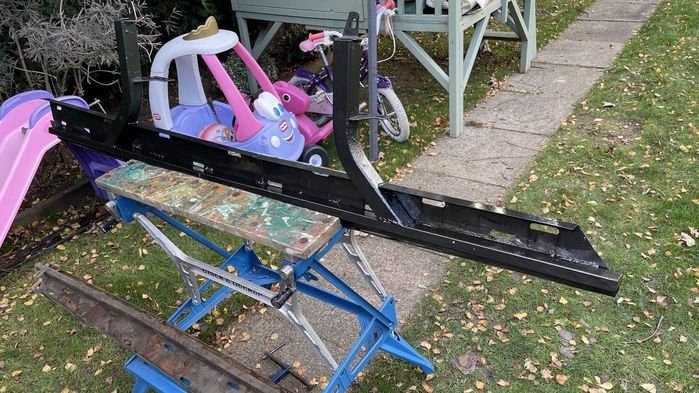
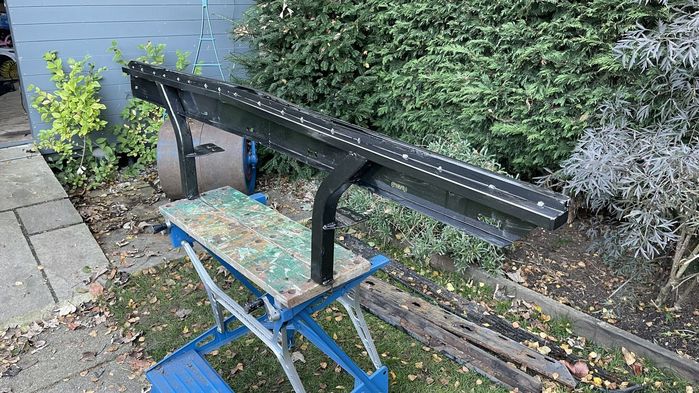
The side steps on my RR were almost complete in their transition from useful back into the iron ore from which they came, they were so heavily corroded I'm surprised they still had the strength to hold the rubber tread.

Totally shot all to hell.

Click image to enlarge


One of my neighbours works for a fabricators and I asked him if he could bend me some steel and he did one better and made me some channels of aircraft grade galvanised steel.

The step diminishes toward the front so I had to cut and bend the front into a smaller width, I used a piece of hardboard to mark the holes for the rubber tread and then drilled a 13mm hole at either end of the slot and then cut between the drilled holes with a grinder.

You can see the diminishing width here on the right hand side of the step.


It appeared that the step is also not straight, neither is the support box section.


Click image to enlarge


I cut a notch out of the box section so that it matched the old one and then welded it up, and did the same with the step itself.


Here's the step and the box section cut and slightly kinked to match the old one.

Click image to enlarge


A test fit onto the car


Then gave the whole lot a good few coats of hammerite, you can see the old one in the bottom of the picture, absolute state. That's the better one of the two, the other one was twice as bad.


The step reassembled and back onto the car


 Christian.


Current Cars
2011 Range Rover Vogue SE
2020 BMW M4 Competition
2019 BMW X4

My RR Blog: www.facebook.com/L322Project
or
https://www.fullfatrr.com/forum/topic61540.html

Last edited by Caesium on 29th Nov 2021 4:30pm. Edited 2 times in total

Post #614165 29th Nov 2021 4:23pm
View user's profile Send private message View poster's gallery Reply with quote
dhallworth


Member Since: 10 Oct 2011
Location: Glasgow
Posts: 2951

United Kingdom 2012 Range Rover Autobiography TDV8 Baltic Blue

That a superb job!

At least you know they'll be safe to use now!

David. 2002 4.6 Vogue SE - Alveston Red with Lightstone Leather
2007 Range Rover Supercharged in Java Black with Ivory Leather
2012 Range Rover 5.0 SC Autobiography in Indus Silver with Jet/Ivory Interior
2012 Range Rover 4.4 TDV8 Autobiography in Baltic Blue with Sand Interior

Post #614166 29th Nov 2021 4:28pm
View user's profile Send private message View poster's gallery Reply with quote
Caesium


Member Since: 21 Sep 2021
Location: Essex
Posts: 451

United Kingdom 2012 Range Rover Vogue SE 4.4 V8 Santorini Black
Battery Low - Start Engine

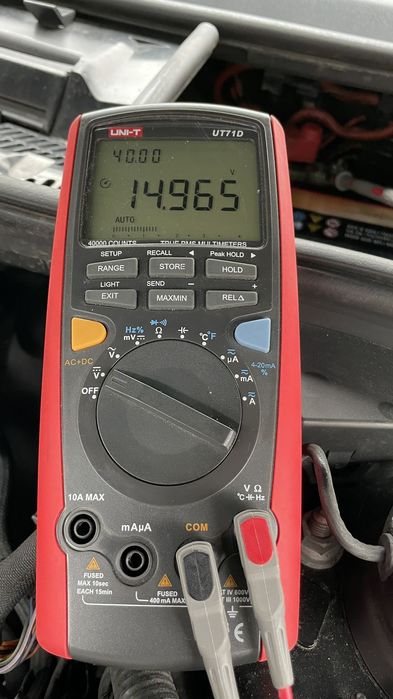
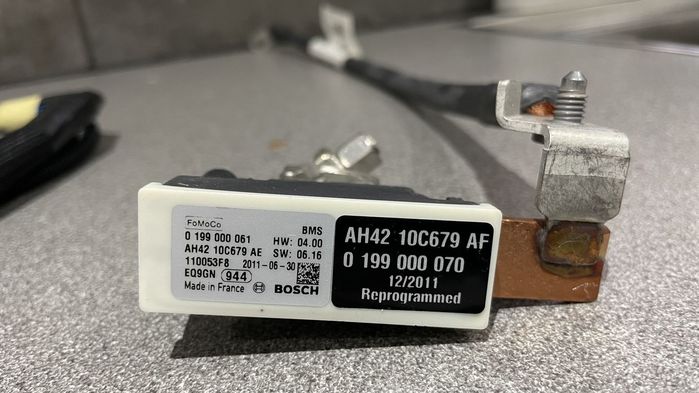
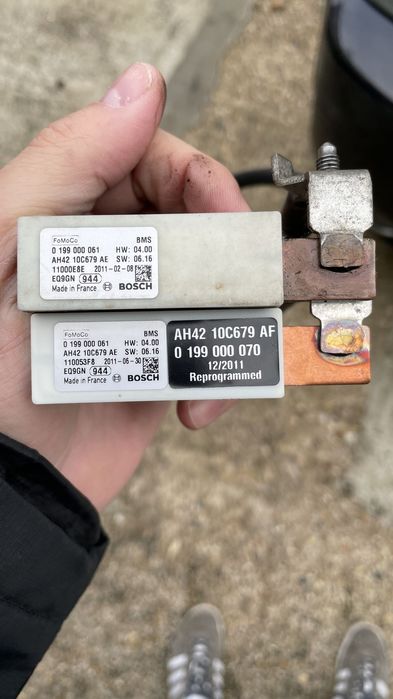
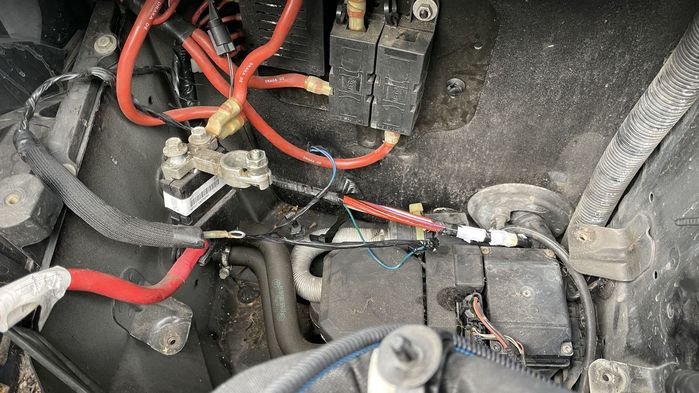
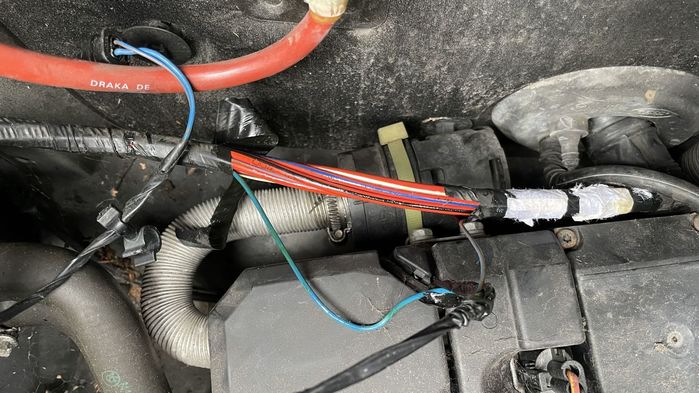
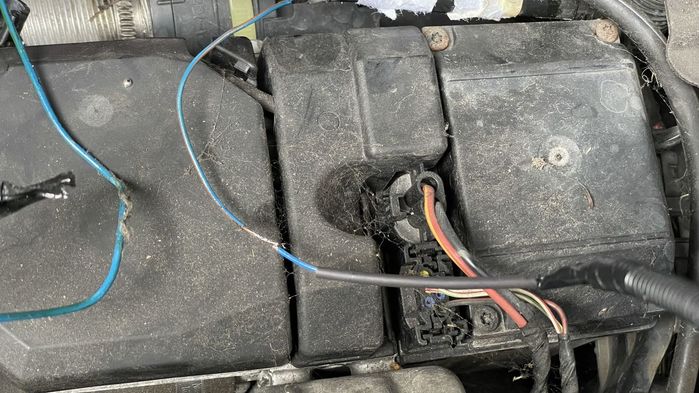
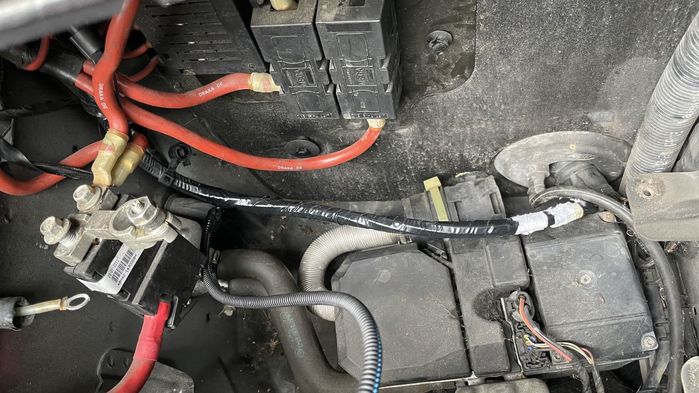
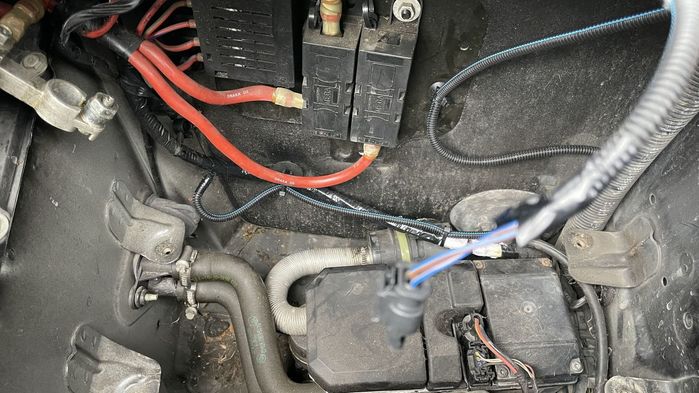
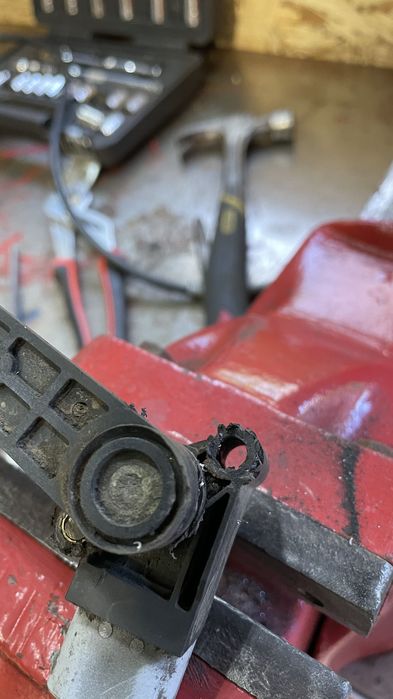
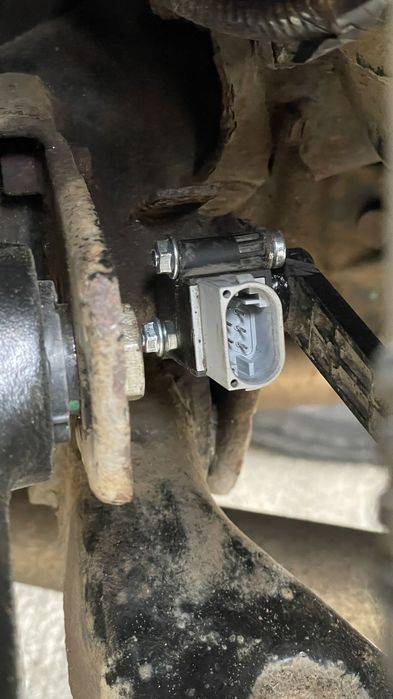
SO having been a victim of the "Battery Low - Start Engine" warning constantly coming up, I decided on a course of action that means I would replace the Battery Monitoring System (BMS) and see if that helps.

I found some information online that the BMS can go faulty and some more information about how the battery monitoring system works see here https://www.fullfatrr.com/forum/topic61536.html

First I checked that my alternator was charging, it's a little high which leads me to think the BMS is reporting the battery as aging, which as you'll recall from earlier in this thread, it's not. It's two months old.


Click image to enlarge


I bought a brand new BMS, part number LR 037886


This is what you get in the box


The sticker shows it's been updated somehow.... interesting!!


Here's the old one and the new one together


Click image to enlarge


Its really straightforward to change them out, remove the battery and battery tray. One of the nuts that holds in the tray is accessible from below within the wheel arch according to the manual but I got it out from above.

The BMS itself is just unbolted from the bodywork and has the Positive and LIN bus cables which unplug.

The LIN bus cable is the most tricky to replace as it's all taped into the loom and it runs into the cabin and into the distribution panel behind the glovebox. Rather than untape all this wiring I just identified the old cable, cut it and soldered on the new one.

In this picture the LIN bus cable is the blue/green one in the centre and it routes into the grommet on the bulkhead.


Close up of the LIN bus cable


Cable cut and new one soldered in, note the heat shrink to cover the joint


All taped back up nice and neatly


The BMS monitoring cables all routed in - the other blue/green wire with the ring terminal is fused and connected to the live post. The whole new cable loom is covered with convoluted cable protection.

You can see the plug that connects to the BMS in the foreground - the unit at the bottom is the fuel burning heater


Once all connected back up I charged the battery overnight and then left it for 12 hours for the float voltage to settle and then I reset the battery again with IID (I did it when I changed the battery before).

Its important to reset the battery when it has been idle for a number of hours or the BMS will not accurately be able to judge the state of the battery due to the artificial elevation of charge caused by engine running or a battery charger.

You will be pleased to know I have not seen the battery low warning since. Christian.


Current Cars
2011 Range Rover Vogue SE
2020 BMW M4 Competition
2019 BMW X4

My RR Blog: www.facebook.com/L322Project
or
https://www.fullfatrr.com/forum/topic61540.html

Post #614397 1st Dec 2021 4:05pm
View user's profile Send private message View poster's gallery Reply with quote
Caesium


Member Since: 21 Sep 2021
Location: Essex
Posts: 451

United Kingdom 2012 Range Rover Vogue SE 4.4 V8 Santorini Black
Removing Window Tints

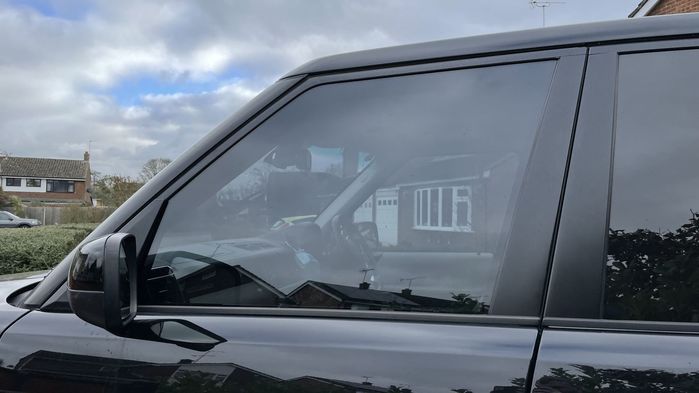
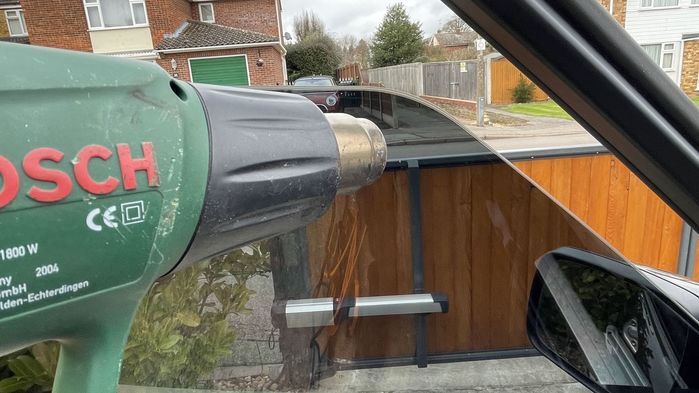
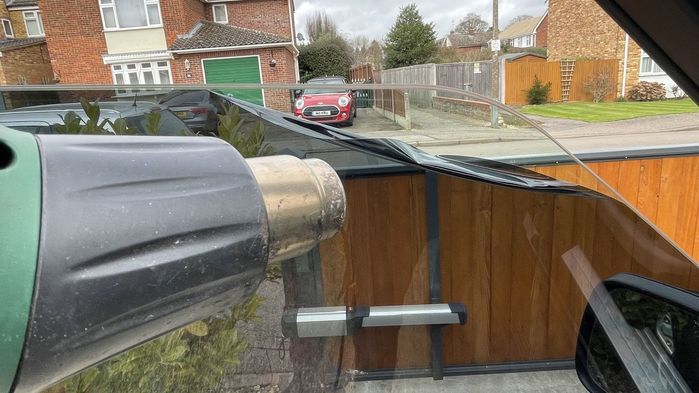
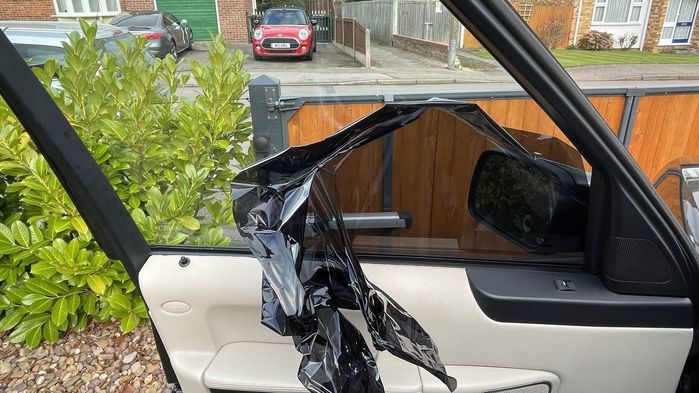
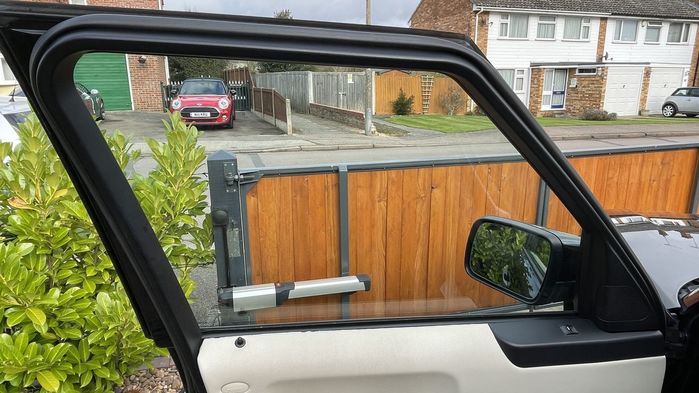
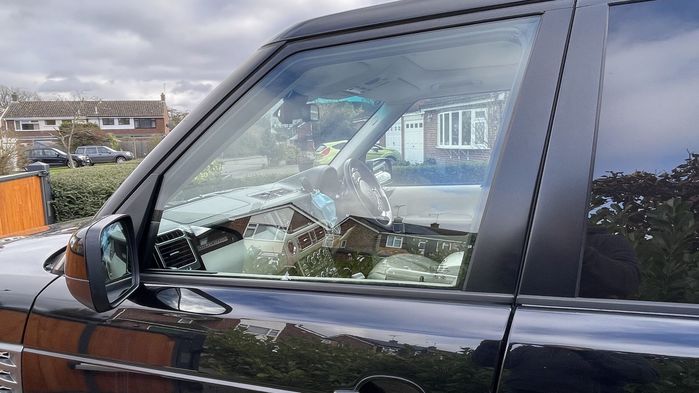
When I bought the car the front windows were tinted pretty dark, and initially I thought it looked pretty good.

Then I drove it at night and noticed that I couldn't see a thing behind me unless it was illuminated. Reversing was a nightmare and I felt that pedestrians could go unnoticed. which as a careful & competent driver I couldn't overlook.

I planned on removing the tints as soon as I could but the weather has prevented me from doing so for a while.

When we got a little break in the weather I get the heatgun out and attempted to remove them.

This is what it looked like before


Got the heatgun on the corner


Eventually it softens enough to peel away


I found the best way was to apply firm pressure and keep the heatgun on the edge where the tint met the glass, as the tint warms up the glue just releases.


Tint removed and left no glue behind whatsoever


Finished article, much clearer and more importantly, safer

 Christian.


Current Cars
2011 Range Rover Vogue SE
2020 BMW M4 Competition
2019 BMW X4

My RR Blog: www.facebook.com/L322Project
or
https://www.fullfatrr.com/forum/topic61540.html

Post #622408 4th Feb 2022 9:09am
View user's profile Send private message View poster's gallery Reply with quote
DaleL322


Member Since: 04 Mar 2021
Location: Stamford
Posts: 176

United Kingdom 2009 Range Rover Vogue SE TDV8 Stornoway Grey

Really great write up and thread, keep up the good work Thumbs Up 2010 MY Range Rover 3.6 TDV8 Vogue SE - Stornoway Grey with Semi-Aniline Ivory Leather and Piano Black Trim

https://www.fullfatrr.com/forum/topic58777.html

Post #622849 7th Feb 2022 1:25pm
View user's profile Send private message View poster's gallery Reply with quote
Caesium


Member Since: 21 Sep 2021
Location: Essex
Posts: 451

United Kingdom 2012 Range Rover Vogue SE 4.4 V8 Santorini Black

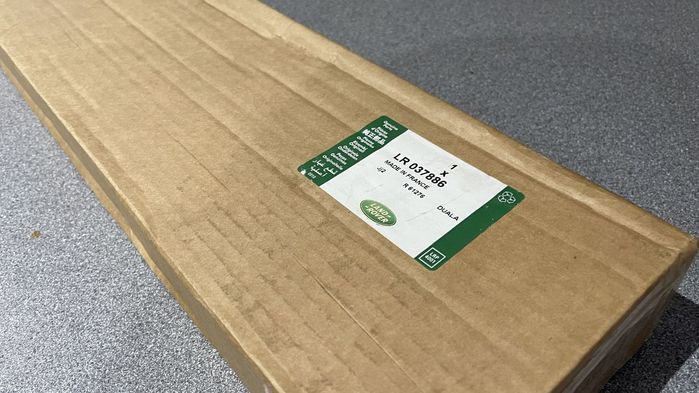
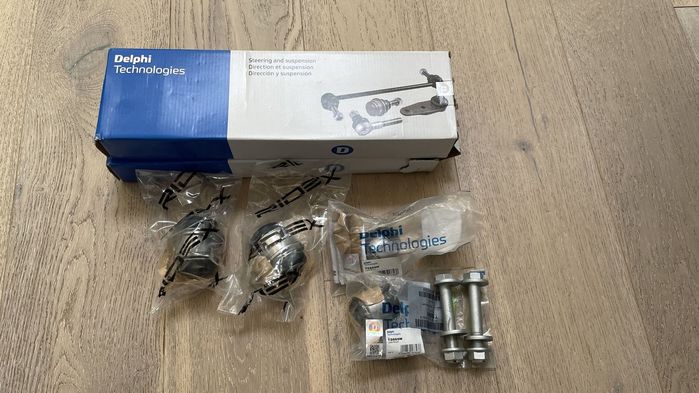
These parts arrived today, keep tuned for the next small(!) job to be undertaken


 Christian.


Current Cars
2011 Range Rover Vogue SE
2020 BMW M4 Competition
2019 BMW X4

My RR Blog: www.facebook.com/L322Project
or
https://www.fullfatrr.com/forum/topic61540.html

Post #622855 7th Feb 2022 2:03pm
View user's profile Send private message View poster's gallery Reply with quote
Jayk69


Member Since: 08 Feb 2018
Location: Daventry
Posts: 601

United Kingdom 2012 Range Rover Vogue 4.4 V8 Barolo Black

nice thread really enjoyed reading that 2012 Vogue 4.4 TDV8 - Current
2014 Navara V6 - Gone
2004 Vogue TD6 - Gone
Grand Cherokee - Gone
Discovery V8 (LPG) - Gone
Discovery TD5 - Gone

Post #623043 9th Feb 2022 2:11pm
View user's profile Send private message View poster's gallery Reply with quote
V8rumbler


Member Since: 07 Mar 2018
Location: Devon
Posts: 88

United Kingdom 2011 Range Rover Autobiography 5.0 SC V8 Ipanema Sand

Great thread 2007 Vogue TDV8 in Stornoway Grey with Jet interior NOW SOLD
2011 (12MY) 5.0 S/C AUTOBIOGRAPHY ipanemaSand with Jet Interior

Post #626410 17th Mar 2022 10:34pm
View user's profile Send private message View poster's gallery Reply with quote
Caesium


Member Since: 21 Sep 2021
Location: Essex
Posts: 451

United Kingdom 2012 Range Rover Vogue SE 4.4 V8 Santorini Black

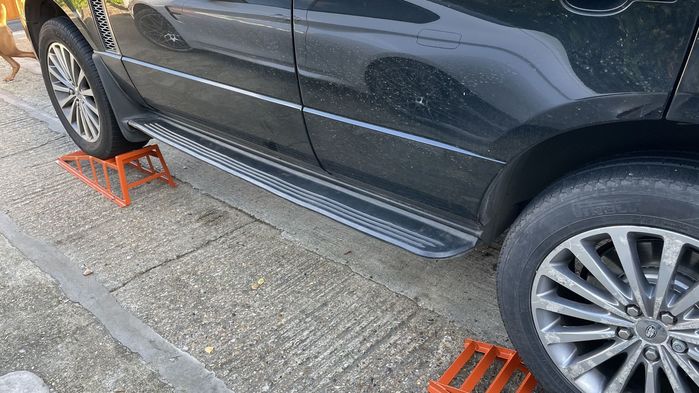
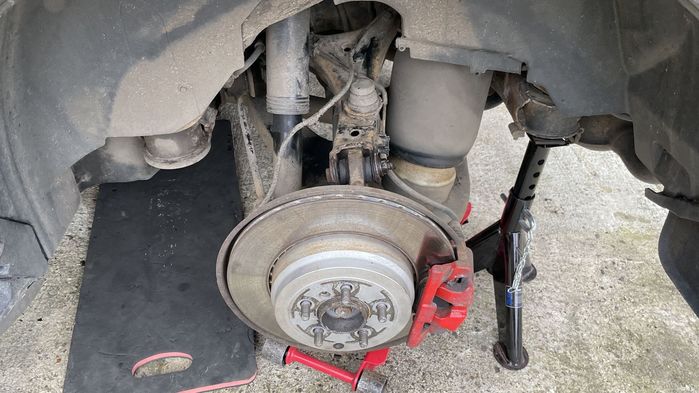
Got the old girl all jacked up and read to start disassembling.


Soaked everything in GT85

Click image to enlarge

Click image to enlarge

Click image to enlarge


Got the bush puller on there, this is a bush puller for the BMW 3 series which fits the top bush


It fits the bush a little too well because it got stuck in there and I couldn't get it out!

Click image to enlarge


I managed to get enough purchase on the bush to get it in the vice and then hammer the puller off the bush.

Click image to enlarge


The puller pulled the bush back in perfectly, I used Delphi components as they're as good as OEM. The housing was in great condition, no corrosion within the opening and no burrs. The old bushes were actually in decent condition.


As it's easy to get access to the adjuster I used a pin punch to mark the original adjustment washer and then transferred it's position to the new one.


Punch marks aligned, note the copper grease on the end of the bolt, everything was smothered in it.

Click image to enlarge


The height sensor is bolted up using brass inserts within the body of the sensor which simply would not come out. I later found out that a bracket can also be removed but on this occasion I did not know beforehand and space is limited in there. I ended up grinding the heads of the bolts off.

Click image to enlarge


I punched out the insert

Click image to enlarge


Bolted the sensor back in using nuts and bolts, a bit fiddly but meant I did not have to buy new sensors.

Click image to enlarge


I missed out taking photos of the bottom bushes as I pressed on, but I did have to buy another bush puller set as the top bush puller was too small for the enormous bottom bush. D'oh!

The track control arm inner bolt simply would not come undone so that also had to be ground off, I cut the nut off in several places and then used a chisel to drive it off the threads.


Click image to enlarge


I marked the bolt head and the chassis with tippex before disassembly to enable refitting in the right position.

Click image to enlarge


Chassis marking with tippex


I had my alignment done when I changed the front suspension arms and I know the back was within tolerance then which is why when refitting I am happy it is in the right place with these markings. Christian.


Current Cars
2011 Range Rover Vogue SE
2020 BMW M4 Competition
2019 BMW X4

My RR Blog: www.facebook.com/L322Project
or
https://www.fullfatrr.com/forum/topic61540.html

Post #626805 23rd Mar 2022 11:30am
View user's profile Send private message View poster's gallery Reply with quote
Caesium


Member Since: 21 Sep 2021
Location: Essex
Posts: 451

United Kingdom 2012 Range Rover Vogue SE 4.4 V8 Santorini Black

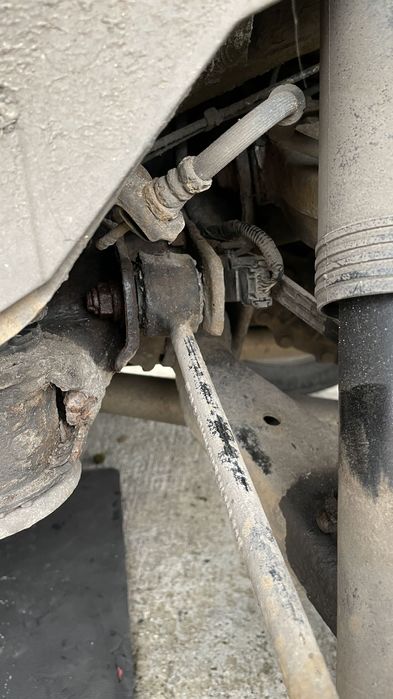
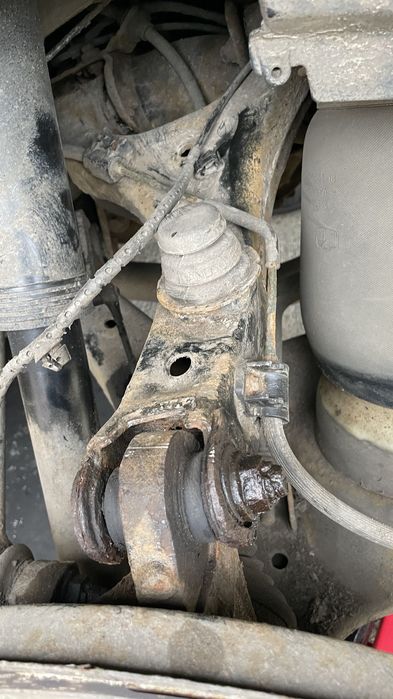
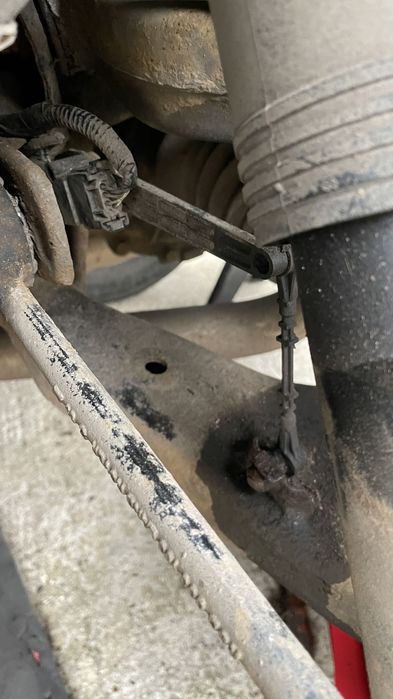
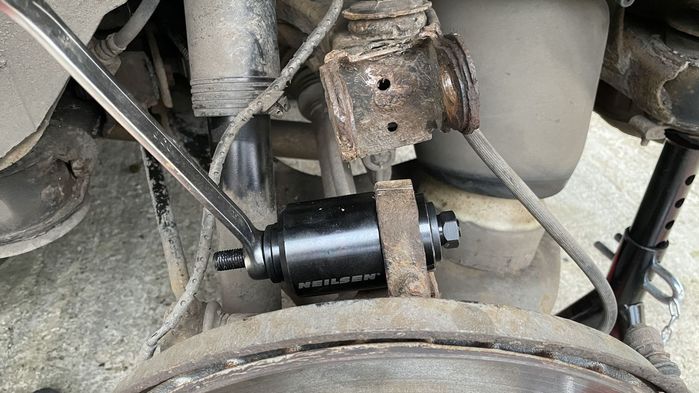
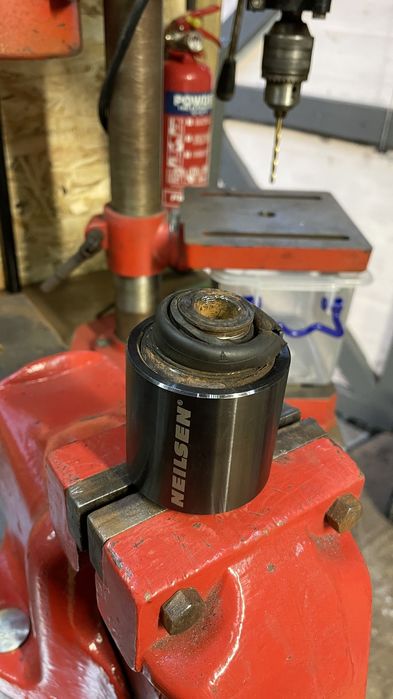
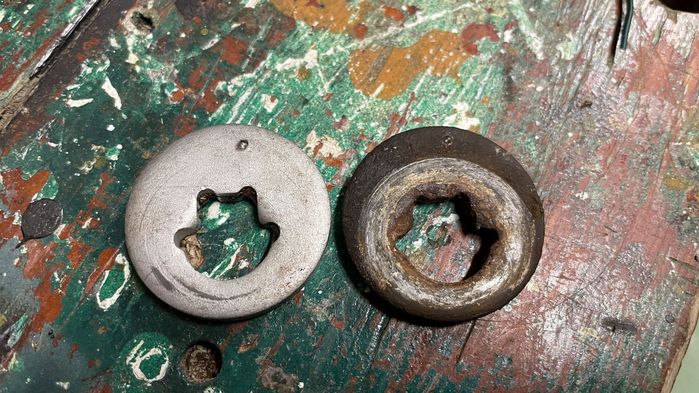
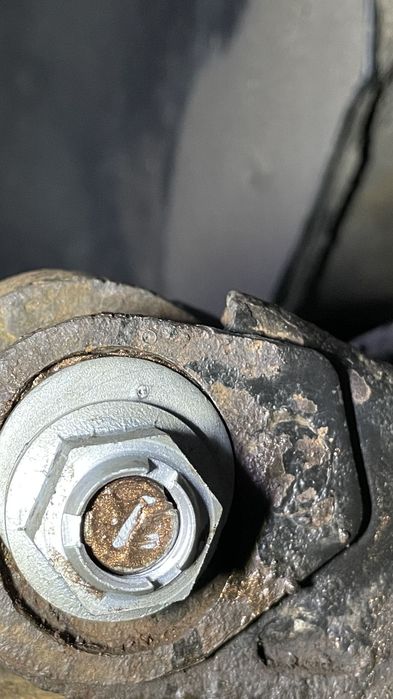
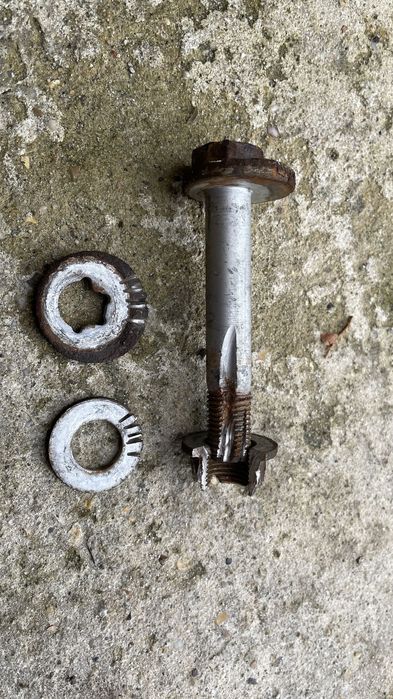
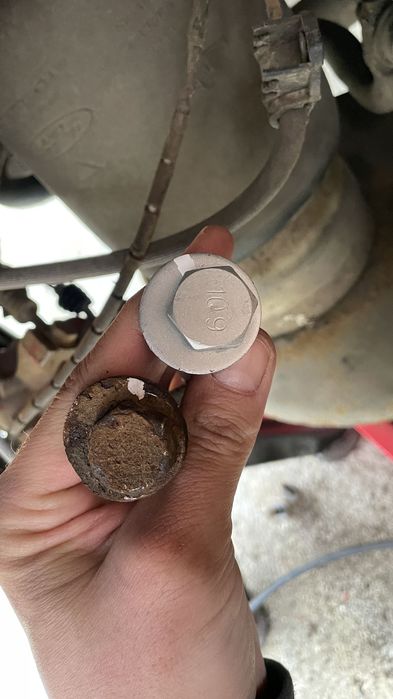
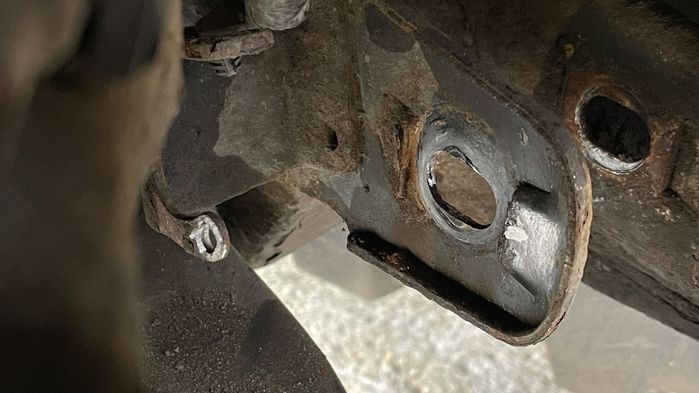
For those following my progress so far, you'll know the front end suspension components were only replaced a few months ago.

I've only travelled about 1200 miles since then and the car has developed a horrible creaking over bumps and when putting on steering, I made a video to show what the issue is.

 Christian.


Current Cars
2011 Range Rover Vogue SE
2020 BMW M4 Competition
2019 BMW X4

My RR Blog: www.facebook.com/L322Project
or
https://www.fullfatrr.com/forum/topic61540.html

Post #626807 23rd Mar 2022 11:37am
View user's profile Send private message View poster's gallery Reply with quote
Caesium


Member Since: 21 Sep 2021
Location: Essex
Posts: 451

United Kingdom 2012 Range Rover Vogue SE 4.4 V8 Santorini Black

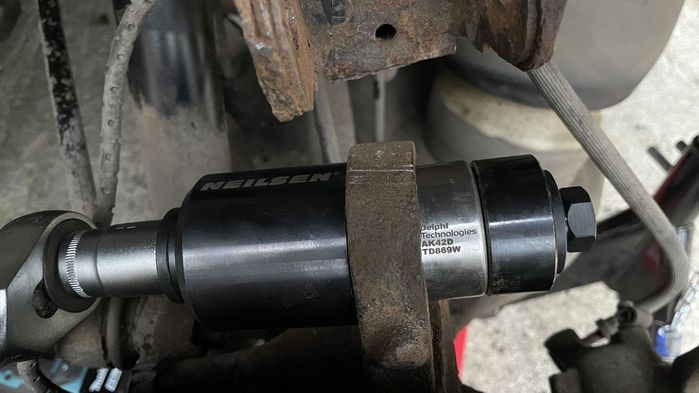
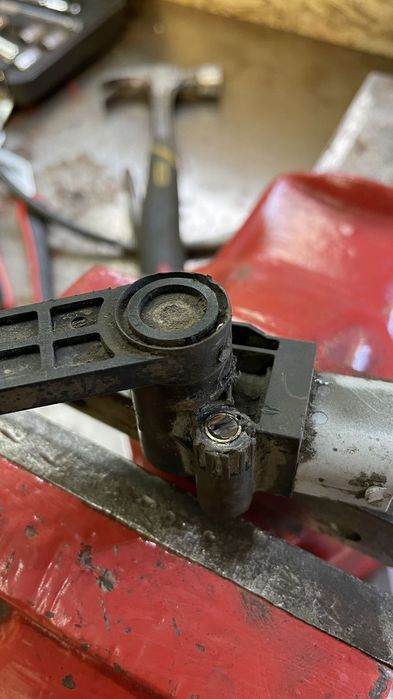
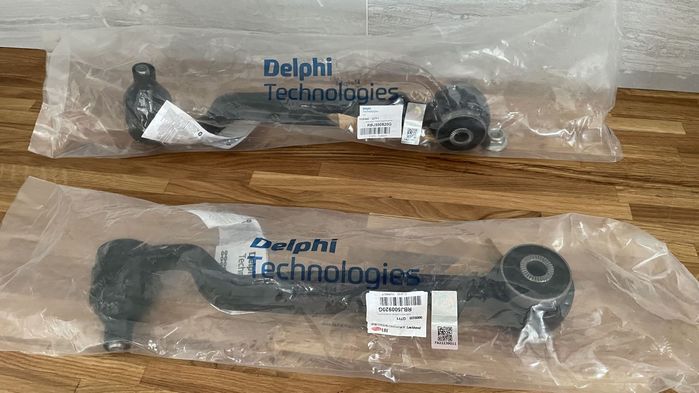
Lower arms changed again, this time for Delphi arms. Sent the Britpart ones back.

Straight forward swap, about 10mins per side.


 Christian.


Current Cars
2011 Range Rover Vogue SE
2020 BMW M4 Competition
2019 BMW X4

My RR Blog: www.facebook.com/L322Project
or
https://www.fullfatrr.com/forum/topic61540.html

Post #627108 27th Mar 2022 9:01pm
View user's profile Send private message View poster's gallery Reply with quote
Post Reply  Back to top
Page 3 of 8 <12345678>
All times are GMT

Jump to  
Previous Topic | Next Topic >
Posting Rules
You cannot post new topics in this forum
You cannot reply to topics in this forum
You cannot edit your posts in this forum
You cannot delete your posts in this forum
You cannot vote in polls in this forum


Site Copyright © 2006-2024 Futuranet Ltd & Martin Lewis
fullfatrr.com RSS Feed - All Forums


Switch to Mobile site