Advertise on fullfatrr.com »

Home > Technical (L322) > P040D-00 (2F) EGR temperature sensor replacement
Post Reply  Down to end
Page 8 of 10 <12345678910>
Print this entire topic · 
BAZ8046


Member Since: 26 May 2023
Location: Chatham
Posts: 15

United Kingdom 2012 Range Rover Westminster 4.4 V8 Santorini Black

Hi, have just done this job today to clear the P040D-00 (2F) code.
Lots of thanks to GGDR and all the other contributors, without this help it would have been difficult to even find the correct sensor!
It’s certainly not an easy job due to the tight access.
I found the correct choice of socket combination was key.
I had some long reach six sided sockets which would fit but they tended to try and pull off the nut before enough torque could be applied.
In the end a short six sided socket on a wobble bar did the trick.
The only other item to note is that a hacksaw blade with a handle on the end was the easiest way to cut off the stem of the sensor.
And the best bit, no fault codes!


Click image to enlarge


Click image to enlarge


Click image to enlarge


Click image to enlarge


Click image to enlarge

Post #667556 25th Jun 2023 9:33pm
View user's profile Send private message View poster's gallery Reply with quote
GGDR


Member Since: 26 Nov 2016
Location: London
Posts: 3519

United Kingdom 2011 Range Rover Vogue SE TDV8 Stornoway Grey

Congratulations and welcome to the club Cheers, Greg
- - - - - - - - - - - - - - - - - - - - - - - - - - - - - - - - - - - - - - - - - -
2011 Vogue SE 4.4 with lots of toys in Stornaway

Post #667566 25th Jun 2023 11:09pm
View user's profile Send private message View poster's gallery Reply with quote
fmgl322


Member Since: 18 Apr 2022
Location: Koblenz
Posts: 52

Germany 

You make it sound so simple! How easily did the sensor nut crack open? Had you been dowsing it in WD40 for months in advance? This is on my to-do list one of these days… -------------------------
2012 4.4 TDV8 Vogue
2001 Audi A2 1.4 16V
2019 Skoda Kodiaq (don't ask...)

Post #667567 25th Jun 2023 11:28pm
View user's profile Send private message View poster's gallery Reply with quote
jaguar3


Member Since: 25 Sep 2022
Location: Estonia
Posts: 193

Estonia 2011 Range Rover Vogue SE 4.4 V8 Baltic Blue

Mine came off quite easy, witout WD40.

Post #667573 26th Jun 2023 7:22am
View user's profile Send private message View poster's gallery Reply with quote
BAZ8046


Member Since: 26 May 2023
Location: Chatham
Posts: 15

United Kingdom 2012 Range Rover Westminster 4.4 V8 Santorini Black

Thanks, I did spray mine with the WD40 release agent on the Saturday and tried it but then left it overnight.
When I tried with the long socket on Sunday morning it was trying to slip off the nut when you applied some weight.
I think the reason for this is the angle is not quite correct with a long socket and the length of the socket tends to want to pull it off the nut.
I changed over to a small socket on a wobble bar and with a very satisfying crack, it came undone.
As the nut is stainless steel, if using the right tools, I would expect these to release most times.
Once cracked off it came out easily.
I can't show the old nut as it disappeared down the side of the engine never to be seen again!
Hope this helps.


Post #667580 26th Jun 2023 8:19am
View user's profile Send private message View poster's gallery Reply with quote
garyRR


Member Since: 13 Mar 2021
Location: Hampshire
Posts: 1356

United Kingdom 

Thanks for sharing your experience BAZ8046.

Looks like you did this job with the heatshields still in-situ?

How long should be budgeted for the job?

Gary 2015 Range Rover Autobiography 4.4 SDV8

Post #667585 26th Jun 2023 9:45am
View user's profile Send private message View poster's gallery Reply with quote
BAZ8046


Member Since: 26 May 2023
Location: Chatham
Posts: 15

United Kingdom 2012 Range Rover Westminster 4.4 V8 Santorini Black

Hi Gary,
Yes you can just bend the heat shied on the inner wing back and I just had to pull up the RH shield corner over the exhaust manifold.
There is a gap in the heat shield to get to the sensor but it just depends how well it is aligned.
I would allow half a day but it all depends on how easily the old sensor comes out.
My view is that it wasn’t working anyway so if the job has to be abandoned, as the old sensor won’t come out, nothing has been lost.
Good luck if you do take it on. Thumbs Up

Barrie.

Post #667631 26th Jun 2023 6:59pm
View user's profile Send private message View poster's gallery Reply with quote
jaguar3


Member Since: 25 Sep 2022
Location: Estonia
Posts: 193

Estonia 2011 Range Rover Vogue SE 4.4 V8 Baltic Blue

Old sensor unscrewing was the easyest part with mine. Heatshield takes long time. I just bend it littlebit, but due poor acess its not easy.
Another hard thing I remember was get in new sensor due too bad angle. Need to avoid get it in wrong thread, because in this case you can demage the thread and then you are in deep Censored , you can imagine.

Post #667674 27th Jun 2023 6:33am
View user's profile Send private message View poster's gallery Reply with quote
jaguar3


Member Since: 25 Sep 2022
Location: Estonia
Posts: 193

Estonia 2011 Range Rover Vogue SE 4.4 V8 Baltic Blue

Another question in the air, why 100% of RR-s have this issue with only this temperature sensor? There is 6 similar sensors on exhaust, but only thisone die on apr. 50 000-100 000km.
Is the aswear sensor location? Too close to burning chamber and therefore in very hot conditions, especially when DPF regeneration cycle in progress?

Post #667825 29th Jun 2023 7:16am
View user's profile Send private message View poster's gallery Reply with quote
garyRR


Member Since: 13 Mar 2021
Location: Hampshire
Posts: 1356

United Kingdom 

I did my gas sensor today. Thank you all for your inputs so far.

Unfortunately it was a pig of a job for me. Looks like mine has been done before - the braided cable wasn't in one of the cleats, and the heatshield was completely covering the nut.

Nothing was too difficult to remove actually - the battery shroud, the outer heatshield and the inner heatshield came off without a fuss - nothing a 1/4" socket set and ratchet spanners couldn't handle.

Removing wasn't a problem, because I cut the cable and put a 13mm deep socket on it, which gave me loads of purchase to remove it (good reason why I did this - see below). This on the end of a 600mm ratchet bar was enough to get it out.

So just over an hour in I thought it was all going so well and I had the sensor out!

I bought a genuine sensor from Maltings 4x4 (great company if you don't know them). Regardless of who you buy these from though, it is a lot of money for what is essentially a thermistor!

When removed, I tested the old sensor with a multimeter and sure enough, the sensor had gone open loop, compared to the new sensor, which was reading 0.2kohm at ambient temperature.

Here's where the job became a pig.

Now, installing and putting back together is what took the time. A word of warning over the Laser 6850 part. Unfortunately I'm the unlucky one who got one with a manufacturing defect - the socket was a fraction of a millimetre too small for the nut! Additionally, this meant it also kept slipping off, making my install job a major ordeal, moving fractions of a turn at a time and then falling off the nut again.

What also took the time was reinstalling the inner heatshield - locating those bolts with less than 5cm of room to play with took a significant amount of time.

I wasn't overly impressed by the Laser part either - not particularly heavy duty and will flex under load. I'd recommend sourcing a proper 13mm difficult access socket, injection line socket or something like the Neilsen EGT sensor set: https://amzn.eu/d/8OdIP4f . Much more heavy duty, and you have the choice of both a straight and offset socket to wind the sensor in properly.

So, the job is done Bow down , but please do make sure the socket for installing a) fits properly and don't just trust the specification and b) get something better quality than the Laser socket, it will pay dividends. 2015 Range Rover Autobiography 4.4 SDV8

Post #667882 29th Jun 2023 6:52pm
View user's profile Send private message View poster's gallery Reply with quote
BAZ8046


Member Since: 26 May 2023
Location: Chatham
Posts: 15

United Kingdom 2012 Range Rover Westminster 4.4 V8 Santorini Black

Hi Gary, glad it all went well in the end.
There is always a good sense of satisfaction from doing the job yourself. Thumbs Up

Barrie.

Post #667909 29th Jun 2023 10:32pm
View user's profile Send private message View poster's gallery Reply with quote
jaguar3


Member Since: 25 Sep 2022
Location: Estonia
Posts: 193

Estonia 2011 Range Rover Vogue SE 4.4 V8 Baltic Blue

Thumbs Up
Now your EGR cooler bypass valve working properly.

Post #667932 30th Jun 2023 9:21am
View user's profile Send private message View poster's gallery Reply with quote
garyRR


Member Since: 13 Mar 2021
Location: Hampshire
Posts: 1356

United Kingdom 

BAZ8046 wrote:
Hi Gary, glad it all went well in the end.
There is always a good sense of satisfaction from doing the job yourself. Thumbs Up

Barrie.


I'm not sure about satisfaction Laughing that was very time consuming with the faulty socket and actually took just as long as the whole job changing the air conditioning compressor!

The other thing I'll have no clue on is the tightness of the nut. All I know is that it felt tight enough on a 600mm bar, although the threads in the hole provide quite a hit of resistance.

Checking the before photos, the nut was sitting slightly proud of the hole, so this is what I opted for also. 2015 Range Rover Autobiography 4.4 SDV8

Post #667936 30th Jun 2023 9:33am
View user's profile Send private message View poster's gallery Reply with quote
PaulCee


Member Since: 31 Oct 2014
Location: UK
Posts: 18

Firstly thank you to everyone who has helped me recently.

I bought a 4.4 TDV8 AB a couple of months ago for my wife, after she had a TD6 for the last 9 years. I wasn’t thinking of changing but this one came up and peaked my interest. Anyway TDV8 bought, TD6 sold and that leads to where I am now.

I knew there were some issues that I needed to fix with it, and I am one of those people who likes to get involved, and after that if I find I can’t, then off to my local indy.

So faults were, so I thought, oil leak back of the engine, some paint work on bonnet, little bit of rust starting to surface on underside of rear tailgate. Not too bad.

There ended up being a few more jobs than that which I will list at the end, but one of these “new jobs” was EGR temp sensor. So I read through the excellent wiki from GGDR, Greg and the the comments that followed and managed to complete it over a few days. I wasn’t at it all the time, there were many breaks and “how am I going to get my hand on that” moments, but I found these breaks and a cup of tea helped.

I only used Gregs steps just as a reference and how each of these went for me.

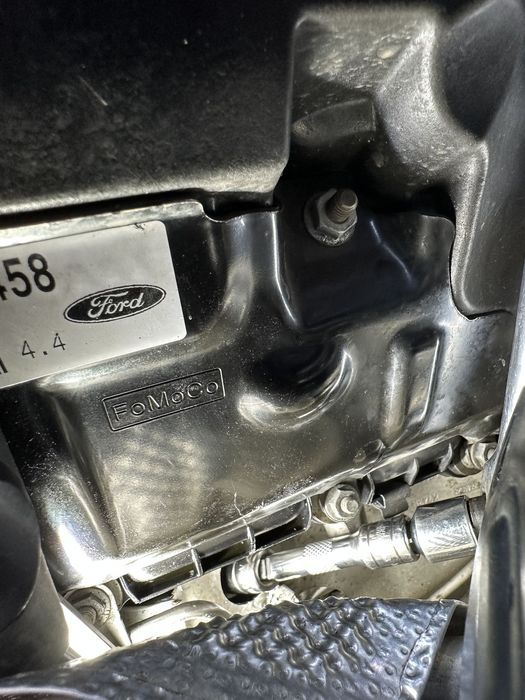
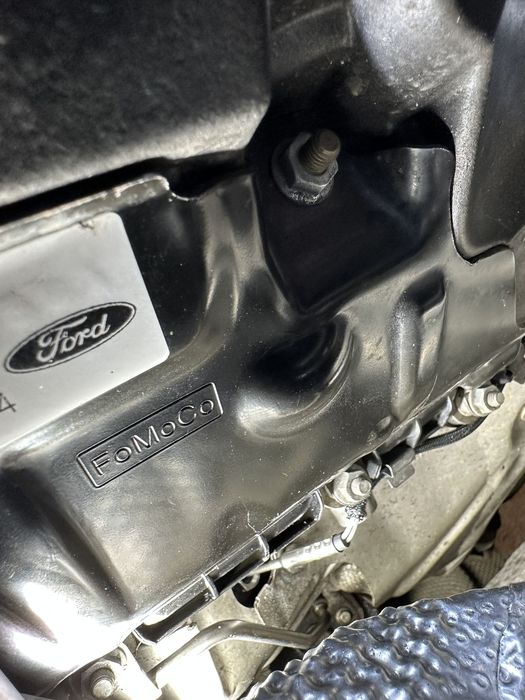
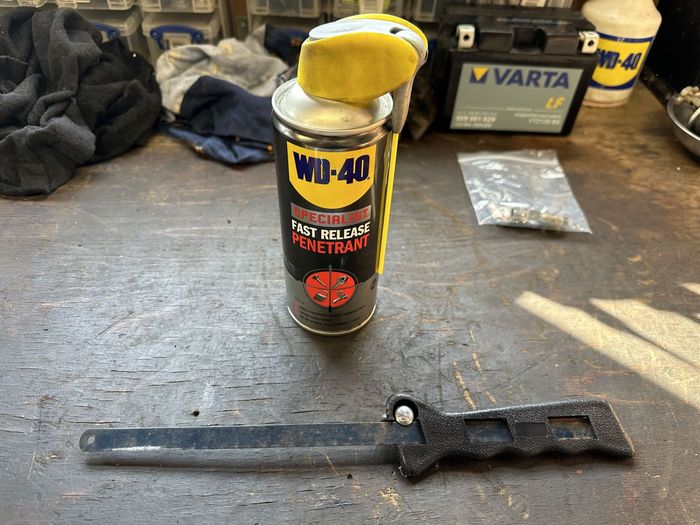
Step 1 was as Greg says find the sensor and over the next week I lubed with Plusgas. I found the best way to achieve this was endoscope camera (the endoscope camera proved vital for most tasks, due to no vision once my arm was down the side of the engine), and a three small straws taped together with tin of Plusgas on the end, as per instructions. It was difficult to spray all around the sensor nut as the top is under the incline of the engine, so I filled the centre where the sensor is, and it overflowed evenly running down the sides of the nut. I did this all week, once a day.

Step 2. Remove the pollen filter air box, battery surround. The cable for my sensor was already unclipped from its clips and looking at the heat shield, this sensor had been changed before. Unplugged sensor wire.

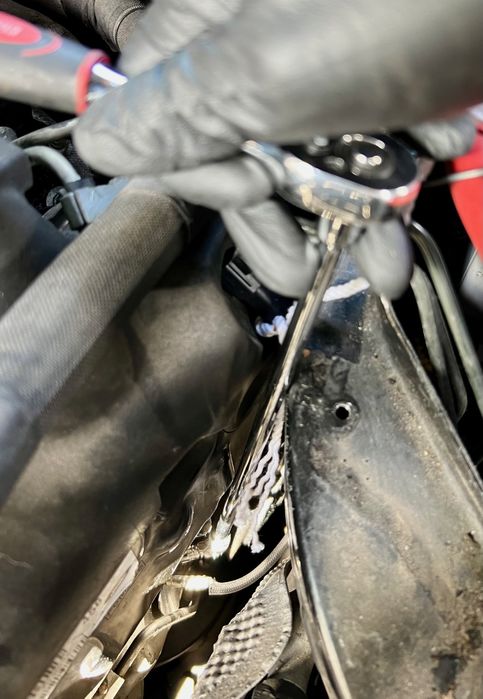
Step3. My step 3 was to cut the top of the sensor before the shield movement, as I figured this would give me better access to the retaining bolt for the heat shield, right next to the sensor. This proved to be one of the biggest hold ups for me. Tried hack saw blade, then I ordered Dremel type tool with Flexi shaft (like aids22) to cut it, but scared me how close the sensor top was to the hard pipe, and how this would give me another job if I messed up. So ordered small bolt cutters, but again a problem as the arms had to open so wide I could not find a way to get them in. Finally back to a hacksaw blade and persevered. Took a while but finally did it .

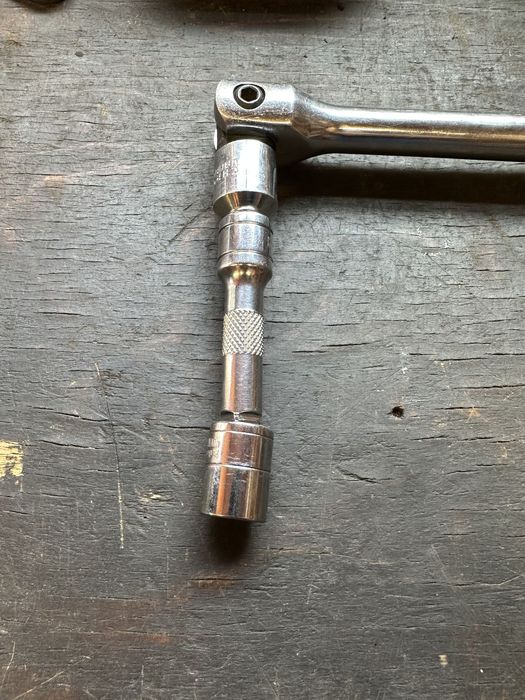
Heat shield bolt was then very visible and easy to remove with a socket, 300mm extension and ratchet.


Click image to enlarge


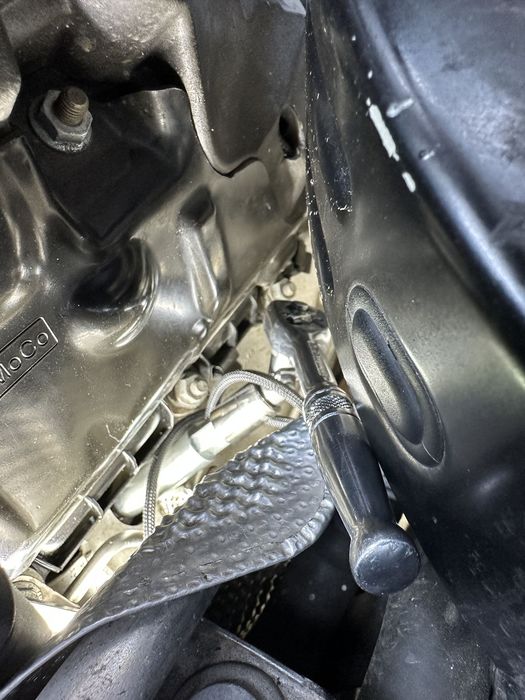
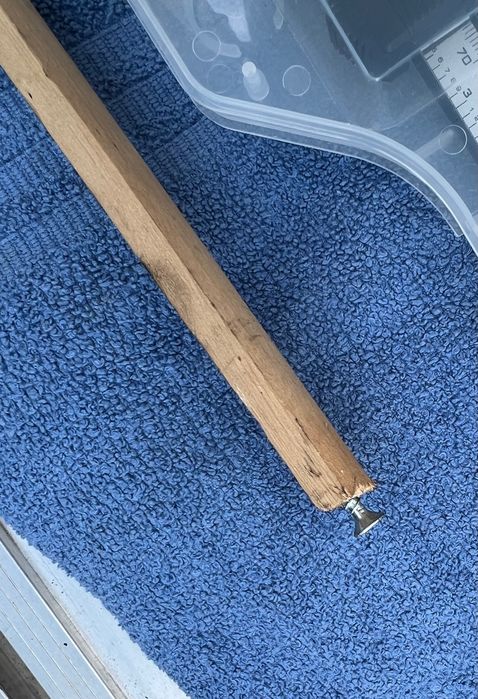
Step4. Now I must thank J9ffy for making my life so much better with the invention of long piece of wood and a screw in the end. Once I had the bolt out of the heat shield by the sensor, and this is the only bolt I took out for the heat shield by the way, the screw in the end in the piece of wood caught under the heat shield and pulled it up and away from the sensor area, I then used the other end of the wood to push it away further, and then that was it done. 2 minutes work.


Click image to enlarge


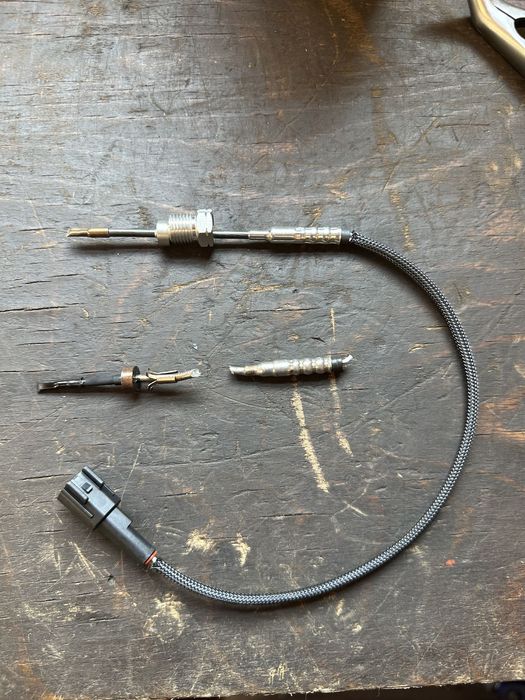
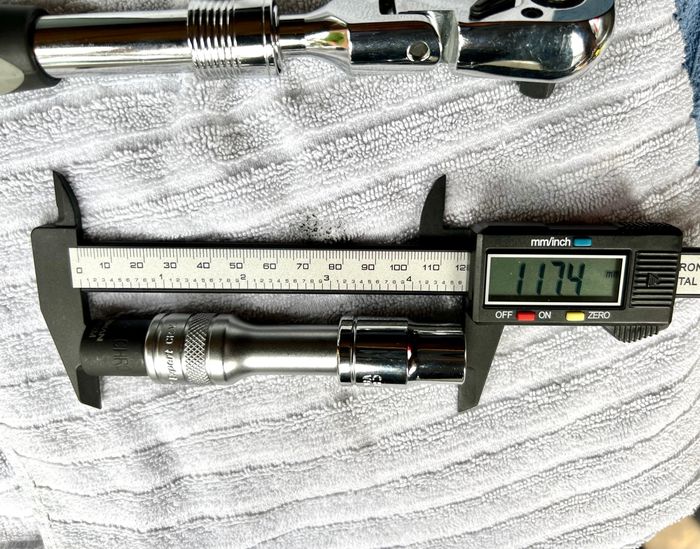
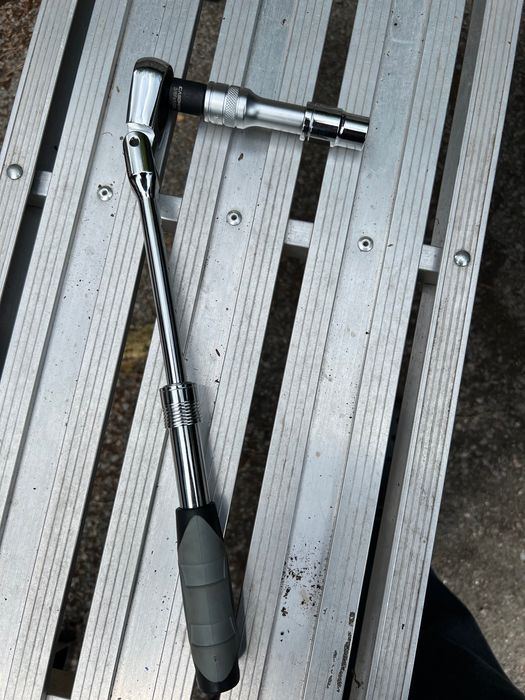
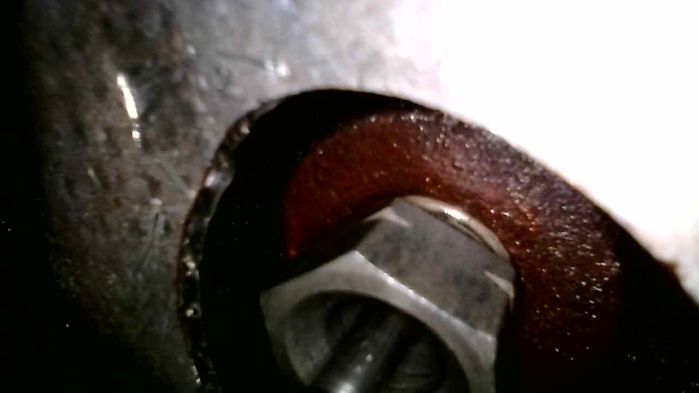
Step 5. Tried both the long socket and the short. With both of them I used aids22 idea , he used for putting the head shield screw back in. I used cotton to lower the socket down and then my fingers to guide it onto the nut of the sensor. In the end I used the small socket as I could feel it better and how it was sitting on the nut, which I thought was important. Now was the time to try and turn the nut, I used a 3/8 flexihead ratchet, with a 3/8 to 1/2 adapter, a small extension and the socket. The flexihead also had an extendable handle. I left the socket in place on the nut and lowered the ratchet and connected the extension to it. Checking everything again to make sure, and all seemed solid. I had enough room to put pressure on the top of the ratchet with my free hand, whilst I turned the ratchet antilock wise with the other. First go nothing, then second with a bit more force it cracked. Once it started to move it really needed very little force, and I swapped out the ratchet etc for the smaller 1/4 ratchet an 300mm bar and socket. Nut came off (picture below) sensor needed a tap to get loose. I would also say that the week long lubrication did work. The threads of the nut were wet from Plusgas, and the end of the temp sensor was wet again, and it was Plusgas. It might be as I used almost a small tin of the stuff over the week.


Click image to enlarge


Step 6. Tried to do this but so difficult to reach with Q-tips. Tried a couple of times and it did clean things but worried about dropping them in the hole I was cleaning. So only minimal cleaning done. Tried putting the old nut in but again my fingers are too short, I could just about touch the nut with fingertips, and kept dropping. Thankful for cotton tied to it, not so much for the old temp sensor as I dropped that and lost in the engine.

Step 7. This was another problem. As I said I could only just touch the nut of the sensor, so once I had lowered the sensor in the hole, trying to get the correct angle, and rotate the nut with the last bit of your finger tips was difficult. All you can do is keep going and eventually the nut grabs. Then you are worried it’s maybe crossed threaded. Again the endoscope camera showing what’s going on was just invaluable. You could see the nut was looking straight for example, so on with the laser tools socket. Also did apply anti seize, just in case I’m lucky enough to have to do it again!

Got to this point, where the laser socket was needed, and like some others it was too small. Testing it on the old nut and it would not fit. So more time taken with crow bar to open up socket, hammer to close, whilst old nut is inside. Then after a few repeats of this process it works. I definitely do not recommend the laser tool spanner.

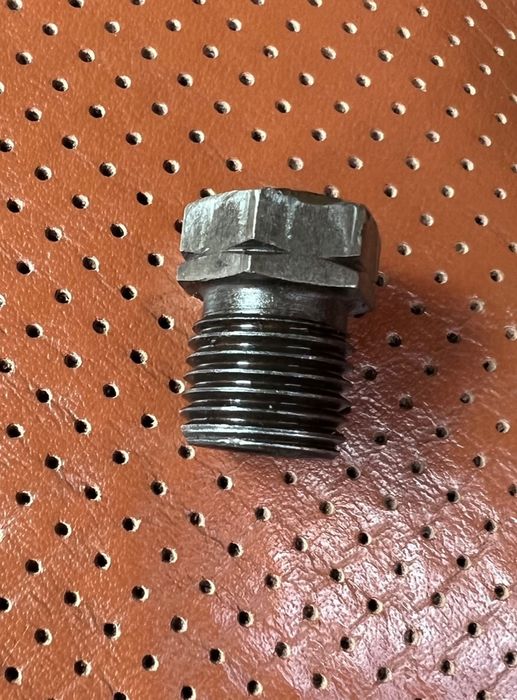
Slipped it onto the sensor, using cotton again, and tightened until it started to feel like the socket starting to flex a bit. So I called this tight. (I could not get my torque wrench in there either). I also worried about the nut properly seating against the block, as there was a gap. But after asking (thank you graryRR) and looking at the old nut, the thread does not go all the way to the top, so this is probably the reason.


Click image to enlarge


Step 8. Used my favourite tool of a bit of wood and screw in the end, to flatten heat shield. I used the blunt end this time without the screw and it folded back where it was meant to be, being careful to miss the sensor. The was also a lifted ridge in the middle where the heat shield had folded back on itself, but a push with the piece of wood flattened it. Again 2 minute job.

The only remaining tricky bit was did the bolt now line up with the hole after the flexing of the heat shield. For this I used again 1/4 wrench, 300mm extension and socket, much like I had done to remove. This time though I had to avoid the sensor top. I loaded socket with grease to keep bolt in place, and pushed “New” bolt into it as I dropped the original. Bolt went in first time and bit into the thread on second rotation, whilst trying to get angle right. Job done.

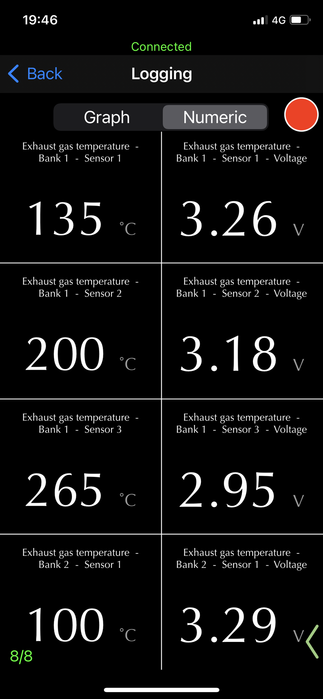
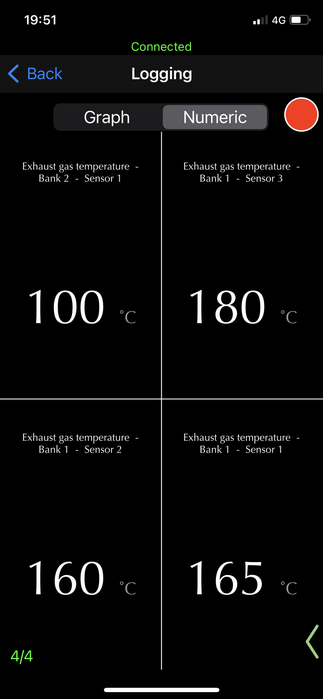
Before final reassembly plugged in sensor and scanned, and what a great feeling that is, code gone.


This is just my experience and is not meant to be any sort of guide, and I have only written it as it may help someone, as other peoples’ experiences have helped me.

Hands and arms a little bruised, and you can’t really explain correctly how little movement there is for your sole hand that can fit down the side of the engine. I also tied my tools to my wrist, which saved me a few times, and gave me confidence to try things as it did not matter if they dropped.

Once again thank you Greg GDDR, not been possible without your guide.


So just to finish, I have now done

“O” Rings on Pipe to Rear of Engine for Oil Leak
Oil Cooler Gaskets
Change Oil and Coolant
Throttle Body Gasket
Throttle Body Clean
EGR Tube degunk
Clean MAP and MAF Sensors
Replace Plenum Hoses
Replace water pipe with “fragile” hose.
Repaired loose Solid Plastic inlet by large “O” ring method (guide from this site)
Replaced small hose from Solid Plastic inlet to solid pipe

It's keeping me busy.

Just and O2 sensor left to do, …..for the moment. 2011 Range Rover AB 4.4 TDV8

Post #669580 22nd Jul 2023 2:54pm
View user's profile Send private message View poster's gallery Reply with quote
shinchan


Member Since: 05 May 2015
Location: santiago de compostela
Posts: 109

Spain 

Hello guys, greetings from Spain!
After reading the excellent wiki from Greg and all the comments that followed I´ll try to explain my problem with the support of this video and screenshots of IdTool.
Already ordered the sensor and tools but in LHD seems very difficult to access...

INLET HOSES MOVEMENTS:
https://youtube.com/shorts/bmO1DOCP500

What do you think about the movement in the hoses? Clamps are tighten.


IIDTool SCREENS:

Click image to enlarge


Click image to enlarge


FAULTS:

PCM-Engine TDV8 4.4L

P006A-00 (27) Manifold absolute pressure - mass or volume air flow correlation
( on 17-08-2023 18:04:28 at 126897 km )

P00BD-07 (27) Mass or volume air flow A circuit range/performance - Air flow too high - General failure information - mechanical failure
( on 17-08-2023 18:05:25 at 126898 km )

P0033-00 (2F) Turbocharger/supercharger bypass valve control - circuit open
( on 11-08-2023 18:48:57 at 126894 km )

P040D-00 (2F) Exhaust gas recirculation temperature sensor A - circuit high
( on 11-08-2023 18:48:57 at 126894 km )

Post #671416 17th Aug 2023 7:46pm
View user's profile Send private message View poster's gallery Reply with quote
Post Reply  Back to top
Page 8 of 10 <12345678910>
All times are GMT + 1 Hour

Jump to  
Previous Topic | Next Topic >
Posting Rules
You cannot post new topics in this forum
You cannot reply to topics in this forum
You cannot edit your posts in this forum
You cannot delete your posts in this forum
You cannot vote in polls in this forum


Site Copyright © 2006-2024 Futuranet Ltd & Martin Lewis
fullfatrr.com RSS Feed - All Forums


Switch to Mobile site