Advertise on fullfatrr.com »

Home > Maintenance & Mods (L322) > Rear washer leak repair - the cheaper option!
Post Reply  Down to end
Page 1 of 2 12>
Print this entire topic · 
stan
Site Moderator


Member Since: 13 Jul 2010
Location: a moderate moderated moderator moderating moderately in moderation
Posts: 34871

United Kingdom 
Rear washer leak repair - the cheaper option!

all credit to alanm_3

A few folks on here have experienced a leaking rear washer motor which results in dirty brown water on the inside of the back window and onto the parcel shelf, so rather than replace the entire motor, and referencing other "how to's" on here, I've come up with a much cheaper alternative!

Credits to those other pioneers will be as I go along!

Parts Required
==========

10x16x4 Radial Oil Seal - http://www.ebay.co.uk/itm/10x16x4mm-Metric...2568bea0f8 - Thanks to user adara for this lead.
Costs the princely sum of £1.50 + P&P!

This is what it looks like :-

Click image to enlarge
[/img]

4 x small screws to re-attach washer inlet to housing :-
Click image to enlarge
[/img]

Tools Required
==========
T15 and T30 Torx bits
10mm and 13mm sockets
small Posidrive screwdriver
2mm and 4mm drill bits
Drill
Rubber gloves!

Method
=====

- Remove wiper motor assembly as per - http://www.fullfatrr.com/forum/topic884.html?highlight=rear+wiper - Thanks to RRUK for this information.

- Remove 7 x T15 Torx screws from motor housing and prise the two halves apart to get to the inside of the motor assembly :-
Click image to enlarge
[/img]

- Using the 4mm drill, drill out the plastic welds that hold the washer inlet to the wiper motor :-
Click image to enlarge
[/img]

- Remove washer inlet from wiper motor housing :-
Click image to enlarge
[/img]

- Fit Radial Oil Seal into the centre of the washer inlet :-
Click image to enlarge
[/img]

- Re-align the washer inlet into the holes on the motor housing and use the 2mm drill to drill small pilot holes.

- using the small screws, re-attach the washer inlet to the motor house. It will sit slightly proud of the housing, but since the water goes through the centre of the inlet, this doesn't need to sit flush or be water tight :-
Click image to enlarge
[/img]

Click image to enlarge
[/img]

- Reassemble the motor assembly using the 7 x T15 Torx screws and refit as per RRUKs post.

all credit to alanm_3

Post #106959 12th Feb 2012 5:16pm
View user's profile Send private message View poster's gallery Reply with quote
stan
Site Moderator


Member Since: 13 Jul 2010
Location: a moderate moderated moderator moderating moderately in moderation
Posts: 34871

United Kingdom 

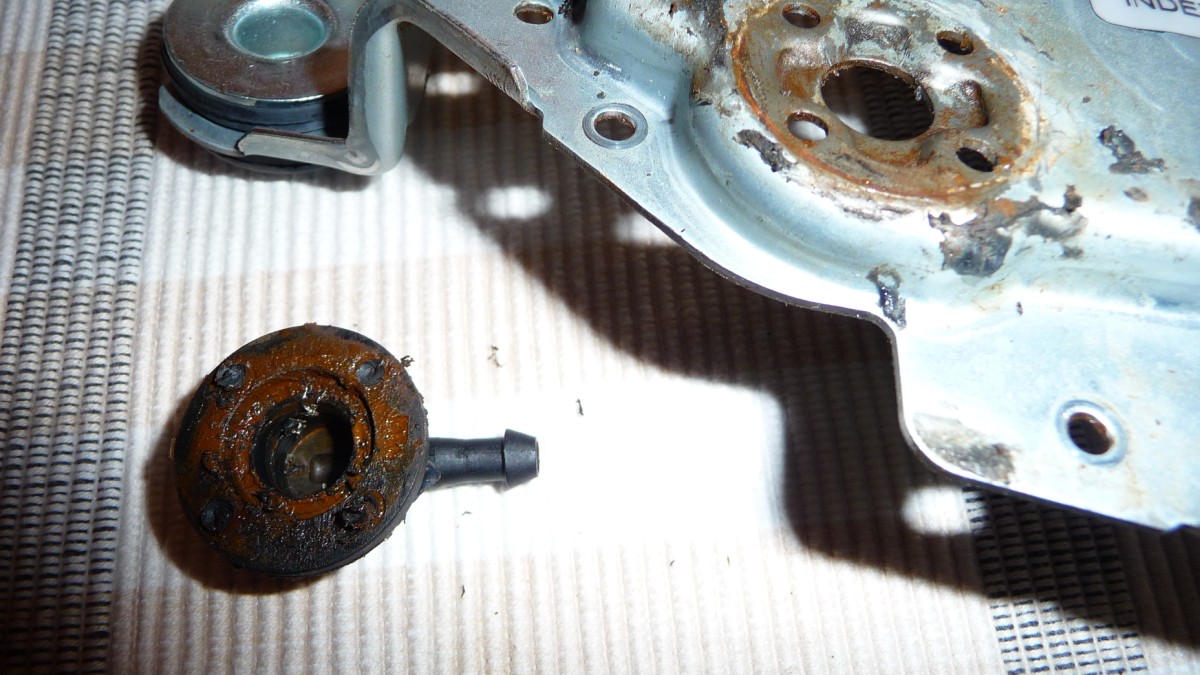
Rear wiper leak repair additional tips.

Today I repaired the leaky rear wiper on my TD6.
The main symptom was it had stopped to wipe the rear window.
On my wiper as well as the seal mentioned in
http://www.fullfatrr.com/forum/topic9924.html
leaking I noticed the outer seal which behind where the wiper bolts on was damaged.
I bought 4 16mm x 10mm x 4mm seals incase I had issues doing the job.
Now following the article in the Wiki I sliced off the plastic heads and popped the water elbow off.
Where I differed from the Wiki is levered the old seal out and pressed in a new one, this means everything sits flush and using superglue and 4 small screws I fitted it back on the wiper unit.
The outer seal was slightly different matter as it appears to have been moulded into the palstic cap. I drifted the plastic cap off the casting extension by tapping a drift down the inside.
As this seal is part of the cap I had to turn the hole out to 16mm to accept the new seal. I am fortunate in having a lathe which made the job easy but a 16mm drill bit will also do the job.
Once the hole was cleaned up I pressed the seal into the plastic cap and pressed the cap back onto the casting.
Reassembly as per Wiki followed and few minutes setting up the start of the sweep on the rear window so it didnt hit the spoiler, all was good.

I dont know if this wants tp be added to the Wiki feel free if you wanrt to do that.

Adrian


credit to ahebron ... - .- -.


click link for ,

FORUM WIKI

HOW TO Ǝꓕ∀ꓕOꓤ PICS

workshop manual downloads are in our wiki

.

Post #272720 25th Jul 2014 7:01am
View user's profile Send private message View poster's gallery Reply with quote
Danwilderspin


Member Since: 15 Jun 2016
Location: Cambridgeshire
Posts: 2180

United Kingdom 2007 Range Rover Vogue SE 4.2 SC V8 Zermatt Silver

Thanks for livening this thread up Stan

I had a blocked none return valve I discovered today - I stripped it and now water goes through but blasts out the bottom of the circle pictured above where the hose connects.

I have order the seal mentioned above but before I waste years fitting it would a thorough dry and thick bead of silicone do the job or not? Current stable:
2006 BMW M6
2007 4.2 V8 S/C FF
Gone:
2002 4.4 V8 FF

Post #572972 15th Nov 2020 9:56pm
View user's profile Send private message View poster's gallery Reply with quote
Chris1573


Member Since: 30 Jan 2021
Location: Gloucestershire
Posts: 162

United Kingdom 2007 Range Rover Vogue TDV8 Zermatt Silver

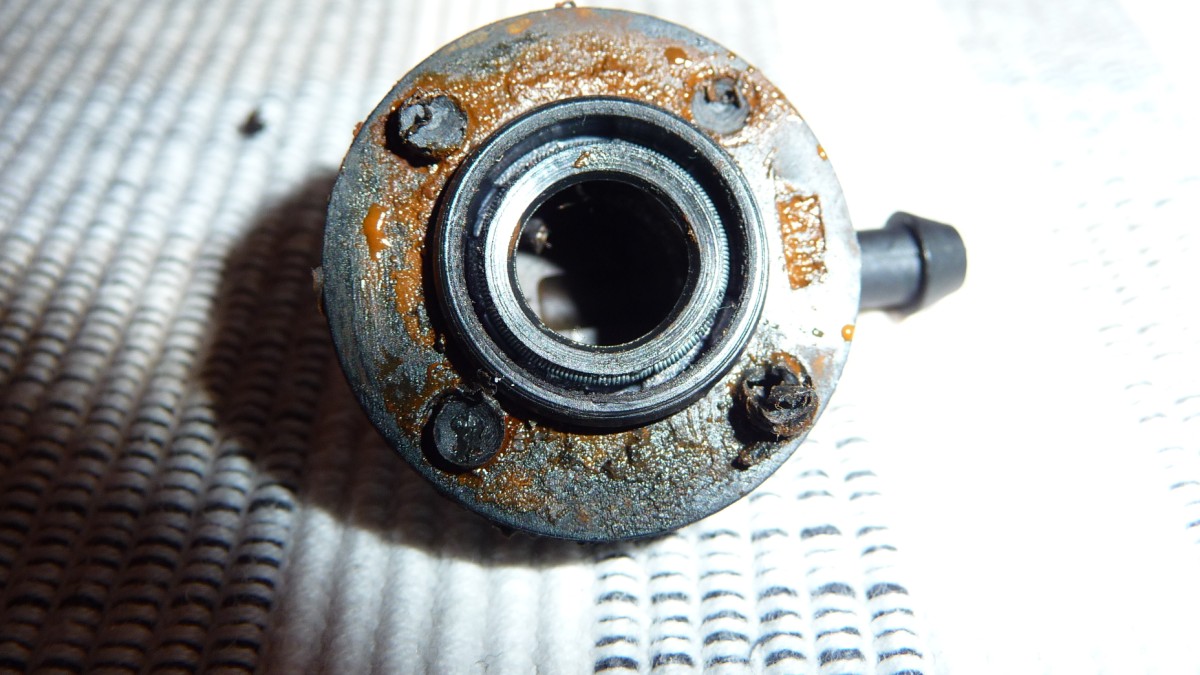
Just to add to the above, you can also use a small flat blade to pry out the original seal then replace with the new one mentioned above. The plastic fitting then sits flush when you re-seat it... Sorry Stan just seen that you already did this Bow down L322 2007 TDV8 3.6

Post #585859 1st Mar 2021 8:40pm
View user's profile Send private message View poster's gallery Reply with quote
uzp315


Member Since: 19 Nov 2017

Posts: 428

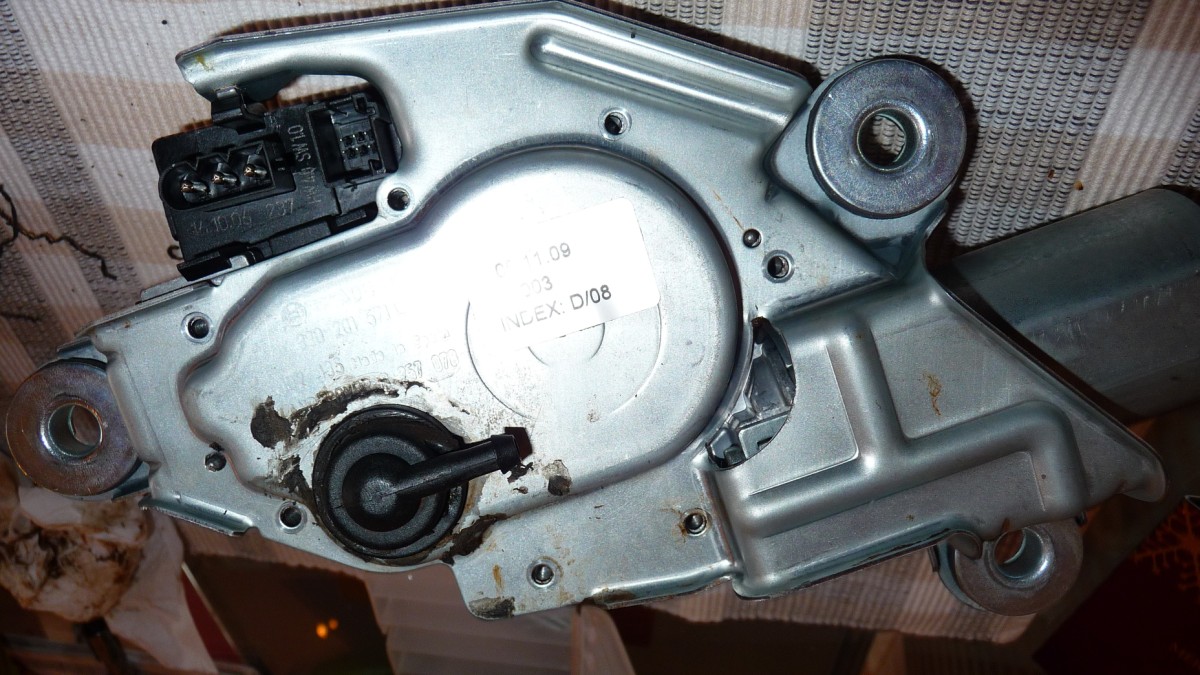
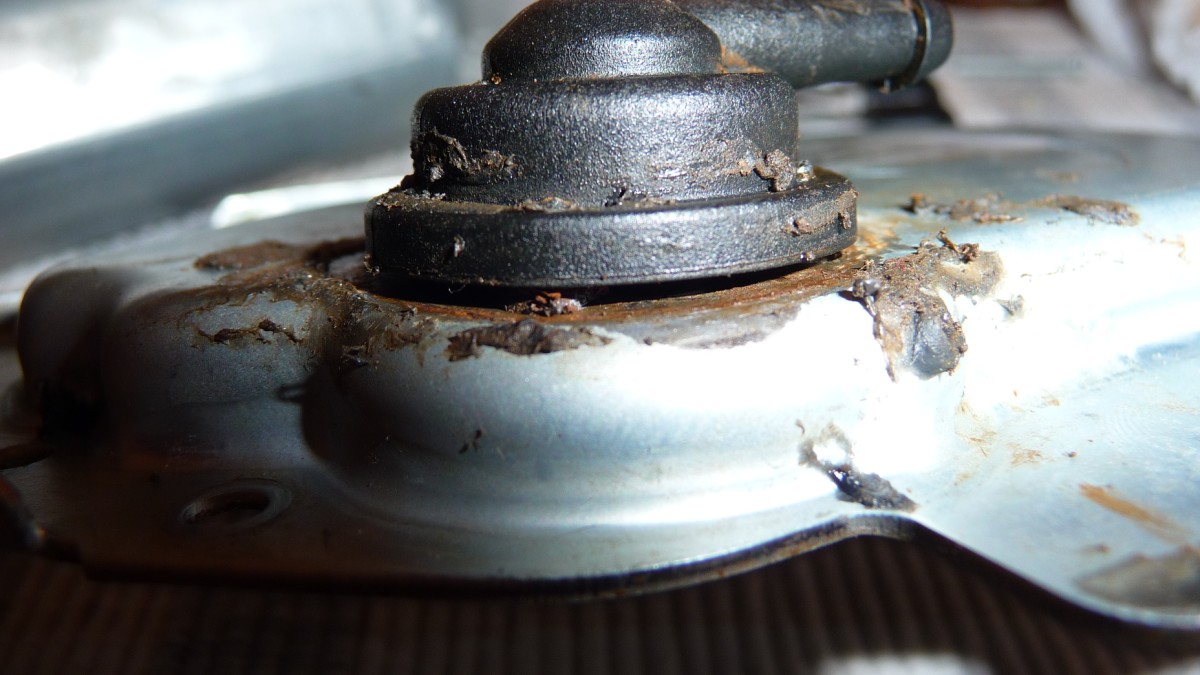
Seeing photos of that motor brings back traumatic memories.

Post #586096 3rd Mar 2021 6:53pm
View user's profile Send private message View poster's gallery Reply with quote
dhallworth


Member Since: 10 Oct 2011
Location: Glasgow
Posts: 2950

United Kingdom 2012 Range Rover Autobiography TDV8 Baltic Blue

I’ve just done this repair today.

When I got my car the rear washer didn’t work. I cleaned it up using the air line and that cured the lack of water problem but it did cause the motor to start filling the boot with water.

Following Alan’s guide, ordering the seal that he gave the dimensions for from eBay, it was a very simple repair. I also removed the old seal which was hard and horrible. A nice easy job with a decent result Smile

Thanks again Alan!

David. 2002 4.6 Vogue SE - Alveston Red with Lightstone Leather
2007 Range Rover Supercharged in Java Black with Ivory Leather
2012 Range Rover 5.0 SC Autobiography in Indus Silver with Jet/Ivory Interior
2012 Range Rover 4.4 TDV8 Autobiography in Baltic Blue with Sand Interior

Post #586656 8th Mar 2021 12:36am
View user's profile Send private message View poster's gallery Reply with quote
alanm_3


Member Since: 19 Feb 2011
Location: my House, unless I’m not at home, in which case I’m somewhere else.
Posts: 6646

Scotland 2017 Range Rover Autobiography SDV8 Loire Blue

Glad it helped David Thumbs Up Got - 2017 SDV8 Autobiography in Loire Blue
Had- 2008 TDV8 Vogue SE in Java black
Had - 2007 S/C in Stornoway Grey

Post #586661 8th Mar 2021 7:47am
View user's profile Send private message View poster's gallery Reply with quote
uzp315


Member Since: 19 Nov 2017

Posts: 428

I hate to play the ghoul, but if your experience is anything like mine, other failures are looming in the near future. When you get to the end of being able to repair the unit, you can make a new working one from a brand new replacement (incompatible with pre-facelift) motor and your old one:

https://www.fullfatrr.com/forum/post580763.html#580763

Note to the uninitiated: I bought three replacements, second hand ones are now £200-£400 on ebay, they lasted a few months. I tried the replacement gears from ebay for £5, they did not work. Just buy a brand new one, and rip out the electronics and follow the instructions above to finally get the bloody thing fixed once and for all.

Post #586669 8th Mar 2021 9:50am
View user's profile Send private message View poster's gallery Reply with quote
dhallworth


Member Since: 10 Oct 2011
Location: Glasgow
Posts: 2950

United Kingdom 2012 Range Rover Autobiography TDV8 Baltic Blue

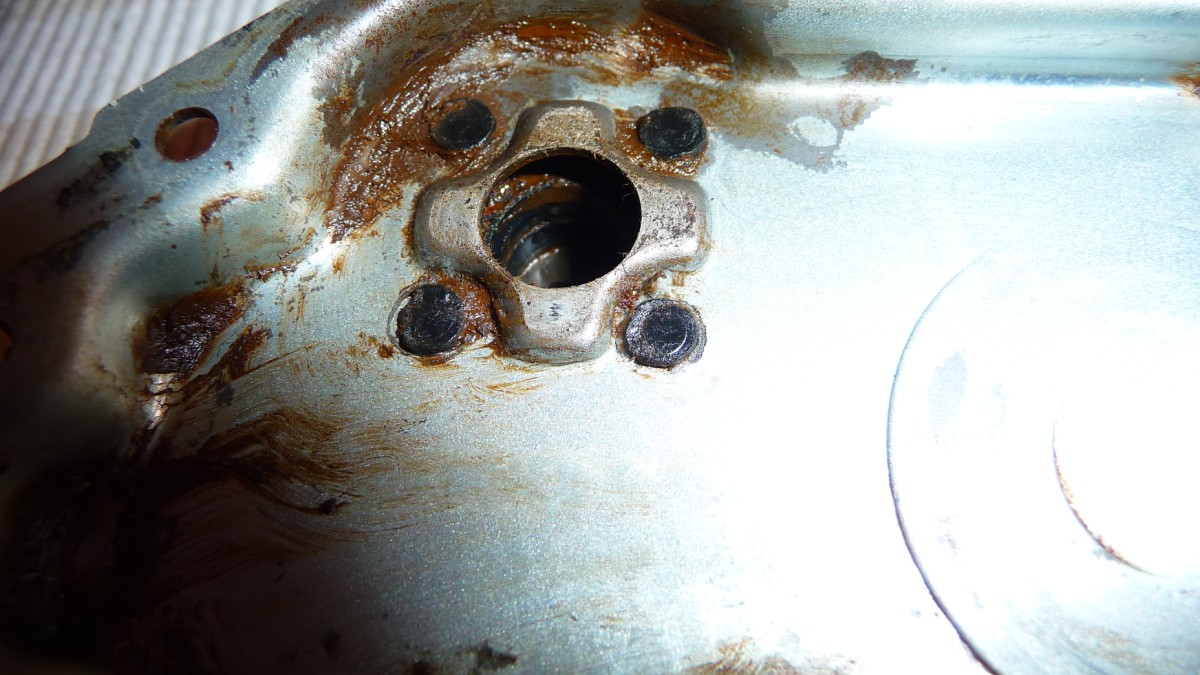
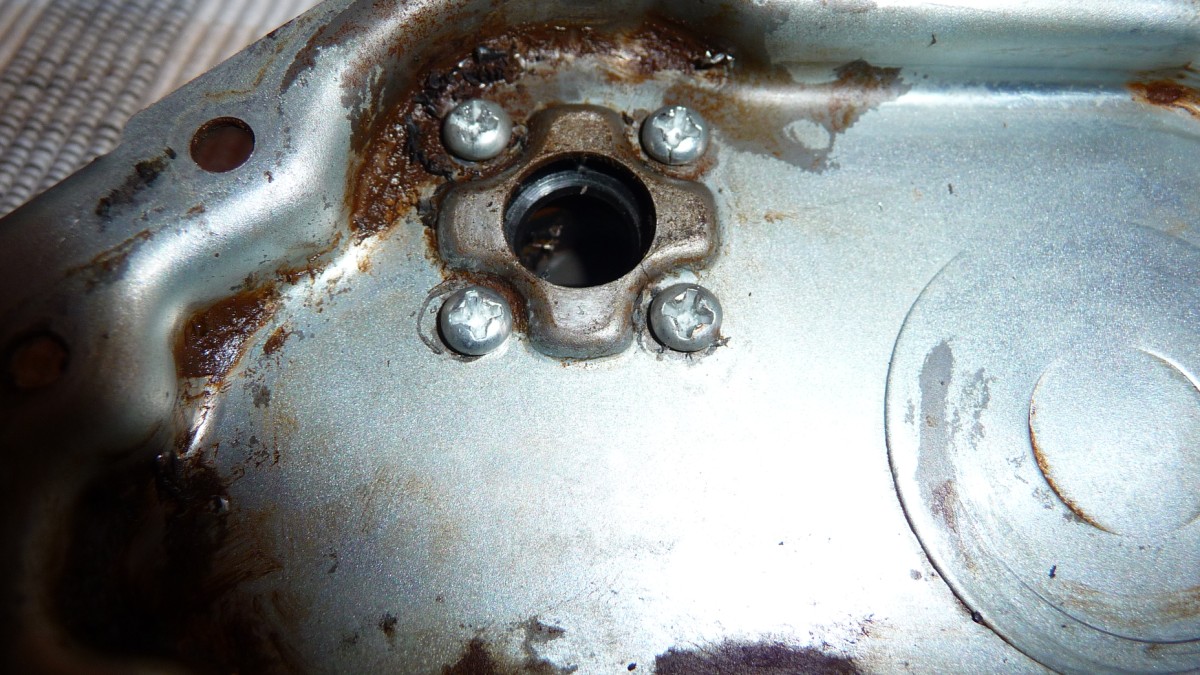
I caught mine early enough that it was just a dribble leaking and there was barely any crap inside the motor.

I cleaned it up using some brake cleaner and the airline, followed Alan's guide above and regreased mine before reassembly. I've no reason at all to think it's going to pack up.

This repair took about an hour and cost me less then 3 quid so IMO it's well worth trying before going to the expense and hassle of buying a new motor and trying to make one from two Smile

David. 2002 4.6 Vogue SE - Alveston Red with Lightstone Leather
2007 Range Rover Supercharged in Java Black with Ivory Leather
2012 Range Rover 5.0 SC Autobiography in Indus Silver with Jet/Ivory Interior
2012 Range Rover 4.4 TDV8 Autobiography in Baltic Blue with Sand Interior

Post #586709 8th Mar 2021 4:45pm
View user's profile Send private message View poster's gallery Reply with quote
uzp315


Member Since: 19 Nov 2017

Posts: 428

I too felt the warm glow of success when I too had swapped an o ring.

The water ingress has nothing to do with the failure of this unit. Either the spindle that grips the arm wears, or the internal gear gets worn out. It is a design flaw that the sharp metal worm gear that drives the main nylon gear is inevitably going to eat the nylon over time.
I hope you don't have to go through what I did, but if you do, you now know what to do.

Post #586714 8th Mar 2021 5:29pm
View user's profile Send private message View poster's gallery Reply with quote
philip1972


Member Since: 16 Jun 2017
Location: Marval 87440
Posts: 502

France 2006 Range Rover Autobiography 4.2 SC V8 Java Black

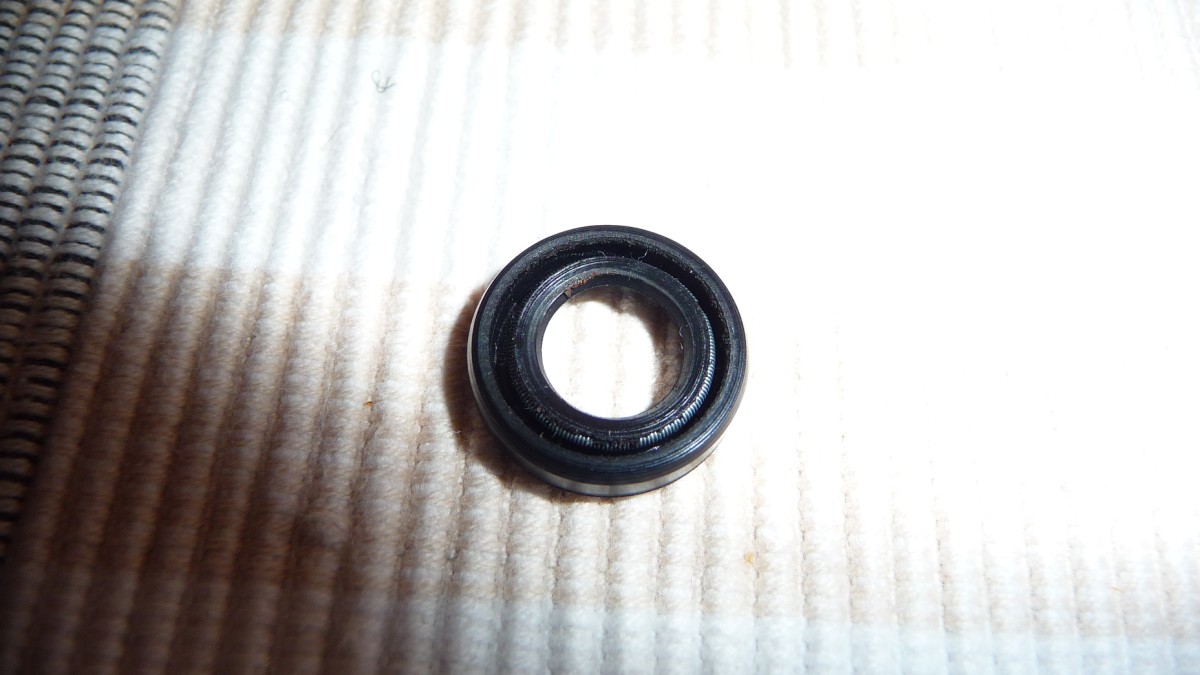
I need to get the 10x16x4 Radial Oil Seal mentioned above, but link is now out of date.

Now, being a mechanical luddite, I have googled but cannot see one that is exactly same as the one above in this thread.

Can anyone point me in the right direction please?

Thanks!

Post #641559 31st Aug 2022 3:00pm
View user's profile Send private message View poster's gallery Reply with quote
dhallworth


Member Since: 10 Oct 2011
Location: Glasgow
Posts: 2950

United Kingdom 2012 Range Rover Autobiography TDV8 Baltic Blue

I fitted this one to my car in Feb 2021 and haven't had any issues with it since.

https://www.ebay.co.uk/itm/174567493226

David. 2002 4.6 Vogue SE - Alveston Red with Lightstone Leather
2007 Range Rover Supercharged in Java Black with Ivory Leather
2012 Range Rover 5.0 SC Autobiography in Indus Silver with Jet/Ivory Interior
2012 Range Rover 4.4 TDV8 Autobiography in Baltic Blue with Sand Interior

Post #641562 31st Aug 2022 3:12pm
View user's profile Send private message View poster's gallery Reply with quote
dhallworth


Member Since: 10 Oct 2011
Location: Glasgow
Posts: 2950

United Kingdom 2012 Range Rover Autobiography TDV8 Baltic Blue

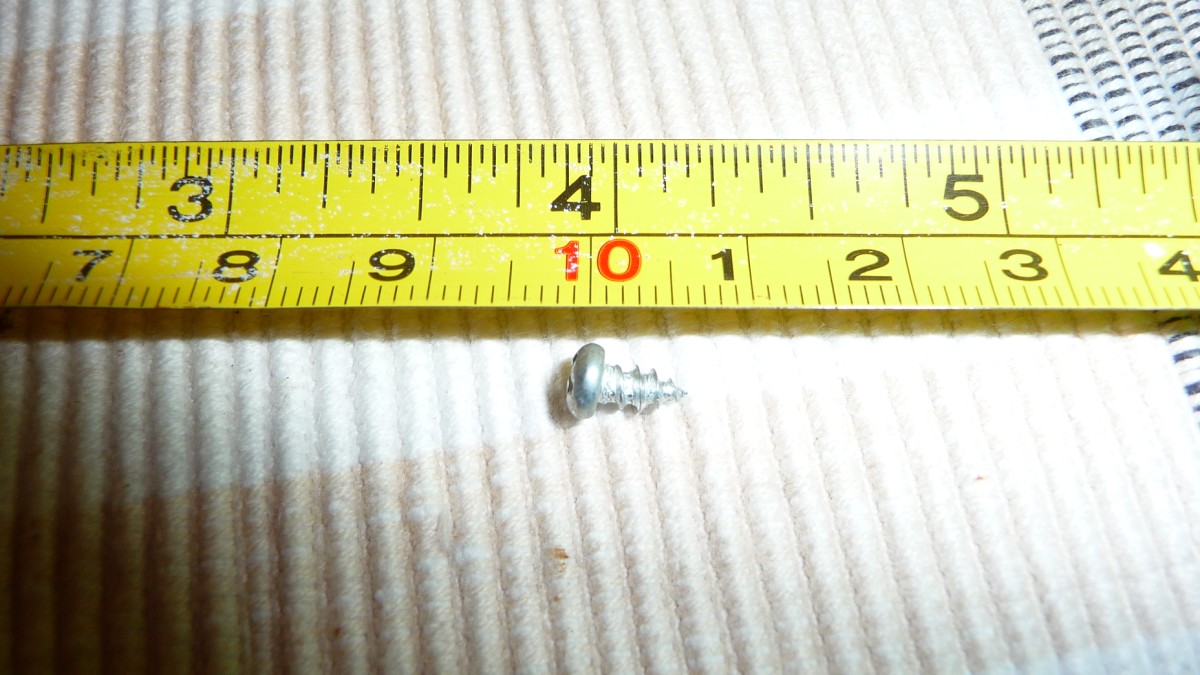
Might be worth ordering this as well just incase you find any wear inside the motor when you open it up:

https://www.ebay.co.uk/itm/122538488520

David. 2002 4.6 Vogue SE - Alveston Red with Lightstone Leather
2007 Range Rover Supercharged in Java Black with Ivory Leather
2012 Range Rover 5.0 SC Autobiography in Indus Silver with Jet/Ivory Interior
2012 Range Rover 4.4 TDV8 Autobiography in Baltic Blue with Sand Interior

Post #641563 31st Aug 2022 3:14pm
View user's profile Send private message View poster's gallery Reply with quote
philip1972


Member Since: 16 Jun 2017
Location: Marval 87440
Posts: 502

France 2006 Range Rover Autobiography 4.2 SC V8 Java Black

Amazing-thank you.

Ordered Thumbs Up

Post #641564 31st Aug 2022 3:19pm
View user's profile Send private message View poster's gallery Reply with quote
philip1972


Member Since: 16 Jun 2017
Location: Marval 87440
Posts: 502

France 2006 Range Rover Autobiography 4.2 SC V8 Java Black

dhallworth wrote:
I fitted this one to my car in Feb 2021 and haven't had any issues with it since.

https://www.ebay.co.uk/itm/174567493226

David.


Hopefully i wont need that. I have taken it all apart and there was minimal rust, which i cleaned off and the gear looks perfect. I have put it back together temporarily while I await the seal, and its wiping well Thumbs Up

Post #641582 31st Aug 2022 7:04pm
View user's profile Send private message View poster's gallery Reply with quote
Post Reply  Back to top
Page 1 of 2 12>
All times are GMT

Jump to  
Previous Topic | Next Topic >
Posting Rules
You cannot post new topics in this forum
You cannot reply to topics in this forum
You cannot edit your posts in this forum
You cannot delete your posts in this forum
You cannot vote in polls in this forum


Site Copyright © 2006-2024 Futuranet Ltd & Martin Lewis
fullfatrr.com RSS Feed - All Forums


Switch to Mobile site